So sorry to leave you hanging yesterday. We had some last minute finishing touches to take care of before ‘after’ pictures were ready. But I was bound and determined to at least get a start on that blog post! So I’ll start right where we left off! A pattern within a pattern:

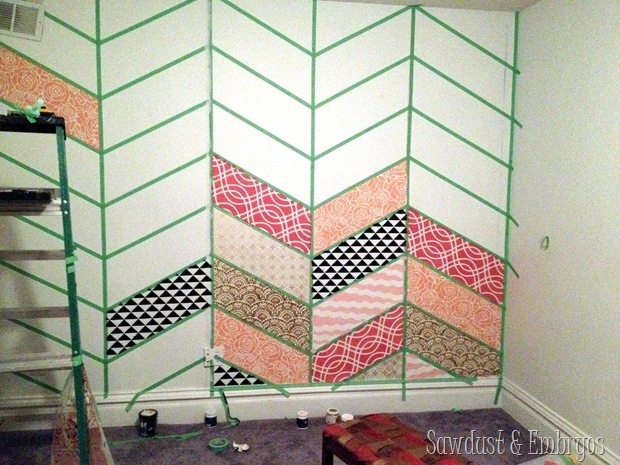
We’ve used stencils from Royal Design Studio before (and love how durable their stencils are), so we were thrilled when they agreed to let us have our choice of stencils for our ‘patchwork wall’. We chose Small Spanish Lace, Small Margarita Lace, Teardrop Trellis, Rockin Rose Damask, and Step Up Triangles.
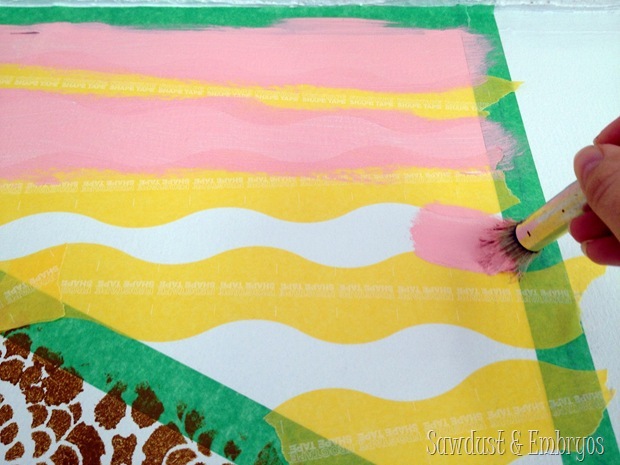
I used a basic stencil brush that you can get at any home improvement or craft store, and just blotted away! Some people prefer using a small foam roller for stencil application, but I prefer the brush and feel that it provides a crisper line. (sorry about the following crappy nighttime iphone pic)
Each ‘cell’ took me about 10 minutes. I just jammed out to Pentatonix and time flew by! Someday when I grow up, I want to be in an acapella group. That would aca-mazing. I’m totally not kidding either.
For the pale pink color paint, I used FrogTape’s wavy painters tape to create an abstract wavy pattern to mix things up.
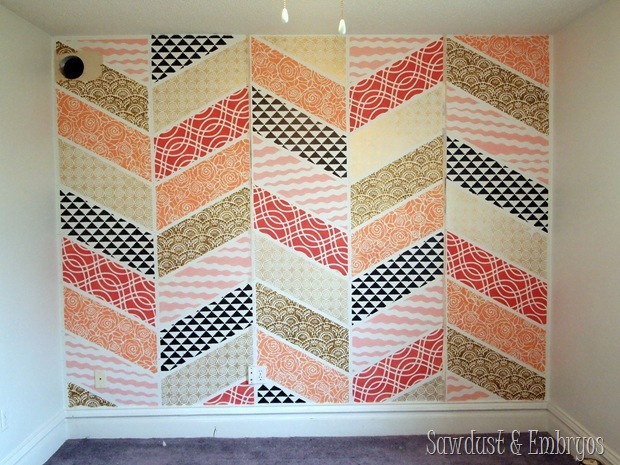
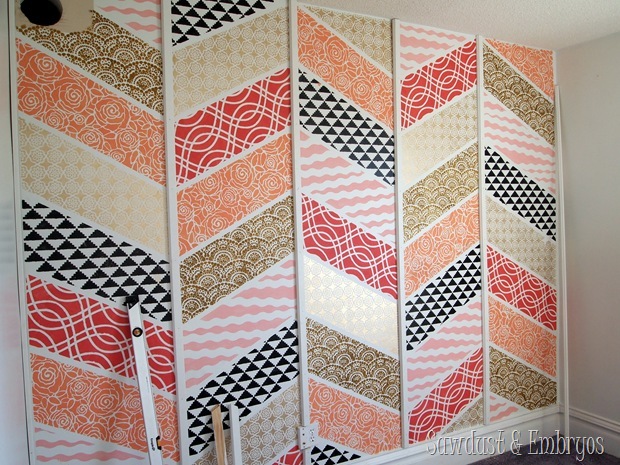
And then we pulled ALL the tape off (including the green tape in the Herringbone pattern).
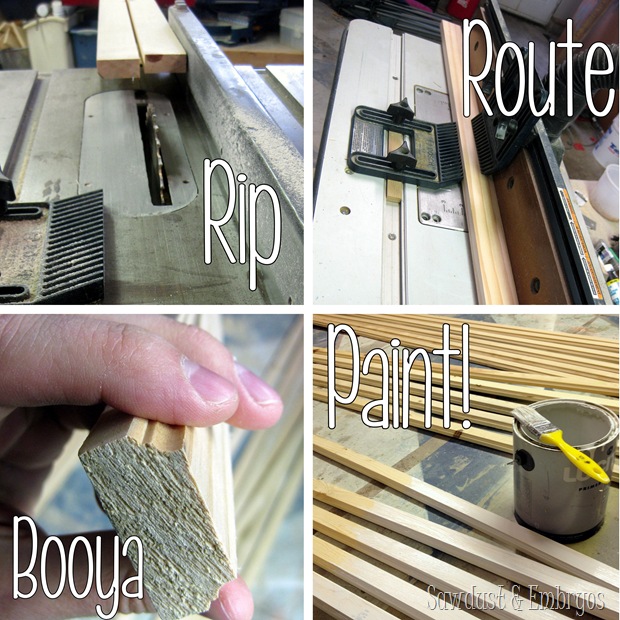
Next, Nick ripped 1×4’s in half (so they were 1×2’s), and routed them using the Bead and Cove router bit. And I spent an ungodly amount of time priming them with a silly paint brush instead of breaking out the paint sprayer (which I DEFINITELY used to paint them the next day).
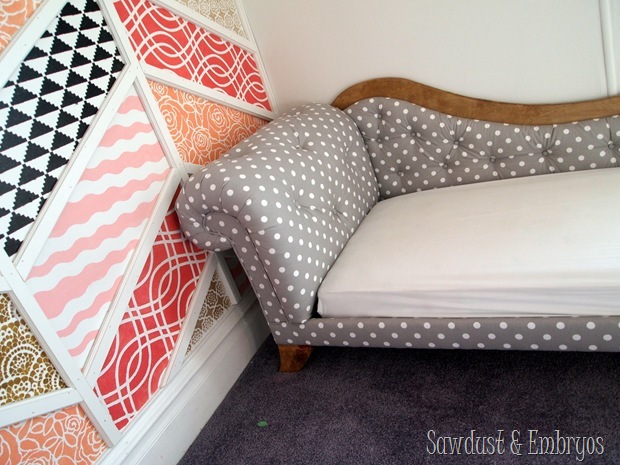
Essentially, we’re making ‘trim’ pieces to frame each cell of our herringbone pattern for a more 3-D architectural effect. You could just buy trim pieces instead of making your own, but this way is cheaper and we’re penny-pinchers.
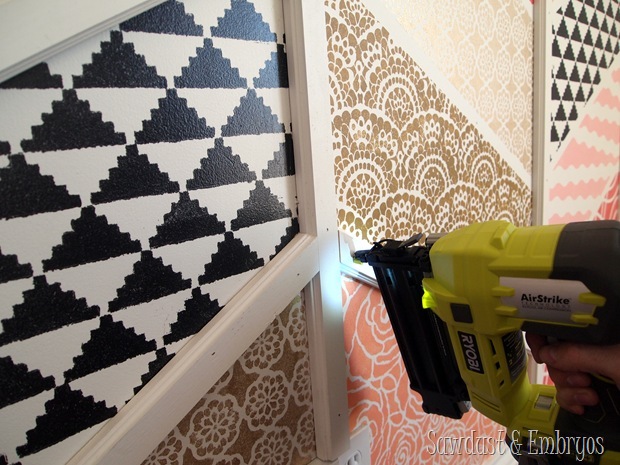
We started by first nailing up the vertical pieces using our RYOBI Brad Nailer. (in the pic below, the ‘cell’ in the lower middle that looks un-stenciled is painted with the metallic gold… the light is hitting it just so)
Then we used our Miter Saw to cut the angled sections with the setting at 30 degrees (angle found using an angle finder (NO MATH NECESSARY!). These angle pieces also had to be routed on the backside edges as well so that they would fit together snuggly with the vertical routed trim pieces. Comprende?
Nick slapped those bad boys up in record time. Hit 4-5 nails in each board, and move on to the next one!
Up close, my stencil job isn’t perfect. Especially the Brown Sugar color ones. But I punched my perfectionist self in the face and decided that the wall is busy enough that you can’t really even notice unless you poke your nose right up against the wall. And I won’t be doing that often.
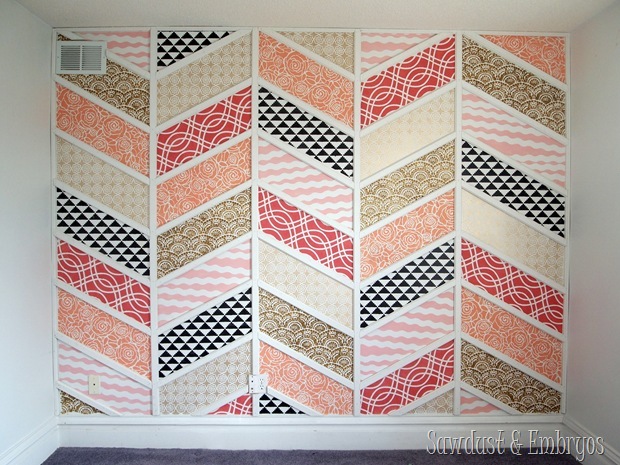
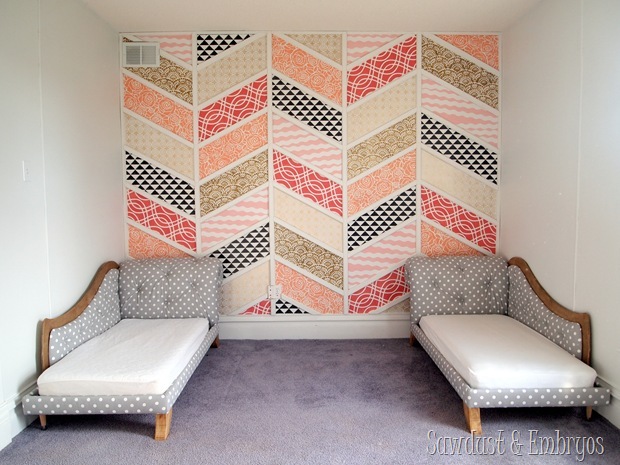
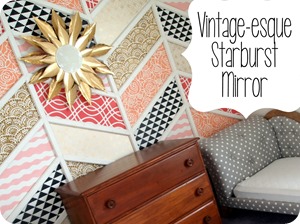
We filled the seams and nail holes with white latex caulk (the same stuff we used on our crown moulding tutorial) and did some minor white paint touch-ups. And voila!
And here we have the toddler beds in place!
It has not escaped me that the existing carpet isn’t very pleasing to the eye, but the tightwad in me cannot justify replacing it. I’m planning to get a fluffy white area rug to go between their beds, and find some sort of small dresser or end table to put centered on that wall. And I’ve got ideas swirling around in my head for a DIY pendant light hanging over each of their beds. And then there’s bedding and window treatments to think about… so many ideas! So little time! AND MONEY!
~~~~~~~~~~~~~~~~~~
UPDATE! This room is done!!!!!!!!

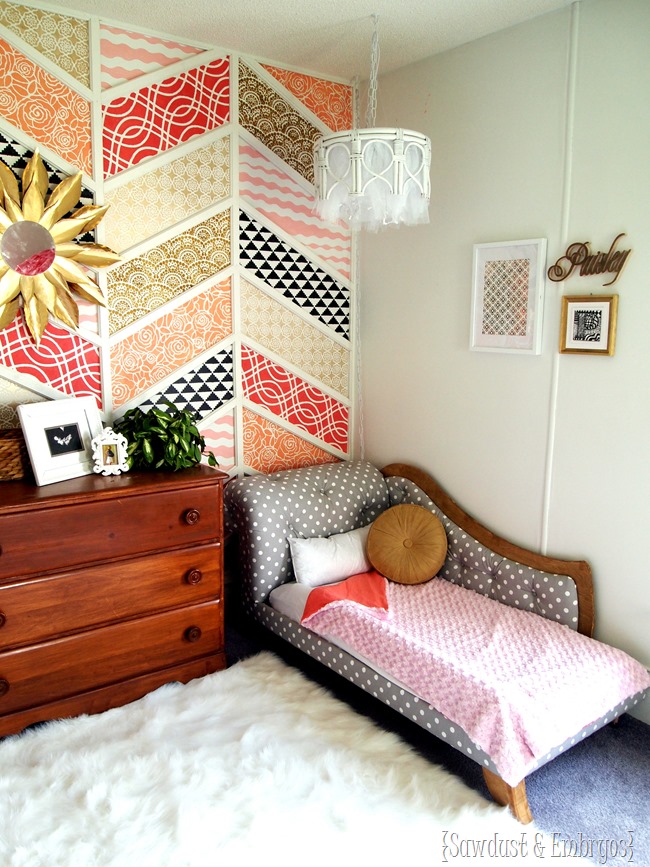
And be sure to check out all the other projects we did to make this room just perfect for our twins!
*this post contains affiliate links







I wish I had an appropriate wall in my house for this. It’as great!
Man this is amazing. You are so awesome!
Love the wall. So original and creative. Love your name !
I love YOUR name too! 😉
This is so beautiful! Amazing job…. 🙂
Wow! That wall is gorgeous! I wish I had the time… and ambition… instead I will just stare at yours. Love your work!
I am so crushing on your work right now! Again, amazing job.
I am amazed. This is beautiful. I want it for MY bedroom! My one question… how the heck do you have the time to do this with twins?? I am simply amazed! Great work! 🙂
Hi Asra! The twins love to ‘help’ with our many projects. 🙂 and they’re still really good sleepers, so it leaves us lots of time to DIY uninterrupted. Hehe!
How to measure out the spaces to start the herrigbone?? I want to do something similar but just different paint colors but I don’t even know where to start. LOL
Ashlie, we shared all the details of laying out the herringbone pattern on the previous (part 1) post. Here’s the link for that!
https://realitydaydream.com/2013/11/herringbone-patchwork-accent-wall-part-1.html
This is just so amazing it is ridiculous. When I first saw it I thought, “What cute fabric prints” Then I read the tutorial. Of COURSE you painted it. Absolutely beautiful and incredible.
I literally just died and went to heaven over this wall! This is totally worth the pain and time that went into it. It is mind blowing!
This is the most beautiful paint job I have ever seen. I LOVE it!!!!
Wow, you guys do have so much patience 🙂 Love, love with what you guys have done 🙂
It’s beautiful! These may be silly questions and if you’ve covered them somewhere else I apologize. How did you measure the wall for taping? How did you chose pattern repeat placement?
Does it flatter you or make you mad when people copy/redo your designs?
I absolutely LOVE this wall and want to recreate it in my son’s room, obviously in different colors/designs. But I don’t want to feel like I’m ripping you off!
No way! We wouldn’t give detailed tutorials if we didn’t LOVE seeing people recreate our ideas. Just BE SURE to send us pictures! We can’t wait to see how yours turns out!
One of the best DIY projects I have seen. GREAT.
This is absolutely amazing! I wish I were as creative and talented ( and could talk my husband into doing anything like this ). However, our current home is not planned to be our “forever” home, so we may hold out on some of our ideas.
I am in awwww at your creativity…and a tad bit jealous! This is amazing!
Wow! Great job. What a lot of work! I probably would have had to stop after the herringbone and stenciling. I can’t always get my husband to do the millworker – although he has mad skills. Maybe I have to tell him that more often…it might get him to do more around our house!
You even made the toddler beds as fainting couches? You guys are really showing off now! Fantastic job all around!
Linda
That is the most beautiful and creative design I have ever seen! The wall and the wonderful beds are just enchanting. I seldom comment since I usually agree with the comments of your great work but this is so outstanding I had to take the time to add my .02 and most importantly, Thank You for sharing your ideas with us! Keep it coming. -Maria B,
You’re so sweet Maria! Thx for taking the time to comment!
oh. my. gosh. AMAZING! I never would have thought to choose those colors/patterns together, but it looks SO GOOD!
this is incredible- and the raised trim really gives it a great finishing touch!!! (PS- we got our state ornament yesterday! thanks again!)
Yayayay, I’m glad you like it!
Girl. I commend you for your patience. looks beautiful!
Hi
I was curious.. Wouldn’t you be using the Toddler beds the other way around? I meant switching the two. I was under the impression that the “arm” of the toddler bed would be towards the center of the room and it would provide as a barricade to prevent the girls from falling down. The other side would be the wall of course. The way you have placed the two toddler beds shows that there is no protection for the girls from falling down since the arm of both the beds is towards the wall.
I hope I am making sense.
My question is not meant to be critical, I am genuinely curious.
Debra, thanks for your concern! These beds are less than a foot from the ground, and we’re not too worried about it. We plan on putting a pool noodle under the fitted sheet along the edge of the mattress to provide a ‘lip’ of sorts. But if they fall out… they fall out! We’re pretty chill like that around here. If it was something where they could legitimately hurt themselves, we would be making some MAJOR changes!
What a brilliantly creative idea! I love the quilted look. I bet the girls just stare at it in delight and awe. It’s so perfect. And the molding really seals the deal. This is perfection!!
Your creativity seriously blows my mind! Wow! You killed it!! Lucky girls to have such a rad room!!
Abso-Freaka-Lutely-Awesome!!!! That wall… Those beds… it’s all to die for=) I LOVE it!!
That is absolutely amazing! It is beautiful!
I have been a Lurker for a while and that gorgeous wall brought me out of hiding 🙂
Haha… what a complement Megan! Thanks for coming out of hiding!
I think the carpet looks fine..plus you have TWO toddlers, new carpet and toddlers don’t mix well, ha!! The room looks fabulous! You’re my super hero!
THAT… is a very good point… Thanks for talking me down!
I just want to stare at that wall all day!
Beautiful Beth! For the life of me, I can’t figure how you get your projects done with two toddlers running around! They must be very well behaved! Your mind must just race at at night figuring out what new and exciting project you are going to come up with next. That wall is unbelievable! You and Nick have really outdone yourselves this time. Thanks so much for the inspiration!
We’re lucky that our girls are VERY good sleepers! They go to sleep at 6:30 each night, and we get busy! We’re so glad you’re inspired. 🙂
WHOAH! Holly SH*T you guys!!!!! Sorry for the profanity, but I think it was called for. This is AMAZING… I thought it was beautiful once you removed the tape but adding that trim was really the icing on the cake. Talk about details! You guys nailed it once again. And I meant that pun!
Thanks Jesse! And I love the PUN! 🙂
Gah! This is GORGEOUS! I absolutely love it. And I have already told you how much I love the toddler beds! I can’t wait to see this room when it is done! I am in the process of designing my twin girls’ “big girl” room with twin beds and am sure I will be drawing some inspiration from you!
Yay for twin girls! How old are yours?
Ours will turn 3 at the end of December. They are IVF twins, too 🙂 Absolutely my dreams come true. I saw you mention in another comment that your girls are good sleepers, which enables you to get a lot done. SAME HERE! Our girls used to go to bed at 6:30. Now it’s 7:15ish, but they still nap for 2-3 hours a day, so we kick it into gear at night and during nap time on the weekends. I love your blog! You have so many inspirational ideas and it’s nice to read posts from someone I relate to on a few different levels. Have a great weekend!
Whoaaaaa. That is INCREDIBLE!!
Question on the beds – are you going to swap them so there’s a tiny toddler wall keeping them from rolling out of bed in the middle of the night?? Or are you going to build an equally awesome railing?
Laney we’re planning to put foam pool noodles under their fitted sheets to act as a ‘lip’ on the edges of the mattress. Honestly, we’re not too worried about it, because the beds are already very low to the ground, so if they fall out they shouldn’t really get hurt. 🙂
Pool noodles! Genius!
Kinda sorta obsessed with this! You are so creative. All your ideas are so outside the box and I love them all! Can’t wait to see the whole room come together!
Thanks Lindsay! We love thinking outside the box!
I love that wall. I don’t think my hubby and I are handy enough or have the tools, but I love it. Did you come up with a pattern (of which stencil and color to put where) beforehand or did you just wing it. The perfectionist in me wonders, as I can see myself hating the pattern if I just started it and just did it as I went.
I think this would be neat for my teenage daughters room when we switch her into a different bedroom soon. The color pattern would be different (as she loves purple) but I love this!
Lisa, I just painted a few ‘cells’ and then stood back and looked at it, and decided which color I felt needed to go next. My only goal was to not have any of the same color side-by-side anywhere and that didn’t seem to be a problem!
You should totally do this in your teenager’s room in shades of purple!
This is so absolutely adorable!!! Makes me reallllly wish I didn’t live in an apartment that I can’t paint and whatnot!!!
You guys had me at your staircase landing stencil/fabric accent wall…which is super fantastic. But I think this has topped it. “So little time! AND MONEY!” = very well said. Thanks so much for sharing all of your budget friendly/beautiful projects!
Can you adopt me?
This is simply..stunning! Your girls are very very blessed to have a mom like you.
OMG!!!! Best accent wall EVER!!!!!!!!!!!!!!!!!!
That looks really beautiful. I can’t even imagine what it would look like if my husband and I tried to make it;)
I would have a hard time covering any part of that beautiful wall with a dresser!!! Excited to see all of it come together though!! Awesome!!!!
Thanks Ann Marie! I’m definitely looking for something small(ish)… I don’t want to cover it up either!!