This Fainting Couch Toddler Bed has been SUCH a fun DIY project. If you’re just tuning in, check out Part 1 and Part 2 to get you caught up to this point.
Today we’re tackling the UPHOLSTERY!
I’ve had to step outside the box with this project… jumping into carpentry and power tools (with an AMAZING and knowledgeable {and sexy coach). But upholstery is a whole other ballgame. I referred a few times to Brooke’s (All Things Thrifty) diamond tufting tutorial, but since this is such a unique project… we just had to do our own thing for the most part.
Here’s where we left you last time.

Start with some cheapo egg-crate foam mattress pad. I picked up a few giant rolls at a garage sale. (Purchasing foam brand new can seriously break the bank, and would have easily doubled the cost of this entire project. I know you have some of this lying around somewhere!)

Using a scissors, cut the foam so it’s large enough to go from the base of the arm (on the mattress side) and wrap all the way around the scroll of the arm. And leave 3” on either side. With the bumpy side down (and staring on the arm that will be the ‘front’ of the bed) wrap the foam over the edge and start stapling along the border of the foam.

After repeating this process on the opposite side of the arm, mark out the spots where you want your tufted buttons with a Sharpie. If you’re an engineer, you’ll measure. If you’re an artist, you’ll eye it. Since we did two beds, we did one of each… and you can’t tell the difference. JUST SAYIN.

Using a razor blade, we sliced through the foam all the way down to the wood on the places marked for buttons. In hindsight, we would have used one of these like we did on the Leather Tufted Ottoman we made.
Then, holding the foam back a bit, drilled a hole through the wood beneath.

Now that we have all our holes drilled, we generously cut the batting and fabric so that there was 5 or 6 inches of excess on all sides. This bag of low-loft batting was enough for one entire bed, and we always used two layers.

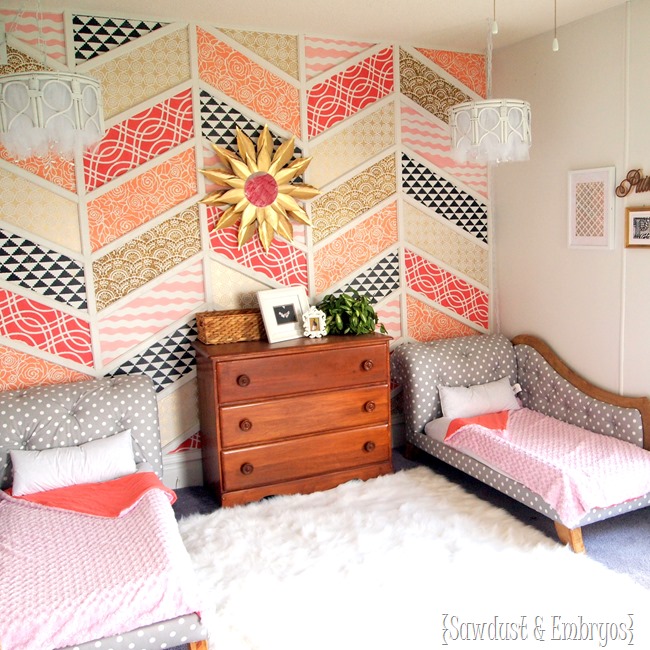
As you can see, we chose the Polka Dot fabric from the options we had y’all vote on over on our Facebook page. I was leaning toward the polka dot anyway, and after the first 3 or 4 votes that were ALL for Polka Dot? CONFIRMATION. You can buy this fabric here.

It’s called ‘Polka Dot Storm’. And I LOVE IT.
Next up is the actual tufting! This part requires two people… PINKY PROMISE. Gather your supplies: scissors, needle/embroidery floss, hefty needle (should have used one of these), staple gun, washers, and covered buttons (we used a ‘button cover kit’ and used the same fabric for a perfect match).

As you can see in the image above, I threaded my needle, and then tied both ends to a washer (triple knot!). You’ll want a good two feet of thread the first couple times until you get a feel for how much you need.
Then, poke your needle up through your pre-drilled hole, loop your button, and stick it back down pulling tight!

When you pull it back through, the washer will catch on the hole so the whole thing doesn’t pull out. Then staple in a zigzag pattern, pulling tight between each additional staple. Voila!

The tufting is done! Now, starting with the front of the arm (at the bottom), start folding over the fabric and stapling right at the base of where the foam ends. Work your way up and around the curve of the arm, taking little folds as you go. This looks a LOT more complicated than it actually is. The folds kinda happen naturally. Then repeat on the opposite end of the arm, and staple along the front and backside.

I traced out the shape of the wood ‘opening’ on the arm onto my fabric, and cut it out… leaving a flap on the side. Then I stapled along the very border, smoothing it out as I went. When I came back down the other side, I folded the flap back behind and stapled on the back.

Our original plan was to put upholstery tacks along the seam, but I wanted to try making my own ‘cording’ to see how it would look… and I LOVE it! Basically I just rolled up fabric (hot gluing as I went) until it was the thickness I wanted, and then I hot-glued it along the seam. It seems pretty secure, but I know there’s a decent chance the girls will pick at it and pull it off at some point, so I’ve totally come to grips with eventually applying upholstery tacks.
UPDATE: after 2 years of the girls sleeping in these beds, they are still in PERFECT condition!!! It’s a Christmas miracle!

Now, on the backboard, I totally forgot to take a pic of this… but I traced out a smaller version of the backboard onto a sheet of 1/4” plywood, because I want there would be a border of wood around the upholstery. (BTW the backboard and legs are stained with Rustoleum Golden Oak) We installed some Tee Nuts so that we could easily install the tufted portion to the backboard when it’s ready! …since most of this is the same process as above, I’m just going to throw out some pics as a reminder and to make myself feel as though I’m being thorough.

After tufting, we flipped that bad boy over and wrapped the loose fabric around back and stapled like a BOSS. I mean, check out our corners yo.

Now, using those handy previously-installed Tee Nuts, we just secured the upholstered backboard to the actual backboard with an allen wrench likety-split-like.

Then, I simply upholstered around the perimeter of the bed using batting and fabric (no foam).

Screw on the backboard, and this bad boy (girl?) is DONE!

Has this not been the longest tutorial in the history of forever?

Oh yeah, and remember? We made two!

 by Sawdust and Embryos")
Can you believe we built these for about $65 a pop? (including the cost of fabric… 4 yards total)
This endeavor has been one of the most fun and educational projects I’ve done in awhile. I’ve been learning so much about power tools and when to use which tool, and how to build things to be structurally stable.
If you missed the previous posts of this tutorial, here’s Part 1 and Part 2!
UPDATE! The room is done!!!

And be sure to come check out other posts from the twins’ room transformation!
 |
 |
") |
") |
 |
 |
") |
 |
*this post contains affiliate links
PS! Check out all of these other amazing ideas for Upholstered Headboards for kids. There are both DIY options, and ones for purchase that are quite affordable!


Related:
-

We're always in awe of how spending a little extra time redefining our garden beds…
This looks like a professional decorator was in the room. Great job!
You’re too kind Shirlee! <3
I just stumbled upon this post. This has to be one of the most amazing projects and tutorials I have seen. Unfortunately my children are too old and I have a decade before grandchildren but I would love to make one. Maybe for the dog? Hmmm….
You’re so sweet Jodi! And you totally SHOULD make one of these as a dog bed. AND SEND ME PICTURES!!! <3
Fantastic tutorial. Thank you so much. I love that you showed every detail along the way. It’s so helpful:-)
Thank you! <3
Love your beds! I am trying to make a miniature Fainting couch and I am stumped on how to make the back meld into the arm. Any photos of the back of your bed?
So happy I stumbled on your blog! These beds are absolutely gorgeous. My daughter is ready for a toddler bed and I just wasn’t thrilled with those available online and then saw your blog post. My husband and father are very handy and are going to begin making one using your wonderful tutorial at the end of the month. Can I ask about how tall you made the arm and back of the couch/bed? Just want to be sure we don’t make the bed too miniature!
OMG!! These beds are just adorable. I am literally swooning just thinking of them!! Though my kids are 23 and 20, I still want one lol. But I can always wait for a granbaby!! (SEVERAL years down the road!!) I’m new to your blog and just love all of the beautiful things you and your hubby make, including the kids! Most of all, I love your story. As someone that initially struggled with infertility, I understand how difficult it is and am so happy you’ve been blessed with three beautiful little girls. Of all the projects you guys work on, be sure to much just as much work into your marriage and build a beautiful, strong family. Best wishes to you all.
You’re super sweet Susan! ! Thanks for taking the time to comment!
Is lovely everything you do, good ideas. You have a beautiful family
You’re so nice! Thanks for taking the time to write such a sweet comment!
Beautiful! But I’m missing the one part I was looking for 😉 It looks like the mattresses are flared up on the sides, so the girls don’t fall out (you know, like the shape of a changing pad for a baby). Maybe I’m missing something, but it looks like they are. I’ve heard you can put a pool noodle under the edge of the fitted sheet, but it just fell down to the side when I tried it. Thanks for any help!
Hi Nancy… Yes! We put pool noodles under the mattress pad and sheet to create a soft ‘lip’ to keep the toddlers from falling out of bed. They work AMAZING! Highly recommend!
These are amazing! I am thinking of trying something similar. One question, when tufting around the arm – how do you get your needle up from underneath and staple there as well when done? Did you go through holes in 2 pieces of wood? Thanks
Jane, the under-side of the arm of the couch is open, so we were able to get our hand up underneath to staple. Does that make sense? Is that what you were asking?
These are gorgeous! Awesome job!
These beefs are absolutely amazing!!! I am so glad that I found your blog! Im going to attempt to make one of these beds this weekend, only instead of putting the side part on I’m going to just do a headboard and footboard so it will be like a tufted sleigh bed! So excited! I had 2 quick questions first, did you use a regular cotton fabric or would a thicker upholstry fabric work better? Also, I seen above that you said you used 4 yards, was that per bed? Thanks!!!
That will be amazing to do a tufted sleigh bed! The 4 yards of fabric was for one bed, but I believe I rounded up just to make sure that people had enough. We just used a cotton twill fabric, but you could use upholstery fabric too I’m sure. Let me know if you have any other questions… and good luck! You MUST email us pictures when you’re done!
Thank you so much for your quick reply! I’m about half way finished with the frame. I’m at the point where I need to cut the scrolls. Do you have a quick estimate of around how tall yours are? I was thinking 2 1/2 ft tall for the headboard and 2ft for the footboard. That would be from the top of the frame up. And how wide the scroll part is, at the widest point. I’m totally fine with a guess, you don’t have to actually go measure them. I just don’t want to end up with a funny “should have went bigger” bed lol! Thanks again and ill definitely send you pics!! 🙂
I’m absolutely obsessed with this project and I need to convince my husband to help me make one for our little girl!!!!
I hope you can talk him into it! It’s easier than it looks! Be sure to send us pics if you go for it 🙂
Just found your site, I love this idea. It looks so cozy and not too hard to do.
I am looking for something unique to make for my teenage daughter, that would be it!!
I already added your site to my favourites!!
We need more creative people!!!!
Keep it up!
You are sooooo talented and creative. Well done on creating a beautiful room. My only suggestion would be covering the seating part of the fainting lounge with the polka dot material and adding a cute cushion. Well done again<3
Thanks Bella! We probably would have done the seating in the same fabric as the rest of the couch… but since we’re using them for toddler beds and using a mattress as the ‘cushion’, it made the most sense to just use white fitted sheets. We’re in the process of making some super cute bedding. Stay tuned!
Oh my goodness, I can’t believe you MADE these, this is incredible!!! Pinning!!
This is so amazing. I don’t know why I haven’t been following you. I obviously live under a rock (in central Iowa!)
Sweet! Where do you live? We’re outside of Marahalltown
Ya’ll did an amazing job on them! I loved seeing the step-by-steps and the details which included the cost (I think that may be the most amazing part!)
WOW WOW WOW!!! The beds are AMAZING!! You and your husband are so talented! I wish I had a sliver of that talent. And I just saw the finished herringbone accent wall….beautiful!!
Thetis gave inspiration to make circle daubed for my baby girl, thank you for such detailed post.
Sorry my phone’s autocorrect made so many mistakes, ment to say: This gave inspiration to make circle daybed.
Sweet!! Send pics when you’re done!!
Did you like doing the upholstery? You chose a challenge that is for sure. I once did an entire sofa bed at night, with a hand stapler when my children slept. This project is adorable but I have a suggestion for you get a pancake air compressor. I love my Porter Cable one my husband gave me for Christmas. Then make sure you get the upholstery staple gun. I have done everything from nailing up our wood trim in out house, blowing all the fuzz out of a picture frame before framing, and today my husband used it to blow all the water out of the hose for the winter. As you can see it is a valued item in my tool box.
Thx for the suggestion! We do have a giant air compressor, but it doesn’t leave the garage. :(. Our staple gun is specifically for upholstery and worked well! Although there were several times we were wishing we had two do we could both be stapling. It was a fun job overall, and turned out much better than we even pictured!
O. M. G. I LOVE LOVE LOVE these! Great job!
A-MAZ-ING!!! So fantastic and inspirational!! Way to go! And you made two? Cray-Cray for sure!! But makes it even more amazing!! Thanks for sharing such a detailed tutorial!! I will be referring back soon! The Hubs says I have to finish the rest of the projects in my to do pile but then he is in!! 🙂 Yay!
Hello there! WOW is all I can say about these toddler beds! Absolutely stunning! I just came across your blog after seeing your post on http://www.allthingsthrifty.com. So glad I found you. I just started my own blog (www.trappeddesigner.blogspot.com). Looks like we have lots in common 🙂 I too, have twin girls after 5 1/2 years of infertility and two rounds of IVF. I look forward to following your blog and your Pinterest boards!
Oh wow we DO have a lot in common! Any words of advice to help us through the toddler years? UGH! What are your girls names?
I just don’t have the words to express how incredible these beds are. The girls are going to LOVE them.
I was over at Delusions of Ingenuity when she mentioned being inspired by Sawdust and Embryos ………..the name alone made me come over! And…WHAT? These beds are crazy good! As a builder/designer/artsy type person, I am so impressed! Fantastic! Love such a unique idea for a girls room! And doing it twice? Confirmation: y’all are OUT OF THE BOX…….in a good way of course..
Awwww you’re too kind! Out of the box is good right?! And I’m glad our blog name caught your eye… 🙂 that’s the point! Ha!
Those are amazeballs!!! I bet your babes love them! Great job!
(Did I use enough exclamation points?!!)
Wow! The beds came out awesome. Can’t wait to see the room come together!
just beautiful! So fun too. Great job. Mary in NY
AMAZING!
Okay folks – am I the ONLY person on this forum that sort of feels like a “slacker”!?!? I have been remodeling our new home, and it has taken almost a year. And, I know that the rooms are never going to be totally finished,,,we all tweak rooms, for the rest of the time we are in the houses.
But wow – even in a remodel mode, I feel like a slacker! LOL
HOWEVER – your picture tutorial has inspired me to finish the top of a Hope Chest that is in my MBR and needs a seating cushion, and this will fit the bill!!! Thanks for the great work in helping us ALL get that deco bug, not only fed, but squashed, making our homes look amazing!
Oh please don’t feel like a slacker! You should see the pile of unfolded laundry that’s been sitting in the living room for the past week. 🙂 if you finish that hope chest be sure to send pics! Can’t wait to see it!
Those beds rock! I am drooling over them and the fabric is perfection!
Just want to say I love the beds! You do great work. First time I’ve commented… but I’ve checked in every week or two for the past year. 🙂
Thank you Lynne! And thx for coming out of hiding!
Just wanted to let you know that I will be featuring you on The Sunday Favorites please feel free to stop by and grab a button from my Buttons Page.
Beth and Nick, Those beds are out of this world !!! Does this fabric have some form of Scotchguard surface so it can be cleaned off easily if necessary? You two are so creative, and this project really ‘shows your stuff !!’
You two did a beautiful job! The girls are going to be so ecstatic about their big girl room, especially their beds! How creative!
Simply ~ perfectly ~ beautiful! Great job…I love it…..them
I absolutely love this bed!!!! How much fabric did you end up using upholstering each bed?
Good question! I should have addressed that in the post! We ended up using about 4 yards total.
WOW!! These are amazing!!!!!!!
I love the fabric you chose and the design of the beds are out of this world!! BEAUTIFUL!!
Just found your blog through your guest post at all things thrifty and I love it!! Looking forward to browsing through ASAP! P.s. The plastic over the upholstery may just save me a lot of headache very soon!!
Wow wow wow! Absolutely gorgeous…now I want one for myself!!
Beth, I LOVE them. So cute. And you make it look so easy!
LOVE LOVE LOVE!!!!
So proud!!! You guys did SPECTACULAR!!!!
~dana~
and the sorry, the Hubs too, of course.
Oh my gosh Bethany, I’ve been looking forward to seeing these, I knew they would be awesome….but wow, even better than I thought. You are amazing!
Beautiful and so unique. The girls will love them. Congrats on lovely work.
Those are so awesome! I want a grown up version! 🙂 Great job you guys! Thanks for sharing!
Wow! It looks amazing! Can’t wait to hear how they like to sleep in it.
HAHA! You and me both! I’m dreading that day, but a little piece of me is looking forward to it now that they have super cute beds to graduate to!
Mind blowing! These turned out even better than I could have imagined. I feel like you would pay hundreds for these in some upscale children’s furniture store. Seriously, this is the best thing I’ve ever seen. I can only imagine how much Paisley and Dell love them!
Seriously? Seriously!!!! I mean totally totally awesome. You are going to get requests to build these things. Which would fund your next baby endeavor so quickly. I would easily pay $600 for this bed. Awesome job!
Thanks Jennifer! We actually discussed that… and as fun as they were to build, it was super time-consuming and just not something we’re interested in selling. Especially since it would be very difficult (and expensive!) to ship. 🙁
Holy crap! Those are beautiful! I absolutely love them! I still have have a question though. Are you going to do something so they don’t fall out of bed? Ok, that is the Grandmother coming out in me but I really want to know!!!
Yep yep! Don’t worry! We’re going to use pool noodles under the fitted sheet to create a ‘lip’ along the edge of the mattress. And even if they do fall out of bed, it’s only about 12″… they’ll live! 🙂
Oh my gosh. These are so incredible I can’t even come up with sufficient words. You have outdone yourselves… Best project so far!!! Amazing. We are new homeowners and therefore new to power tools but you have made this seem do-able. Maybe my someday little girl will be as lucky as yours 🙂
Wow I love this project!!! I’ve always wanted a couch like this but never had the money/room for it when ever I found one that I liked, now I know how to make one myself! Thank you so much and I can’t wait to see how the rest of the girls “big girl” room turns out.
CUTE!!! Can’t wait to see how the whole room looks done! 🙂
love, Love, LOVE! Turned out better than I was imagining!
Those are AMAZING… my daughter is almost three and probably coming out of her toddler bed soon but I all of a sudden feel the need to make her one of these anyways! Except of course it would end in my husband and I trying to kill each other if we tried to make this together lol!
You could totally make a fainting couch with the dimensions of a twin size mattress! You should TOTALLY do it!!!
these are so amazing they almost make me want another child!! (almost.) If I had any girls, this would totally be on my honey-do list!! 🙂
OMG I LOVE IT! Beautiful work, thanks so much for the awesome, totally thorough tutorial! 🙂
Standing ovation Beth!!! Two very lucky little ladies at your house. Vikki in VA
Oh.My.Gosh! How adorable! You did a great job!
Hats of to you!!! I’ve always admired your work… but this.. wow.. whole new level.
This is stunning and something they can treasure and pass down themselves.
Wow…just WOW!!!
those are awesome!!!!!! i love it!!! i can’t wait to see the girls laying on them!!!
Holy cow, these are awesome! There’s no way I can talk my husband into buying the tools we would need to make this for our daughter (who isn’t even born yet!), but I love them! I can’t wait to see what the twin’s big girls room looks like!
Turned out beautiful! Great job!!!
Wow! So blown away. They are amazing! Love the suggestion to buy the egg-crate foam.
Incredible!!!! LOVE these! Now you’re all set to reupholster those cool chairs in your living room! 😉
WOW!!!!!!!
holy canoli Beth, you are a superhero. these are awesome.
These are incredibly fabulous!! What inspired his idea? It’s so out of the box (or at least to me, it is)!
Mary Anne, I knew I wanted the girls’ big-girl room to be super unique and full of things that we DIYed with our own two hands. I don’t remember exactly what prompted the fainting couch idea, but when I had the idea, I knew that was IT! I’m so glad it came together as good as it did. It was such an ambitious endeavor, and there were a couple points where I was pretty worried. But we LOVE the outcome! And hope the girls do as well!
Oh My Hell. Beth, are you KIDDING ME?!
THOSE ARE AMAZINGGGG.
Like, child isn’t even birthed and I feel like I need one of these.