We’ve been inching away at the toddler beds, and are SO excited about how they’re turning out! Many times, the picture in my head isn’t really something that’s logical… or structurally stable. But with Nick’s knowledge and arsenal of power tools, and my dream… SOMETIMES amazing things happen!
Consider this Part 2 of a 3-part series… so don’t get ahead of yourself and skip to the end hoping for a gorgeous mini fainting-couch-toddler-bed. If you missed part 1, click here to see the inspiration pics and beginning construction!
This is where we left you. Bedframe in place, and starting on the ‘arm’ of the fainting couch.
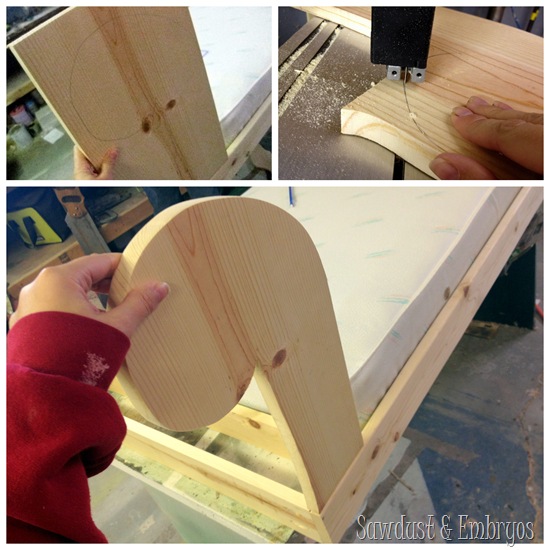
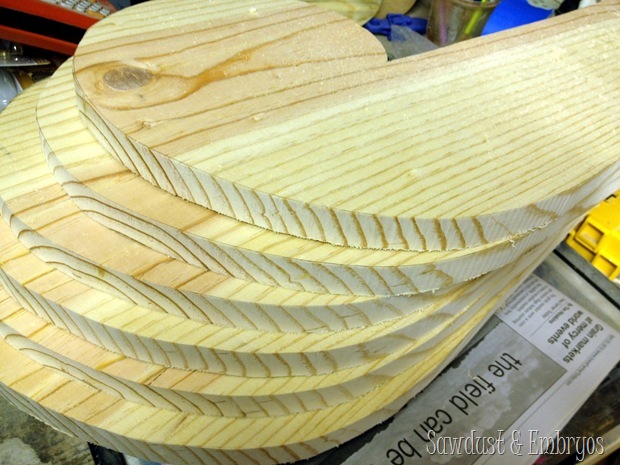
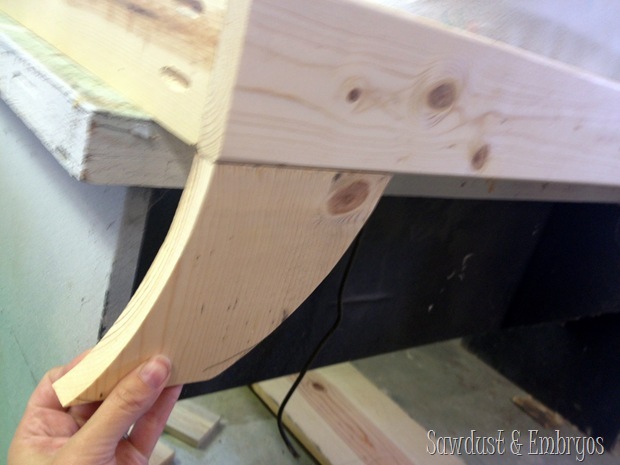
Since we have a couple rambunctious 2-year-olds, we knew that this arm would need some extra stability. We cut 3 identical ‘scrolly shapes’ for each bed.
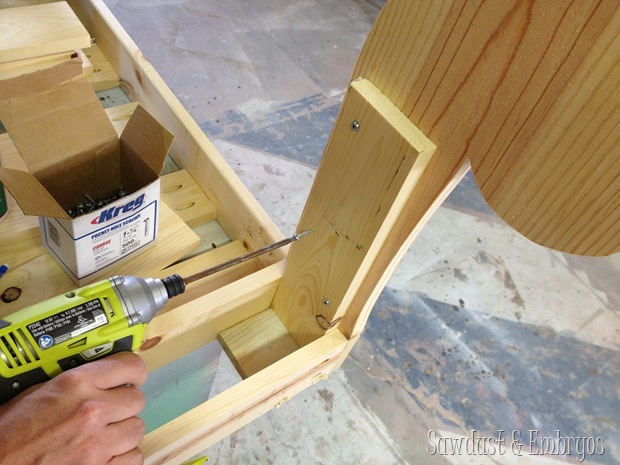
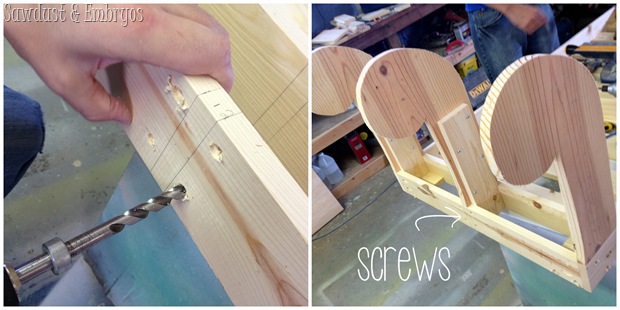
Then secured them to the support. No need to use pocket holes for this part, because these screws are going to be hidden. You’ll see!
This method worked for the front and back, but the center ‘scroll’ needed supports too, so we found the center, and screwed in two supports on either side of the scrolly thing.
Next goal is to make this thing have some substance instead of just being a fainting-couch-skeleton! Nick and I had different ideas on how this would work, but in the end MY idea proved best! BOOYA! Out of respect for my husband, I won’t demonstrate his design FAIL. (love you babe!)
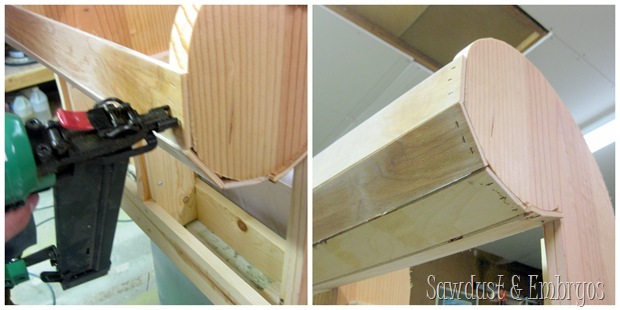
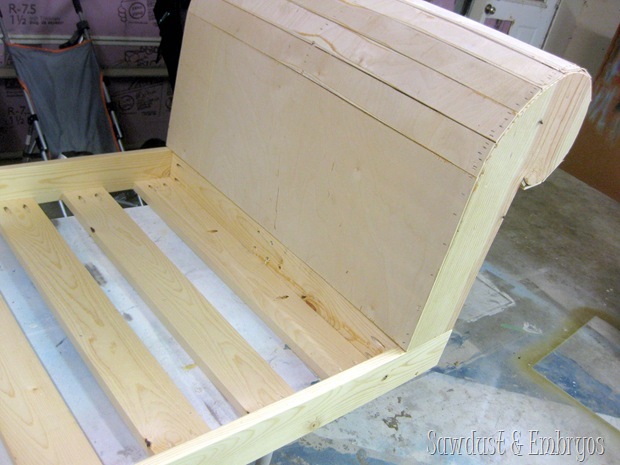
We cut lots of narrow ‘slats’ out of 1/4 plywood. They’re about 1.5” wide, and the length of the arm of the bed (29.75”). Using our air stapler, we affixed each slat to the bed one at a time and made our way around!
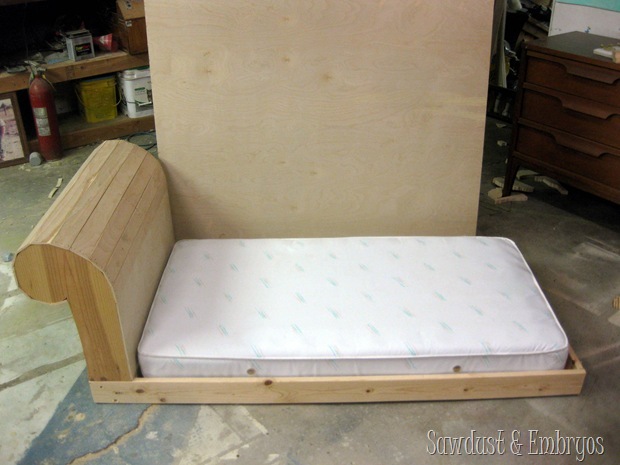
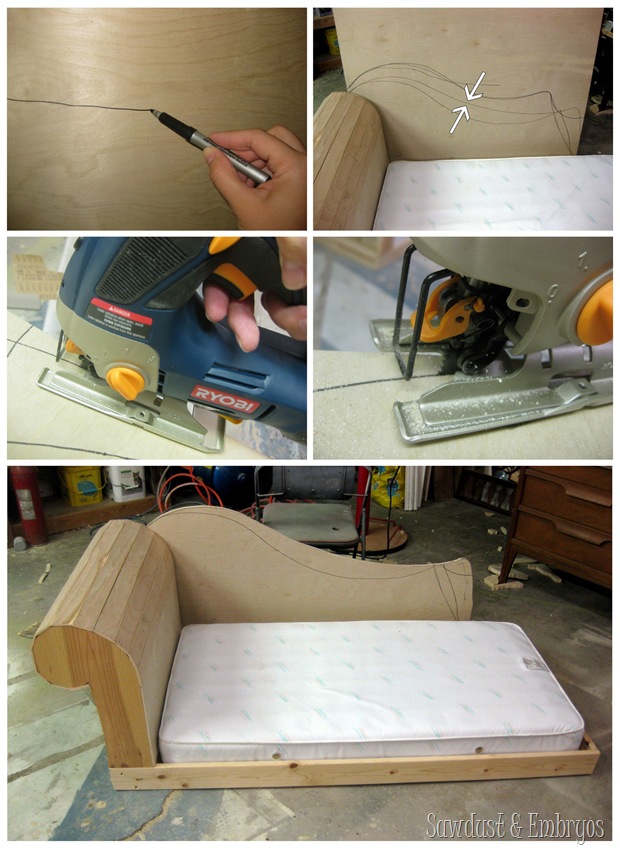
While Nick was busy working on the legs, I pulled out a sheet of 1/2” plywood for the ‘backboard’ of the fainting couch.
Using a sharpie, I traced out the general shape I wanted… and then stood back and shook my head. And then tried again. Until I had a mess of lines (with ONE PERFECT ONE) and cut it with my jigsaw.
MEANWHILE, Nick is busily working on the feet of the bed! We wanted the legs to look curvy like this (only chunkier):
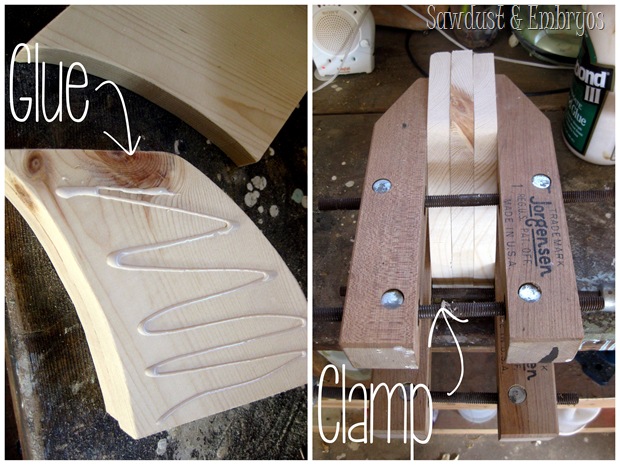
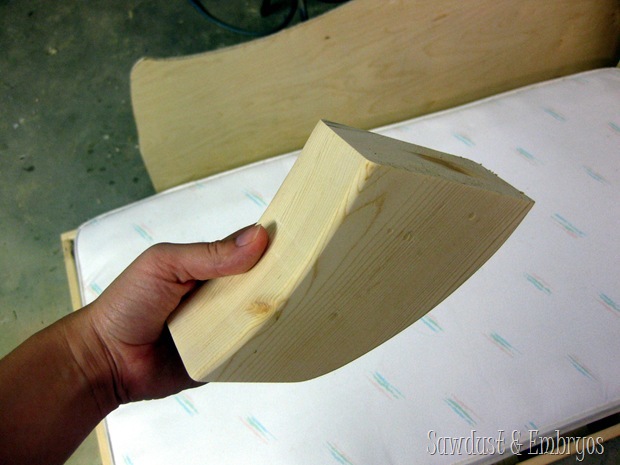
So we took this shape and traced it several times onto a 1” board, and cut them out on the band saw. Then glued 3 together at a time… giving us one hefty leg!
Once the glue was good and dry and it was one big hunk-o-leg, went around the edges with the band saw once again to give it a smooth edge. Then he ran each leg through the table saw to make sure the top was perfectly level with the bottom of the leg, and then rounded all the edges with the router.
Nick found the center of the foot and marked it with a pencil line. Then he drilled a hole and threaded in a hanger bolt. Then after drilling a corresponding hole in the bed, he put the leg on and secured it down with a blind nut. Got it? GOOD.
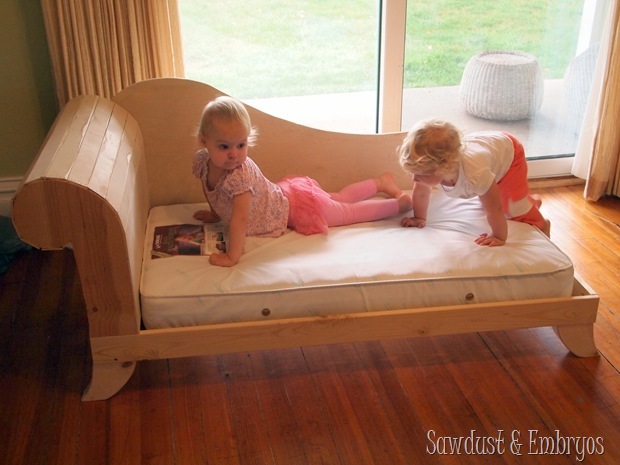
We secured the ‘back board’ on one of the beds temporarily so we could see just how adorable it’s going to be!
The girls seem to approve. Dell even felt comfortable enough to do some yoga moves.
Now all we have left is to make things fluffy and padded and upholstered. I’m not going to lie… I’m a little intimidated, but I’m hopeful! And we’ll be back to share the deets and finished product SOON hopefully! I’m super excited!
OH! And you may remember us having you ‘vote’ on our facebook page to help us decide on one of the patterns below? A decision has been made! And this is for the upholstery fabric that will be used for these mini fainting couches!
I’ll give you a hint…
JUST KIDDING! NO HINTS!
Update! Part 3 (upholstery) is here! Come see how she turned out! WOOHOO!





You guys are something out of this world! I love your things and how you go the extra mile. I have never seen anything as professional as this on any other blog. You have inspired me to build my own sofa.
Sweetest complement EVER! Thank you so much! Please send us pics after you build your couch!!
This is the greatest post I’ve ever seen, anywhere!!!!!
I love these fainting couch inspired beds. I would love to make one for my own twin bed. I have to sleep in an electric (hospital like) bed, and I’ve been trying to figure out a way to fancy it up. I could just make the side pieces as a frame to sit around the current electric bed.
I just found your blog….you are just lovely. I also struggled with infertility for 20 or so years. No success. We tried in vitro once. It was in the early years of that technology, so the odds were very low. I wish there was such a thing as blogs when I was younger. I had no one to share my feelings with. It’s wonderful that you are so open and honest and generous. I’m sure you’ve made many a young couple feel not so alone, and hopeful too. Congratulations on your success and the birth of your two sweet girls.
I’m a new follower!
You’re suuuuuper sweet Tracey! Thanks for taking the time to comment!
~Beth
So im in the middle of getting all of the supplies to make this. Is there any way you could tell me exact dimensions to all peices. I have an engineer type mind so i work better with numbers.
Just stumbled onto your site. WOW, I love it! It sounds and looks like you and your husband have something really special and it is reflected on this site. Thanks for sharing all of your amazing creations as well as a bit of yourselves. Looking forward to trying several of these projects just as soon as I find some extra time:). Keep up the great work, I am inspired!
Thank you Sheranna! Welcome to our blog!
Looks fantasic! Kudos to you on making gorgeous things come our of your imagination!
oh goodness gracious are these looking cute!!
I love the way you guys work together… it’s one of the many reasons I’m a big fan of your blog! And what I REALLY love about these beds, is that when the twins outgrow them for sleeping, they’re totally re-pupose-able into actual seating!
Awww that sweet! Except DON’T BE DECEIVED! We argue like cats and dogs sometimes. We just don’t blog about it! HA! 🙂
Actually, that makes me like you more – haha! You’re, like, REAL people! Crazy!
Adorable, keeping fingers crossed for polka dots.
I love these beds so much! They are soooooo adorable. Perfect for such cute little girls. I love Dell’s downward dog. Although I was thinking more “george costanza.” I’m really excited to see them all covered in beautiful fabric.
As a mom of twin toddlers – I’m super jealous of your beds! My girls would love those! Such an awesome idea! I cracked up about the yoga moves. Haha!
You guys are amazing!!! I was thinking I wanted to make one of these too until you started talking about making the legs. I don’t have all those saws 🙁 I can’t wait to see them upholstered. Cutest toddler beds ever!!
Cara, if you have just a jig saw you could totally get by. There would just be a lot of sanding involved to get everything smooth. Honestly you could just put pre-made legs on that you can get at any home improvement store and it would still be cute!
I just love these. I hope the fabric I voted on won. I can’t wait to see the final project!!
WOW WOW WOW! I feel like the world’s WORST MOM EVER – lol. They were put in ‘twin beds’ after the crib fiasco was over. I am JUST NOW (at four years old) Making the room look ‘older’ and less baby-ish! AHH!
But seriously, awesome job! I can’t wait for the finished product.
Nooo! You’re not the worst mom ever! We just ENJOY building together… So really it’s a selfish choice. HA!
Those are gorge…I can’t wait to see the finished project!
4 words:
A.Door.A.Bull.
😀
I love this project, you guys are such inspiration 🙂
Wonderful progress. I can imagine them finished already. I really like the Arm, how sturdy it is. I can already see the girls using it for sleeping and a slide and a climbing /jumping platform. The girls are really going to like these. Also a comment on the new web design. for some reason the section of the sidebar for SyWoodInk is all stretched out like two or three times longer than it should be. Bob
Thanks Bob! We knew the girls would be doing plenty of rough-housing on these beds, so it was important that they be super sturdy!
We’re aware of the stretched out sidebar and are trying to figure out how to fix it. Thanks for the heads up! We always want to know if something’s askew. 🙂
Bob, are you using Internet Explorer when the sidebar is all stretched out?
Those are gorgeous! Do you have plan for helping them not to roll out at night? We struggled for weeks; finding our guy on the floor or hearing that ‘thud’ in the night until someone suggested tucking a swim pool noodle into the sheets at the outside. Worked like a charm.
That’s exactly what we’re planning Sara! Does it work out well for your little guy?
It worked beautifully. He used it for about 3 months–until he caught me changing his bed and stole the noodle to use as a giant sword. Thankfully, he had learned to stay in the bed by then.
That’s great news! I’m so glad it served its purpose! We bought two noodles on clearance a couple days ago… Because I realized by the time we need them they’ll be out of season and impossible to find in stores. 🙂 we’ve been hiding them from the girls too!
Question: Are the “fainting couches” identical or opposites? Just asking because they could be pushed together to make a “double bed” or back to back in the room or on opposite walls of each other. They are adorable!! If you ever need projects, I have plenty that need to be completed and I will watch the girls!! 🙂
We’re doing them opposite, so we can totally push them together sometimes for fun! We used to do that with living room couches as a kid and it was SO FUN!
SUPER adorable!!!! Can’t wait to see the rest of the project!
Thanks so much!