It’s been awhile since I’ve done a sewing project, and as weird as it sounds, I’ve been craving it! If you’ve been around our blog for any amount of time, you know that I only share SIMPLE, easy sewing tutorials… because I’m somewhat of a beginner myself. No shame! Today’s easy sewing project is DIY Rice Packs (or Ice/heat Packs)… what do YOU call them?
In our family, we refer them as rice packs. But the truth is, there’s barley inside! Not rice! We have one rectangular one that we keep in the freezer, and even though we have several other kinds of ice packs (with gel), the barley one is what everyone reaches for.
(I’ve also heard of people using cherry pits, flax seeds, and seed corn to fill their ‘rice’ packs! Whatever floats your boat!)
So let’s make some more hot packs / cold packs for our stash, shall we?
SUPPLY LIST for DIY Rice Ice Packs or Heat Packs
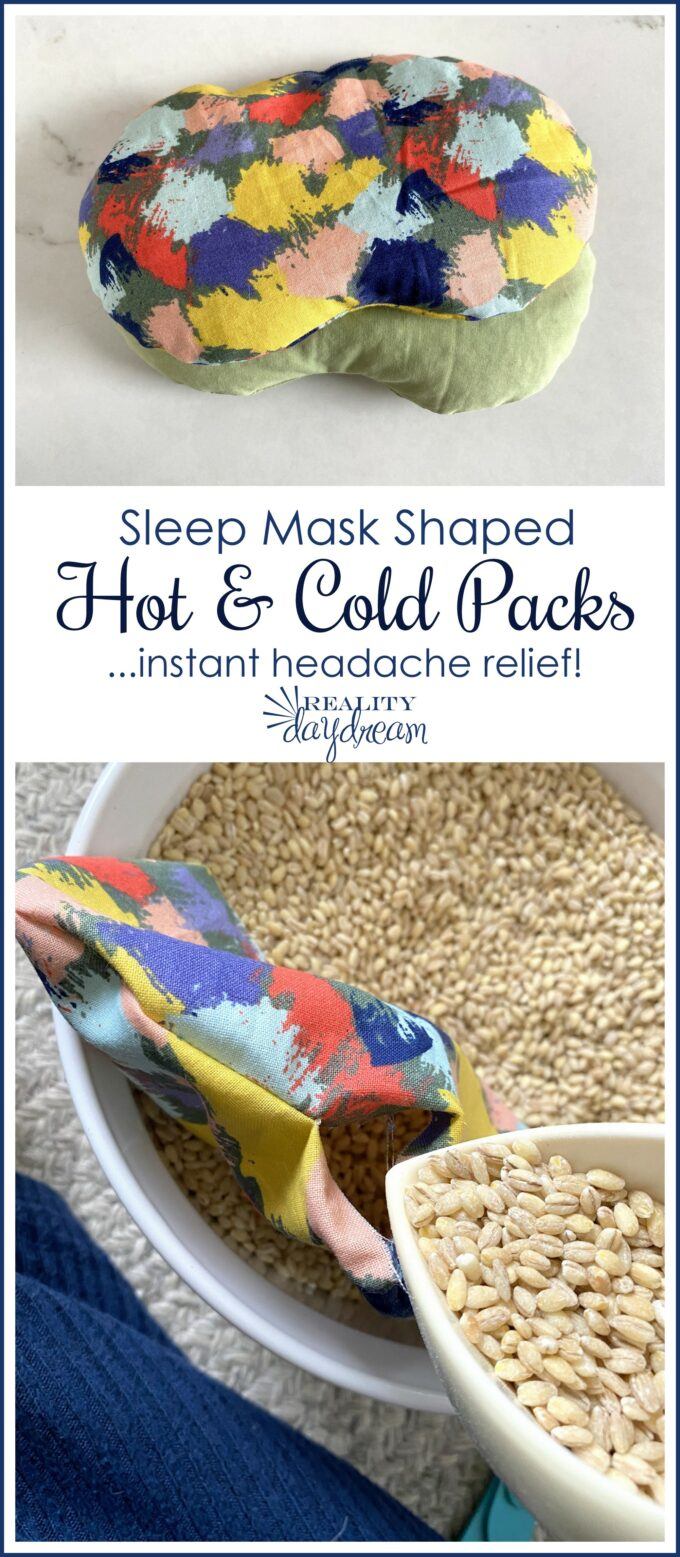
- Uncooked Barley (pot barley OR pearl barley are completely fine)
- 100% cotton fabric (fat quarters)
- Fabric marker
- Fabric scissors
- Pins
- Sewing machine (this is the one I have and LOVE. Easy enough for a beginner, but does a lot of other more advanced stuff)
- Printable Eye Mask Template
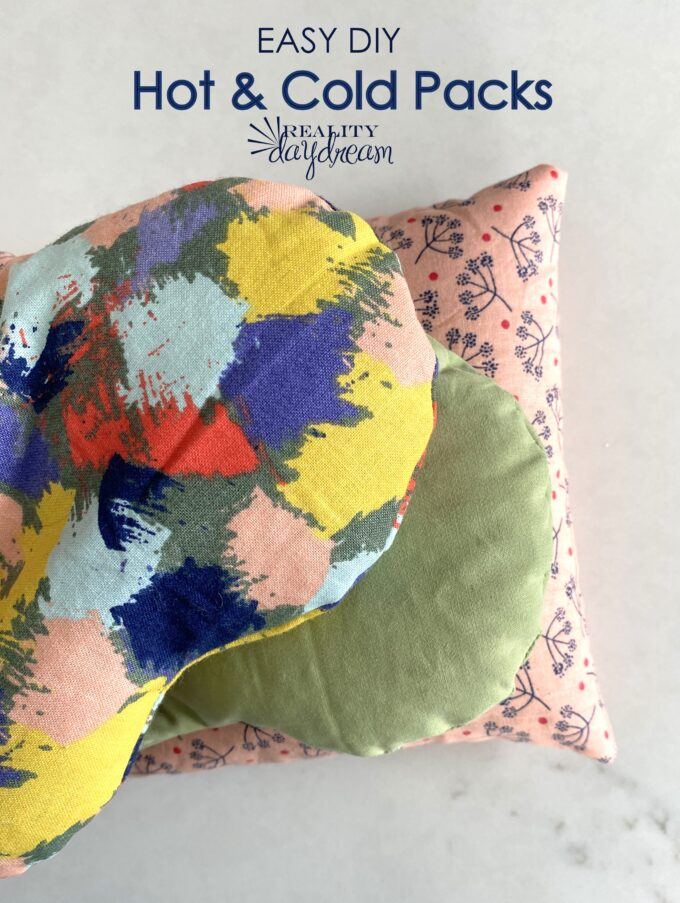
For this tutorial, we’re making an ‘eye mask’ version that is SO PERFECT for headaches. I’m the queen of headaches, so I would know. 😉
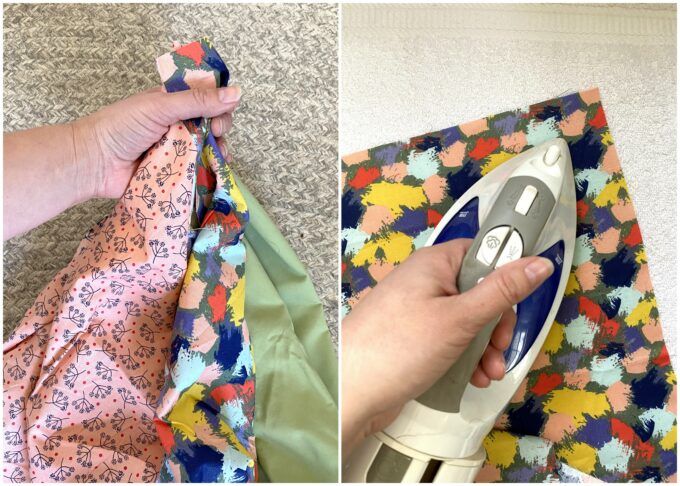
Start out by choosing some fun fabric(s) and iron! You could use fat quarters and pick some beautiful coordinating fabrics or cheap!
You can absolutely make a rectangular or square heat pack. Just choose your own dimensions and ignore the template parts!
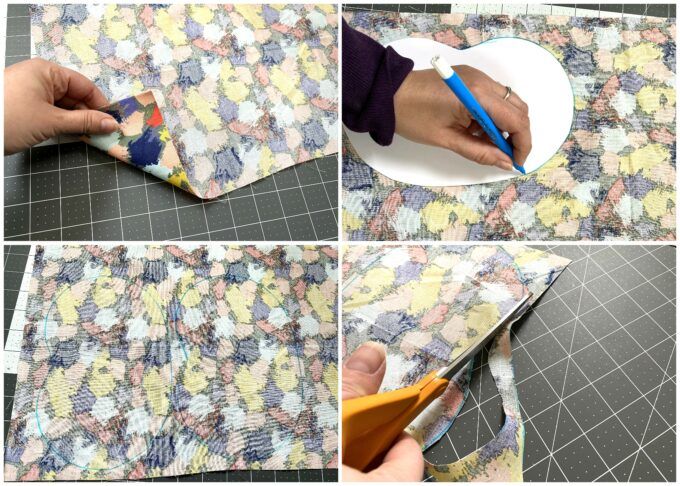
Download our printable template, print it on cardstock and cut it out. Trace it out twice on the back side of your fabric (or two different fabrics if you want it to be different on each side!).

We’re going to place the pretty sides of the fabric facing each other like so, and pin every few inches to keep things lined up.


Yikes, I’m realizing I didn’t do a very good job at ironing. 🙂
We’re going to plan to leave about a 2″ gap at the top, so start sewing about right here:

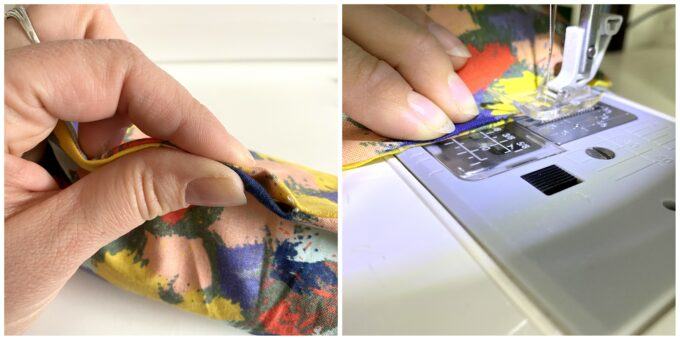
Sew around the whole thing (leaving about 1/4″ seam allowance) until you get back to that two inch gap at the top. It’s time to turn this baby right side out through that hole, and add some barley!

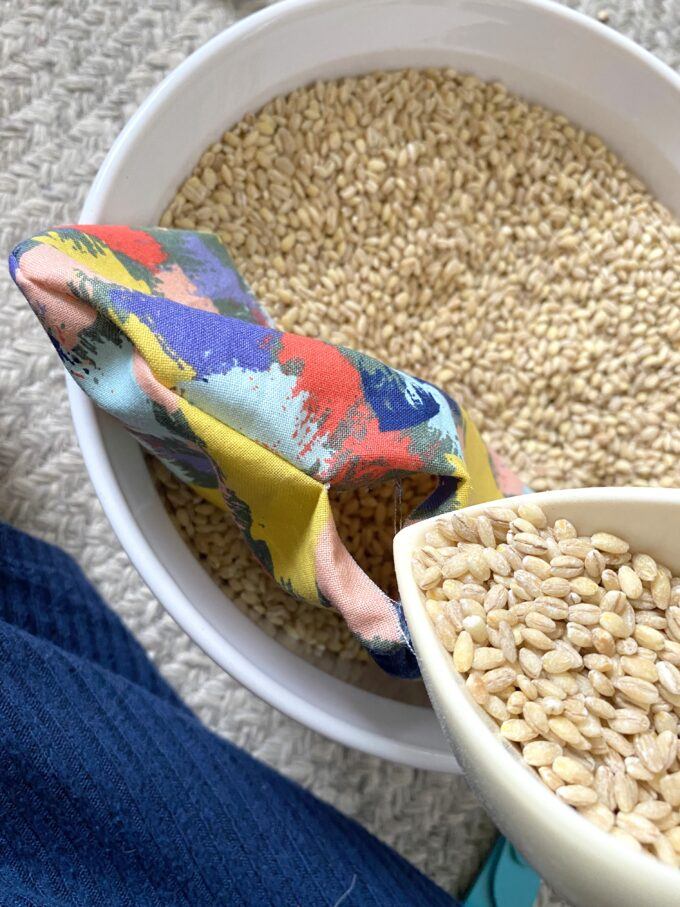
Be careful not to overfill your heat pack! You don’t want it to be a chubby little pillow! You want it to be loose enough that it will spread out a bit when you put it on your body. But you also don’t wait it to be too floppy. It’s a happy medium!
Optional: if you want, you could also add in a couple teaspoons of dried lavender!
Then we’re going to fold those edges in, and sew verrrrrry closely along the edge.
I’m cringing at how wrinkly my fabric still is, but you get the point, right?! 😉
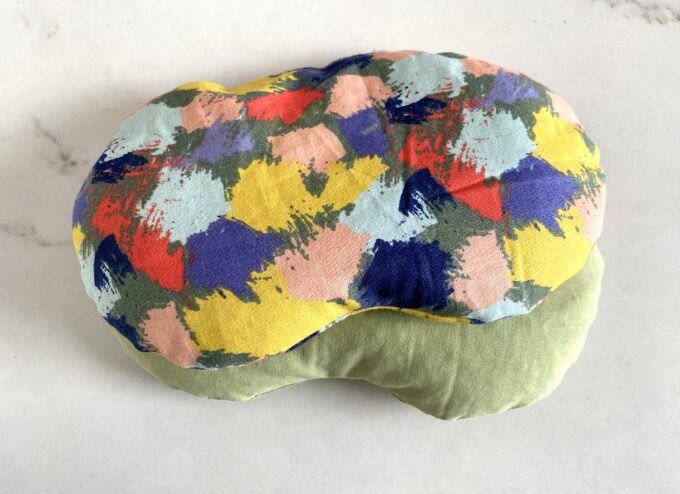

Here I am dramatically posing like I have a headache. These things really do provide INSTANT relief for headaches when stored in the freezer.

I hope this tutorial inspires you to get out your sewing machine and make something, no matter your skill level!
And if you try making these barley ice packs / cold packs, please tag me in pics on social media! We’re @RealityDaydream on both Instagram and Facebook!
~Bethany
~~~~~~~~~~~~~~~~
Be sure to check out our master list of DIY Handmade Gift Ideas!

Thank you for pinning!
Related:
-

I occasionally talk about our love for our whole grain Pumpkin Oat Muffins (that can…
-

My kids are getting to the age where they want to tape pictures, cards, notes...…
-

Making a cutting board almost seems like a right of passage into the world of…
I found this article very informative and useful. I like your sewing technique of DIY Rice Ice Packs or Heat Packs. It’s amazing, I definitely
try it out. but before read this article i’m using reusable heat and ice packs that i buy from Amazon in Hampton Adam brand they are also very effectively works for pain relief. Overall all great article!
Keep Posting!
We call them HOT BUNS. I made a muff style heatable pack from cordoroy filled with field corn for my sister who had a massive stroke and can’t put on gloves. Keeps her hands toasty warm in our cold Ohio winters.