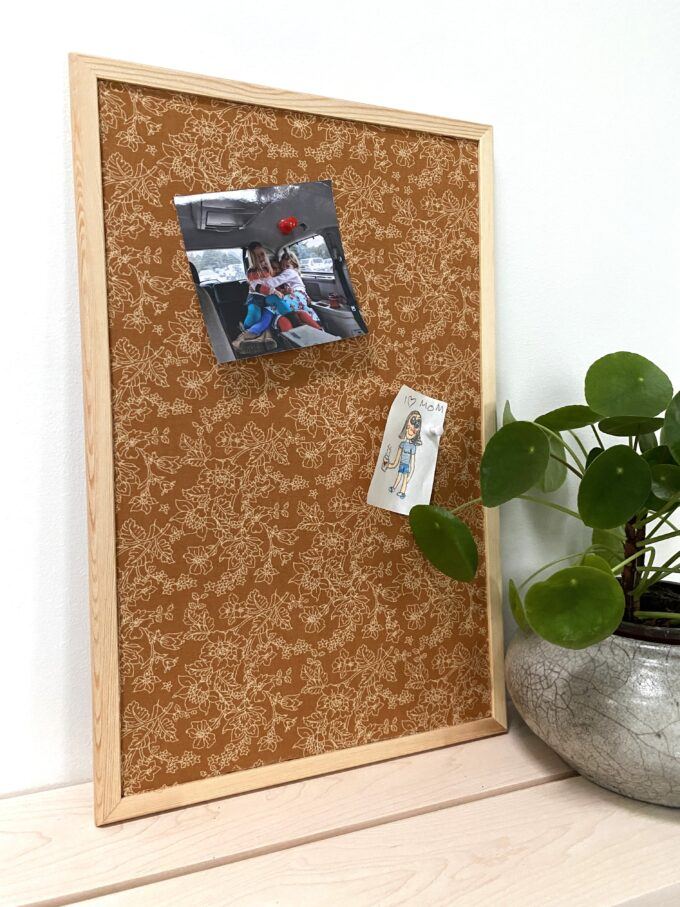
My kids are getting to the age where they want to tape pictures, cards, notes… ALL THE THINGS to their wall. And then I get ragey because the tape pulls off the paint and we have a whole situation. So I set out to make an extra cute solution with these DIY fabric covered bulletin boards! So simple… anyone can do it! We’re even using an existing bulletin board, so the skill-level needed here is minimal. Praise be!

*This post contains affiliate links.*
DIY Fabric-Covered Bulletin Board
Supplies Needed:
- Bulletin board (I got mine in the teacher supply section of Hobby Lobby for just a couple bucks!)
- Fabric (also Hobby Lobby)
- Spray Adhesive
- Sharp Craft Knife
- Painters tape

Step 1
Cut your fabric so you have an inch allowance on all sides of your bulletin board.

Step 2
Make sure you iron your fabric! Don’t skip this step, because even the faintest of wrinkles will show when you’re done affixing it to the bulletin board. You want this to be smoooooth and flawless.

Step 3
Use painters tape to cover the frame part of the bulletin board. We’re going to use a spray adhesive, and we want to prevent it from getting on the frame!

Step 4
Use a spray adhesive that’s meant for both fabric AND cork. This is the stuff I used, and it worked great! Honestly it’s just a good all-purpose spray adhesive to have around. I use it all the time for various projects, and it is effective on so many different surfaces. I even use it for affixing scroll saw templates!

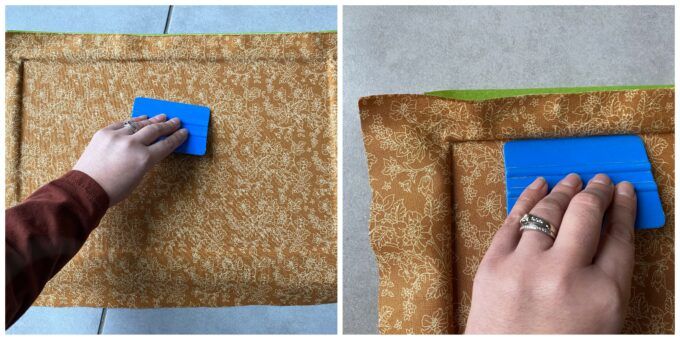
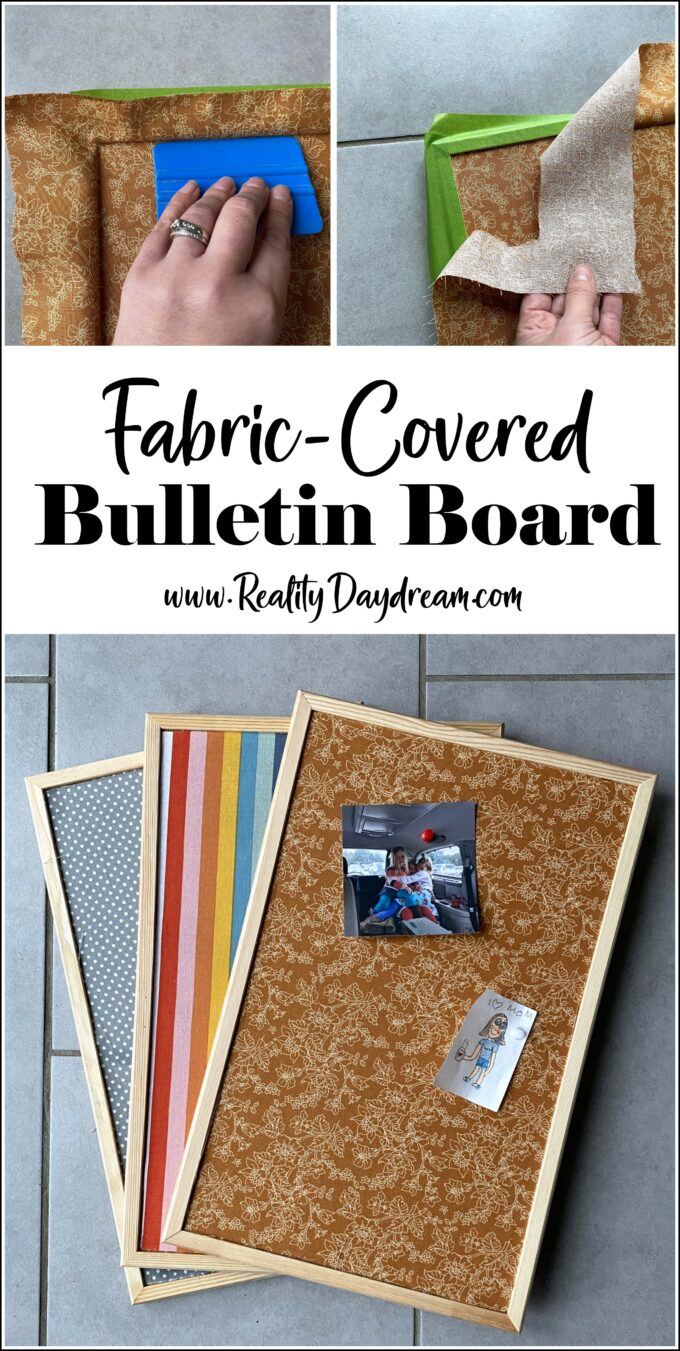
After you’ve sprayed an even coat on both the cork and fabric, carefully apply the fabric to the bulletin board. Smooth it with your hands; starting in the center and working your way out. Use a vinyl squeegee or credit card to get all the way to the edges. Then wait a good hour for the adhesive to dry.
Step 5
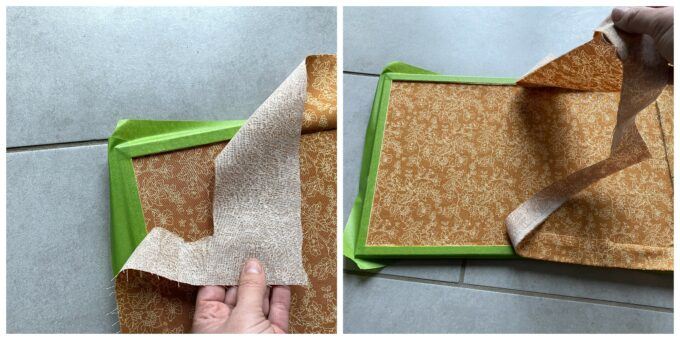
Cut into that crack with one of those rolling fabric cutters, or a Fiskars sharp craft knife. I tried both and actually ended up preferring the craft knife. I just didn’t get a photo of it. 🙂
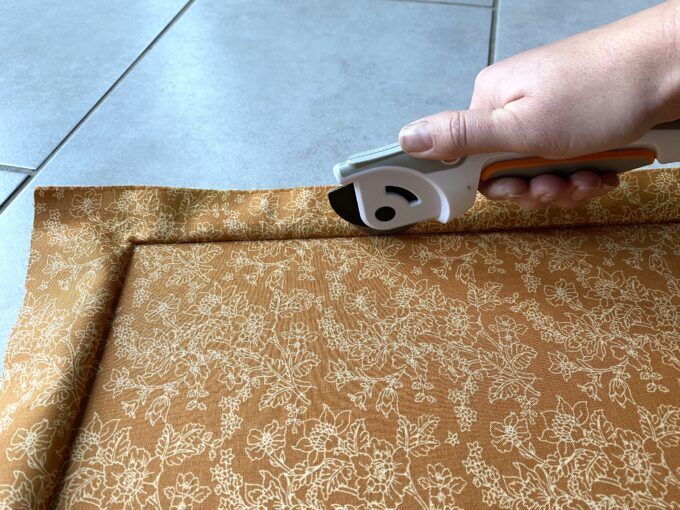
Then take it slow and peel back the fabric scraps from the bulletin board!
Step 7
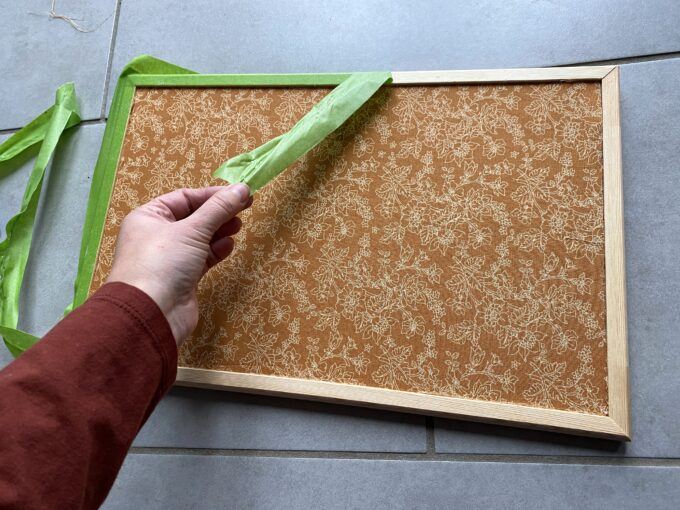
All we have left is to peel off that painters tape to reveal the original bulletin board frame… now perfectly complimented by the fabric!
You could absolutely continue to embellish these fabric covered bulletin boards to your hearts content. You could add nail head trim, a pompom border, paint the frame… anything you want! I decided to leave mine as-is though. I love letting the fabric be the star. Each one of these fabrics was picked out specifically for each of my kiddos’ style!

I can’t wait to give these fabric bulletin boards to my girls for Christmas, and see where they decide to hang them in their rooms! Hopefully it’ll encourage them not to tape things to the wall anymore!
As always, if you give this project a try, let me know how it turns out! I’d love to see pics! I’m @RealityDaydream on Instagram and Facebook.
~Bethany
~~~~~~~~~~~~~~~~~~~
Psssst! Be sure to check out my other fabric-related projects from the archives! This tutorial is probably the most popular project on my entire website, and has gone viral several times. So crazy!
And check out our master list of DIY Handmade Gift Ideas!

Thank you for pinning!
Related:
-

I've had this idea in the back of my mind for quite awhile... why not…
-

I have a fun and easy building project for you! And while I do end…
-

I've been needing to figure out a solution for my overwhelming plant propagation situation for…
Leave a Reply