• Home
  • About
  • Tutorials
  • Recipes
  • Furniture
  • Contact
    • Contact
    • Infertility
    • Disclosure
    • Privacy Policy
  • Shop
    • Facebook
    • Instagram
    • Pinterest

Reality Daydream

The Dream is Free, The Hustle Sold Separately

  • Home
  • About
  • Tutorials
  • Recipes
  • Furniture
  • Contact
    • Contact
    • Infertility
    • Disclosure
    • Privacy Policy
  • Shop

Wooden Centerpiece Tray Tutorial

September 19, 2022 by Bethany Sy

I have a fun and easy building project for you! And while I do end up decorating it to be fall-themed, it can be used to decorate for any holiday or season! But if you’re here because you love the fall look, I have some other fall-themed projects for you too check out too.

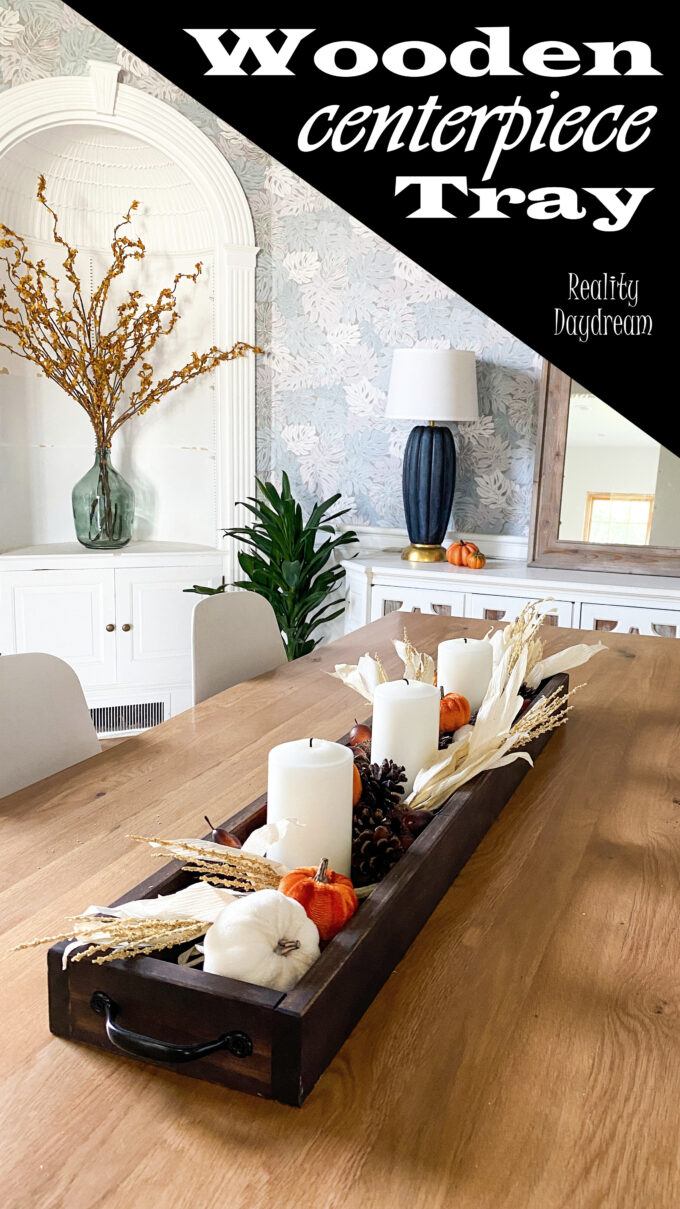
Today we’re going to build a long/narrow “tray’ of sorts, to use as a centerpiece on your dining table! Unfortunately this won’t work well for round or square tables, just rectangle or oval. But you could still use it on a console or buffet table. Or even on top of an upright piano!

*This post is sponsored by our friends at WORKPRO®  Tools! Thank you for supporting the fabulous brands that make Reality Daydream possible.*

Cute, right??

And to make this even simpler, we’re just going to use ONE BOARD.

Supply List for Wooden Centerpiece Tray

  • 1×12 board (I used a 10′, but did have some leftover)
  • Wood Glue
  • Orbital Sander (or just sandpaper)
  • Router and WORKPRO® router bits (optional, but I love the polished look it gives!)
  • WORKPRO®  Clamps
  • x2 cabinet pulls
  • WORKPRO®  Drill/driver or screw driver
  • Stain or paint color of your choice
  • WORKPRO®  Paint brush
  • Circular saw

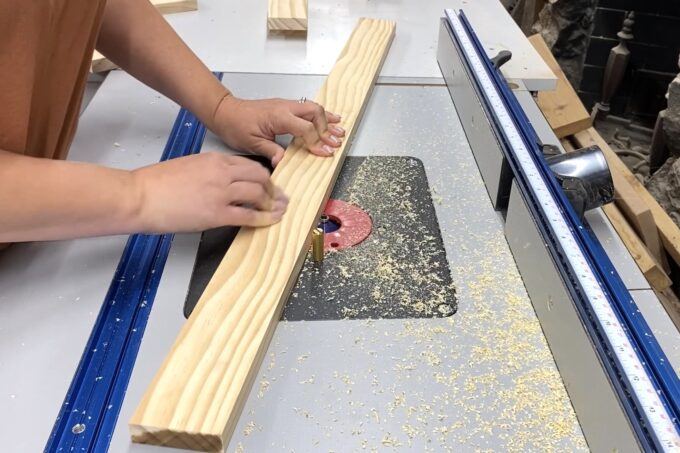
I started out by cutting down my board with a circular saw to the following dimensions:

I decided to route the edges to have a chamfered edge to look more high-end (and less thrown together). It’s all in the details!

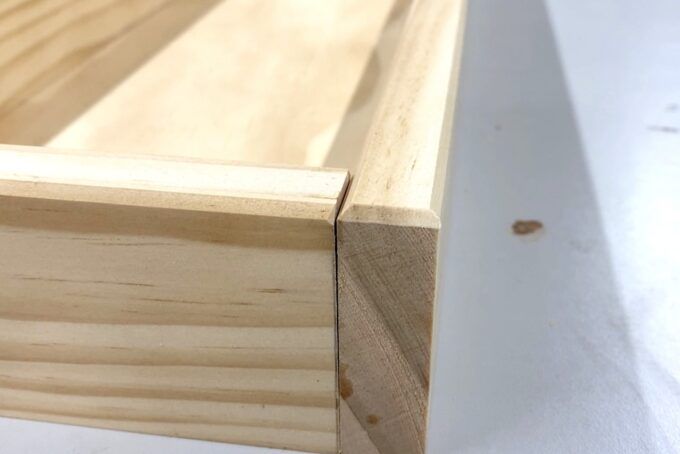
If this were a piece of furniture, or something you were going to carry your child around in, I would suggest using some screws or pin nails to make it more beefy and durable. But since it’s just gonna sit there and look pretty, let’s keep it simple and just glue and clamp these babies up!

When using wood glue, it takes a few minutes to set up, so you have some time to get everything in place! I did clamp the first two boards while I worked on gluing up the rest since I knew it would be pushing it. These WORKPRO®  clamps are amazing and so easy to work with when you’re trying to move quickly!

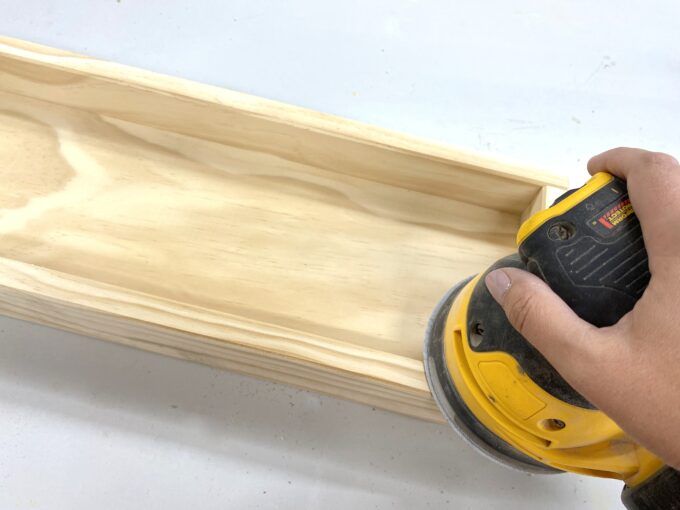
After about an hour or so, I took the clamps off and sanded the whole thing down… even the bottom! You don’t want sharp little glue drips scratching up your dining table!

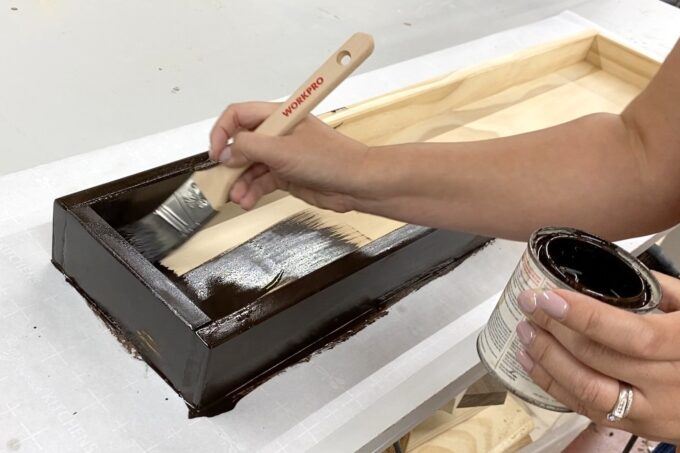
Stain with whatever shade you like! I went with a super dark stain because I wanted it to really contrast the blonde wood of our dining table. I used my WORKPRO®  paint brushes, and simply wiped it off with a cotton cloth after about 5 mins.

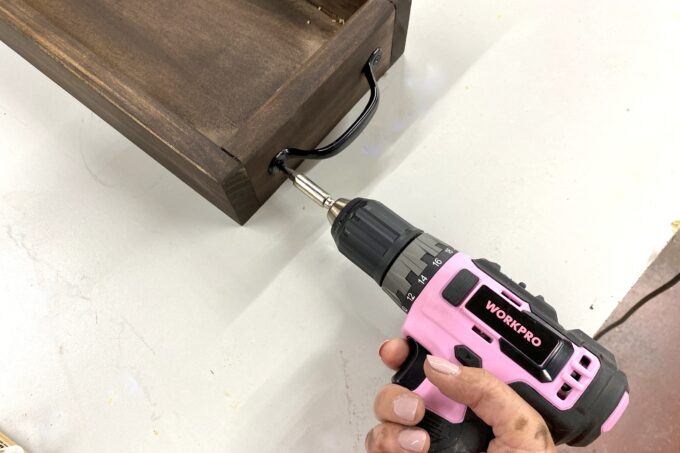
All we have left is to put those handles on, and we’re donnnnne!

Hold up your pulls and mark with a pencil where each screw needs to go. Then drill a pilot hold with a bit that’s at least two sizes small than the screw. Then your free to pop those screws in without worrying about your wood splitting out! I used my WORKPRO®  drill/driver for both of these steps.

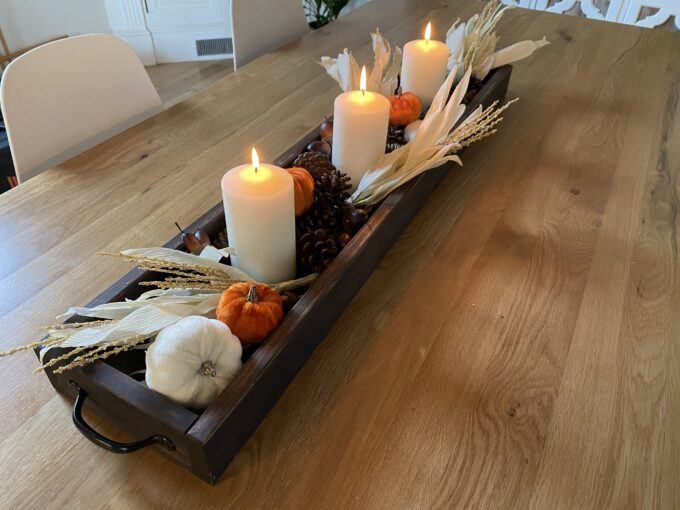
Would you look at that? I’m both nervous and excited to load this baby up with some fall decor! I’m not very confident in my seasonal decorating skills. 🙂

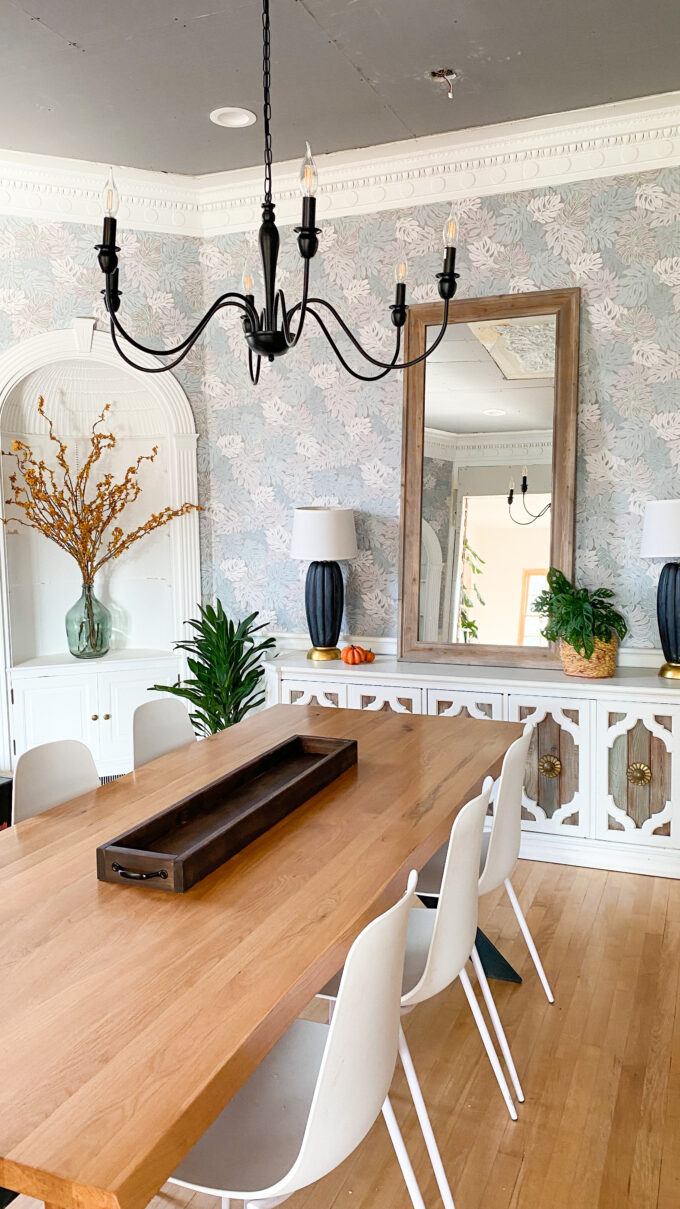
Not bad though, eh? I’m pretty proud of myself!

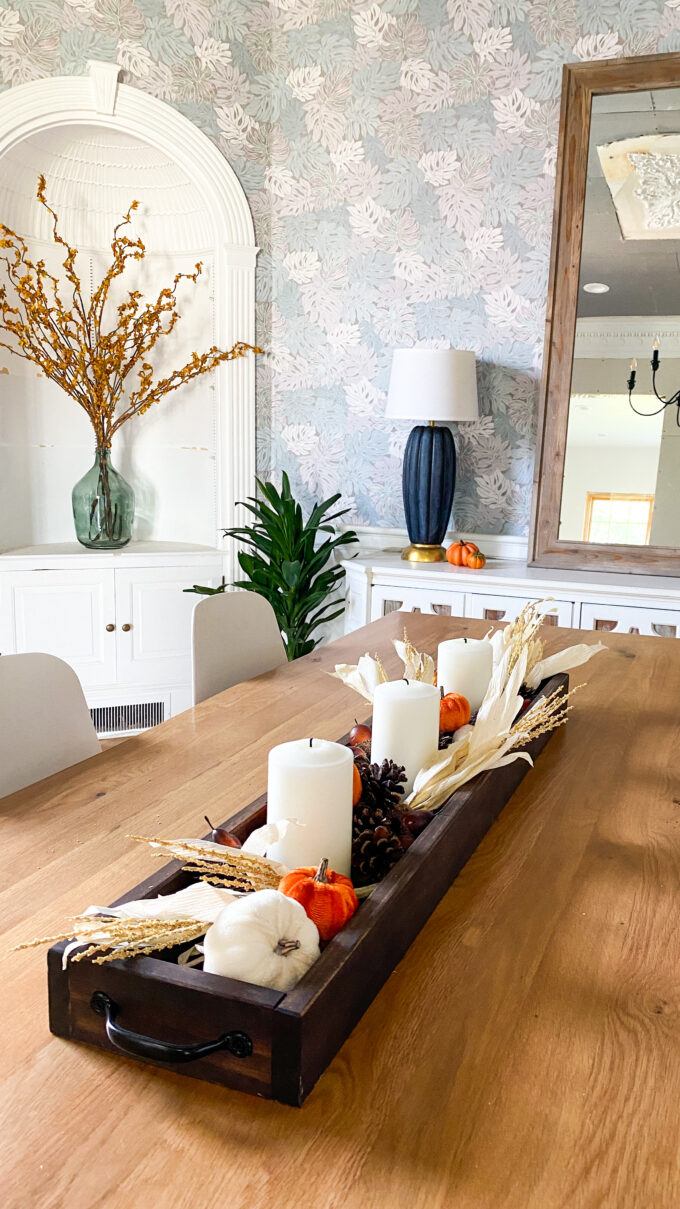
I am SO loving this cozy fall vibe!

We hope you snag some WORKPRO®  tools, and tackle this project yourself! And it’s perfect timing, because they’re having a sitewide 15% off sale for fall until Oct 16th, 2022!

~Bethany

PSSSSST! Be sure to check out these other simple woodworking projects from our archives!

Related:

  • Test Tube Propagation Station Tutorial

    I've been needing to figure out a solution for my overwhelming plant propagation situation for…

  • DIY Fabric-Covered Bulletin Tutorial

    My kids are getting to the age where they want to tape pictures, cards, notes...…

  • Wooden Circle & Test Tube Propagation Art

    We're in the dog days of summer, and it seems like my kids are always…

About Bethany Sy

Nick and Bethany Sy are the creative free-spirits behind DIY/Lifestyle blog, Reality Daydream. They recently purchased a historic mansion and have been documenting the ups and downs of renovation and making this home their own... all while sharing tips and tutorials along the way! When they found themselves in the trenches of infertility, they started a journey that would prove to be their most important DIY project ever, and have 3 beautiful girls to show for it. <3

« Veggie Garden Update (and why we love our weed trimmer!)
Banquette L-Shaped Bench Tutorial – with free building plans! »

Comments

  1. 2

    SawsHub says

    November 10, 2022 at 3:45 am

    This is perfect for our Thanksgiving celebration, and I have a bit of time off this weekend. Thanks for the idea!

    Reply
  2. 3

    Diane sywassink says

    September 20, 2022 at 11:32 pm

    I love the tray!!! I need to make one for my dining table.

    Reply

Leave a Reply Cancel reply

Your email address will not be published. Required fields are marked *

  • Facebook
  • Instagram
  • Pinterest
  • RSS
  • YouTube
We are Nick and Bethany! Welcome to our blog, Reality Daydream where we share our DIY adventures!

realitydaydream

You’ve all seen the video, but here’s some sti You’ve all seen the video, but here’s some still shots of the kitchen wall in all its glory!! 

The Aksel Radius Floating Shelves by @shelfology were the perfect finishing touch! 

Should I do a house tour of our main floor this week?!?! 🙌🌿

#sponsored #floatingshelf #radshelfie
Sometimes we just need to draw out a perfectly sca Sometimes we just need to draw out a perfectly scaled rendering of our design plan to get the hubs on board with our vision. He just couldn’t see it otherwise!

We’re SO THRILLED with how this kitchen wall project turned out. There will be a blog post coming soon with all the details and sources!

What is your MOST FAVORITE FEATURE of the finished wall?!
Do y’all know what room this is now? Comment you Do y’all know what room this is now? Comment your guess below! I’m so glad to have it FINISHED! What a labor of love. 💜

SHARE with a friend that’s renovating so they know they’re not alone!

#renovation #renovationmaison #historichomes #historichouse #historicarchitecture
I’m so happy that Instagram is letting us post p I’m so happy that Instagram is letting us post pictures again! Alllll the videos in my feed give me a little overstimulation. 

Are you going to try out this Propagation Tower I shared in Stories? I saved it all to a highlight if you need it! 🌿

#plantmama #plantsofig #plantsofinstagram #plantperson #propgation #plantsarelife #houseplants #houseplantclub #houseplantsofinstagram #plantlover #plants
Load More Follow on Instagram
View of our entryway of our historic mansion that we're slowly renovating and making our own.
Click here for lots of art projects using only wood stain on furniture!!
Please feel free to share or pin my posts! You're welcome to use ONE of my images (no collages or pinnables) with a link back to the corresponding post. Please do not edit or crop that single image in any way. Improper use of my photos, ideas or words is a violation of copyright. Thank you!

Categories

Attention: Almost any do-it-yourself project involves risk of some sort. Your tools, materials, and skills will vary, as will the conditions at your project site. Reality Daydream has made every effort to be complete and accurate in the instructions of the plans on this website. Reality Daydream will not assume any responsibility or liability for damages or losses sustained or incurred in the course of your project or in the use of the item you create. Always follow the manufacturer’s operating instructions in the use of tools, check and follow your local building codes, and observe all commonly accepted safety precautions.


Copyright © 2023 · Modern Blogger Pro On Genesis Framework · Customizations by Sweet Theory Designs · Privacy Policy · Log in