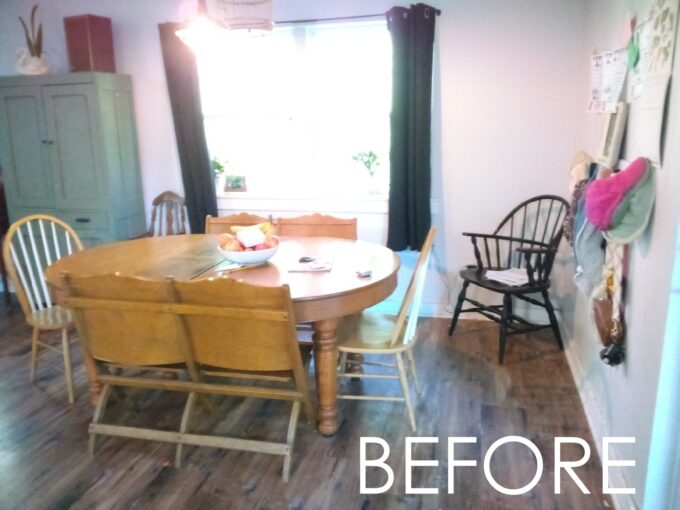
Our very best friends moved away to Tennessee, but we still find reasons to visit (and be visited by them) several times a year. So when Katie invited me to come help her build some banquette seating in her dining room, I immediately started plotting to make this happen. It’s such a perfect spot for an L-shaped banquette bench!
*This post is sponsored by our friends at National Hardware! Thank you for supporting the fabulous brands that make Reality Daydream possible!*
She’s gonna kill me for posting that pic, because we were texting about this and she got OUT OF BED to take a pic and measurements for me. So this is neither styled, nor high-res, but you get the picture (PUN!), right?
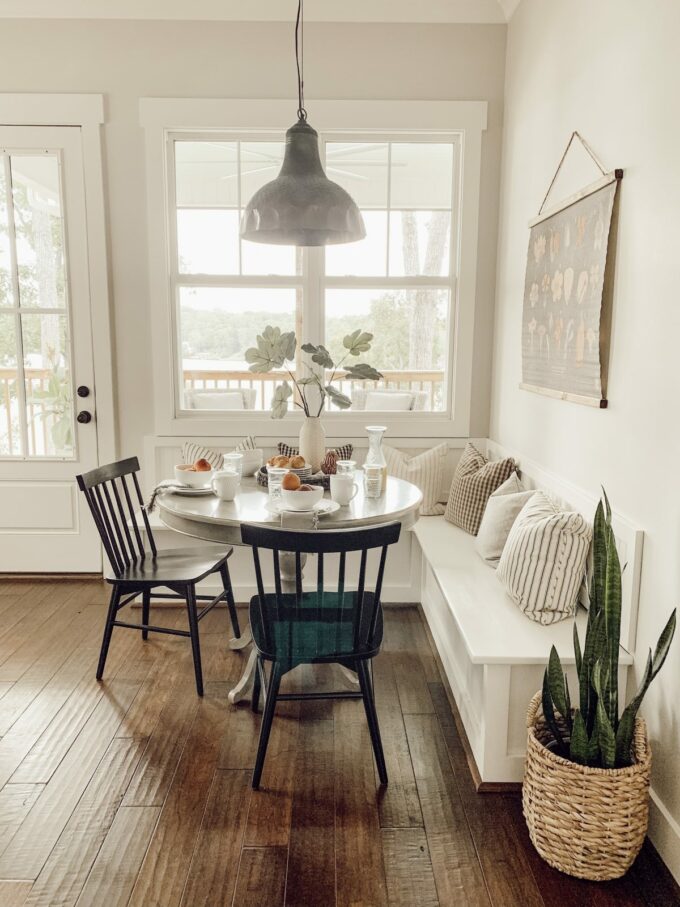
Katie showed me this dreamy inspiration pic from Southern Surroundings, and Nick and I started plotting out how we were going to pull this off! Isn’t it beautiful?!
We are delighted to share that National Hardware is partnering with us for this project, and we will be featuring their continuous hinges so this L-shaped banquette bench is even more functional than just seating… it also will provide SO MUCH STORAGE!
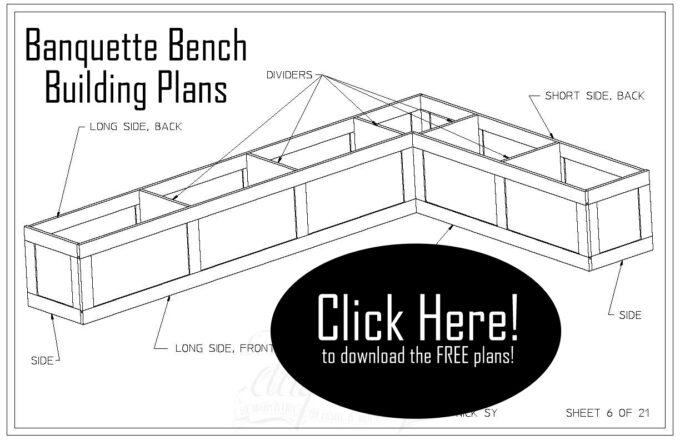
But first, Nick made these very detailed building plans so you can make these too! You can print them for free. All we ask is that you send us pics when you’re done! 🙂
L-Shaped Banquette Seating Bench
Supplies
- Banquette Bench Building Plans
- (7) 1x8x10 board
- (2) 1/4x4x8 plywood
- (2) 3/4x4x8
- (5) National Hardware continuous hinge
- Trim screws
- Brad nails
Tools
- Table saw/Track saw
- Miter saw
- Router
- Wood glue
- Pin nailer
- impact driver
- brad nailer

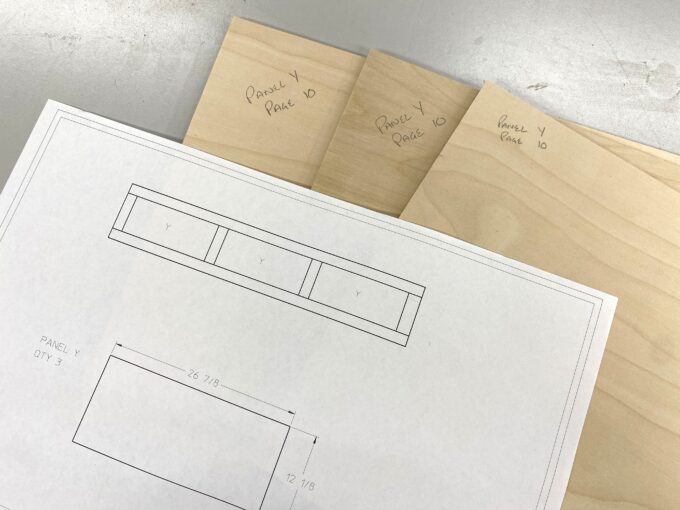
After gathering our lumber and supplies, we started out by cutting down all the wood, and labeling each piece with a pencil. The cut list on the plans makes this simple!


Using a tongue and groove router bit we routed all the rails and stiles.

We assembled the backs first, gluing the stiles in place, then adding the panels and top rail. Clamp, check for square, and set off the the side. We repeated this process for the backs, fronts and sides of the base.
I just picked up these clamps, and I really like them.

We used a small L-square the make sure all the rails where square. This one required a small tap of a mallet to correct it.

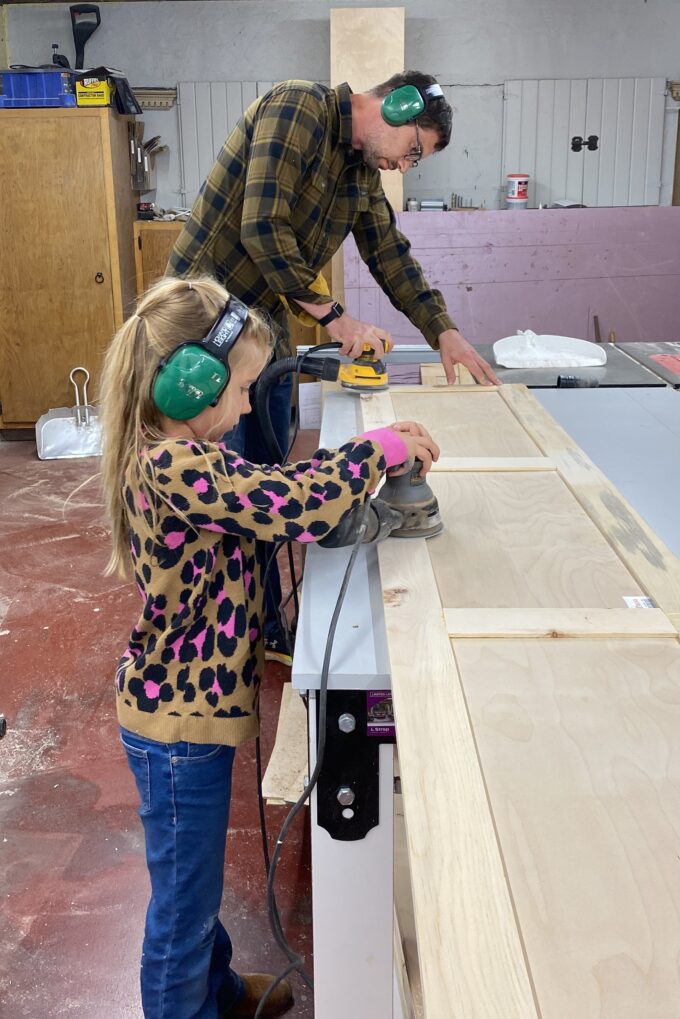
There is a lot of sanding involved so it is a great time to recruit some help.
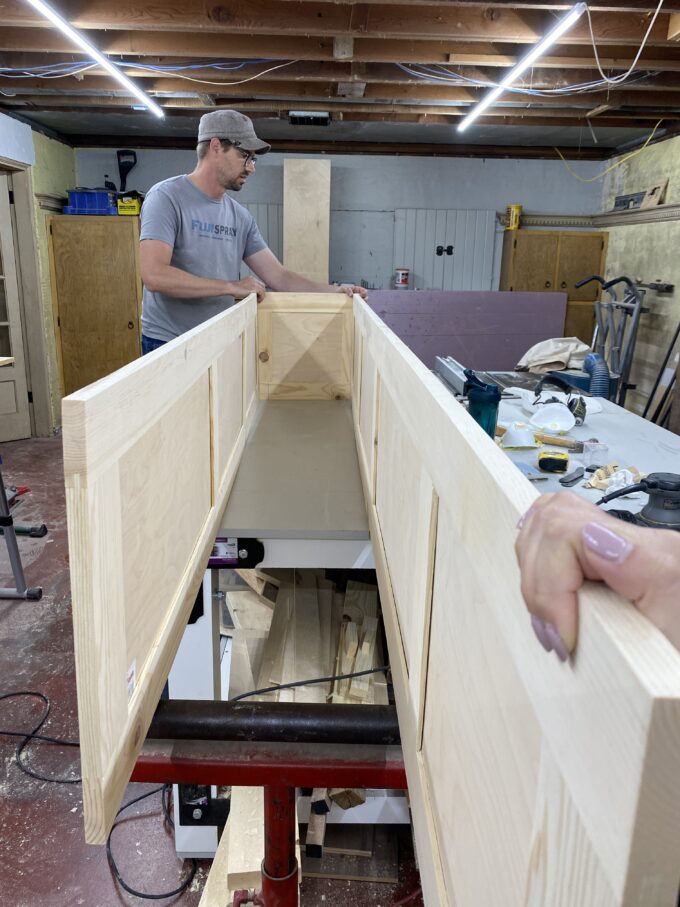
We dry fit the assembly to make sure everything fit and marked out the location for the bottom shelf and bracing.
We installed the long bracing before assembling the bench. The short braces were attached by driving a trim screw through the front and back of the assembly.
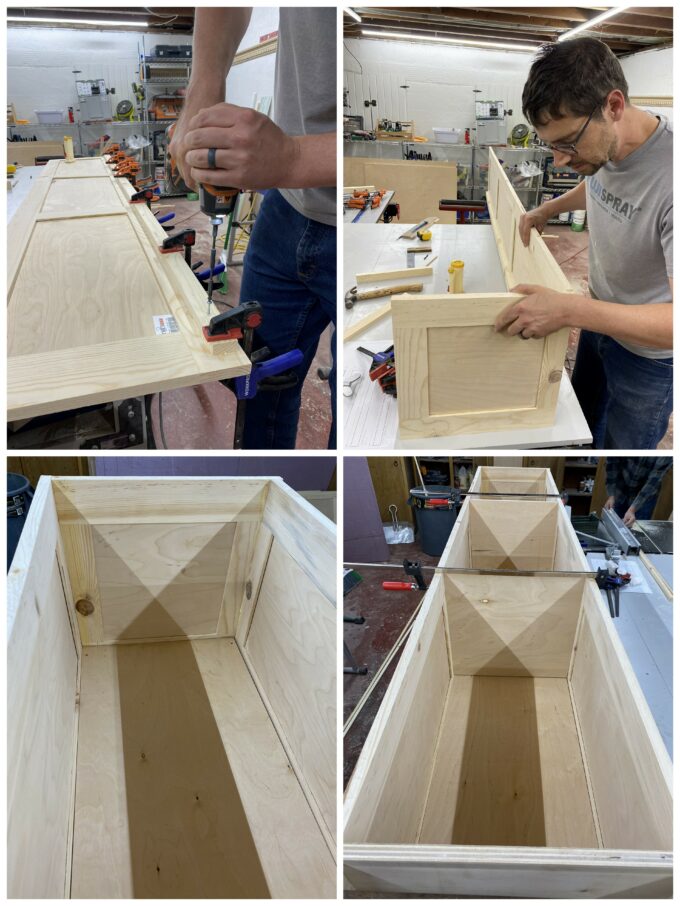
We then added the bottom and screwed it in place. Spacing out the dividers so they are centered on the stiles.
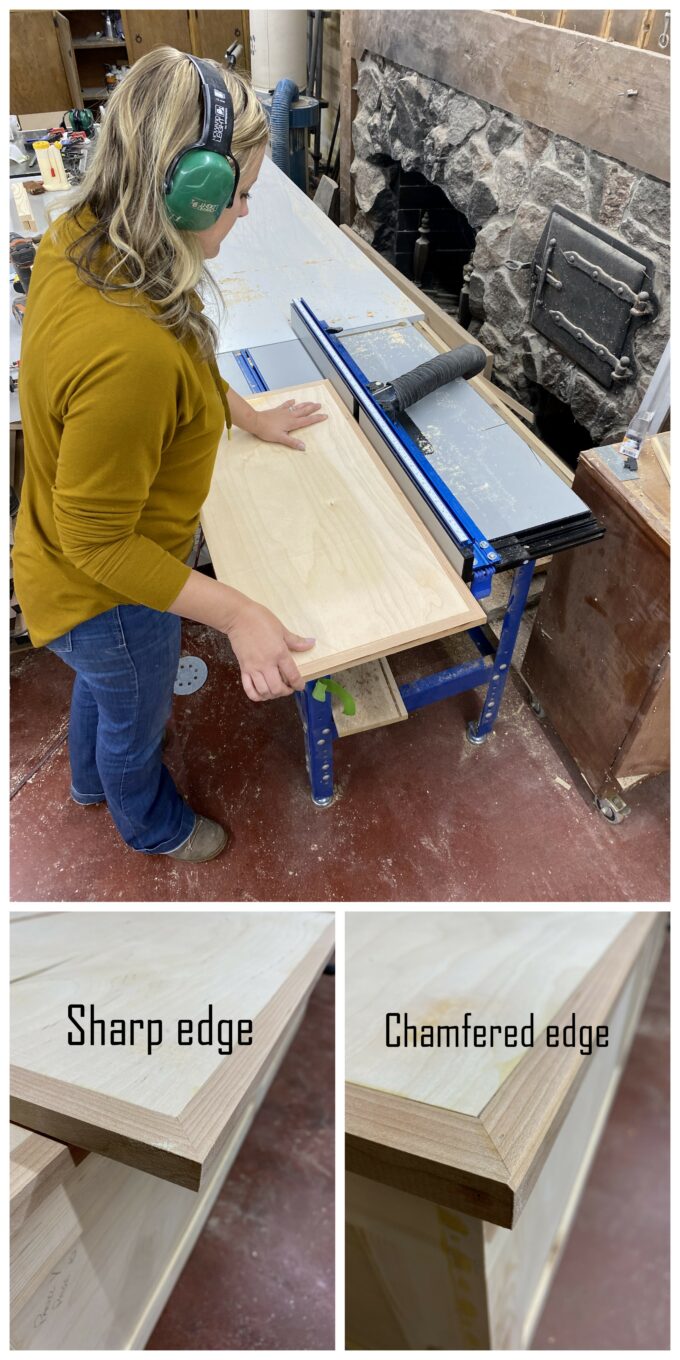
While this isn’t on the blueprints, we decided to add a piece of 3/4 x 3/4″ pine around the dividers, then glued and nailed them in place with a pin nailer. We chamfered the edge to the trim and added it to align with the top of the dividers.
This should help provide more surface area for the seats to rest.

For the bench seats, we made a decision to wrap them in solid wood. Our thought here was that we didn’t want to leave the plywood edge exposed. We did the front and sides, however, in hindsight we would have added wood to the hinge side also.
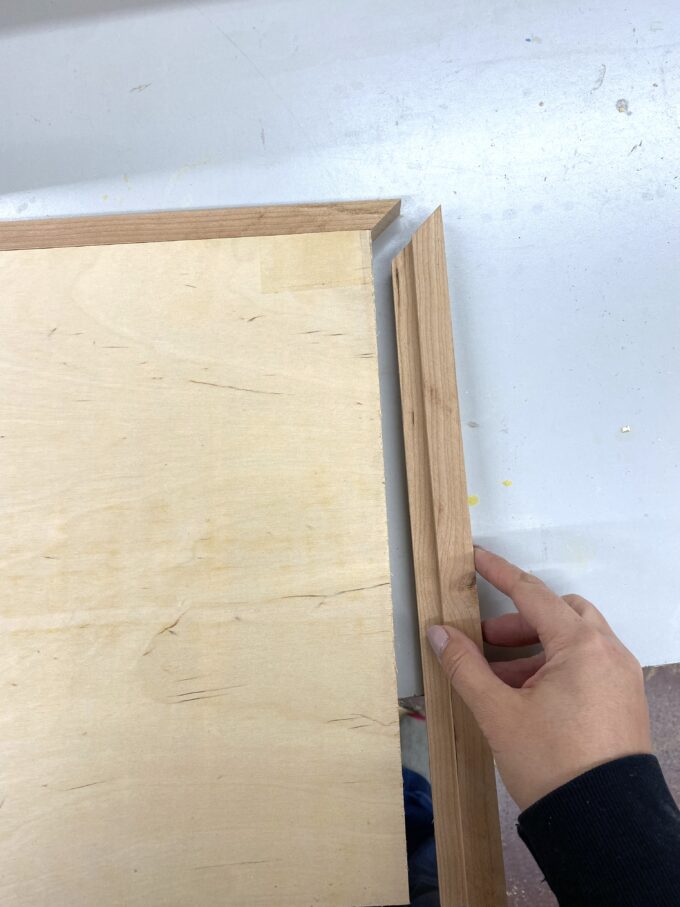
We then chamfered the seat fronts
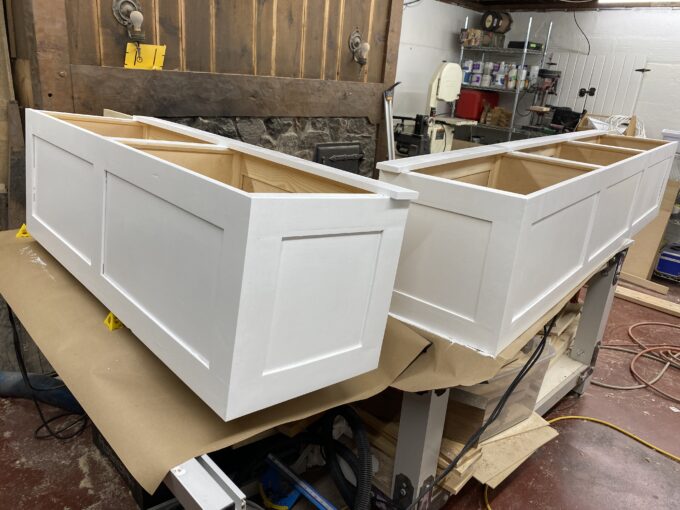
We filled all the holes with wood putty, sanded, primed and painted! And now we’re ready to get the hinges on! Are you excited?!
These hinges are so high quality, and come in TONS of sizes. And even if they don’t have the exact length you need, they can be cut to size easily! We chose the nickel finish for this project, but they also have brass option!

Installing these was so gratifying! We’re on the homestretch!
We drilled a pilot hole first, then just screwed them all into place!


Before assembling the two pieces of the “L-shape” together, we’re going to load these up and drive them to our friends in Tennessee! We woke the kiddos early, and set out before the sunrise.

I cannot even convey how beautiful the drive was. If I need to drive 10 hours, let it be in October!

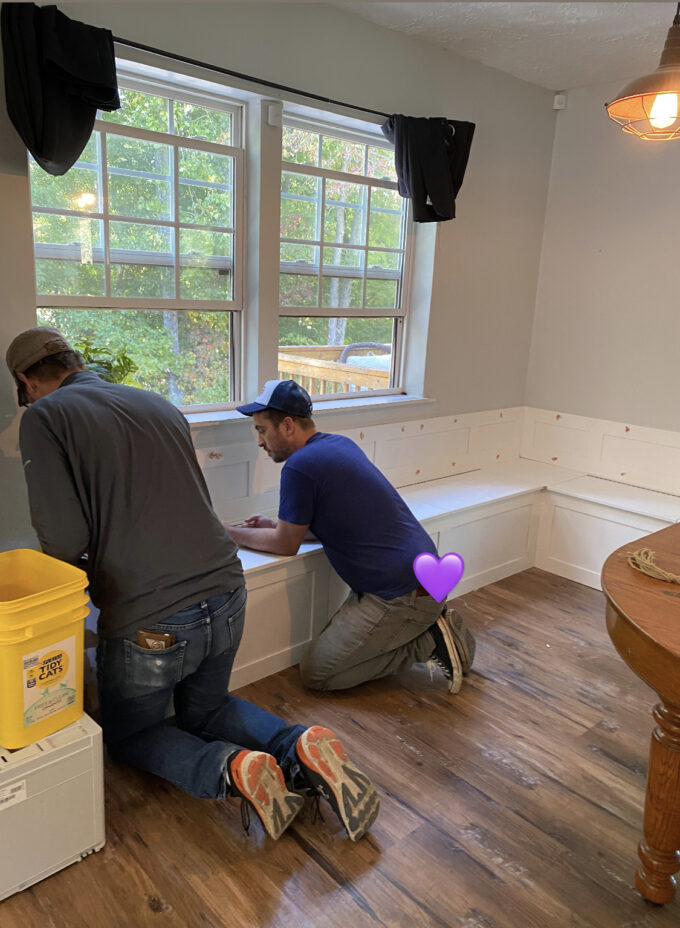
Nick and Mr. Andrew got busy cutting holes for outlets, installing the seat backs to the wall, affixing everything together, trimming, caulking, filling, and touching up the paint.
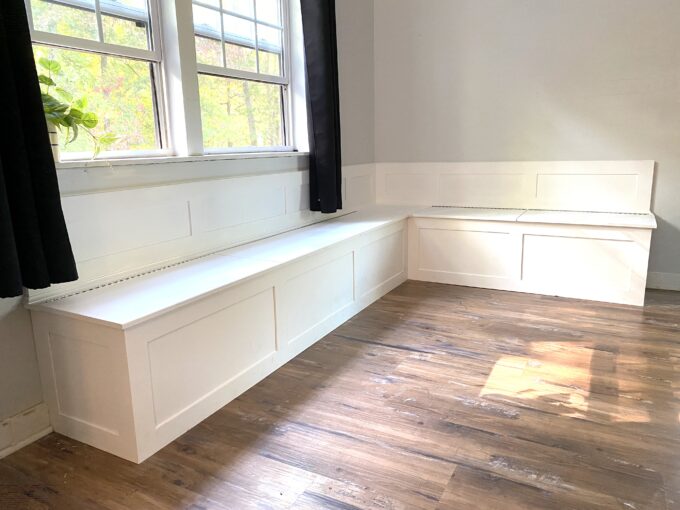
We put the table and chairs back in place, and I snapped some pics of this area… ready to make lots of memories! Think of all the family meals, game nights, and homeschool days that will be spent on this banquette bench!


Doesn’t it look like it was always meant to be there?!

I can’t wait to see what Katie loads up all that storage with! What would you put in yours? Kitchen linens? Seasonal dishes? Infrequently-used small appliances? Board games? The possibilities are endless!
We hope you enjoyed this tutorial and will consider building some L-shaped banquette seating for yourself and your family… using our free building plans! If you do, be sure to tag us in pics on social media! We’re @RealityDaydream on both Instagram and Facebook.
And head on over to National Hardware and see what other fabulous, high-quality products they have!
~Bethany
~~~~~~~~~~~~~~~
Thanks for pinning!

Related:
-

I have a fun and easy building project for you! And while I do end…
-

My kids are getting to the age where they want to tape pictures, cards, notes...…
-

I've been needing to figure out a solution for my overwhelming plant propagation situation for…
Hi
I really like the looks of this and would like to build a version of it. However, the link to download the cut list is showing as a phishing site. Is it possible to send the plans to me directly?
Thank you!
Dave
Yikes! It should be set up so you just enter your email and it sends the building plans and cut-list to your email. Can you send us a screenshot so we can troubleshoot? Thanks so much! beth@realitydaydream.com
Bethany, how beautiful and inspiring. I wish I had the room to make something like this but I’m going to pass it along to a very good friend of mine. I love how you show us other things that we can make ourselves. Thanks for sharing all the steps and where you got your supplies. Best regards, Annette Gustavson/lilypadlady
It’s the best — I love it (and you guys) so much!! We’re loading that amazing bench seat storage with school supplies, shoes, extra kitchen stuff that’s only occasionally used, and I think we’ll take some notes from the comments and dedicate one secrion of it to family games!
Wow it looks amazing!! Your friends must be so happy!! You guys are so talented!!
Great job! This is beautiful!
Love how you never “cut the corners” and include the family!
Looks great!
Amazing custom wood work-
And I know how much work that was. It is awesome!!
It looks amazing!! Where were you 6 years ago when we desperately needed something like this? Haha. Huge admirerer!
Omg came great …. Love it so much better than just the table and chairs…. Your husband and you are amazing. What you take and also for other people while have so much to do on your own love you