• Home
  • About
  • Tutorials
  • Recipes
  • Furniture
  • Contact
    • Contact
    • Infertility
    • Disclosure
    • Privacy Policy
  • Shop
    • Facebook
    • Instagram
    • Pinterest

Reality Daydream

The Dream is Free, The Hustle Sold Separately

  • Home
  • About
  • Tutorials
  • Recipes
  • Furniture
  • Contact
    • Contact
    • Infertility
    • Disclosure
    • Privacy Policy
  • Shop

How to Make a DIY Starburst Mirror

December 30, 2013 by Bethany Sy

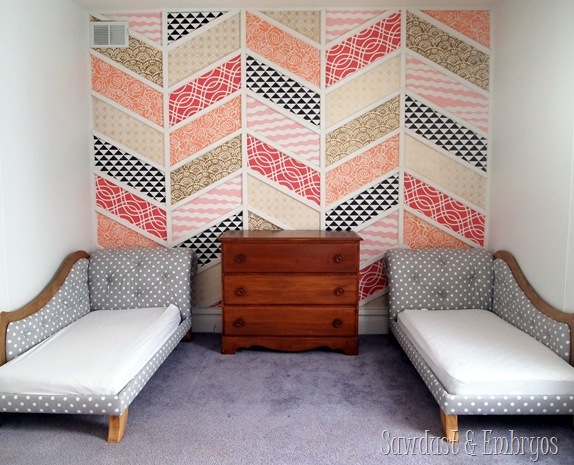
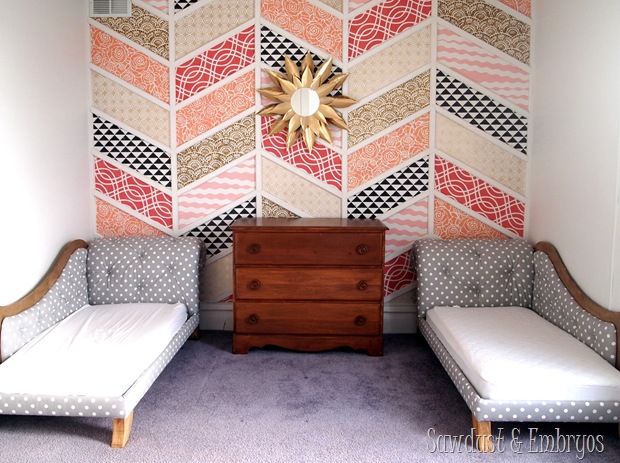
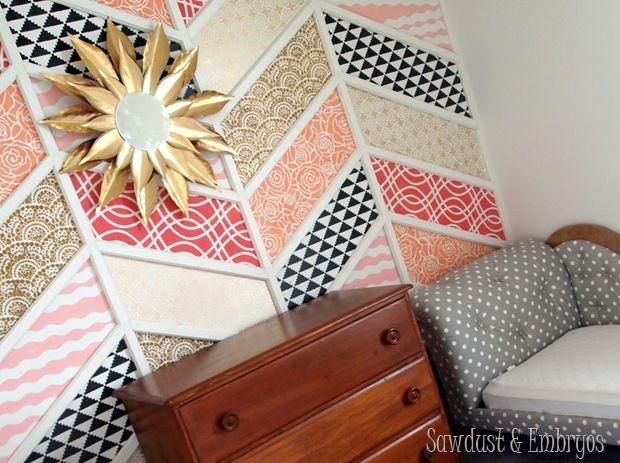
Between the toddler bed / fainting couches and the stenciled herringbone accent wall, there’s a lot of ‘pizzazz’ going on in the twins’ big-girl room. Adding the plain wooden dresser grounded the room a lot and brought some necessary warmth (and storage)!

Progress on Paisley and Adelyn's big-girl room {Sawdust and Embryos}

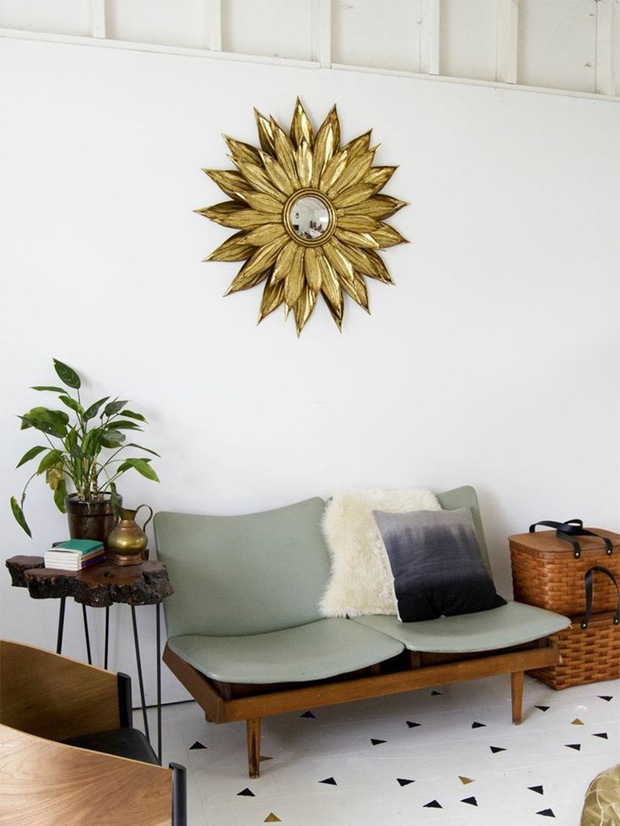
Even though the accent wall is fairly busy, we felt that there needed to be something hanging on the wall above the dresser. I love starburst mirrors (despite their trendy-ness), but I don’t like the price tag for a true antique one. And I don’t really care for the many DIY versions all over Pinterest. So we set out to make our own with this as our inspiration:

DIY Starburst Mirror Inspiration Picsource

I already had a  round mirror (8″ diameter) lying around from IKEA, so all I needed for this project was cardstock (two large sheets), gold spray paint, hot glue gun, and E6000 adhesive.

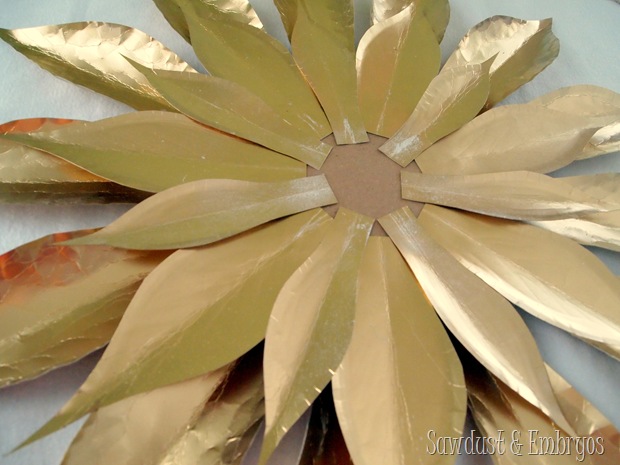
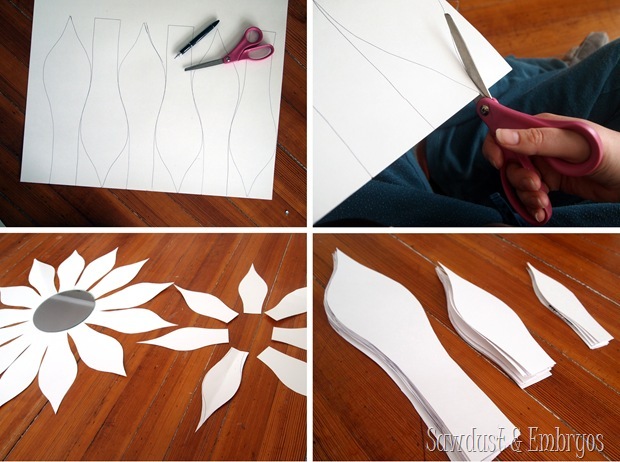
I started out by drawing out a leaf shape in 3 different sizes, then traced those repeatedly and cut them all out! I ended up needing 14 large ‘leaves’, 7 medium ones, and 7 small ones.

DIY Vintage Starburst Mirror {Sawdust and Embryos}

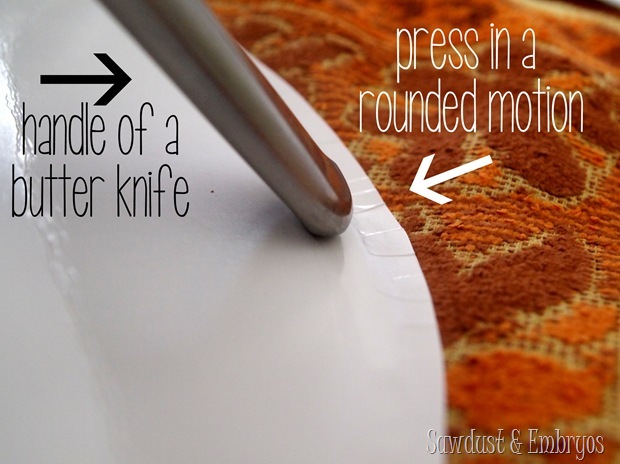
I wanted the leaves to have some dimension and curl up around the edges. After consulting two creative masterminds (my mom and my mom-in-law), I decided to fold the leaves down the center and use the rounded edge of a butter knife to push along the edges of the cardstock in a rounded motion. Having a folded towel underneath allows some ‘give’ and helps the fibers in the cardstock to break down and naturally ‘curl’.

Make your own vintage-looking starburst mirror! {Sawdust and Embryos}

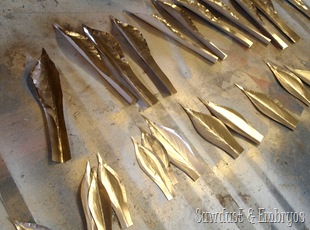
Then I took all my ‘leaves’ out to the garage, spread them out, and sprayed them front and back with Rustoleum American Accents Bright Metallic Gold spray paint. I waited about an hour before I flipped them and did the back.
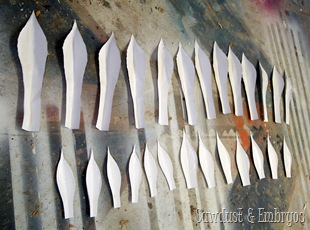
Make your own Starburst Mirror {Sawdust and Embryos} Make your own Startburst Mirror {Sawdust & Embryos}

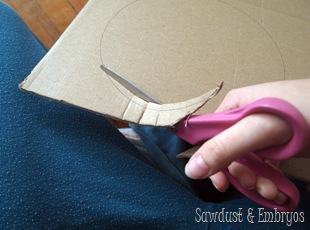
I was a little worried that the spray paint would UNDO all the work I had done getting the edges to curl… but it actually helped them to curl a bit more, so that was a lovely surprise. Next, I traced my rounded mirror on a piece of corrugated cardboard, and again on a 1/4” thick piece of wood and cut them out (scissors for cardboard, scroll saw for wood).
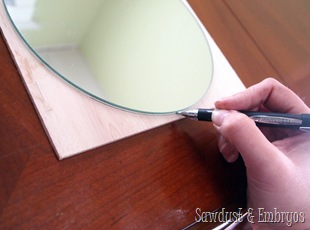
PC253144 Sawdust and Embryos}

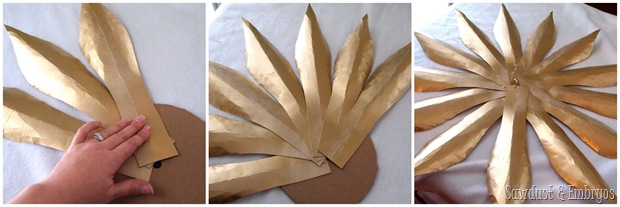
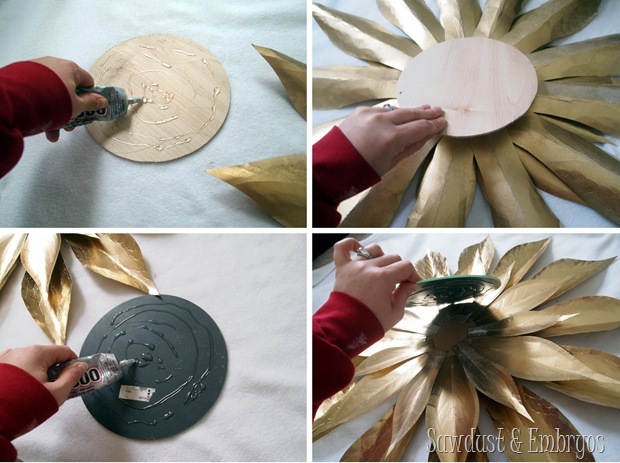
On my cardboard circle, I marked the center with a sharpie, and started gluing down (with a glue gun) my large ‘leaves’ front-side-down with the bottom lining up with the center marking.How to assemble your DIY STarburst Mirror! {Sawdust and Embryos}starburst mirror1
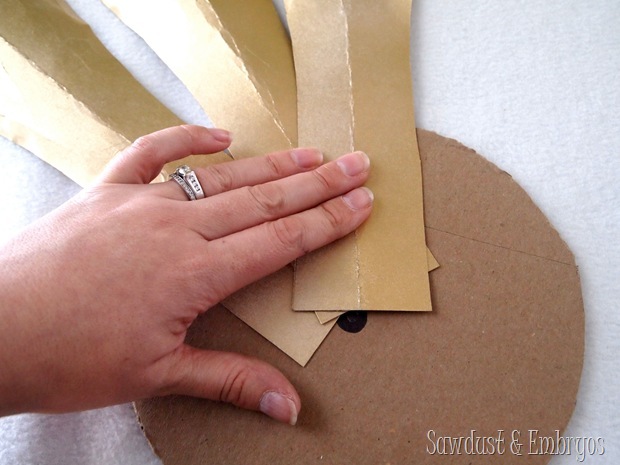
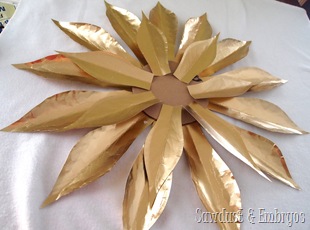
Then I flipped it over and began gluing the medium ones on the opposite side. The most difficult part of this is making sure they’re evenly spaced. I recommend laying them out first and making marks on your cardboard circle where they should each be placed. Then after the medium ones are glued down, just glue the smallest ones between them!
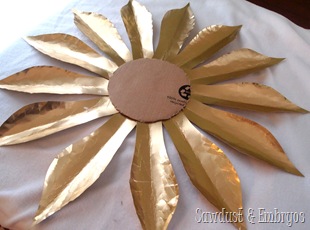
DIY Starburst Mirror Tutorial {Sawdust and Embryos} How to make your own Starburst Mirror! {Sawdust and Embryos}

DIY Starburst Mirror Tutorial {Sawdust & Embryos}All that’s left is affixing the mirror and the backing! I used E6000 glue and just globbered some on the wooden circle and pressed it in place (after drilling a small nail hole in the wood for hanging purposes). Then I flipped the whole thing over and did the same thing with the mirror (minus the drilling part).

How to make your own Vintage-esque STarburst Mirror {Sawdust and Embryos}

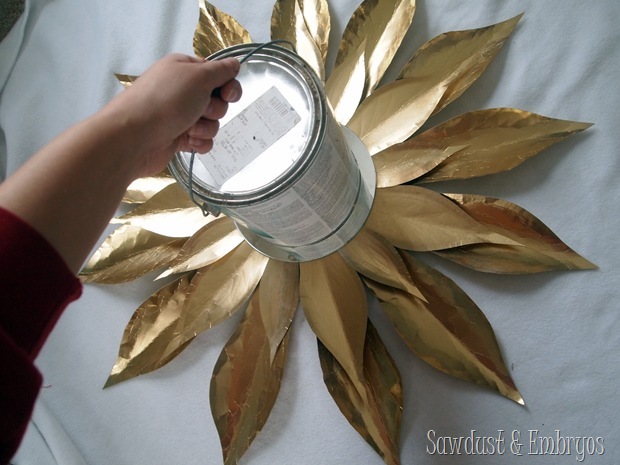
Then I set a full can of paint on it and left to spend the weekend at my folks for Christmas. I would at LEAST let it dry overnight. This glue is amazing, but it does require pressure and 12+ hours of dry-time for maximum hold. Also… it’s pretty fumey, so plan accordingly.

Put something heavy on your DIY Starburst Mirror while the glue is drying {Sawdust and Embryos}

When we got home from our crazy-family-filled-holiday-madness weekend, I was so excited to hang this starburst mirror in the girls’ big-girl room! I just pounded a tiny nail (because this bad-boy is pretty light) into the wall and popped it up!

Progress in the Big-Girl Room! DIY Starburst Mirror {Sawdust and Embryos}


DIY Vintage-esque Starburst Mirror Tutorial {Sawdust and Embryos}

Sometimes it’s the little details that make a big statement and help pull the room together!DIY Vintage-esque Starburst Mirror Tutorial {Sawdust & Embryos}
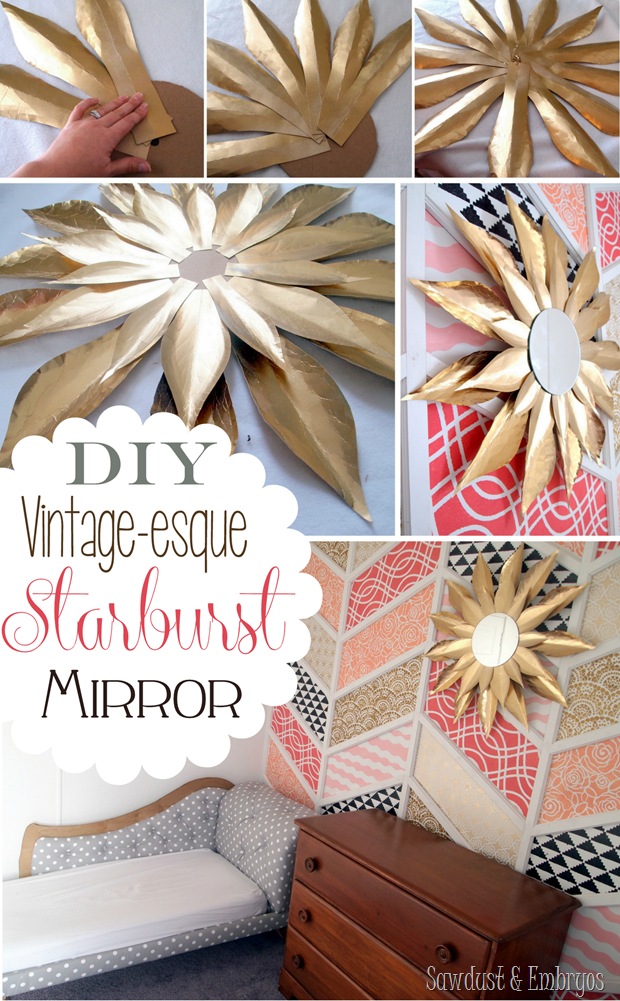
I ordered a fluffy white area rug (to cover up the unpleasant purple carpeting), and have an idea for building little chandeliers to hang about the beds. I love accessorizing!.

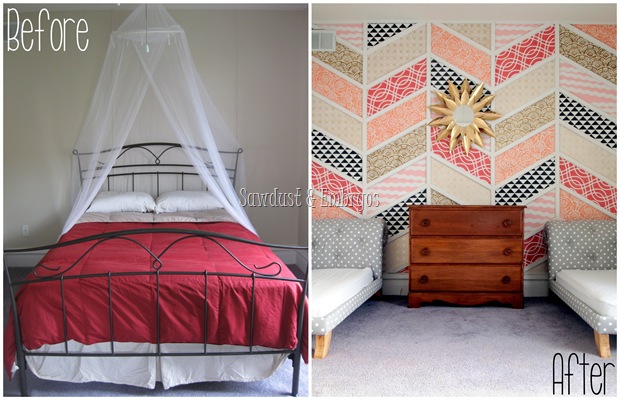
We’ve come a long way since this room was a boring/neglected guest bedroom, hey?

Room Transformation {Sawdust and Embryos}

I have such mixed emotions about the day we introduce the girls to this room. It will be the end of the confined-sleeping-era, but the beginning of a new chapter of parenthood. Until the girls are hurling themselves over the edge of the crib, this room remains off limits while mommy and daddy add all the finishing touches!

Sawdust & Embryos


P.S! If you missed previous posts on the process of this room transformation, click on the individual images below:
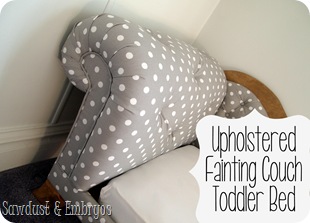
DIY Tufted Fainting Couch Toddler Bed TUTORIAL (Sawdust and Embryos) Stenciled Herringbone Accent Wall {Sawdust and Embryos}
Finding the PERFECT Dresser! {Sawdust and Embryos} DIY Vintage-esque Starburst Mirror Tutorial (Sawdust & Embryos)

*this post contains affiliate links
Related:

  • DIY fabric-wrapped bulletin boards
    DIY Fabric-Covered Bulletin Tutorial

    My kids are getting to the age where they want to tape pictures, cards, notes...…

  • DIY Rice Pack / Heat Packs - EASY Sewing Tutorial!

    It's been awhile since I've done a sewing project, and as weird as it sounds,…

  • Pair of Cascading Wave Petunia Planters DIY

    These DIY Planters are perfect for cascading Wave Petunias, and it will be so fun…

  • DIY Scroll Saw Family Silhouette Sign

    Hello hello friends! Things have been wild as we've been navigating the holiday season, schedules,…

  • Large-Scale DIY Pixel Art Using Dowels

    If you love unique art and have absolutely nothing to do with your time, come…

  • Kids Closet Storage Ideas

    When the twins moved into what used to be the guest bedroom, I knew I…

About Bethany Sy

Nick and Bethany Sy are the creative free-spirits behind DIY/Lifestyle blog, Reality Daydream. They recently purchased a historic mansion and have been documenting the ups and downs of renovation and making this home their own... all while sharing tips and tutorials along the way! When they found themselves in the trenches of infertility, they started a journey that would prove to be their most important DIY project ever, and have 3 beautiful girls to show for it. <3

« A little addition to the big-girl room!
Looking Back at 2013 »

Comments

  1. 18

    nataliar says

    February 6, 2019 at 11:14 am

    u are v talent .. u decore is high value
    i am artist from algerie and egypt bravo

    Reply
  2. 19

    Amanda says

    February 17, 2014 at 11:32 am

    What size mirror and cardstock did you use?

    Reply
    • 20

      Bethany @ Sawdust and Embryos says

      February 17, 2014 at 12:06 pm

      Amanda we used a 8″ diameter mirror.

      Reply
      • 21

        Bethany @ Sawdust and Embryos says

        February 17, 2014 at 1:36 pm

        and one of those giant pieces of cardstock that you get in full sheets at Walmart in the craft isle. I’m not sure the exact measurements, but they’re about 2′ x 3′

        Reply
        • 22

          Amanda says

          February 17, 2014 at 3:19 pm

          Perfect! When I think of cardstock, I guess I just assume scrapbook card stock, not pster size. Thanks! I think I’ll make one this weekend! 🙂

          Reply
  3. 23

    Heidi @ Honeybearlane says

    January 29, 2014 at 10:13 am

    I’ve looked at a lot of the DIY starburst mirrors and I was really impressed with this one! It has the curved edges and I never would have guessed it was just cardstock based on the pictures! Also that wall is amazing and reminds me of a quilt. Can’t wait to see the whole room finished!!

    Reply
  4. 24

    Maha says

    January 28, 2014 at 3:04 am

    who you are ….. are very talented to decorate things specially….really great… 🙂

    Reply
  5. 25

    capturing joy with kristen duke says

    January 12, 2014 at 9:53 am

    wow, love this mirror, love the room! off to check out the other links!!

    Reply
  6. 26

    Jenn says

    December 31, 2013 at 11:55 am

    I love love LOVE everything about this room and this mirror is such a wonderful finishing touch. Consider it Pinned!

    Reply
  7. 27

    Gypsie says

    December 30, 2013 at 7:58 pm

    I love your mirror! It looks amazing!

    Reply
  8. 28

    Katie @ On the Banks of Squaw Creek says

    December 30, 2013 at 7:57 pm

    I love it! I have a small collection of vintage starburst mirrors on my master bedroom wall, but yours is probably the cutest I’ve seen!

    Reply
  9. 29

    Crystal Otto says

    December 30, 2013 at 4:44 pm

    I remember that room! I have to agree it looks waaaay better now. This mirror looks awesome! You have such good taste. It really pulls the room together and it looks simple to make. You go girl 😉
    Cryst

    Reply
    • 30

      Bethany @ Sawdust and Embryos says

      December 30, 2013 at 6:01 pm

      Thanks Cryst I miss you!

      Reply
  10. 31

    katy says

    December 30, 2013 at 2:08 pm

    wow! It looks amazing!

    Reply
  11. 32

    Dana Schoppe says

    December 30, 2013 at 12:17 pm

    sawwweet! LOOKS SPECTACULAR!!!!!!!
    ~dana~

    Reply
  12. 33

    Vickylynne says

    December 30, 2013 at 10:58 am

    I just love that!! It really makes the room pop even more! Great work!

    Reply

Trackbacks

  1. DIY Starburst Mirror Made From Paper | Bellwood Manor says:
    June 25, 2014 at 5:02 am

    […] the starburst mirror fad a little late. I was just so inspired by the DIY starburst mirror by Sawdust & Embryos that I just had to try my hand at it. Plus, I was really in need for a little decoration above my […]

    Reply
  2. How to make Roman Shades using Mini-Blinds says:
    January 24, 2014 at 8:32 am

    […] the herringbone patchwork accent wall, acquired the perfect dresser, and fashioned a vintage-esque starburst mirror. Phew! That run-on sentence sounds far more exhausting than it actually […]

    Reply

Leave a Reply Cancel reply

Your email address will not be published. Required fields are marked *

Recipe Rating


  • Facebook
  • Instagram
  • Pinterest
  • RSS
  • YouTube
We are Nick and Bethany! Welcome to our blog, Reality Daydream where we share our DIY adventures!
Click here for lots of art projects using only wood stain on furniture!!
Please feel free to share or pin my posts! You're welcome to use ONE of my images (no collages or pinnables) with a link back to the corresponding post. Please do not edit or crop that single image in any way. Improper use of my photos, ideas or words is a violation of copyright. Thank you!

Categories

Attention: Almost any do-it-yourself project involves risk of some sort. Your tools, materials, and skills will vary, as will the conditions at your project site. Reality Daydream has made every effort to be complete and accurate in the instructions of the plans on this website. Reality Daydream will not assume any responsibility or liability for damages or losses sustained or incurred in the course of your project or in the use of the item you create. Always follow the manufacturer’s operating instructions in the use of tools, check and follow your local building codes, and observe all commonly accepted safety precautions.


Copyright © 2025 · Modern Blogger Pro On Genesis Framework · Customizations by Sweet Theory Designs · Privacy Policy · Log in