If you love unique art and have absolutely nothing to do with your time, come and be inspired by this enormous pixel art using thousands of chunks of wooden dowels! It’s basically a large-scale diamond painting project, and is actually pretty fun if you love tedious/repetitive tasks.
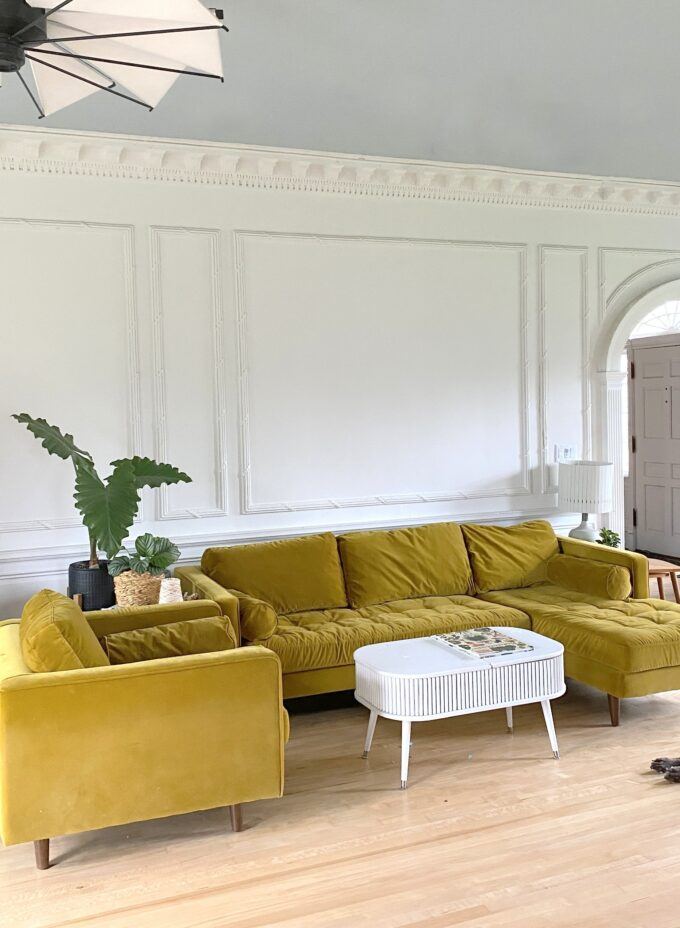
Our living room has really been coming together over the years, but one area that I’ve struggled to complete is this big blank wall behind the couch. I considered a gallery wall or a tryptic of some sort, but I’ve just waited for inspiration to strike, because I want it to be PERFECT.
*This post is sponsored by our friends at DAP. Thank you for supporting the fabulous brands that make Reality Daydream possible! This post contains affiliate links.*
Recently, my friend Ashley made a large-scale piece of “Cross-Stitch Art”, and it really got my wheels turning. I thought, why not use pieces of wood instead of Xs of yarn?
Supplies for large scale pixel art
- dowels (I used 1″)
- paint (get spray paint if you can, otherwise tester pots from Benjamin Moore)
- picture to use as pattern (cross stitch pattern at FlossCross.com
- Weldwood Instant Wood Adhesive
- 1/4″ plywood to use as substrate
- Laser Level
- French cleats
Tools:
- Miter Saw
- Track Saw
STEP 1 – Choose an image to pixelate!
I cruised through hundreds of images (I used Adobe Stock images because we have an account with them, which gives us free access to their image library) and tried out several different pictures into the www.FlossCross.com website that pixilates ANY image. It’s basically a website that generates a cross stitch pattern for you with any picture you choose. It’s very fun to play around with, because you can choose how large or small your ‘pixels’ are, and how many colors you want involved.
I chose this image of a Ficus Tineke plant. You know I love plants, and I love that it’s botanical yet still has an abstract vibe to it. So pretty!
You can even change colors if you want. I decided to make the background black instead of pink.
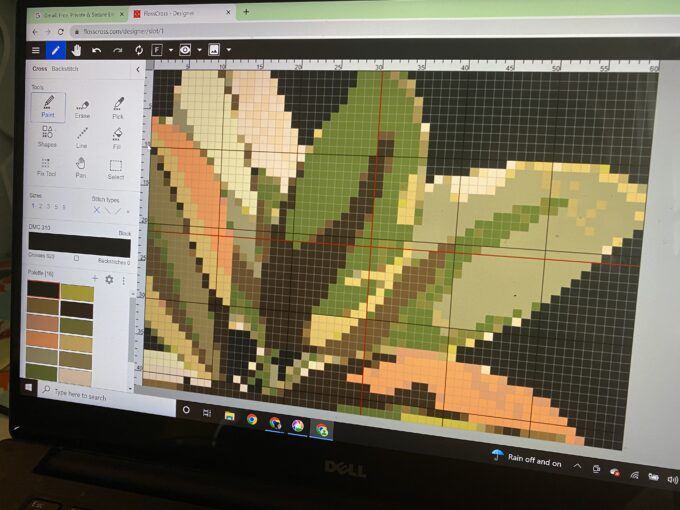
This website is really user friendly and fun to play around with. And it’s free! Highly recommend!
Once you have your pattern just the way you want it, you can print it out and it looks like this.
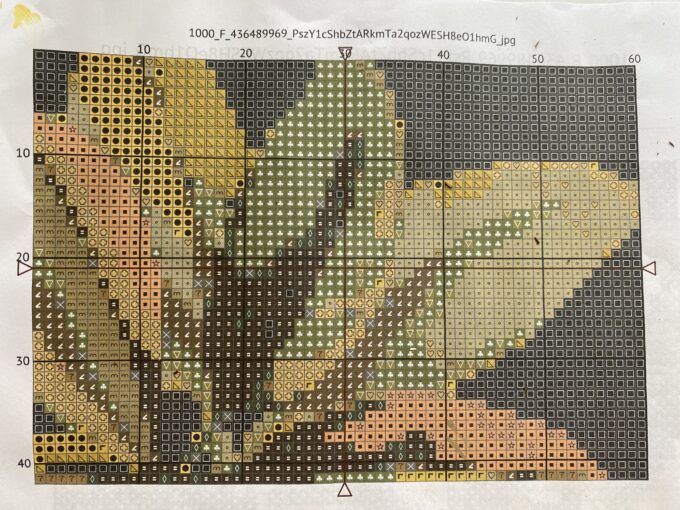
It also gives you a color list. I color-matched my 17 colors as close as I could, and found as many as possible as spray paint. The ones I couldn’t find a close enough match in spray paint, I had tester pots of paint mixed up by Benjamin Moore (I found out SW doesn’t do tester pots anymore, so BM color-matched for me).
Since the names of my paints are different than the ones generated by the program, I made sure to be really organized about which paint colors went with which numbers for my pattern. I labeled them all carefully on my paper tablecloth.
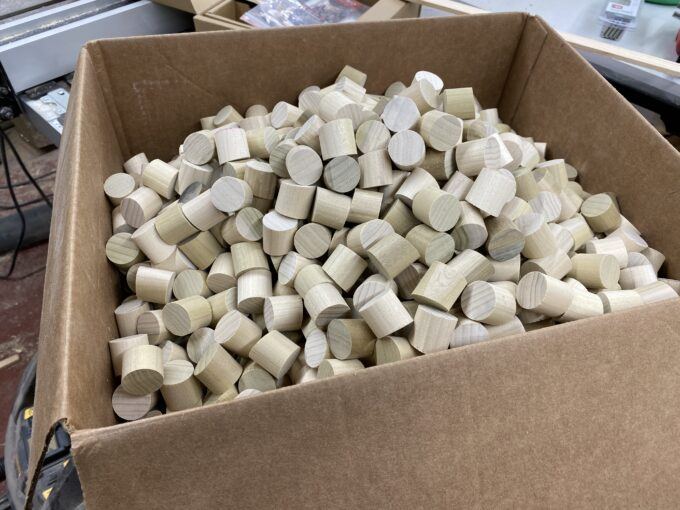
STEP 2 – Cut Dowels
Now we need something to actually paint on, right? Hubs and I went to every store in our town (and neighboring towns) and bought out all the 1″ wooden dowels. This is not even half of my actual load of dowels. 😉
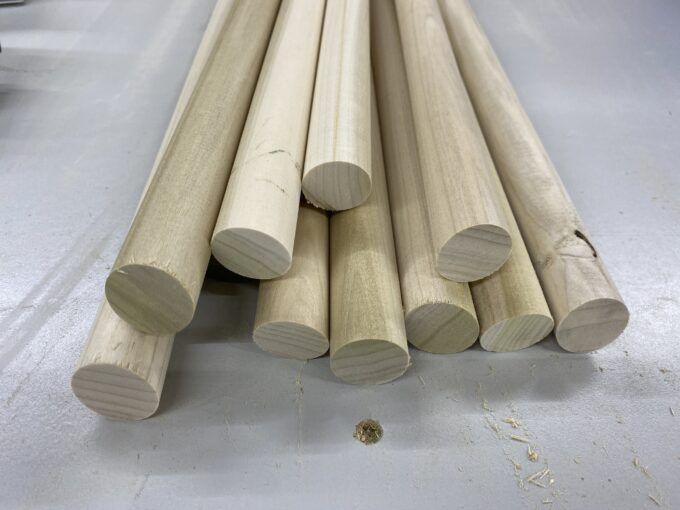
I made a choice to cut my dowels at a slight angle, so that when they’re all together, there will be a gorgeous texture! Stay with me, ok??
I set my miter saw to a 10% angle, and cut both sides of all my dowels, like so:
Then I moved the miter saw back to 0% angle, and cut all my ends again. Repeating for infinity. LOL!
I was dreading sanding THE MOST, but I had a little helper.
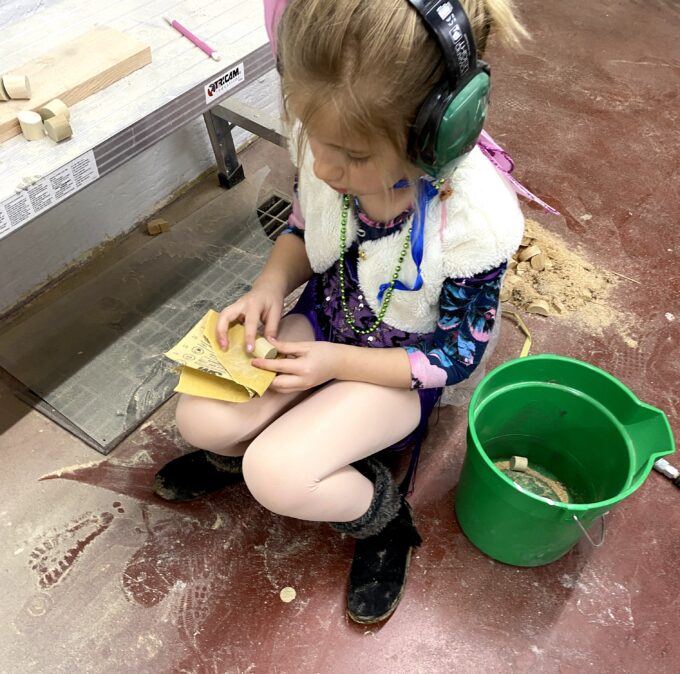
And actually, I found that just shaking them around in a box to get all the rough edges off worked swimmingly! Kinda like a rock tumbler! 😉
STEP 3 – Paint!
But now, let’s get to painting! For the ones that I had spray paint for, I laid them all out on a big piece of craft paper out on the driveway, making sure the angled side was up. Then did several light coats of paint until they were decently covered. Let those dry for about an hour before removing them and lining up the next group.
The rest need to be hand ainted, but DON’T WORRY! It went faster than I expected and wasn’t nearly as tedious as I had worried it would be. Put on a good podcast and get to work! I used a 3/4″ craft brush.
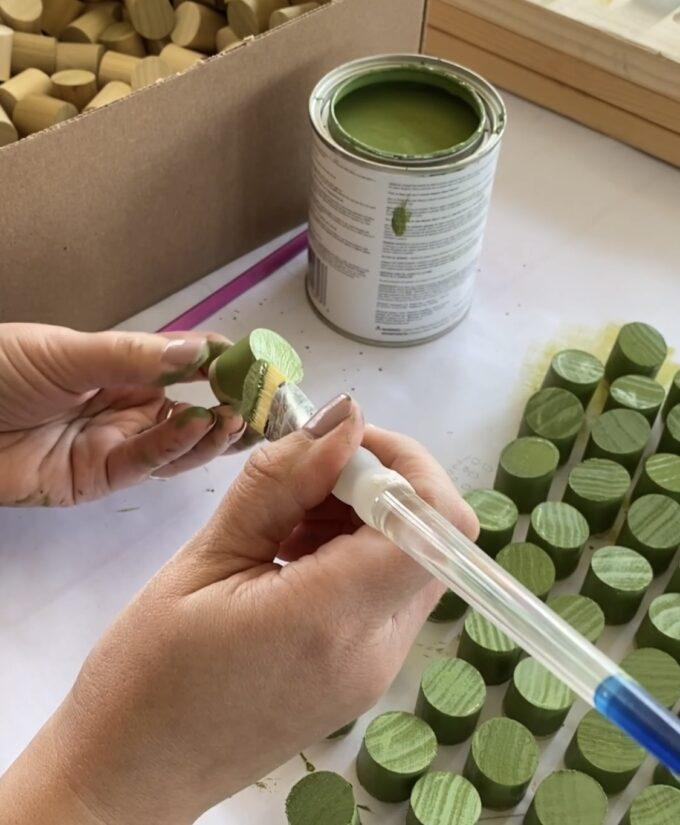
Don’t you love how the woodgrain still shows through even after being painted?!
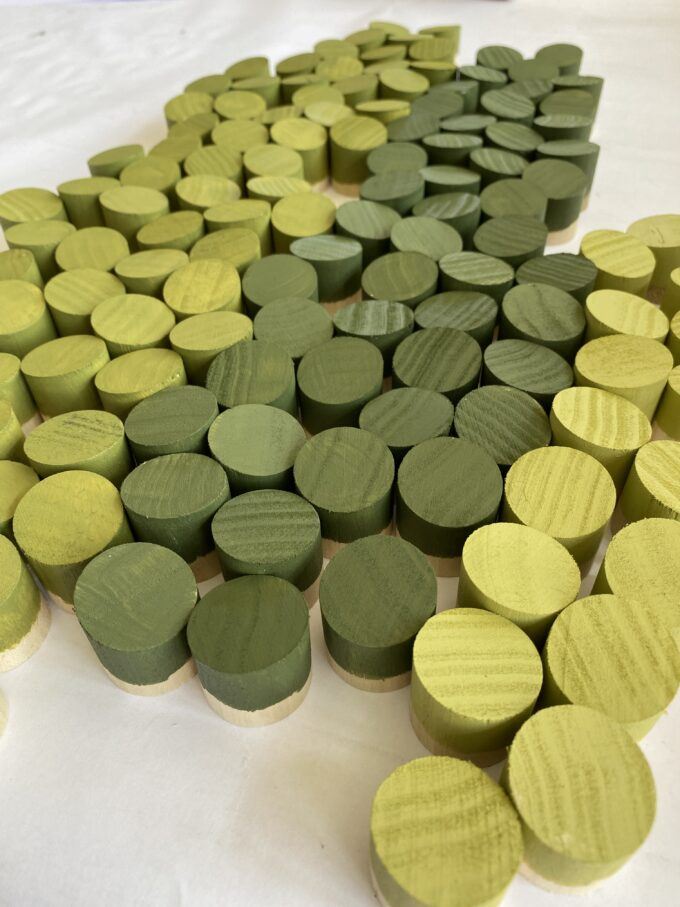
Remember to be organized and keep track of which colors are which symbol on your pattern. It’s so nice how the pattern shows you exactly how many you need of each color!
Having all those little dowel chunks painted and ready to assemble was so satisfying! Isn’t this a gorgeous color scheme?!
STEP 4 – Glue on dowel chunks
I purchased a 1/4″ piece of wooden 5-ply underlayment as my backerboard substrate, cut to the appropriate dimensions using a track saw, and drew out a 1″ grid with pencil.

WE ARE READY TO GLUE!! ARE YOU INVESTED?

This Weldwood Instant Wood Adhesive by DAP is a fast-curing “instant adhesive” that is so perfect for this project. It’s basically super glue for wood! You can reposition for up to 3 minutes, and then it dries and cures ROCK HARD in 30 minutes.
It works on all types of wood, as well as ABS, melamine, particle board, and many other surfaces. I have a feeling I’ll be using this stuff on LOTS of projects!

We love DAP products, and have grown to really appreciate the quality and selection that they have. We use their products on so many of our home projects! This Weldwood Instant Wood Adhesive is no exception!
I started at the top left and went all the way across the top row, then repeated, row after row. Check out my setup! I put sticky notes on each box of dowel chunks with a symbol that corresponds to the cross stitch pattern.
It was so fun to see the image slowly come together. Especially during the time-lapse video that I took! That reminds me, be sure to check out the video tutorial I did! Especially if you prefer video content for learning how to do things. 🙂
STEP 5 – Frame and hang
Hubby helped with cutting the edges with a track saw (that’s how STRONG that wood adhesive is!), and building a frame.

I cannot convey to you how incredibly heavy this giant pixel art is. We used 3 french cleats that were strategically placed into wall studs. And our laser level for centering and leveling.
Pssst… if you’re eyeing our golden velvet sofa/chair, it’s from Article, and we LOVE IT. As for the fluted coffee table, we built it! Here is the tutorial. It includes secret Lego storage! 😉
This large scale pixel art took SOOOOO MANY HOURS, but it was fun, and I enjoyed each step! And… the finished project was well worth it.

It’s everything I could have hoped for!

Doesn’t it fit this space so perfectly? I’m OBSESSED.
That texture!
This large-scale pixel art could easily be modified to a smaller scale, and the options are absolutely endless. Let your creativity run wild! And PLEASE send me pics if you do a project inspired by this pixel art. You can tag me on social… I’m @RealityDaydream on both Instagram and Facebook!
Be sure to check out the other unique Art Projects we’ve done over the years. Which one is your fave? I’m pretty partial to that Ocean Art. 😉
And if you enjoyed this tutorial (even if you don’t plan on making one for yourself!) I would be so grateful if you would pin this image to your Pinterest boards. Your support means so much!
Thanks for pinning and sharing!
Related:
-

Hello hello friends! Things have been wild as we've been navigating the holiday season, schedules,…
-

Nick and I have dabbled in epoxy here and there, but we've never done anything…
-

We're in the dog days of summer, and it seems like my kids are always…
Hi this is amazing! I am wondering how heavy would you guess that it is? I am doing some math myself to get an idea. Love the project I will be starting soon!
I fell in love with this concept and am starting to make plans for my own piece. I am trying to figure out how to convert chart width/height from stitches to inches on FlossCross. I am not a cross-stitcher and was wondering if you have any tips?
If I remember correctly your Cross Stitch pattern will have your picture measurement for the picture and the you can figure up you enlargement for whatever material and backboard you will be using. I hope that makes sense for you. Read your pattern, that you order, very carefully and you will be able to easily go from there.
I agree this is such a great idea! Very very Clever and very good imagination. I love it when people think outside the box and Bethany this is A PERFECT EXAMPLE of using creative licenses and THINKING OUTSIDE THE BOX!!!!
My kiddos are in 4-H, I showed my 16 y/o son and he is doing something similar to show for wood art in our county fair! Thanks for explaining everything so well , it inspired him!
That’s so exciting! I would love to see pictures!
You could email me at beth@realitydaydream.com
Bethany,
I literally just saw something similar two days ago only the lady used hole plugs. She then sealed it in poured acrylic. The blog is addicted2decoating.
Maureen
You are amazing! I love everything about this piece.
This is amazing! How would you suggest keeping it clean (dust free)?
I’m not really a clean (dust free) type of person. But perhaps once a year, I’ll take a vacuum hose with a brush attachment to it. 😉
So so good!
This is WILD! So cool! Don’t tell my husband, but I can see myself trying this some day… when he’s not looking. 😄
Oh my goodness! You’ve out done yourself for sure! Amazing results!
Oh wow!! That is absolutely stunning!! You are always so creative.
Wow! That’s gorgeous, love it 💕