Nick and I have dabbled in epoxy here and there, but we’ve never done anything like this ocean resin art that we just finished. It turned out so awesome!
Wanna learn how to do it yourself? This ocean resin art is easier than it looks, and it could be done on furniture, trays, cutting boards… anything!

*This post contains affiliate links.*
I was inspired by Sam at DIY Huntress because I loved how her serving tray turned out with her epoxy resin pour and how it looks so much like an ocean! Since this was my first pour, I tried to follow her instructions pretty closely and use similar supplies. Thanks to Sam for virtually walking me trough this!
Supplies for Ocean Resin Art:
- Slab of wood to do your art on
- Two-part epoxy (we used this stuff and it was great)
- Medium Blue pigment
- Dark blue pigment
- Light blue pigment
- White pigment
- Mixing cups
- Stir sticks
- Gloves
- Heat gun
- Propane torch
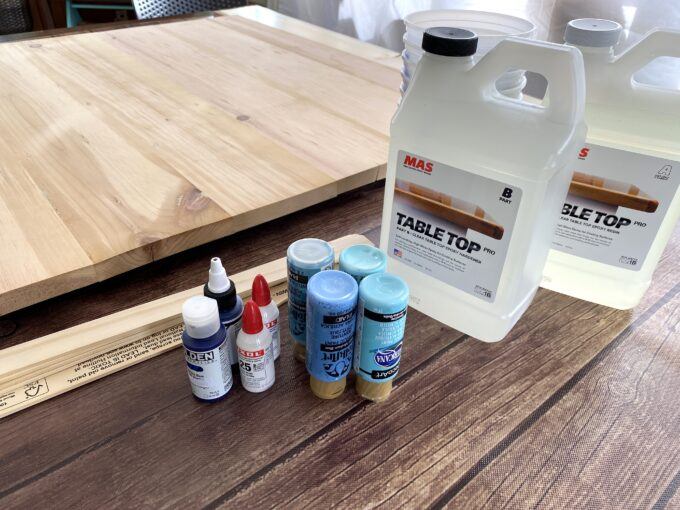
1. Prepare your board
Since we’re renovating a historic mansion, we love to try to find little ways to honor the house and hits history wherever we can. So when we tore the subfloor out of that weird little room to make it our master bathroom, we saved it so we could use it for fun projects like this!
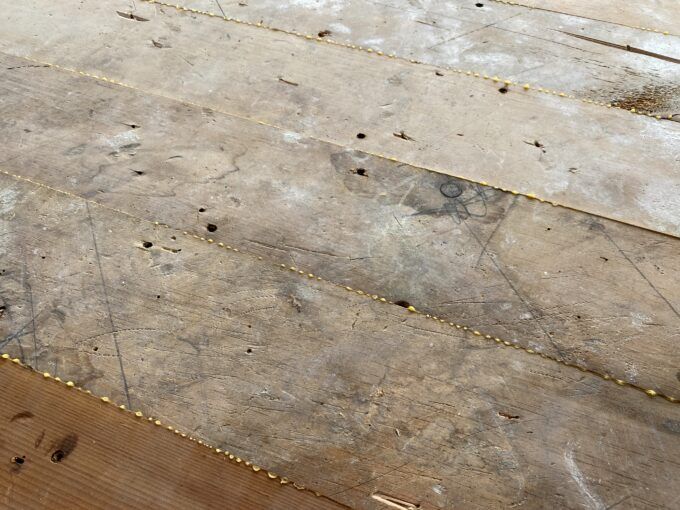
These boards very imperfect, and I love it. Why am I so sentimental?
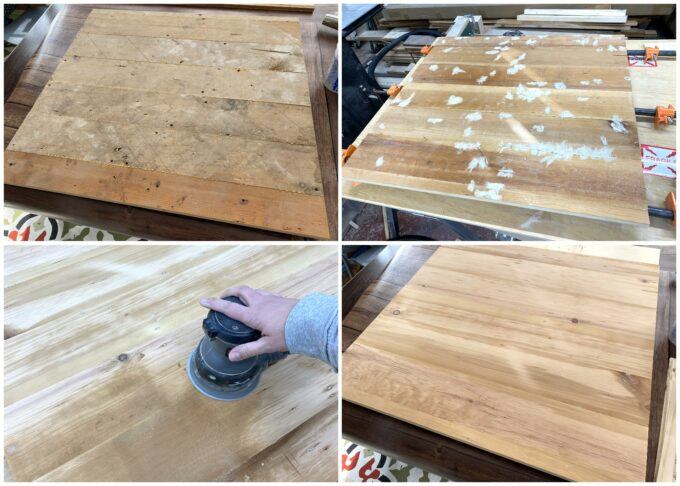
We glued all the boards together and clamped them. Once dry, I filled all the nail holes with wood putty, and sanded a LOT.
2. Mix up the epoxy
It’s time to mix our epoxy! We want to measure out equal parts of each (we did 1.5 cups of each) and then pour them together in a mixing cup and stir with a stir stick. Follow the instructions on your epoxy for how long to stir and such.
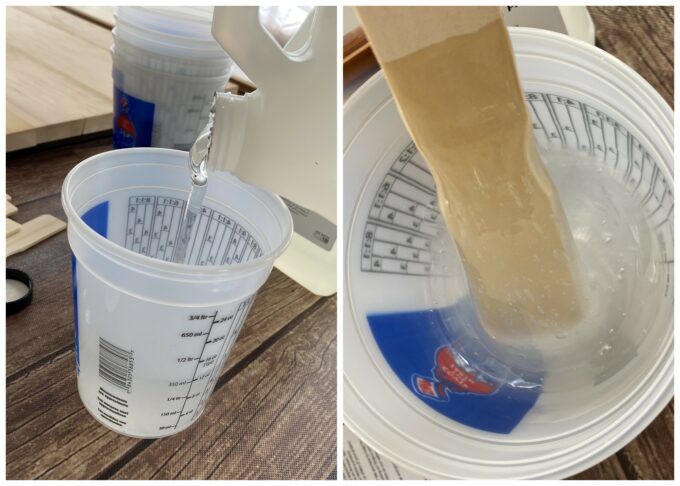
We used these giant cups, which was nice for mixing. But for mixing in pigments, we should have just used solo cups (which we ended up doing for the second and third wave).
3. Mix in pigments
Once your epoxy is all mixed and ready, divide it into 4 cups of varying measurements, shown below. (save a little back in the cup you stirred with too). These measurements don’t need to be exact.

The cup with the most will get the darkest blue pigment, then medium blue, then light blue, and finally white. (plus the tiny amount that you saved back in your mixing cup… we will leave that clear)
Just quirt in several drops of pigment and stir, then decide if you want to add more. There’s no science to this!

4. Pour on the epoxy
Pour a nice wide stripe of your darkest blue, then another stripe of medium blue, then light blue. Use a stir stick to slightly swirl the blues so that there aren’t any harsh lines. Then a tiiiiiiny strip of clear, and finally, WHITE. (Although in hindsight, I wish I had made that clear strip and white strip bigger on this first wave like I did on the next two)

If you look closely at the above picture, you can see that we got our dark blue and medium blue mixed up. It ended up not being a big deal. There’s so much forgiveness with this project!
5. Hit it with heat
Next step… hit it with a heat gun! This part is soooo fun. Start blowing the white toward the blues and just let the colors mix and swirl. It’s amazing how much it looks like an ocean wave! Let yourself really have fun and experiment. It’s hard to mess this up!

Let yourself really have fun with this, making some waves bigger than others!

Wait 10 or 15 minutes, and do a sweep with your torch to get rid of any bubbles that may have risen. You want it to be as smooooooth as glass!

6. Wait and repeat
We decided to do 3 ocean waves, so we let this wave dry for 4 hours, and then repeated the whole process.

Look at this second wave after hitting it with the heat gun! I’M OBSESSED!!

After waiting ANOTHER 4 hours, we did our final wave.

I’ll admit that I was pretty intimidated to try this ocean resin art, but it turned out SO GOOD and didn’t take any special talents or artistic abilities! HIGHLY RECOMMEND!
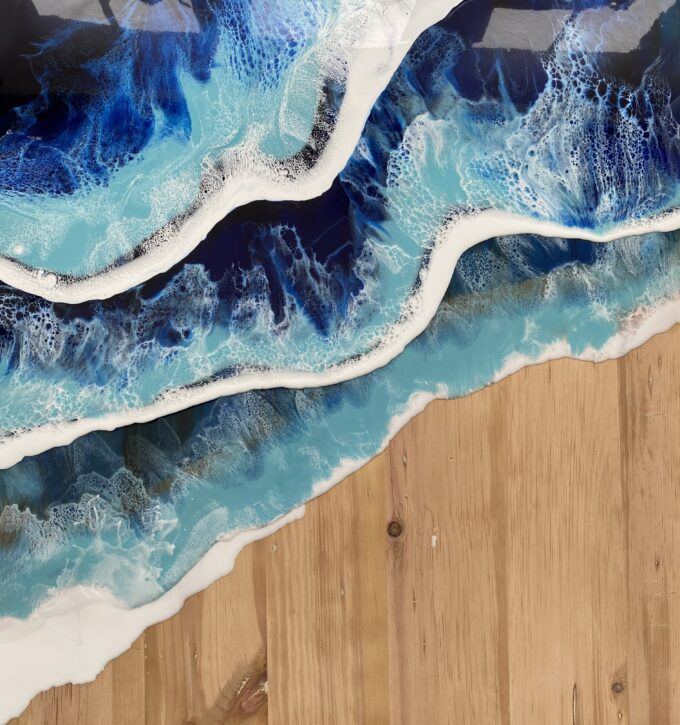
7. Hang ‘er up!
Wait until the epoxy is good and dry, and then flip it over onto a soft blanket to affix the hardware. We use these to hang large/heavy art link this so we don’t have to worry about it ever falling. It’s also easy to make sure we hang it straight because it comes with a level.
The whole reason behind creating this art was to have some bright/happy art to put above the fireplace in the library.

And the ocean theme plays off the tiny shore birds known as sandpipers that used to adorn the fireplace in the form of fugly hand-painted tiles.
There’s a whole story behind all this that you may know if you follow us on Instagram. And if you don’t follow us there, you really should, because that’s where we share most everything.

Whattya think? Is this a project you would ever tackle? Your answer should be yes… unless you just think it’s ugly. Because it’s so easy and fun!
If you give it a go, pleeeeeease tag me on social media! We’re @RealityDaydream on Instagram and Facebook! Or send us pics at beth@realitydaydream.com.
Have an inspired day!!
Bethany
Be sure to check out our master list of DIY Handmade Gift Ideas!

~~~~~~~~~~~~~~~~~~~~~~~~~~~
Thank you for pinning!


do you let the blue resin thicken up a bit before pouring? should the white and clear be thick?
Do you have much of a problem with the waste epoxy that flows off the wooden base.
We just lay down a plastic drop cloth to catch all the waste so we don’t damage the table beneath. Is that what you’re asking
This resin ocean is so cool. I’ve been using resin for about 7 months and I am so addicted as well. I think I will try this soon. I try to resin over alot of mosiacs.
Resin is the greatest! Plus it hides mistakes nicely.
Thanks for this & I pinned
Thank you so much! I’d love to see your work! Are you on Instagram?
I love this! I’ve been so intimidated to try this but you’ve made it seem a little simpler. So, I plan to try this in the near future. I was just wondering if you poured some clear resin on the brown, or sandy, part of the board, to finish it off? TIA
Yes you totally can pour clear epoxy on the raw wood to make the whole thing glossy, if that’s the look you’re going for. I loved the contrast of the glossy ‘ocean’ with the matte ‘sandy beach’. Just a personal preference!
If you give this project a try, I’d love to see pictures!!
Holy bejeebers this is the COOLEST thing ever! I am going to get me a blow torch (something I never thought would come out of my mouth) and give it a whirl. What could possibly go wrong, right? heheh
*nervous laugh*
Christy 🙂
Do it! And send me pics!
I love it! It turned out so pretty and looks so fun!
I love this and am so intimidated at the thought of trying it. But you explained it in a way I may give it a go, sometime in the near future. I was just wondering if you put clear resin over the brown, or sandy, part of the wood, just to finish it off?
Nope. I just left it raw wood… because I’m a rebel. 😉
And also because it’s just art. If it was a cutting board or serving tray, I would have slapped something on it.
I LOVE ❤️ IT!!!
How beautiful!!
I watched quite a few “pour” videos a while back bc I was intrigued by the process and the interesting results. Yet I never felt anything move me to try it until I saw this…. I’ll be gathering scrap wood from the storage area & garage to see what I can come up with. I’ll try a smaller piece as I don’t have a large wall space. I’m exited to try this, thank you for sharing your talent and your projects!!
How exciting!!! Please send pics when you do!
I adore this!!