Good morning beautiful people! I’m happy today for the following reasons:
- It’s FRIDAY!
- My cold is almost gone
- The weekend is tomorrow
- I own the movie Frozen
- We are approaching the weekend
- It is gloriously sunny and warm enough to frolic about
- It’s FRIDAY!
Are you as jubilant as I? Do you need a warm hug? Do you want to build a snowman? I KNOW! Let’s see how long we can carry on a conversation using ONLY quotes from the movie Frozen.
JK.
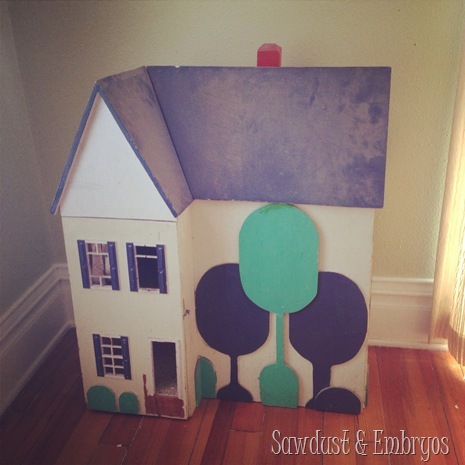
Hey, so if you follow us on Instagram (@RealityDaydream) you’re aware that I’ve been slooooowly making progress fixing up my childhood dollhouse that my grandfather made me as a little girl.
I love it. And have SO many memories playing with it. Creating a whole world of innocent, perfect, and unrealistic life situations. And I can’t wait for my girls to get to make their own memories with it, and let their imaginations run wild together.
Truthfully, I was planning on making minor and only aesthetic changes to the dollhouse. I wasn’t even going to really blog about the process… maybe just touch on it in the final ‘Room Reveal’ of their new big-girl room. But it’s turned into a ‘thing’. And I’m spending enough time on this that it deserves a little spotlight.
I love the original design. It just needed a good wipe-down, some ancient wallpaper removed, and really gross carpet that was home to some squirrels in my parents garage for a time. EW.
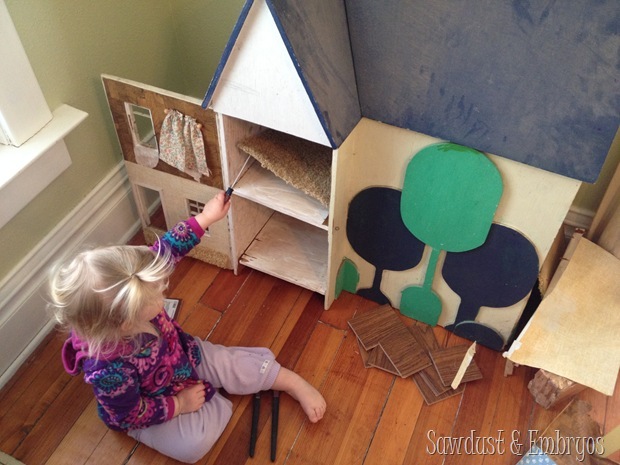
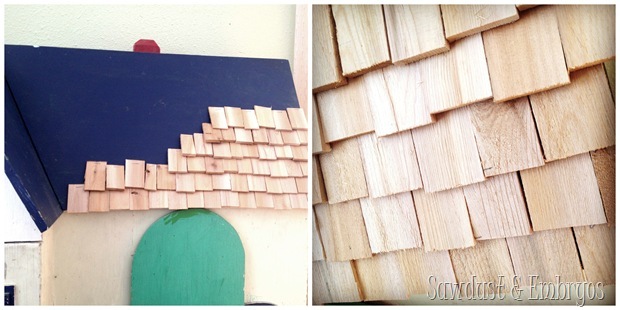
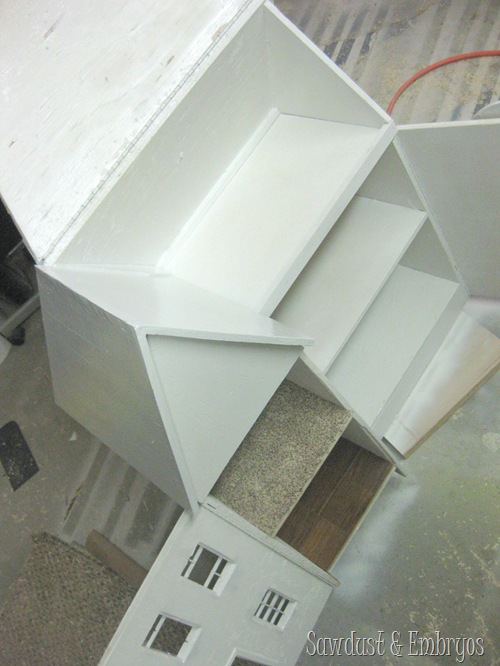
With the help of the girls, I tore out all the nasties and gave the interiors a new coat of white (for now). I bought a couple packages of wood shims and cut them down to 2-3”, and glued/stapled them on the roof as wooden shingles.
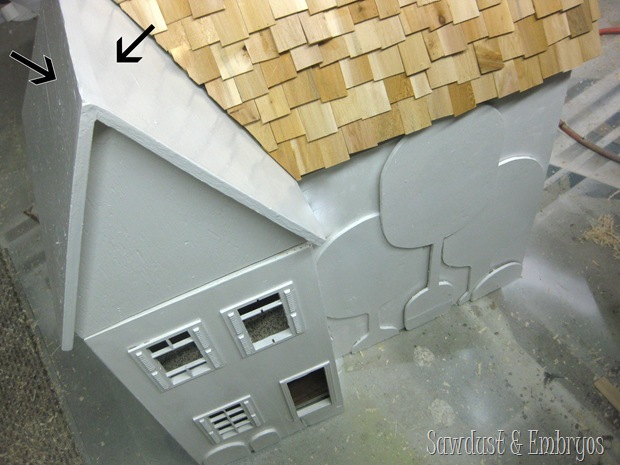
I was having a hard time visualizing how I was going to paint the exterior. I knew I wanted to use the colors from the Stenciled Herringbone Accent Wall, but wasn’t exactly sure how it all was going down. And whenever that happens, I paint white so I can truly see it as a blank canvas. This ol’ brain can’t visualize things like I used to. (as you can see I still need to put the wood-shim roofing on the other two sides where the arrows are)
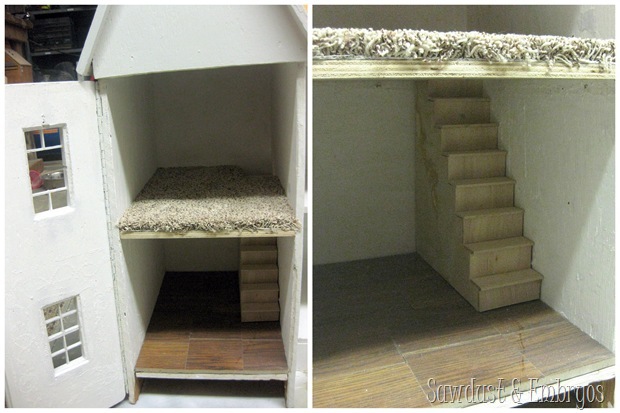
I also laid hardwood floors (free flooring samples from Home Depot!) on the first floor and carpeting (from a carpet sample) on the second floor. And friends? I built those stairs ALL BY MYSELF while Nick was at work one night. He would have cringed at my technique and craftsmanship. But I think he was proud of me in the end. Even if it’s not as perfect as if he would have done it.
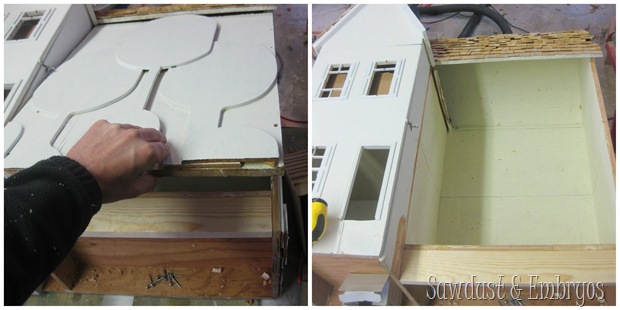
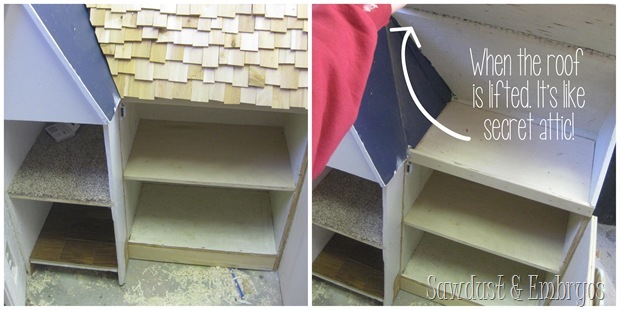
You might be thinking to yourself… where’s the rest of the dollhouse? Well I’ll tell you! The entire ‘West Wing’ is a TOYBOX. The roof opens up, and it’s just a big open cavernous space for toys and whathaveyou.
This is a cute design and all, but I was finding myself wishing that there was more space for rooms and furniture. Especially given the fact that there will be TWO children playing simultaneously. I had been furiously avoiding asking for Nick’s help on this dollhouse for two reasons. a) he’s working on other things, like operation laundry room, and b) I didn’t want this dollhouse to turn into the Taj Mahal. When he does things, he goes all out. It’s one of the things that I love about him. And it’s one of the things that makes me want to punch him in the face sometimes.
ANYWAY! So after giving it a lot of thought, this is how our conversation went.
- Me: Hey honey? You are looking so fine today. Soooo, hypothetically speaking, how much work would it be for you to tear off the front of the toybox and put hinges on the side?
- Nick: –blank stare-
- Me: you could just tap it with a hammer from the inside right? And then put on a piano hinge? And call it a day? Please understand that I do NOT want you to fashion me a tiny working elevator, or a balcony with a functional hot tub, or anything like that. Let’s just keep this simple babe!
- Nick: –blank stare-
Now you have to understand that when Nick has a blank stare, it could mean that he thinks I’m crazy and what I’m asking is impossible… OR, his wheels are turning and he’s conjuring up insanely intricate and fabulous ways to accomplish what I’m asking.
With that being said… I know I’m a pretty lucky girl. He can do anything. And he humors me almost all the time.
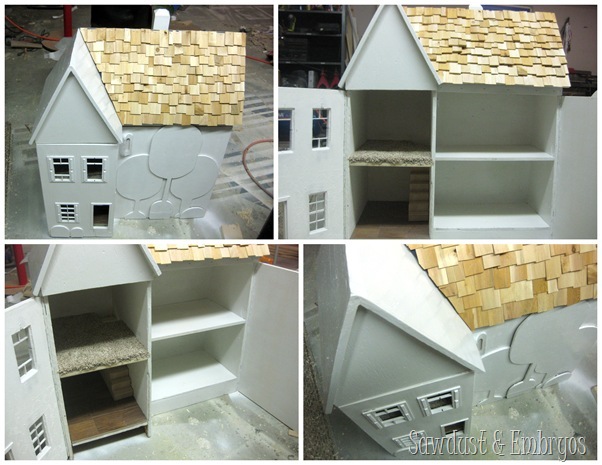
He added two shelves so there would be plenty more floor-space for the dollies. It’s all starting to feel pretty dreamy to me. So many possibilities!
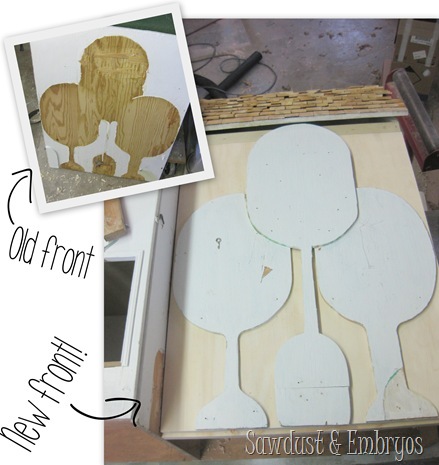
The board that he removed from the front ended up being in rough shape and not being stable enough to withstand the pressure of being a door, so he replaced it by cutting a new 1/2” piece of plywood to size. He even popped off the tree shapes from the old front and replaced them.
He even added a little handle for opening, and a magnetic closure thing! I filled some holes with wood putty, sanded all the new stuff down, and primed/painted it white. You know how I love a blank canvas!
I have renewed excitement about this project… even though it’s turning into a ‘thing’. I still want to keep it FAIRLY simple. I mean, you just can’t compete with Ashley’s dollhouse. Plus, I want to leave a little to the girls’ imagination. Feel me?
This dollhouse is very sentimental to me, so it’s pretty nostalgic to be fixing it up for my own tiny humans. Stay tuned!
UPDATE! To see the rest of the transformation, Here is Part 2 and the Finished Dollhouse!



It’s GORGEOUS! I just finished a dollhouse for my niece, but it was from a kit and didn’t have nearly the level of charm that yours already does. Love, love, love it.
i love this more than i should!!! i had a home made dollhouse when i was a kid and i played with that thing for countless hours! and how special that it was yours!!!! can’t wait to see the fun decoration part!!
This is pure perfection! Nick is such a master at carpentry. A million gold stars to him!
great story, great gift (both from your gf to you and then from you on) … dig the progress and I am so jealous … I have put my own daughters off so many times I am not sure they’d even want one anymore… maybe I’ll get another shot when I’m a gf myself one day. well done!
Girls of any age love dollhouses… the time is now! 😉
awe! this makes me wish I hadn’t passed down the one I inherited from my cousin that our great grandpa built. 🙁 what a great project for your girls!!!
I love the cedar shingles and the new hinges. Now just imagine all the dollar store stuff you and the girls (and Nick) can use to finist creating the new look for this generation. Keep in mind that another big reno will occur in 20+ years or so
Yes! The Dollar store is where it’s at! Especially for something like this where things will get broken and damaged anyway. 🙂 And you’re right about it getting another overhaul in 20 years or so. I get all misty-eyed thinking about them passing it on to their own littles.
ADORABLE! Love the shingles. I think using the same design from the girls room wall yhat you did and doing the same on the trees tops would be awesome. Cant wait to see it all finished !!
I’m definitely considering that! Although I want to be careful about getting too matchy matchy. We’ll see!!
I love this! I had a wooden dollhouse that my oldest sister made me as a child (wish I knew what happened to it). My dad let me make my own out of cardboard boxes. He let me use old carpet samples, bought fabric so I could make curtains, sheets, blankets, furniture coverings. I built my own furniture and cabinets all from cardboard. Lots of memories. I’m sure your girls will love it.