Good morning friends!
My computer has been on the fritz lately, making me nervous to even TRY to compose a blog post… lest it might abruptly go to be with Jesus. But I wanted to at least stop in and quickly show some progress shots on what’s been happening with my childhood dollhouse we’ve been fixing up for the girls’ new room.
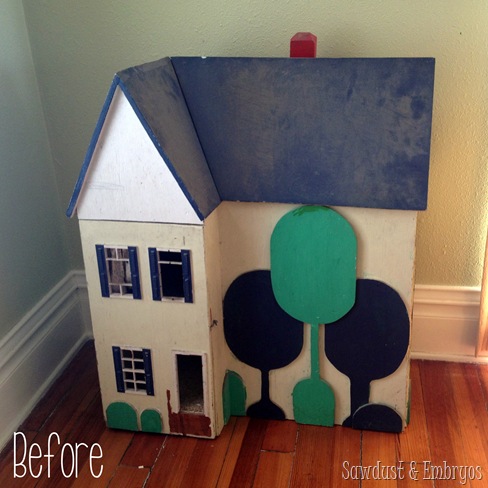
Last time, we shared how we added the wood-shim roof shingles, added 3 extra rooms, painted everything white, built a stairway leading to the second floor, and laid some hardwood flooring and carpet.
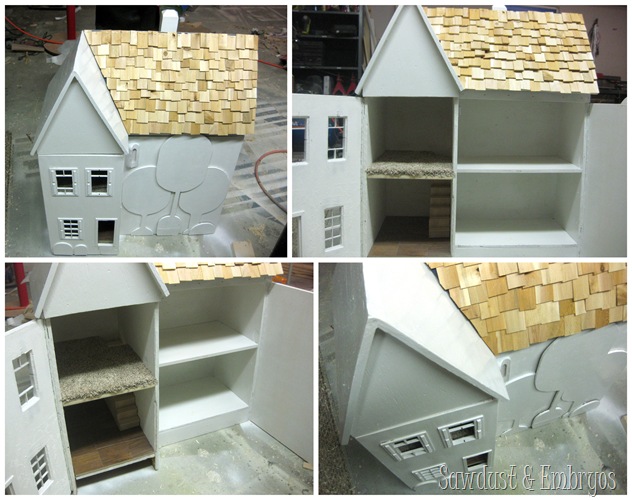
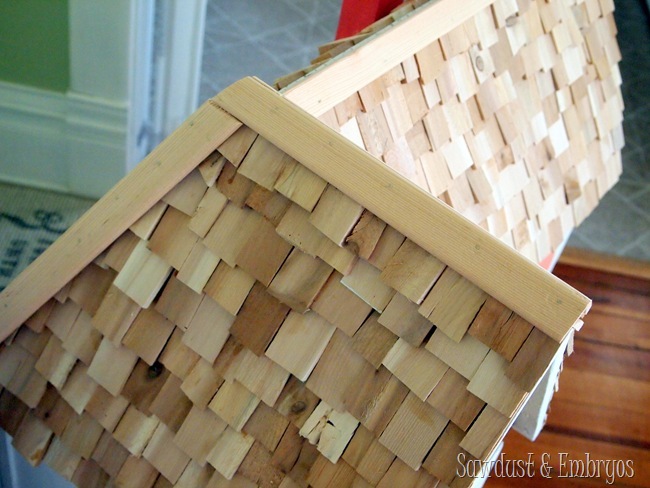
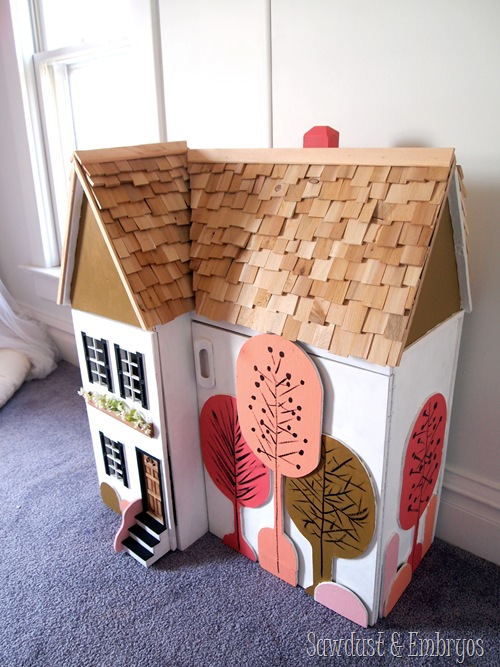
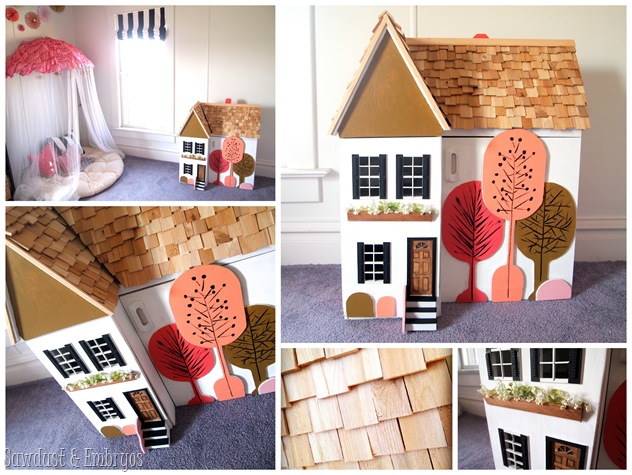
Since then, we finished the shim roof… complete with trim pieces to cover the ugly seams (genius husband).
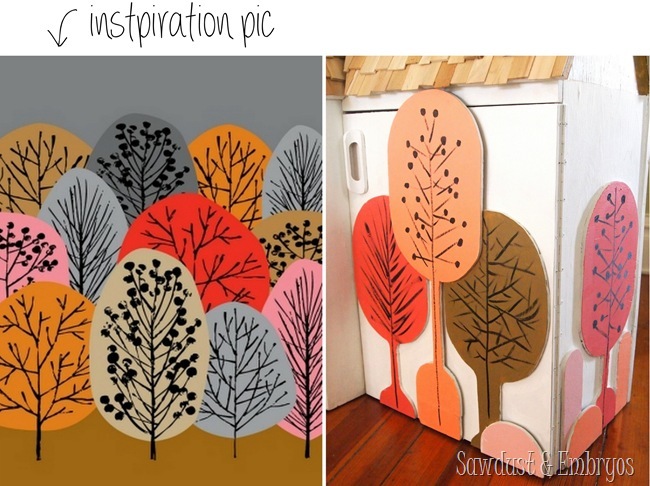
As expected, I decided to paint the ‘trees’ the same colors as the Patchwork Herringbone Accent Wall and did a little design on them to add some whimsy using this design as inspiration. I just used a small brush with black paint, and let it be a little choppy and whimsical.
I found this PERFECT dollhouse door at Hobby Lobby by complete accident. My heart skipped a beat.
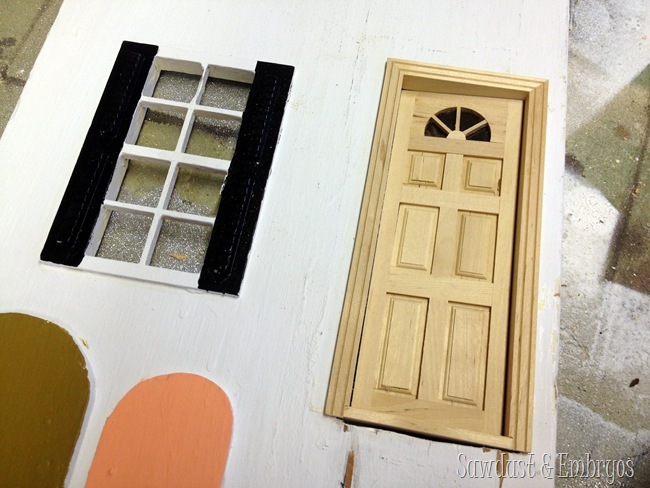
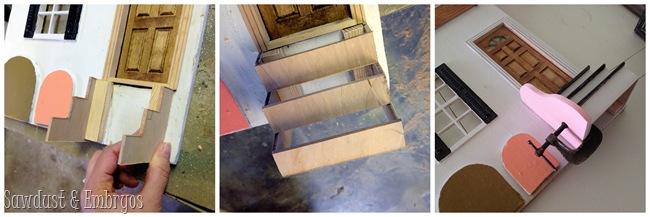
I stained the door and built a little stairway for the ‘stoop’ porchy thing. I also added a new ‘bush’ to make the stairs look a bit like there’s a railing and less like a falling hazard (don’t mind that adorable tiny clamp that’s holding the bush onto the stoop). You can see I also painted the shutters and stairs black.
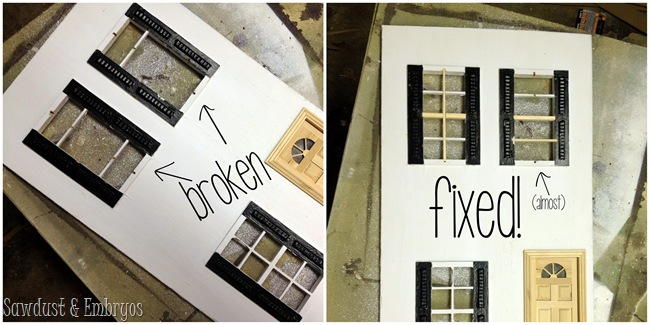
The grids of the windowpanes were broken on two of the 3 windows. They’re so tiny and intricate… I was pretty sure we would just have to work around it. But then Nick swooped in and fashioned two tiny windows in 5 minutes flat. His skills are astounding.
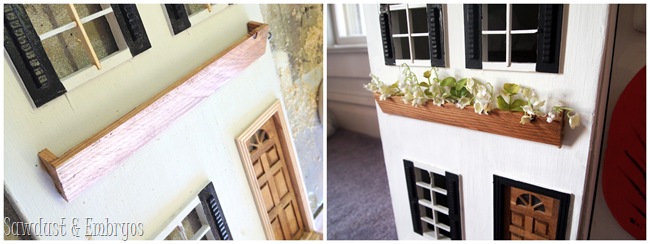
While I was waiting for the windows to be finished, I made a little flower box using some scrap wood! I stained it the same color as the door, and glued in some tiny fake flowers that I stole from my wedding bouquet.
I’m thinking the exterior of this little cottage is DONE! I’ve still got a few things I want to do inside, and we still need to find the perfect ‘family’ to live in our dollhouse. Do you have any recommendations for little dolls? Smaller than Barbies, but larger than Quints. 🙂

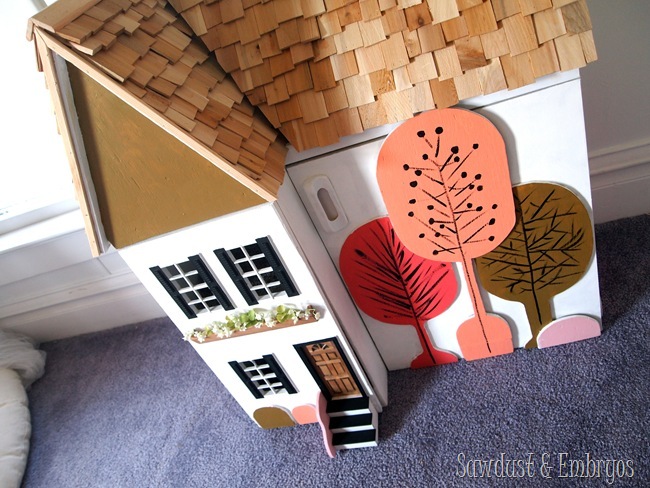
The girls have been watching me work on/paint their ‘baby house’ and they’re SO EXCITED to play with it.
UPDATE! We finished the inside, and the girls loooooove playing with it! Click here to see the inside reveal!
If you missed any previous installments of this room transformation (for our twin girls!) feel free to click on the links below and explore all the DIY projects we’ve done to make this room perfect… for cheap!
![Stenciled-Herringbone-Accent-Wall-Sa[1] Stenciled-Herringbone-Accent-Wall-Sa[1]](https://realitydaydream.com/wp-content/uploads/2014/04/Stenciled-Herringbone-Accent-Wall-Sa1.jpg) |
![DIY-Roman-Shades-Sawdust-and-Embryos[1] DIY-Roman-Shades-Sawdust-and-Embryos[1]](https://realitydaydream.com/wp-content/uploads/2014/04/DIY-Roman-Shades-Sawdust-and-Embryos1.jpg) |
![DIY-Tufted-Fainting-Couch-Toddler-Be[1] DIY-Tufted-Fainting-Couch-Toddler-Be[1]](https://realitydaydream.com/wp-content/uploads/2014/04/DIY-Tufted-Fainting-Couch-Toddler-Be1.jpg) |
![DIY-Vintage-esque-Starburst-Mirror-T[1] DIY-Vintage-esque-Starburst-Mirror-T[1]](https://realitydaydream.com/wp-content/uploads/2014/04/DIY-Vintage-esque-Starburst-Mirror-T1.jpg) |
 |
 |
 |
 |
Have a great weekend!


I see the Peanuts gang hanging out there, at least Snoopy. 🙂 Great job! Love the trees on the front.
The quints reference had me laughing! Quints, quints, five times more fun! Ha!
Check your scale. It is probably 1:1, meaning one foot equals one inch. If so then it is standard doll house sized and will fit any standard dolls. I love dollhouse and this is so sweet!
That’s a good point Andrea! Thanks for that tip!
I would think the Melissa & Doug dolls or the Fisher Price Loving Family dolls would work for you 🙂
Also, I found some gingerbread dollhouse trim on eBay:
http://www.ebay.com/sch/i.html?_trksid=p2054897.m570.l1313.TR1.TRC0.A0.H0.Xdollhouse+gingerbread+trim&_nkw=dollhouse+gingerbread+trim&_sacat=0&_from=R40
found this post through Kristen Duke’s FB- I gotta say, it was cute before, but I love the after! Love what you did to the already adorable and unique trees! And I love window boxes. I want to make a doll house!
I love that you used flowers from your wedding bouquet…so sentimental. It is adorable.
I cant. This is too perfect. How about I let you design the curb appeal and elevation of my house ok? You are perfect.
Love what you’ve done with the dollhouse! So cute! My daughter has the dolls from Plan Toys – they come in all different types of families and their eco-friendly too.
This is darling! LOVE the colored trees; perpetually autumn and yet springlike at the same time AND they match the room already. You’re a genius! But you knew that already, right? Your girls will be 100% lucky to play with such a sentimental treasure.
As far as dolls, recommend you hunt ones that minimize choking hazards, unless you believe your girls past that stage? Also, is your search limited to people? I’ve seen all kinds of animal families too. Just a thought.
I made some little dolls like this for my son and my niece a few years ago. They both still play with them, I think mostly because I let them pick out the details. They’re very similar to the ones posted above, but this place has some really cute ideas/designs too. I figured you would be into this since you’re such a DIY girl, and the twins could make representations of themselves and family in addition to just fun people. Lots of fun and SUPER cheap. http://littlenannygoat.blogspot.com/2009/11/ask-and-you-shall-receive.html
Love the doll house. No suggestions for dolls, I have 3 sons. Sorry. Great job.
How cute! I love the heritage of your dollhouse! I recently made a dollhouse for my niece and found patterns for dolls on Etsy–the seller ‘LuckyKorat’ has some Japanese pattern books scanned to pdf. The language was no barrier, their instruction images were SO good. There were even a few different sizes of dolls in one of the books. I used felt to make the dolls and random scraps for their clothes. They were perfect for her tiny (2 year old) hands.
I’ve been reading your blog for a few years now and love all of your projects. A friend of mine has painted some amazing dolls for her daughter’s doll house and they might work for you. Here is a link to all of her posts about her painting and if you scroll down to one of the posts, she lists where she bought the unpainted dolls. http://one-little-woman.blogspot.ca/search/label/wood%20peg%20dolls
Wow those are sooooo cute! Thanks for the suggestion!
“Smaller than Barbies, but larger than Quints.”
This made me laugh, but mostly because I knew exactly what you meant. #90skids
I know Melissa and Doug makes some doll house families, but I’m not sure about size.
Haha! I was waiting for someone to catch the ‘Quints’ reference. 🙂 I’m going to check out the Melissa and Doug collections… great idea!
You and Nick make an Awesome pair!!!!!
Oh my gosh it is soooo cute! I don’t know about finding dolls for it from experience (my girl is too little for a real doll house) but I saw on another blog (awhile ago so I can’t remember which one) that they found fun (vintage in their case) dolls & furniture on ebay.
I also love the Fisher Price Little People – they are addicting haha and Harper loves them (she is only 1 & 1/2) but my boy (3.5) will sit and play with her too. So something like that might be good until you find what you want more long term.
Omgoodness… I just died a little! Love, love, love!!! OK. Now I’m going to stop thinking about it because it will lead to sappy tears.
Oh my..so adorable!!!! You make me want to redo my daughters entire doll house now.
I see gingerbread trim on that house. Just sayin’ The best part of this project is the generations of love going into it. I love what you guys have added as your share.
Oooo… gingerbread trim! Totally! I wonder if I could find miniature stuff for a dollhouse. Cause I don’t think I’m THAT good with a scroll saw… HAHA!
I can’t help you with dolls to chose, my children are way past that stage, but had to say you did a great job and that door is the cutest thing ever!
I love it! Grampa would be so impressed!
That’s awesome! Your ideas and artistic talents are so inspiring!
Little people by fisher price has lots of sets for dollhouses,warning buying them can be addictive!