• Home
  • About
  • Tutorials
  • Recipes
  • Furniture
  • Contact
    • Contact
    • Infertility
    • Disclosure
    • Privacy Policy
  • Shop
    • Facebook
    • Instagram
    • Pinterest

Reality Daydream

The Dream is Free, The Hustle Sold Separately

  • Home
  • About
  • Tutorials
  • Recipes
  • Furniture
  • Contact
    • Contact
    • Infertility
    • Disclosure
    • Privacy Policy
  • Shop

Recipe for Red Velvet Brownies

December 4, 2013 by Bethany Sy

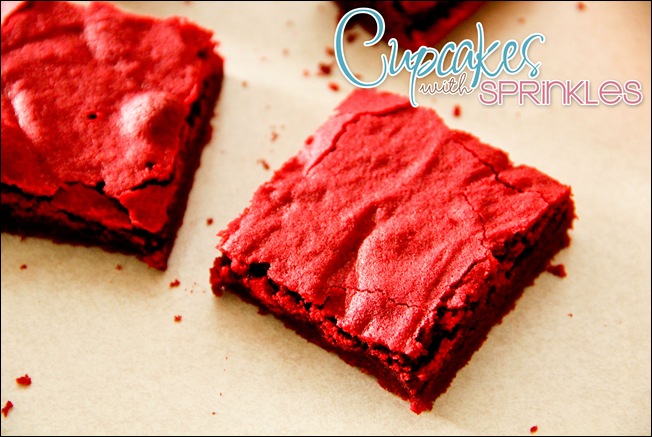
Hi! It’s Meghan back from Cupcakes with Sprinkles!! I’m excited for Christmas and I think these red velvet brownies are so festive, mainly because they’re RED! But I love me some red velvet so any excuse really. These are sweet, rich, and chewy. Perfect for neighbor holiday treats or for that Christmas party you’re excited about! Get ready cause its so easy…

Holiday Red Velvet Brownies... simple and FESTIVE!

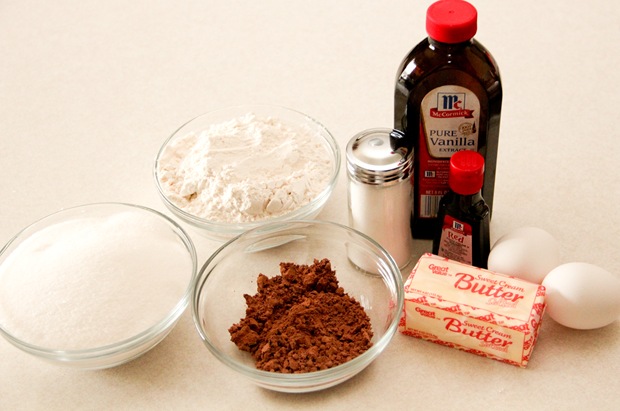
We don’t need a lot, so gather them up…

IMG_7646-1

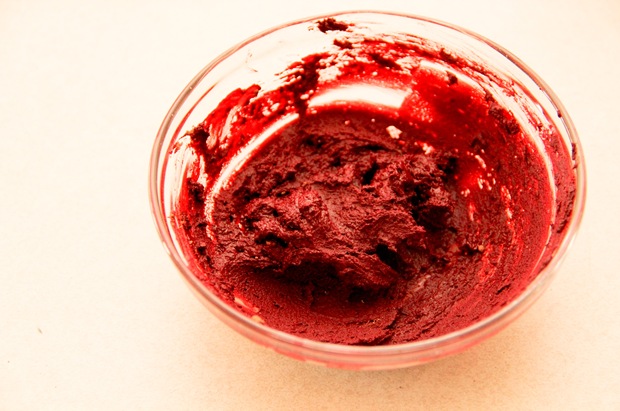
In a small bowl combine the cocoa, food coloring, and vanilla…

IMG_7658-1

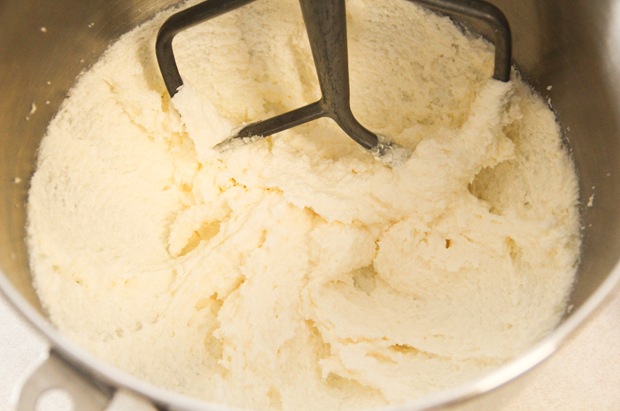
In a large bowl combine the butter and sugar and beat until light and fluffy. Add the eggs one at a time, mixing well after each addition, then mix in the remaining teaspoon of vanilla…

IMG_7665-1

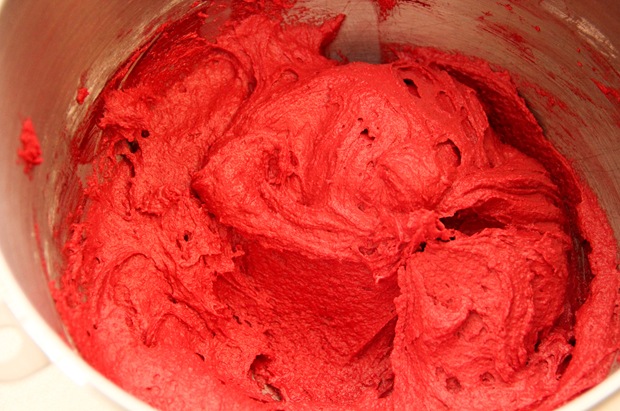
Add the cocoa mixture and beat until the color is uniform. Then add in the flour and salt and mix until just combined…

IMG_7666-1

Spread into your baking pan and bake for about 35-40 minutes. Let cool, cut, and serve!

Holiday Red Velvet Brownies... simple and FESTIVE!

Save Print
Recipe for Red Velvet Brownies
 
Ingredients
  • 3 Tablespoons Cocoa Powder
  • 1oz Red Food Coloring
  • 2 teaspoon Pure Vanilla Extract, divided
  • ½ cup Unsalted Butter, room temp
  • 1½ cups Granulated Sugar
  • 2 large Eggs, room temperature
  • 1¼ cups All-Purpose Flour
  • ¼ teaspoon Salt
Instructions
  1. Preheat the oven to 350 degrees. Prepare an 8″ square pan with baking spray.
  2. In a small bowl, combine the cocoa powder, food coloring, and 1 teaspoon of the vanilla. Mix until its a thick paste with no lumps.
  3. In the bowl of a stand mixer, beat the butter and sugar on medium, until light and fluffy, about 2 minutes. Add the eggs one at a time, mixing well after each addition, then mix in the remaining teaspoon of vanilla. Add in the cocoa mixture and turn the mixer to medium and beat until uniform in color. Slowly add in the flour and salt and mix on low speed, until combined. Do not overmix.
  4. Remove the bowl and stir with a wooden spoon a couple of times making sure the flour is incorporated.
  5. Spread the batter into the prepared pan and bake for 35-40 minutes or until a toothpick comes out clean. Allow brownies to completely cool in the pan on a baking rack, about an hour. Remove from the pan. Cut and serve.
3.5.3226
 

Be sure to also check out these other Holiday-ish yummies from our Recipe Archives!

Peppermint Bark Fudge peppermint-patties-cupcakes-with-sprinkles red-velvet-fudge1
homemade-hot-chocolate red-velvet-cake-cupcakes-with-sprinkles salted-caramel-recipe-so-simple

Thanks for pinning!

Red Velvet Brownies

Related:

  • Shop Local - Iowa Christmas Gift Guide

    Friends! The holidays are sneaking up on us, aren't they? This year, more than ever,…

  • Raspberry Scones

    Raspberry Scones Recipe

  • EASY One-Bowl Pumpkin Muffins

    I occasionally talk about our love for our whole grain Pumpkin Oat Muffins (that can…

About Bethany Sy

Nick and Bethany Sy are the creative free-spirits behind DIY/Lifestyle blog, Reality Daydream. They recently purchased a historic mansion and have been documenting the ups and downs of renovation and making this home their own... all while sharing tips and tutorials along the way! When they found themselves in the trenches of infertility, they started a journey that would prove to be their most important DIY project ever, and have 3 beautiful girls to show for it. <3

« DIY Industrial Christmas Tree Ornament
Handmade Talent Features! »

Comments

  1. 2

    Brandi Lang says

    December 9, 2013 at 2:45 pm

    I just made these and they are super super AWESOME! The batter is amahhhzing as well… but my question is this – does it really call for 1oz of food coloring? I used less than 1/2oz and filled in with a little water to make the paste, and it’s seemed to work out great. Also, they really really puffed on me and then fell when I took them out of the oven. Then I was left with a Niagara Falls edge of broken top crust as the middle settled back out. Any tips?? Thanks for the great recipe – they are sooo good!

    Reply
    • 3

      Meghan says

      January 8, 2014 at 10:47 am

      That’s great if it worked with less food coloring! The recipe did call for 1oz. And mine did the exact same thing. They look pretty terrible around the edge but tasted great!

      Reply
  2. 4

    KatieP says

    December 4, 2013 at 11:24 am

    aaaaaaaand you just killed my “I’m gonna be good till Christmas” plan. I will be making these tonight.

    Reply

Trackbacks

  1. 25 days of Christmas DIY : Day 20 - Red Velvet Brownies - Amanda G Renaldi, Realtor says:
    December 20, 2014 at 8:03 am

    […] Here is the recipe: https://realitydaydream.com/2013/12/red-velvet-holiday-brownies.html […]

    Reply
  2. Red Velvet Brownies | Ranger Kaiti May says:
    December 13, 2013 at 6:15 pm

    […] So, I kinda cheat when I bake, and don’t really follow the instructions about mixing this in one bowl, and then this in another ….. so if you want the exact directions check out the recipe here. […]

    Reply

Leave a Reply Cancel reply

Your email address will not be published. Required fields are marked *

Rate this recipe:  

  • Facebook
  • Instagram
  • Pinterest
  • RSS
  • YouTube
We are Nick and Bethany! Welcome to our blog, Reality Daydream where we share our DIY adventures!

realitydaydream

Still can’t get over these shelves. 😍 These Still can’t get over these shelves. 😍

These Aksel Radius Floating Shelves by @shelfology are the perfect finishing touch to this wall in our kitchen. 🙌

#gifted #shelfology #radshelfie #floatingshelf #akselradius
I needed an instant-gratification project today fo I needed an instant-gratification project today for my well-being, and this little wooden stand was so fun and fast!

Details and links to everything in this pic in Stories!
If ya just need a slab of wood, grab a cutting boa If ya just need a slab of wood, grab a cutting board when you’re at Target or Walmart! They’re made of hard wood!

I used this cutting board to experiment and make some prototypes for a large-scale piece of art I’m doing for our church. It’s got me EXCITED!

Follow along for that project- happening soooon!

@dapproducts @dremel @jet.woodworking
You’ve all seen the video, but here’s some sti You’ve all seen the video, but here’s some still shots of the kitchen wall in all its glory!! 

The Aksel Radius Floating Shelves by @shelfology were the perfect finishing touch! 

Should I do a house tour of our main floor this week?!?! 🙌🌿

#sponsored #floatingshelf #radshelfie
Load More Follow on Instagram
View of our entryway of our historic mansion that we're slowly renovating and making our own.
Click here for lots of art projects using only wood stain on furniture!!
Please feel free to share or pin my posts! You're welcome to use ONE of my images (no collages or pinnables) with a link back to the corresponding post. Please do not edit or crop that single image in any way. Improper use of my photos, ideas or words is a violation of copyright. Thank you!

Categories

Attention: Almost any do-it-yourself project involves risk of some sort. Your tools, materials, and skills will vary, as will the conditions at your project site. Reality Daydream has made every effort to be complete and accurate in the instructions of the plans on this website. Reality Daydream will not assume any responsibility or liability for damages or losses sustained or incurred in the course of your project or in the use of the item you create. Always follow the manufacturer’s operating instructions in the use of tools, check and follow your local building codes, and observe all commonly accepted safety precautions.


Copyright © 2023 · Modern Blogger Pro On Genesis Framework · Customizations by Sweet Theory Designs · Privacy Policy · Log in