Back to the big-girl room transformation!
It’s shaping up to be my fave room in the house for sure. Just to bring you up to speed, we’ve built and upholstered the mini-fainting couch / toddler beds, stenciled and trimmed-out the herringbone patchwork accent wall, acquired the perfect dresser, and fashioned a vintage-esque starburst mirror. Phew! That run-on sentence sounds far more exhausting than it actually should.
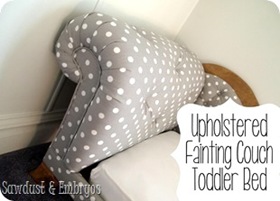 |
 |
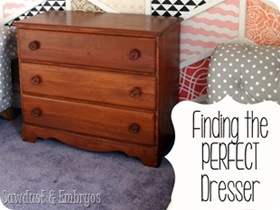 |
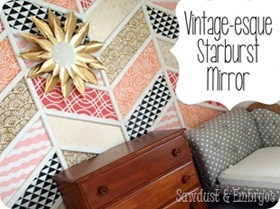 |
Because of the way the toddler beds extend right to the window, floor-to-ceiling curtains are out of the question for this room. That’s usually my go-to curtain type, but I’m learning to be flexible. Even when it involves the ever-intimidating sewing machine! But this project turned out to be pretty darn simple!

I’m going to show you how we pulled this off, alrighty?
To start with, part of my vision for this room was to have black/white accents. I love the stenciled sections with the black/white step-up triangle stencil, so I thought it would be so fun to play off those with a bold black/white striped roman shade!
I used Premier Prints Vertical Black/White fabric and some fabulous black-out curtain lining fabric (which is OPTIONAL for this project). We learned the hard way the importance of a DARK ROOM to promote sleeping for the tots. In fact, there are still towels and fleece blankets thumb-tacked to the wall in the nursery right at this very moment. We’re classy that way.
SO!
The opening of the window is 28” x 72”, so I laid out my fabric and cut 1 inch longer in both directions to leave room for hemming (29” x 73”). I laid out the black out fabric and cut it the exact dimensions of the window because I’m going to hem the edge of the striped fabric over the edge of the black-out fabric. Make sense?

As you can tell by that hem-job above… I’M NO SEAMSTRESS. And it should demonstrate to you that it doesn’t have to be perfect. And if I can do it, why I believe you can too.
Good talk.
Next! We need some mini-blinds! I was going to use the existing blinds in that room, but they were a little shawty… and I didn’t want to go to all this work just to have the mini-blinds bite the dust. So I bought new ones here for only $4 dolla bills. FOUR DOLLARS my people.
Which made me feel better about completely dismantling them. We laid out the mini-blinds completely extended, and cut all the strings to release the ‘slats’. Be sure not to cut the main cords that go vertically through the holes in each slat!

Pop off the little rubber stoppers at the very bottom, snip off the knot at the end of the cords, and pull off all the slats. I recommend using a flathead screwdriver instead of a pocket knife as demonstrated below. It would have been a tragedy to accidently slice off the rubber stopper!

We laid out our panel of already-hemmed-fabric, and made marks every 7 inches (there ended up being 10). Then we put one slat across each of the 10 markings. I put lots of little arrows on this pic because it’s kinda hard to see since there’s so much white going on. You’re welcome.

Using a bulky needle and some embroidery floss, I took a stitch on each slat… going in through the hole, and coming out just above the slat to hold them together.

Then you’ve got this:
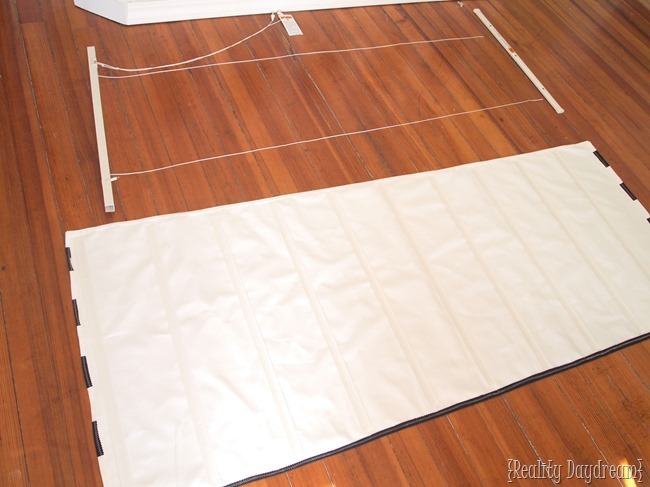
We laid our mini-blind ‘skeleton’ over our fabric panel, and started stringing the cords through the holes in each slat… all the way down to the bottom! Then we strung them through the very bottom piece of the mini-blind, tied a knot, and popped those rubber-stoppers back in place.

We hot-glued the top inch of fabric onto the front of the top piece of the mini-blind, and cut a slit for the string.

And glue the bottom piece on as well. Make sure it’s standing up vertically like so:

This bad-boy is ready to hang! Just pop it into the existing mini-blind brackets!

We were so excited the first time we slowly pulled up the Roman Shade with the string… THOSE RUFFLES!

And that black-out curtain fabric is like a Christmas-in-January-MIRACLE. I almost couldn’t see my hand in front of my face! Ok not literally. But let me just tell you it was pretty darn dark.
Here you can see how our ‘new’ roman shades fit in with the rest of the room!

Of course there’s another window in this room that you’ve never seen… because there’s a bunch of junk on that side of the room. But I can assure you that window got the same bold treatment. And eventually we’ll be tackling that side of the room… but not before we finish the chandeliers that will hang over their little beds! I’ll give you a hint… THEY’RE SOOOOO CUTE!
UPDATE! Come check out the chandeliers and what we did on the other side of the room here! You won’t be disappointed!

Disclosure! We received free product from The Online Fabric Store to help us out with this project, but were not compensated or told what to say. All opinions and words are our own!



Making Roman shades via the use of mini blinds is honestly so hard to pull off it’s ridiculous. While I was one day really inspired to carry out the whole process, I failed. It’s just too complicated.
Thank you for this idea! It makes me happy every time I look at it. I needed to add 2 things to make it work for me – one was that my little knots kept untying so I put a drop of nail polish on them. Not going to get my girl scout “knot badge, I guess”! And the sides of the fabric would ruffle up when I raised them so I added another hole on the ends of the miniblind and tied it in place with a knot. And nail polish.
I would never have come up with this idea – very slick!
So you don’t put any glue on the slats right? Just stitching at the string holes holds them in place well enough?
Thanks for a great tutorial! I made three and LOVE them! I’ve made roman shades “from scratch” before and it is really difficult to get the rows straight. Also, over time, the plastic rings keep breaking , I think from the sun making them brittle.
I am considering placing a grommet or buttonhole the material right in front of the mechanism at the top f the shade where the string exits to make raising and lowering easier, what do you think?
When fully open how much of the window is covered by the shade? I would like to put roman shades in my sunroom but am leaning toward cellular so that I have the maximum window exposed. The shade either way will be mounted within the frame.
It does take up a bit of space at the top of the window when open. I would say maybe 10″? I don’t blame you for wanting maximum window exposure in your sunroom!
I don’t sew, but has anyone tried this technique with the iron on no sew tape stuff (you know what I’m saying right)? I’m concerned it won’t hold up over time.
I haven’t tried it, and I have the same concerns. But some people swear by that stuff, so who knows. 🙂
Yes!!!! It works great! I have made some very large and sturdy shades with just the glue !
It will …buy the heavy duty tape and don’t be stingy when putting it on
Can the Roman shades be made utilizing cordless blinds?
That’s a good question, I’m not sure!
Can the roman shades be made using cordless blinds? Just thinking about toddlers…..
I love this project!! Question tho…I cannot find mini blinds to cover my sliding patio doors unless I special order the length…and what’s the point of a DIY if you’re gonna spend it all in blinds alone? So…is it possible to add length to the cord or restring longer cords to get the length I need?
I make Roman Blinds the other way and find it easier than this. Here’s the how-to link: http://m.wikihow.com/Make-a-Roman-Shade
In step #9 I use the second option when the blinds are lined so you can slide the wood pieces in pockets you have sewed (jus straight stitching)…and remove them for washing!
That looks like a great tutorial too! <3
I prefer it because it allows you to wash the blinds.
That makes so much sense! I don’t ever wash my curtains, but I probably should… LOL! 😉
That’s a great idea, because I was wondering how you would clean this roman shade with the mini blinds slat attached to material
Wow! This is a great project. I don’t sew but somehow I believe I can do this. Thanks for sharing. Pinning!
My MIL and I made a large roman shade using your technique two weekends ago. The window is 45″ wide x 51″ tall (inside jamb dimensions). Our fabric was not as wide as we needed so we deconstructed the existing (cheap) curtains to get our width and length. Doing the math proved to be the hardest part of this whole project. Somehow both of us failed to allow for seam allowances! But in the end it looks amazing. Deconstructing the mini-blind, stitching it to the fabric/blackout was EASY! Anyone can do this if they have the fabric the size they needed. As far as the the questions about how to slide in the stays for the mini-blind frame we just left about 3″ of the shade fabric unglued, it was stiff enough to stand up (because of the black out fabric) so if I need to take it down, ie to FrayCheck the cheap slippery fabric that we had to use, the corners fold over and I slide out the stays. No problem. I would highly recommend this technique — the hardest part is getting your fabric to the right size. Great tutorial! We will be doing it again and again!
I have everything I need to make these Roman Shades, but I am scared to cut my beautiful material, afraid I will make a mess. It looks easy on the tutorial, but when I start thinking about it, I just put it all up. HELP!
I’ve decided I’m going to try this. I’m a no-sew gal but this looks do-able and the results, YOUR results, are gorgeous! Excuse me for being so bold, but is there ANY chance at all you might do a VIDEO tutorial on the making of these DIY Roman Shades? I think it would be super cool to see it actually coming together step-by-step, much like watching your Shading with Stain video (which btw, is awesome!) Fingers crossed… and thank you Beth for all your wonderful projects, you are mega-inspiring!
This is AWESOME, as the half of the house my hubby and I live in gets hammered with western sun, so it gets pretty bright, which leads to lots of heat. We are migraine sufferers, especially in the hotter months, so having blackout blinds is best. We have the PITA retractable kind, but the new ones are not blackout 🙁 So napping in the daytime to kick a headache is an exercise in futility. I am SO doing THIS.
I’m so trying this! I hate my old blinds, the color has been sun-burnt and they look horrible.
I have a large window 72 x 45 Should I “double up” on the slats and should I railroad a fabric rather than seam it Your help would be greatly appreciated
I knew I wanted roman shades in my house. We live way out in the country and I LOVE having my windows let in every bit of sunlight and views that they can! Completely uncovered is best! However, when the night comes, I prefer Bigfoot NOT getting to see what TV show I’m watching! LOL! So I knew I had to have something that I can leave wide open during the day and close easily in the evening. I knew immediately that I didn’t want to pay for store bought shades. I searched for DIY options and stumbled on this blog. I just finished one of my windows (my trial run) and I AM SO EXCITED! They look great and were SO simple! I can’t wait to do the rest of the windows! THANK YOU!!!
YAY that’s awesome! I’m so glad you went for it! We still love ours. 🙂
Holy cow! This is one of the coolest DIY’s I’ve seen. I think that even I can do it! I absolutely love it. I like the way you write too. (very cute) 😉
N ever mind the question, I figured it out. I didn’t hot glue the fabric all the way to the end. After they were up and the little slidey thing was in place to hold them, then I finished gluing the fabric. I didn’t line my shade because they were made from the black out curtains that used to be hanging in there (correct color but boring). They didn’t ruffle nice, I think because fabric isn’t stiff enough. So I hot-glued the fabric to the end of each slat, much better now.
I’m in the midst of trying this. I don’t know how to get them to stay in the little brackets since you can’t slide the little holder-inners into place with the fabric on. Someone else asked a similar question. Can you ask your very obliging hubby how he made it stay in place for me? Thanks!
PS I tried long ago to make these by sewing on the little rings and I had to mess with them every time to make them look nice. I’m hoping the slats will provide the nice ruffles. Great idea!
I’ve been wanting to do mini-blind roman shades for my living room windows for longer than I care to publicly admit. This is the best, least intimidating tutorial I’ve seen for them, and I’ve looked at many of them, trying to find some courage! I think I can do it.
Hi! Would this work with faux wooden blinds? And BTW, I got a quote of $530 for each window to do Roman shades in my bathroom!
Do a google search, I’ve seen a tutorial with faux wooden blinds and modpodge glue. Good luck!
The wife of one of my former co-workers had a window treatment business. At a holiday party I asked her “So what’s the difference between ‘window treatment’ and ‘curtains’? Her answer: ” About $300.”
LOL! I love that!
Oh – and a few other tweaks —
(1) I’m going to attach the fabric shade to the mini-blinds top and bottom rod with very thin velcro so that it’s easier to take down and wash. (b/c I’m like that)
That’s another reason tying the blinds on is better than gluing for me.
(2) I keep the bottom mini-blind rod from “clanking” every time the door opens and shuts w/two tiny pieces of velcro – one on each corner of the bottom rod. Invisible to anyone but me.
omigosh! I did it!! Thank you so much for these instructions! I like a couple of things better about this DIY Roman Shade from mini-blinds than other tutorials.
1) b/c you’re tying the slats on instead of attaching with glue – when the shade has a backing on it – tying seems to work better than glue.
2) It’s more detailed step by agonizing step. I felt VERY confident in beginning this project.
I backed mine with navy blue canvas as I think it keeps out more sun than the white “room darkening/blackout” fabric. for my next one though I’m going to do both the darkening / blackout fabric and then the navy blue backing over that.
Mine is UP on my back door and keeping the hottest sun out of the house now – it feels like we have air conditioning today! Hooray!!!!! I can’t believe it was the back door window causing most of the heat in the house. Crazy.
Next up – the kitchen window to match the back door window.
And then the twins room. :-))
Your twins are adorable – i love that photo of them in their skirts at the kitchen sink…………………..CUTENESS!!
Yaaaay! I’m so glad it worked and you loved it! Please send us pics! sawdustandembryos@gmail.com
Thank you! I love your solution for these! Just bought a new home and need to do window treatments for everywhere. First up, 4 year old son’s room. Custom roman shade solution x 3 tiny windows? $300 each. One large shade across the 3 $900 – Um…never. Bought all the materials for this project $75. i was giddy buying mini blinds for $3.47 each at Home Depot. Excited to go home and start putting these together.
I made my shades today with your instructions. Turned out great. One thing I did differently, I hot glued the edges of the slats to the fabric. I’m setting up my craft room and these are perfect. Except now I need to paint the window frames.
The shade looks beautiful and I want to try these but I have a question. I will be raising these shades up and down frequently and do not see the plastic stops that hold the mini blinds in their bracket. What keeps them from falling out when you lower and raise them?
And did you make them just a bit wider than the bracket, too, as I do not see that ugly plastic bracket where you slide the blind into?
Thanks.
How do these look from outside your house?
This seems like an easy to follow tutorial, so I am actually on my way out to buy the black out fabric right now. My daughter can’t sleep if it’s too bright. I have such a pretty fabric! My only question is when you used the embroidery floss to sew the fabric to the slat, did you put the needle through the blackout fabric only or through both fabrics, blackout and striped? I don’t want to mess up 😉 Wish me luck!
We stitched through both fabrics, but it’s such a tiny stitch that it isn’t very noticeable. You could touch up with a marker that matches your fabric too. Good luck!
I just love, love these!! They are much more durable than the other mini blind suggestions and look perfect! Thank you for sharing!
Hi! great idea! just one question… how can you clean this shades if they’re glued? Thankssss
You definitely can’t throw them in the washing machine huh! Since they’re usually in the ‘up’ position, they don’t really get dirty… And we plan to spot-clean them with oxy if we have to.
The best way to clean these is to hang them in the shower and have at it. Use your iron on the high steam and put real close to fabric after they have dried and still hanging to smooth out wrinkles! eezy-peezy!! Lucy
I have a maybe stupid question, but I’ve never taken blinds apart before, so I wanted to ask before I kick myself later…
We have really tall windows (82″) so standard (read: cheap!) blinds don’t cover them all the way down. Since I’m taking them apart, it stands to reason that that’s ok, and I’d just need to extend the length of the cording (buy buying longer cording). I’m not asking you to guaranteed it would work, but does that sound like it would work? Thanks in advance, this tutorial is AMAZING and just what I need to hopefully get my 5 month old some restful sleep!
Carolyn,
You are correct, but before you go and replace the cording try and adjust the plastic stops on the existing cording. The manufacture tends to give you a lot of extra cord with standard mini blinds. If it is not sufficient then replace the cording.
Good Luck,
Thanks for the reply! I just ordered my fabric to get this project done soon! One more stupid question, then I’ll only bug you again with a link to my finished project 😉 When you sew the slats back into the new roman shade, did you thread through just the back? I can’t see any of it from the front, but wasn’t sure! Thank you!
I was hoping to find the answer to this same question! I don’t see the thread coming through the front of the fabric in the tutorials! Maybe it’s just hard to see??
This is going to be my second Roman shade. The first time I did this, I used a no-sew hemming tape and lots and lots of glue. It was a HUGE PAIN! I would much rather have sewed my fabric and avoid using the glue.
Emily, the thread does show through on the fronts of the roman shades, but it’s just a tiny little stitch, and we made an effort to use the same color thread as our fabric so it wouldn’t show as much. We tried gluing at first too, and it didn’t hold up AT ALL… so that’s why we turned to the stitches. I hope this helps! If you try it, be sure to send us pictures!
Thank you thank you for your quick reply! I actually. did this today! I will send pics whenever we get the shade installed. I have to be patient with the hubby on that one! haha
I did try sewing the slats to the shade with embroidery floss, as shown in your tutorial. I guess my knots were pretty weak because they all began to come undone. UGH! I ended up just doing a small dab of hot glue on each side of the slat nearest the little hole that the cord goes through. Of course I was careful not to actually glue the cord in place!
Overall, this project turned out SO MUCH BETTER than when I did a no-sew version using the hem tape and glue.
You guys are awesome! I look at the blog every day but don’t comment often! Thanks for all you do!! I wish you all the best in your baby making adventures!!
I love these shades. And I really don’t like my mini blinds so this is fantastic. I have a question, I like the idea of changing the material out for seasons and holidays. How do you think this would work by attaching the blinds to the fabric with Velcro? Any thoughts?
Thanks,
Debbie
I really hope you are taking some precautions with these “shades.”
According to a number of agencies, cords on window coverings are one of the top 5 hidden dangers in a home.
I wrote about this issue on my blog as well if you are interested in reading the article you can find it here: http://www.southeastinstalls.com/blog/Window-Covering-Child-Safety.html
Nice! The room is looking better and better with each project.
This is SO genius!! I was debating with myself wether to spend over $100 for one roman shade for my boys room….they currently have a $4 walmart cheapie blind that they have ripped a few pieces off of….problem solved. I am so excited to try this.
And that room…..oh my goodness. The patterned wall and fainting couches are to die for. I come to your website just to stare at that photo. Amazing.
Wouldn’t it have been easier to just snip the extra strings at the top and slide it off-slats and all-at the same time?
This is by far my favorite room yet! Your girls are lucky to have such handy, creative parents! Very cool room!
Wow, what a fantastic idea! I love them, and we have a blind in the master bath I hate. I am going to look at doing this! Thanks for the inspiration!
Debbie 🙂
I’m feeling a bit of hero worship for you right now! And for the rest of you who could do this! I’m blown away by how cute they are but I am totally intimidated to even try! You all are awesome!
I’ll admit, I was intimidated too. I put this off for several weeks! But when I finally did it, it was much easier than I thought it would be… promise!
The room is fabulous! So unique. It definitely deserves a magazine layout.
Thanks Cathy! That’s such a huge complement!
Genius! Love seeing how this room is coming together!
Beth, this room is looking SUPER GORGEOUS! Can I have it in my house please? With a queen size bed? (The hubby wont mind right?!) I think that your ingenuity with the use of the mini blinds was fabulous! I have never seen this done! I need to head over to that online fabric store and find some new pillow fabric. When I’m done crafting for our gender reveal I am making a new duvet for our bed! Yay! Can’t wait to see this room done and the girls living in it!
Diane!!!!!!!!!!! Congrats on your pregnancy!!!!
I love it. I helped make some years ago just using the ring pulls and they ended up floppy. Which is still nice, but not really what I want. This gives them a nice crispness. VERY nice.
This is the cutest kids room I’ve seen. I absolutely love it all! The black and white accents really add a lot. I am planning to make some roman shades like that for our master bathroom so thanks for the detailed tutorial.
It looks so cute with the black and white sections of the wall and I love the beds. I cannot wait to see it all done. You are so talented. I couldn’t do any of this…
Seriously! I have ugly blinds hanging in my kitchen, already picked out new fabric, and have been contemplating what to do in there. It NEVER occurred to me to turn the ugly into useful! This post was perfect timing for me! One question though…I don’t really want it to be so ruffled for the kitchen. if i do less slats across the back, will it lay flatter when pulled?
Yep exactly! Just use less slats with them spaced out more. If you go for it, be sure to send us pics!!
I’ve been sewing over 50yrs and boy you guys have blown me away with this tutorial. It’s on my list to do. Thanks. Awesome!!!!!
Wow what a complement from an experienced seamstress! It’s definitely not perfect, but we consider the imperfections ‘character’ … Haha! 🙂
I simply love the roman shades, they are awesome and you made it so easy to understand the steps. I bought a old 1990 Georgy Boy RV that I have been completely remodeling. Since I hate the idea of floppy window covering or mini-blinds, which I removed and discarded (original and gross). I have been playing with the idea of roman shades. Each time I looked into the patterns I would get so confused, as they just looked so complicated, and store bought, out of my budget. I would give you a big hug if you lived close as I already said, exceptional explanations at each step, and great photos to visualize. Thanks, and God bless you and you family. 🙂
That fabric and those blinds!! I totally want to make some now! Thanks for the awesome tutorial! The whole room is going to be gorgeous and I can wait to see what you guys do next!
Rena
LOVE these! I’m definitely pinning this idea for later 🙂 I think I already have some fabric in here to use when the time comes 😉 It would be so super cute in Harper’s room (my 17month old baby girl)!
Awwww I love the name Harper!
Oh I adore this room! I love the fabric you chose for the shades. This is a great tutorial. In fact, I will be referring to it soon when I start doing projects again. I need to make shades for the window above the kitchen sink and back door window. You are amazing.
**come** together
I love watching this room together!
We have twin girls that are four and we made them the Ana-white farmhouse beds when they were two.
Now the question is…. How long do we keep them in toddler beds before upgrading to twin size? Do you have a plan for this?
Oh man that’s a good question! We’re the types to just take one day at a time and make changes when necessary! Are their feet hanging off the edges yet? 🙂
Oh no, they are still the perfect size! I really want to redecorate their room and make new bedding, but then hold off thinking…..by the time I finish they will be ready to go to a twin bed, haha!
Just my procrastination, I’m sure 🙂