• Home
  • About
  • Tutorials
  • Recipes
  • Furniture
  • Contact
    • Contact
    • Infertility
    • Disclosure
    • Privacy Policy
  • Shop
    • Facebook
    • Instagram
    • Pinterest

Reality Daydream

The Dream is Free, The Hustle Sold Separately

  • Home
  • About
  • Tutorials
  • Recipes
  • Furniture
  • Contact
    • Contact
    • Infertility
    • Disclosure
    • Privacy Policy
  • Shop

Temporary Mid-Century Furniture Update!

December 5, 2014 by Bethany Sy

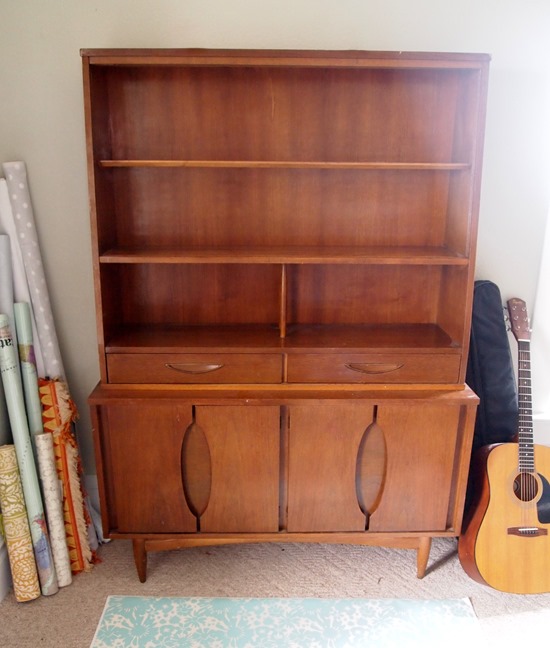
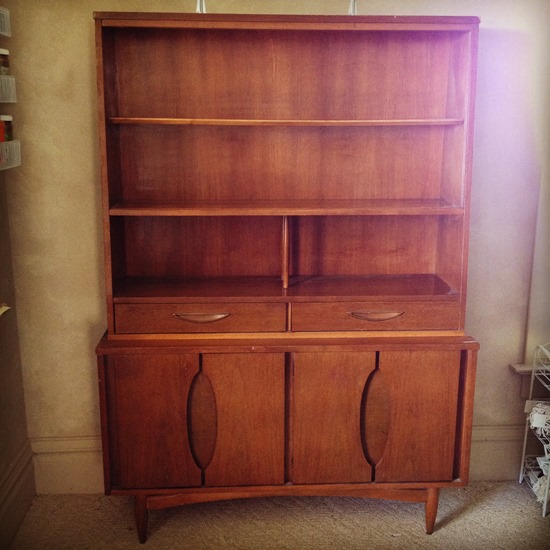
A few weeks ago, I was bragging on Instagram about how I found this amazing /authentic mid-century Garrison  hutch for $70 on our local FB For Sale Page.

Thrifted Mid-Century Hutch {Sawdust and Embryos}

Normally, $70 would have been more than I would spend on ANY piece of furniture… but I love me some MCM furniture, and I knew this bad boy was worth at least a few hundred dollars. If nothing else we could resell it, right? That was the plea I used when trying to convince Nick at least. Teehee!

So to make a loooong story short, we acquired the hutch, and she now lives in my craft room (which we call ‘The Studio’ with a British accent).

Updating Mid-Century Modern Furniture TEMPORARILY! (without compromising the finish) {Sawdust and Embryos}

Even though we’re known for our eccentric furniture transformations, you know I’m not going to mess with a 60’s piece in pristine condition. But at the same time, it definitely needed a little flare of some sort.

That’s when I remembered a product I had heard about called Wallternatives. It’s removable wallpaper that doesn’t leave ANY residue and can even be reused! I was a little skeptical, so I emailed the company and asked if their product would damage my precious hutch in any way. They swore it wouldn’t, and even offered to send me some to try on my piece! HOLLA!

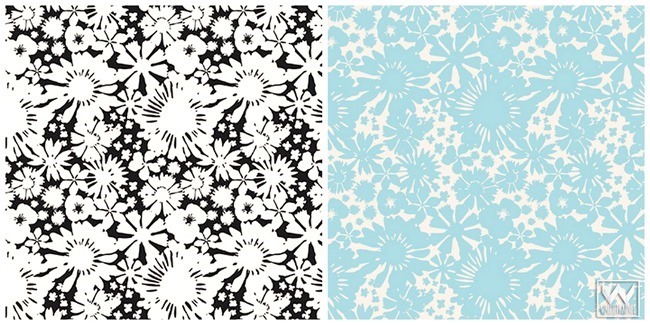
They have tons of patterns, but I narrowed it down to this one… just couldn’t decide which color!

Applying Wallternatives to Furniture {Sawdust and Embryos}

I really like the edginess of the black/white, but ended up going with the aqua just because I think the muted tone will look better once I have the shelves all loaded up with me-stuff.

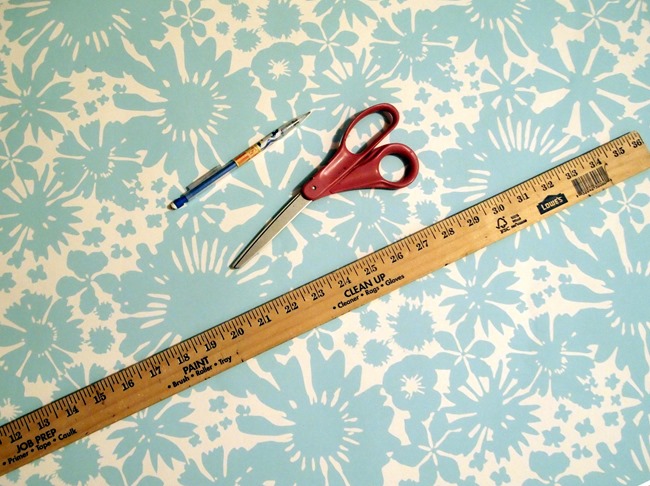
All I really needed to apply this was a tape measure, yard stick, pencil and scissors!

Applying temporary wallpaper to furniture {Sawdust and Embryos}

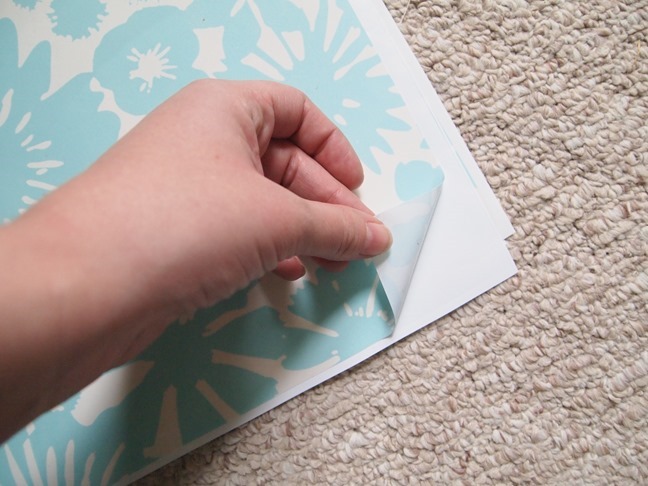
After measuring each opening of the 3 shelves with a tape measure, I marked with pencil on my Wallternatives and cut with scissors! Then, simply peel the backing off and apply!

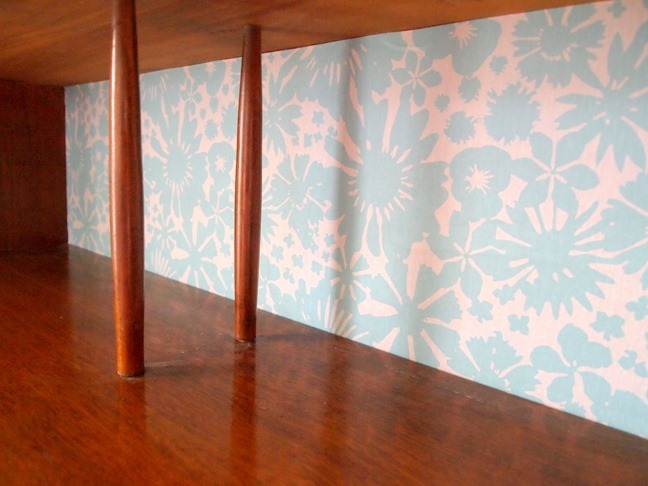
Adding temporary wall paper to dress up antique furniture without damaging it! {Sawdust and Embryos}

I was a little worried about getting it on straight and without any bubbles or creases… but this stuff is so easy and forgiving. And you can always pull it off and re-stick it if it’s a little wonky the first time. Or second time. Or third time.

Use Wallternatives 'removable wallpaper' to temporarily update mid-century furniture without ruining it! {Sawdust and Embryos}

Add strips of removable wallpaper to the back of a hutch for a quick custom update! {Sawdust and Embryos}

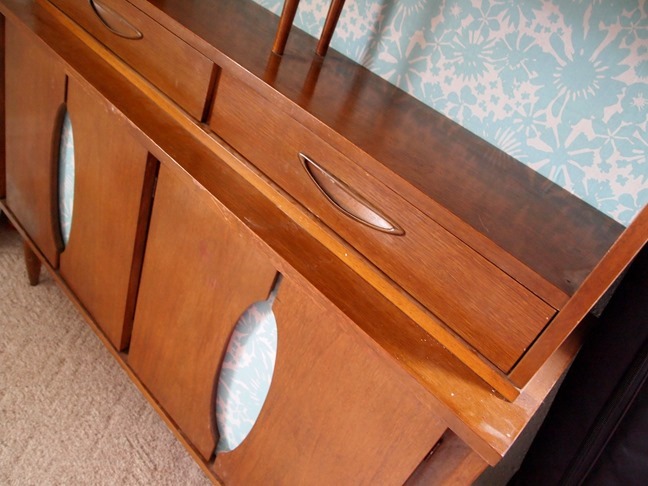
As you can see, we also put the removable wallpaper on those little cutouts on the bottom doors too. I love how custom it looks!

Add removable wallpaper to the back of your hutch for a temporary update! {Sawdust and Embryos} (2)

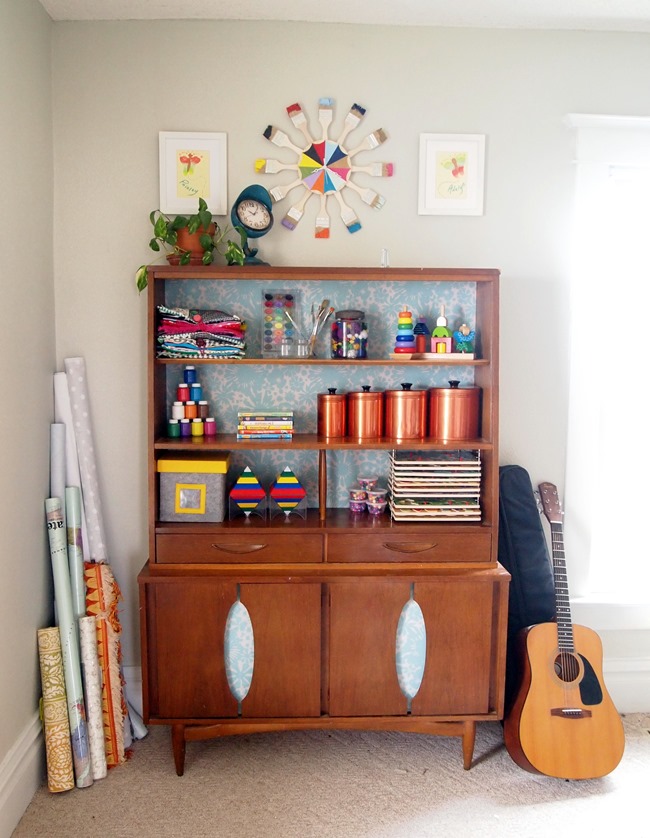
The rest of ‘The Studio’ still needs a lot of organizational work… but this one little corner is what you see when you first walk in… and I love how cheerful it is! I also love that all the girls’ craft supplies, puzzles, blocks, and quiet books are neatly organized.

Add a little 'temporary' flare to mid-century furniture without ruining it! Removable wallpaper by Wallternatives {Sawdust & Embryos}

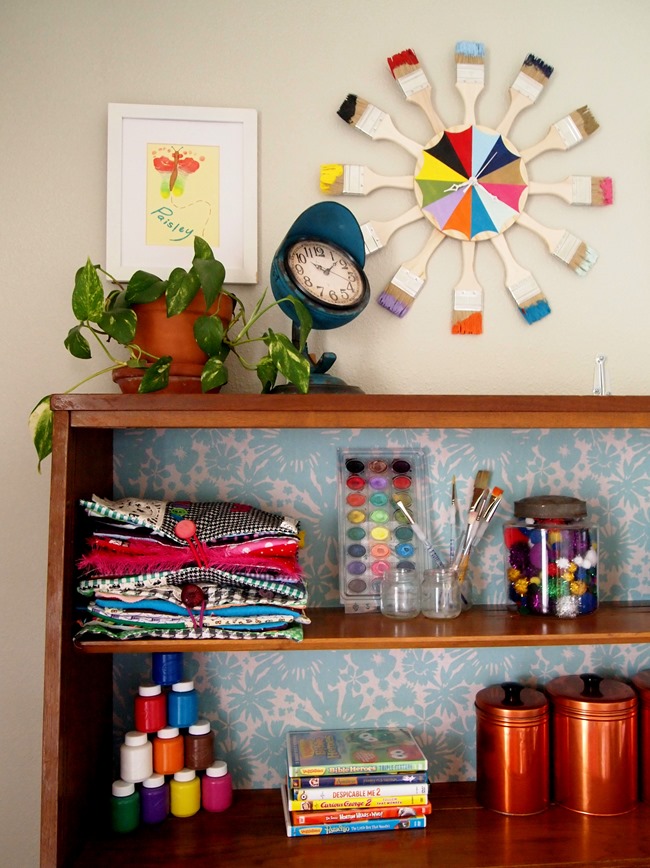
And doesn’t my Paintbrush Dipped Starburst Clock look perfect above it? Gahhh!

Apply removable wallpaper to the back of a hutch for a quick punch of color! {Sawdust and Embryos}

I love suuuuper simple projects like this that make a big impact! Huge thanks to Wallternatives for sending us some of their removable wallpaper to try! Be sure to go snoop around their page… they have tons of wall decals and cute ideas too!

And, because I’m a safety freak… I have to mention this: BE SURE to anchor your furniture to your wall. Can you imagine this giant hutch falling on to a small child? I shudder at the thought. But dressers, sofa tables, TV stands, etc could have the same tragic consequences. Don’t take a chance! PLEASE! We used these to affix this bad boy to the wall.

Happy weekend!
Sawdust-Embryos_thumb5

Related:

  • Master Bathroom Update

    If you've been following along on the 'gram or Youtube, you know we've been turning…

  • Veggie Garden Update

    If you follow our adventures on Instagram (we're @RealityDaydream!), you know we pulled the trigger…

  • Stripping an Old Stained Desk

    We love the original wood of our library, and wanted to find a desk that…

About Bethany Sy

Nick and Bethany Sy are the creative free-spirits behind DIY/Lifestyle blog, Reality Daydream. They recently purchased a historic mansion and have been documenting the ups and downs of renovation and making this home their own... all while sharing tips and tutorials along the way! When they found themselves in the trenches of infertility, they started a journey that would prove to be their most important DIY project ever, and have 3 beautiful girls to show for it. <3

« Homemade Hot Chocolate
Rolling Mudroom Bench with Cubbies! »

Comments

  1. 14

    CatwomanMN says

    April 17, 2015 at 9:44 am

    YOU are so creative! I love your blog!

    Reply
  2. 15

    Hayday says

    January 10, 2015 at 11:18 pm

    Love it. My hubby would laugh if I tried to convince him I was going to resell something I was trying to “sell” him. :). Even free stuff is a one stop-destination 🙂

    Reply
  3. 16

    Vicki at EntriWP says

    December 6, 2014 at 7:31 pm

    Love the size & shape of that piece. I think I’d love it more painted though – especially with that beautiful blue background you installed.

    Reply
  4. 17

    Cindy says

    December 5, 2014 at 4:33 pm

    Looks great, girl!! xo

    Reply
  5. 18

    Nicole Goodwin says

    December 5, 2014 at 4:10 pm

    SO CUTE!

    Reply
  6. 19

    Kenz, Interiors By Kenz says

    December 5, 2014 at 1:19 pm

    What a beauty! I love the print and color you chose. It really spices it up!

    Reply
  7. 20

    jess says

    December 5, 2014 at 12:25 pm

    Tell me abou that super cool clock sitting on top of your hutch!

    Reply
    • 21

      Beth @ Sawdust and Embryos says

      December 8, 2014 at 3:42 pm

      Haha! Isn’t that an awesome light? We picked it up at a little main street shop in Hampton, IA. It was a little pricier than we would normally spend… but I just loved it SO MUCH! 😉

      Reply
  8. 22

    christine says

    December 5, 2014 at 10:51 am

    It looks fabulous! And so yall 🙂 would you please give us a tutorial on attaching furntiure to the wall? I need to do that in our homw but dont know where to begin.

    Reply
    • 23

      Beth @ Sawdust and Embryos says

      December 5, 2014 at 11:54 am

      Yes we can absolutely do a tutorial for that. It’s something that’s soooo important!

      Reply
      • 24

        Rachel says

        December 5, 2014 at 12:53 pm

        Yes please!

        Reply
      • 25

        randomcreativity says

        December 5, 2014 at 7:55 pm

        I would love to see that too – I have seen many people say how important it is to anchor heavy furniture, but no one ever tells you how. And the people at our local hardware stores didn’t have any ideas when I asked. We just randomly screwed little “L” brackets between the shelves and studs, but I’m not sure how you would do a heavy tv or piano, etc. 🙂

        Reply
        • 26

          Beth @ Sawdust and Embryos says

          December 8, 2014 at 3:41 pm

          Yes I can see how that would be confusing. We’ve had several people ask for a tutorial, so we’ll be putting one together soon! Such an important safety feature!

          Reply

Trackbacks

  1. A Tour of our Homestead! - Sawdust and Embryos says:
    May 28, 2015 at 7:35 am

    […] feels DONE is this mid-century hutch that houses all the girls’ creative/crafty things. I added removable wallpaper to the backboard of the hutch for a little added interest while maintaining the integrity of the […]

    Reply
  2. The Studio {Counter/workbench and Storage - Sawdust and Embryos says:
    April 15, 2015 at 8:31 am

    […] we keep the door closed pretty much all the time. We recently got one little corner organized with this mid-century hutch, but that’s about […]

    Reply

Leave a Reply to Nicole Goodwin Cancel reply

Your email address will not be published. Required fields are marked *

Recipe Rating


  • Facebook
  • Instagram
  • Pinterest
  • RSS
  • YouTube
We are Nick and Bethany! Welcome to our blog, Reality Daydream where we share our DIY adventures!
Click here for lots of art projects using only wood stain on furniture!!
Please feel free to share or pin my posts! You're welcome to use ONE of my images (no collages or pinnables) with a link back to the corresponding post. Please do not edit or crop that single image in any way. Improper use of my photos, ideas or words is a violation of copyright. Thank you!

Categories

Attention: Almost any do-it-yourself project involves risk of some sort. Your tools, materials, and skills will vary, as will the conditions at your project site. Reality Daydream has made every effort to be complete and accurate in the instructions of the plans on this website. Reality Daydream will not assume any responsibility or liability for damages or losses sustained or incurred in the course of your project or in the use of the item you create. Always follow the manufacturer’s operating instructions in the use of tools, check and follow your local building codes, and observe all commonly accepted safety precautions.


Copyright © 2025 · Modern Blogger Pro On Genesis Framework · Customizations by Sweet Theory Designs · Privacy Policy · Log in