• Home
  • About
  • Tutorials
  • Recipes
  • Furniture
  • Contact
    • Contact
    • Infertility
    • Disclosure
    • Privacy Policy
  • Shop
    • Facebook
    • Instagram
    • Pinterest

Reality Daydream

The Dream is Free, The Hustle Sold Separately

  • Home
  • About
  • Tutorials
  • Recipes
  • Furniture
  • Contact
    • Contact
    • Infertility
    • Disclosure
    • Privacy Policy
  • Shop

Stripping an Old Stained Desk

July 28, 2022 by Bethany Sy

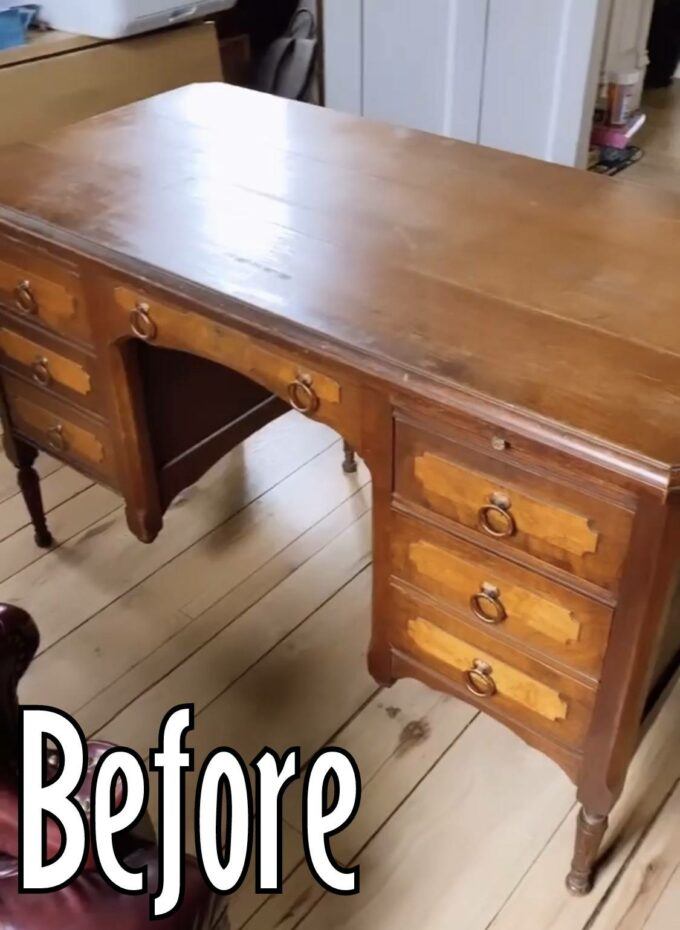
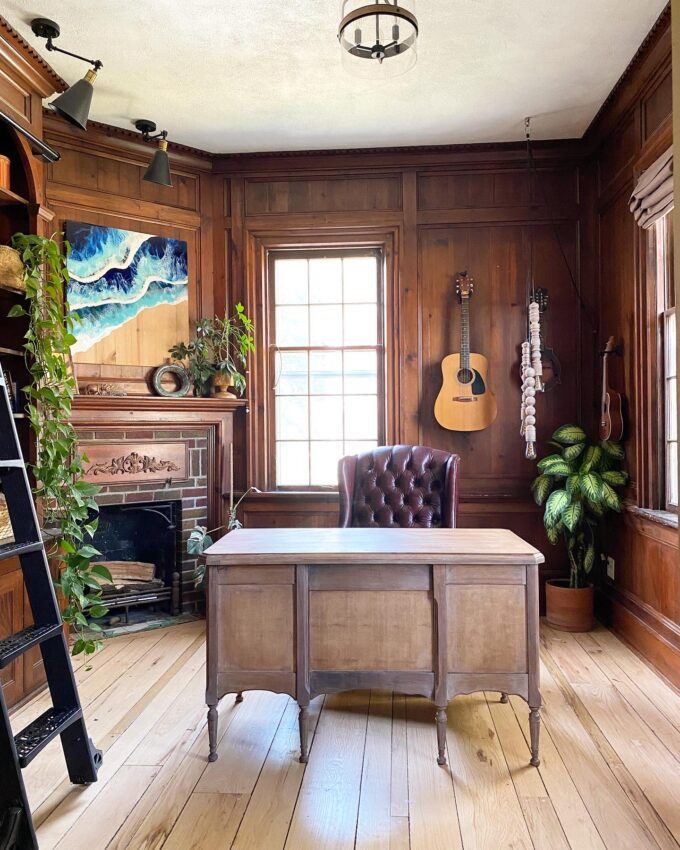
We love the original wood of our library, and wanted to find a desk that would not only be old/antique, but also be a light wood that would contrast the dark wood of the library. I knew this would mean that whatever old desk we find would need to be stripped, and I was excited to try Natalie from Vintage Porch‘s stripping technique of using oven cleaner “Easy Off”. She also sometimes uses this ‘greener’ cleaner. So I will be trying both for this project, and sharing the whole adventure of stripping the finish off this desk. Stripping furniture is fun!

I removed the drawers from the desk, and decided to start with those. I sprayed each drawer down with this Green EZ Finishing Cleaner (not the furniture stripper!), then let it sit for 5 ish minutes. Using one of these basic kitchen scrub brushes, I scrubbed down each drawer, being intentional about getting into all those cracks and crevices AND the flat surfaces. Try to go with the woodgrain whenever you can!

Once you’re done scrubbing, spray it all down with your hose, using the most aggressive setting on your nozzle. Resist the urge to use a power washer, because that would be too aggressive! We don’t want to raise the grain any more than we have to. Now we just let these sit in the sun and dry. That’s when the magic happens!

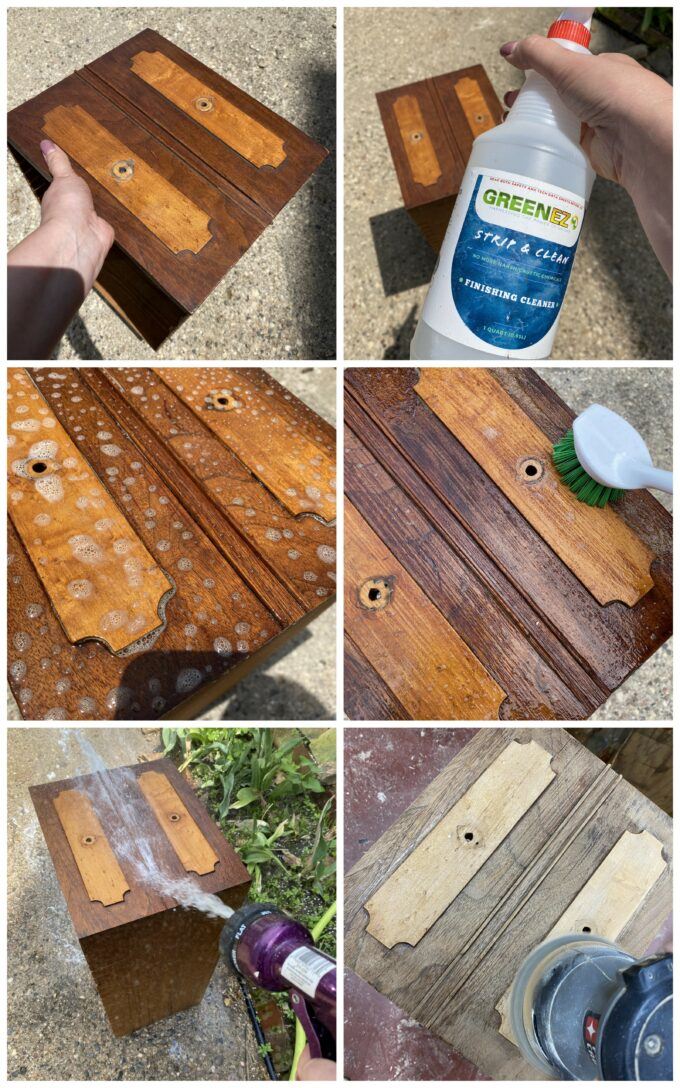
Once the drawers have dried, go ahead and sand it all down with an orbital sander until it’s suuuuper smooth!

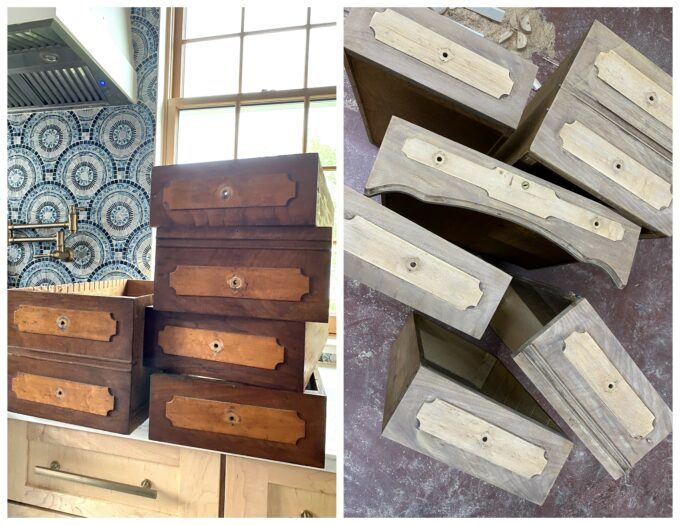
Look at the difference!

Time to move on to the body of the desk! I used the same technique here, but had to repeat several times.

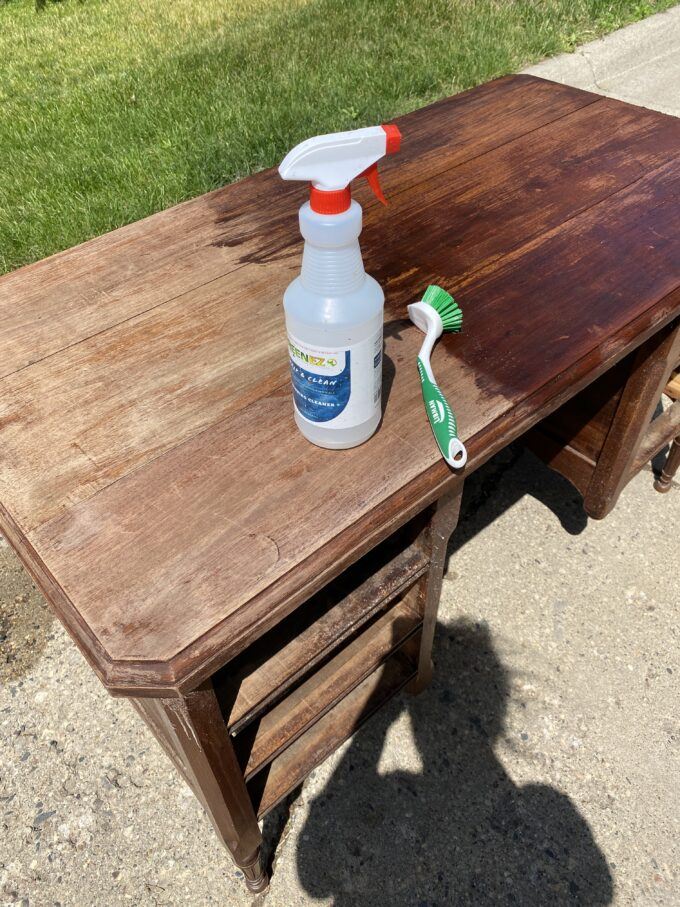
I used my multi-tool to sand off the finish in those corners that were hard to get otherwise. The finish sanded off pretty easily after it had the finishing cleaner sitting on it for awhile.

I flipped the desk upside down to tackle the feet, and was having trouble getting the Finishing Cleaner product to work as well. So it was time to pull out the Easy Off and see how that would work! It comes out a bit foamy, and was very pleased to see it pulling the stain out before my eyes. Be sure to wear gloves and a mask with this stuff! It’s intense!

I let the Easy Off oven cleaner sit and soak in for about 20 minutes, then sprayed it down and let it sit in the sun to dry. I had to repeat this twice as well, but the result was great!

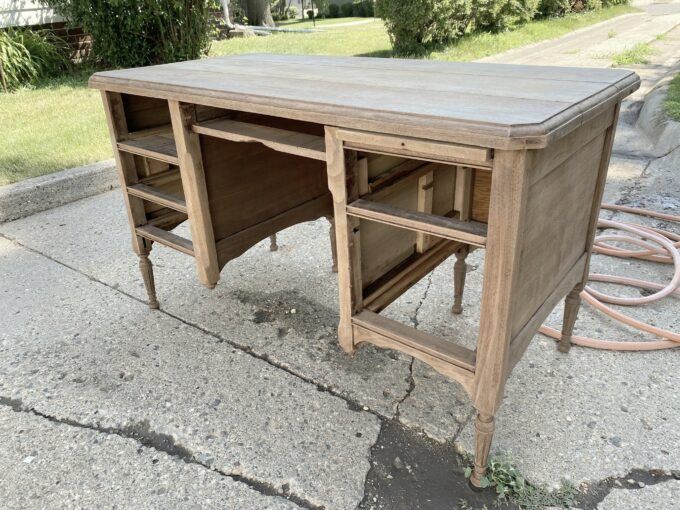
It was at this point that we decided last-minute to put new wood veneer on the top surface. Those cracks are pretty gaping, and we’ve always wanted to try our hand at veneering! Have you done it before?

We share the whole process of applying new wood veneer to a surface HERE.

How gorgeous does this look?!?!

I used this wax sealer on the top surface, and we’re done! It’s SO GOOD!

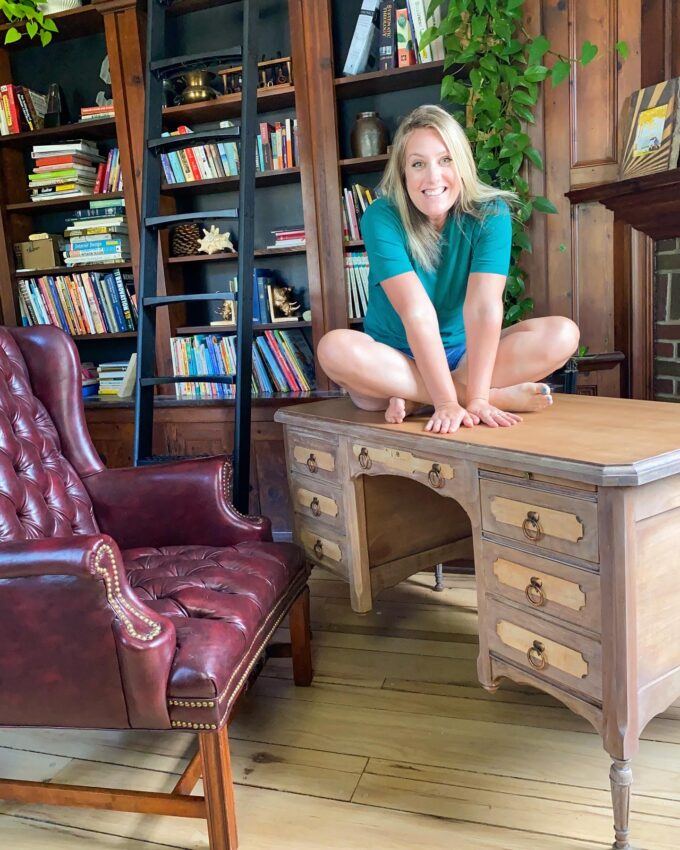
My favorite part of this whole vibe is that the wood tone of the desk contrasts the deep wood tone of the library walls and shelving. Do you love it?! Tell me what you think in the comments!!

Thank you for pinning!

Related:

  • How to Apply Wood Veneer

    If you follow us on the 'gram, you know I've been stripping the finish off…

  • Plaster-Hardened Fabric Planters

    I've had this idea in the back of my mind for quite awhile... why not…

  • Installing a Sliding Barndoor

    This is a sponsored post written by me on behalf of Masonite Doors. All opinions…

About Bethany Sy

Nick and Bethany Sy are the creative free-spirits behind DIY/Lifestyle blog, Reality Daydream. They recently purchased a historic mansion and have been documenting the ups and downs of renovation and making this home their own... all while sharing tips and tutorials along the way! When they found themselves in the trenches of infertility, they started a journey that would prove to be their most important DIY project ever, and have 3 beautiful girls to show for it. <3

« When to Hire a Contractor (and when not to)
How to Apply Wood Veneer »

Comments

  1. 6

    angie says

    August 9, 2022 at 7:06 pm

    love, love, love this room

    Reply
  2. 7

    Julie says

    August 6, 2022 at 1:28 am

    Gorgeous!

    Reply
  3. 8

    Becky says

    August 2, 2022 at 2:01 pm

    Beautiful!

    Reply
  4. 9

    Mea Cadwell says

    July 30, 2022 at 10:39 pm

    I’m sorry but I’m not a fan. The desk looks like it’s been sitting out in the sun for too long and turned ashy. I much prefer the warmer brown tones from stained wood.

    But, how boring the world would be if we all liked the same things.

    Reply
    • 10

      Trudy Eby says

      July 31, 2022 at 2:04 pm

      I agree, you can have light wood without it looking ashy. Try oxalic acid. Easy Off is not environmentally friendly and you are washing it into your lawn where your kids play. It also isn’t a good idea to hose off furniture. Some wood glues can dissolve and you risk weakening your furniture.
      Normally I wouldn’t post something so negative, but Bethany, you are an influencer and I don’t think this is good information to spread.

      Reply
  5. 11

    Lori says

    July 28, 2022 at 10:05 pm

    It looks awesome!! Im going to have to try the easy off method myself sometime.

    Reply

Leave a Reply Cancel reply

Your email address will not be published. Required fields are marked *

  • Facebook
  • Instagram
  • Pinterest
  • RSS
  • YouTube
We are Nick and Bethany! Welcome to our blog, Reality Daydream where we share our DIY adventures!

realitydaydream

I only want your honesty if you love it. 🤣 Jk. I only want your honesty if you love it. 🤣

Jk. Give it to me straight. I can take it.
It’s that time again! A new fresh month is about It’s that time again! A new fresh month is about to start. Jumpstart your goals and good habits with my free printable habit tracker! 🌈 

It makes the mundane daily tasks fun and BEAUTIFUL!!

Link to download in my profile. 😘
Still can’t get over these shelves. 😍 These Still can’t get over these shelves. 😍

These Aksel Radius Floating Shelves by @shelfology are the perfect finishing touch to this wall in our kitchen. 🙌

#gifted #shelfology #radshelfie #floatingshelf #akselradius
I needed an instant-gratification project today fo I needed an instant-gratification project today for my well-being, and this little wooden stand was so fun and fast!

Details and links to everything in this pic in Stories!
Load More Follow on Instagram
View of our entryway of our historic mansion that we're slowly renovating and making our own.
Click here for lots of art projects using only wood stain on furniture!!
Please feel free to share or pin my posts! You're welcome to use ONE of my images (no collages or pinnables) with a link back to the corresponding post. Please do not edit or crop that single image in any way. Improper use of my photos, ideas or words is a violation of copyright. Thank you!

Categories

Attention: Almost any do-it-yourself project involves risk of some sort. Your tools, materials, and skills will vary, as will the conditions at your project site. Reality Daydream has made every effort to be complete and accurate in the instructions of the plans on this website. Reality Daydream will not assume any responsibility or liability for damages or losses sustained or incurred in the course of your project or in the use of the item you create. Always follow the manufacturer’s operating instructions in the use of tools, check and follow your local building codes, and observe all commonly accepted safety precautions.


Copyright © 2023 · Modern Blogger Pro On Genesis Framework · Customizations by Sweet Theory Designs · Privacy Policy · Log in