Lately I’ve talked a lot about my love for plants, and how I’m so proud of myself for defeating the dreaded black thumb. I’ve gotten a LOT of questions about that, and what exactly I do to keep my plants alive, so I wrote a post sharing details about HOW I FOUND MY GREEN THUMB! But today, I want to show you a suuuuper fun Vertical ‘Living Wall’ Planter installation made from wooden bowls. It’s freaking amazing.
 *this post contains affiliate links*
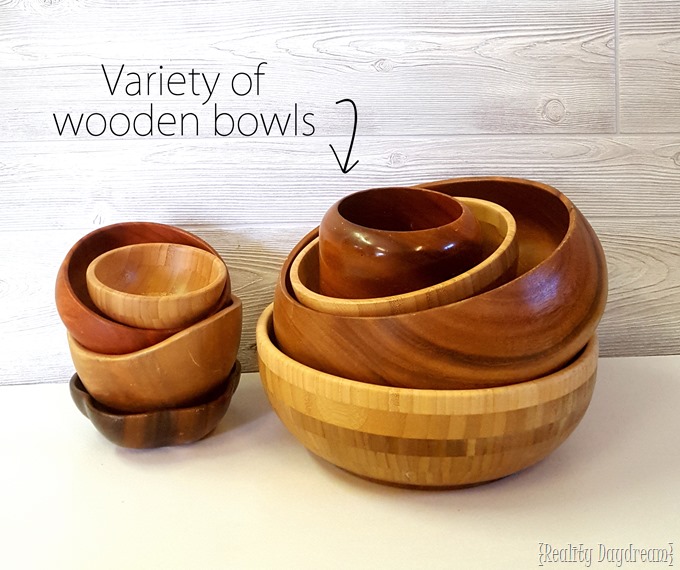
I find wooden bowls all the time at the thrift store, garage sales, and even on the clearance rack at Target. If you’re looking for them, they’re EVERYWHERE. (if you’re not the junkin type, there are TONS of wooden bowls in all sizes and shades here on Amazon). At first I would buy them because I love wooden things, and I hoard little ‘trinket holders’ like it’s nobody’s business. But once I had accumulated a handful of them, I had the most brilliant idea… CUT THEM IN HALF! #staywithme #asusual
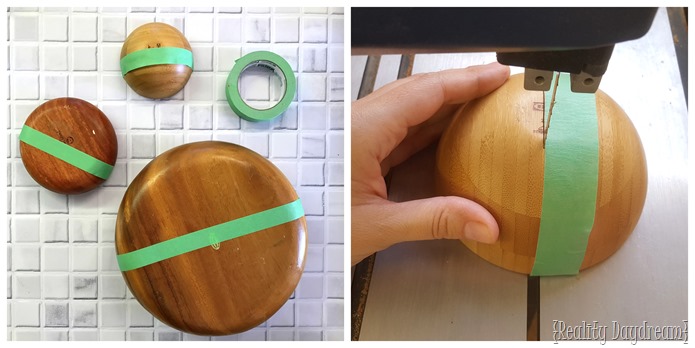
We pretty much just eyed where the center of the bowl is, and pulled the tape taut while putting it on the bowl to make sure the tape was straight. Having your tape straight is more important than being perfectly in the center. The reason the tape looks CLEARLY off center, is because we were shooting for one edge of the tape being the center line to cut with the band saw.

I found a piece of 1/2” plywood that had cool woodgrain on it, and laid out my bowls randomly to see if it would be about the right size (2’x4’), and it was perfect! If you have more or fewer bowls than me, you’ll want to adjust the dimensions of your plywood accordingly.
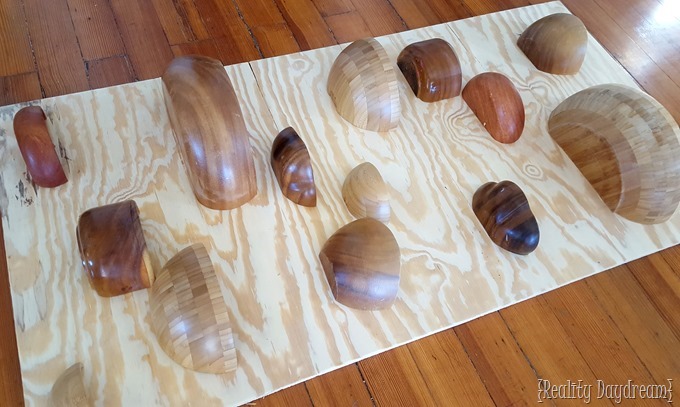
I routed the edges of my plywood to be rounded, and stained it a medium chocolatey brown (this shade I think). After that was dry, I laid out my bowls again… this time I arranged them exactly how I wanted them. Using a T-square, I was able to make sure that each bowl was perfectly straight, and used a white colored pencil to trace around each bowl.
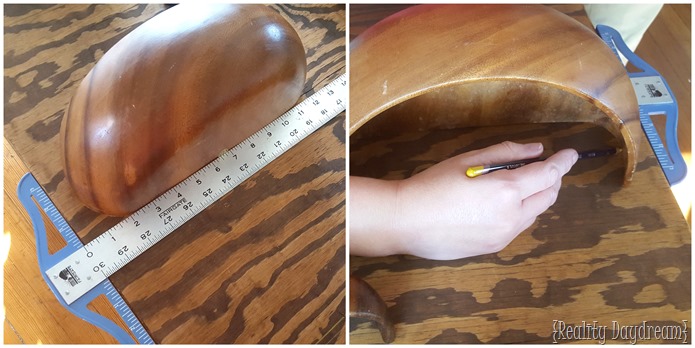
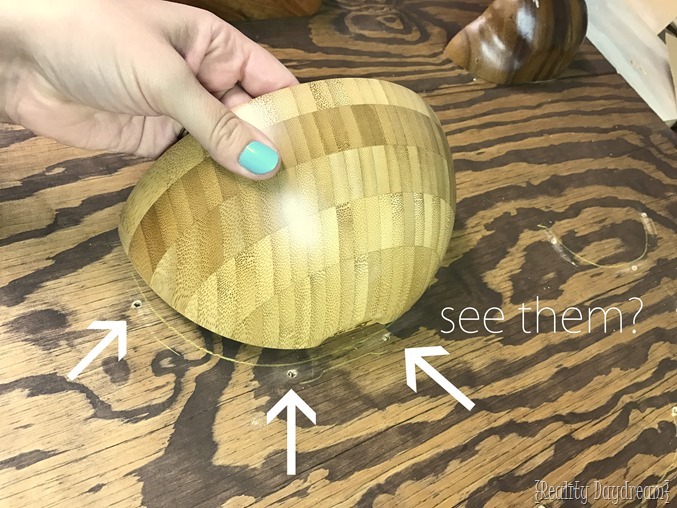
Then we drilled 4 pilot holds in each traced-out section with a 1/8” bit. The reason for this is so that when we’re screwing in screws from the backside, we’ll KNOW that it’s going straight into the bowl.
In an effort to really seal these buggers on, we applied a strip of this clear silicone before screwing the bowls down tight.
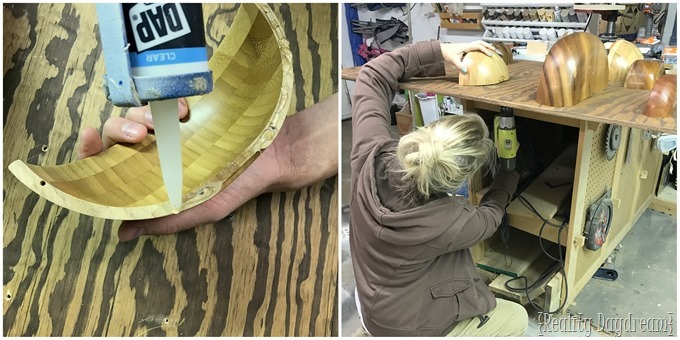
And repeat, repeat, repeat.
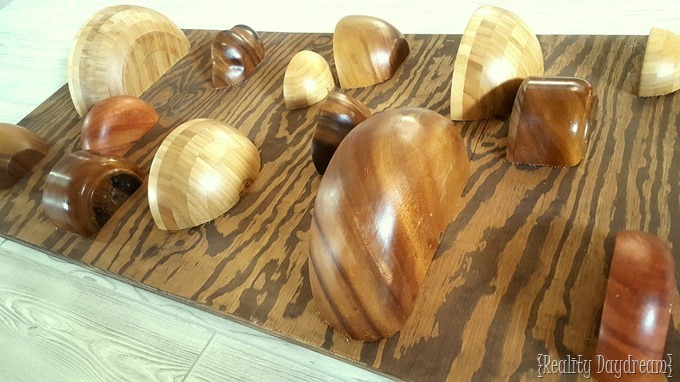
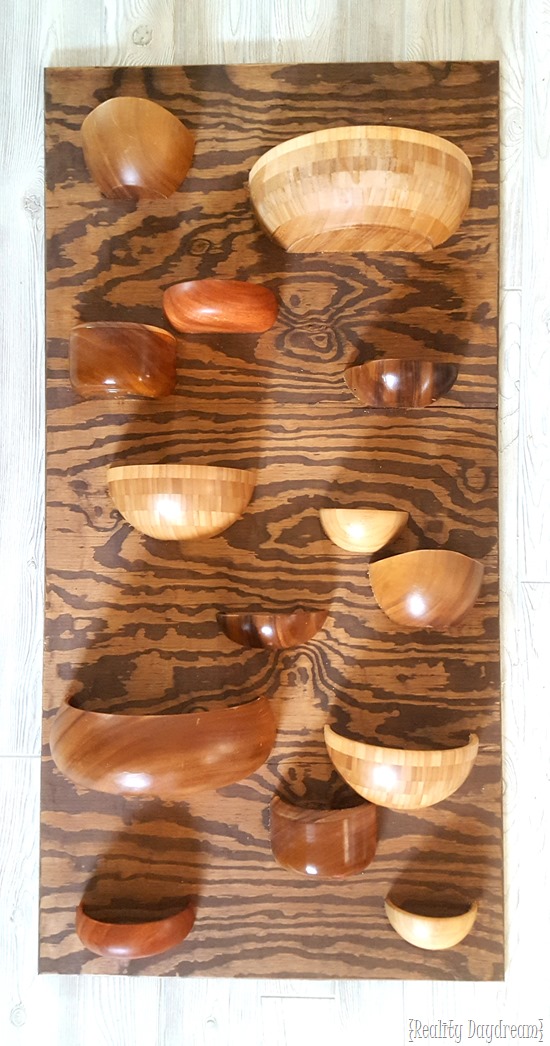
SO. Using the silicone to seal the wooden bowl to the wooden substrate is one thing. Yessss… it will prevent water from dripping through the crack and running down the entire thing. But you also don’t just want standing water on wood, because it will rot. And so even though I was ITCHING to get some plants in these bowls already (!!!), I decided to take that extra step and spray a rubber coating on the inside to truly water-proof them. Taping is the worst, but we found this tape dispenser that dispenses painters tape AND PAPER THAT IS ALREADY ATTACHED TO THE EDGE OF THE TAPE. I seriously hope whoever invented this device is a multi-millionaire.

This thing is finally ready to mount on the wall and load up with plants! We used two heavy duty hangers on the back. One on the top, and one on the bottom. Don’t want this sucka to fall!
I threw a few rocks in each bowl, and then lined them with foil… using scissors to cut off the excess (cutting foil actually sharpens your scissors!)

Then poke a couple holes in the bottom of the foil so the water can drain out. The rocks below hold the foil up so that if there’s any standing water, the roots of the plant won’t be sitting in it. Since we don’t have drainage holes, ya know?

When you’re done popping your plants in, you might end up with a mess. But nothing a quick vacuum job can’t take care of! Look at that poor MCM shelf Nick just built me! Wahhhh!

But the final product is sooooo worth it! LOVE.ME.SOME.PLANTS!
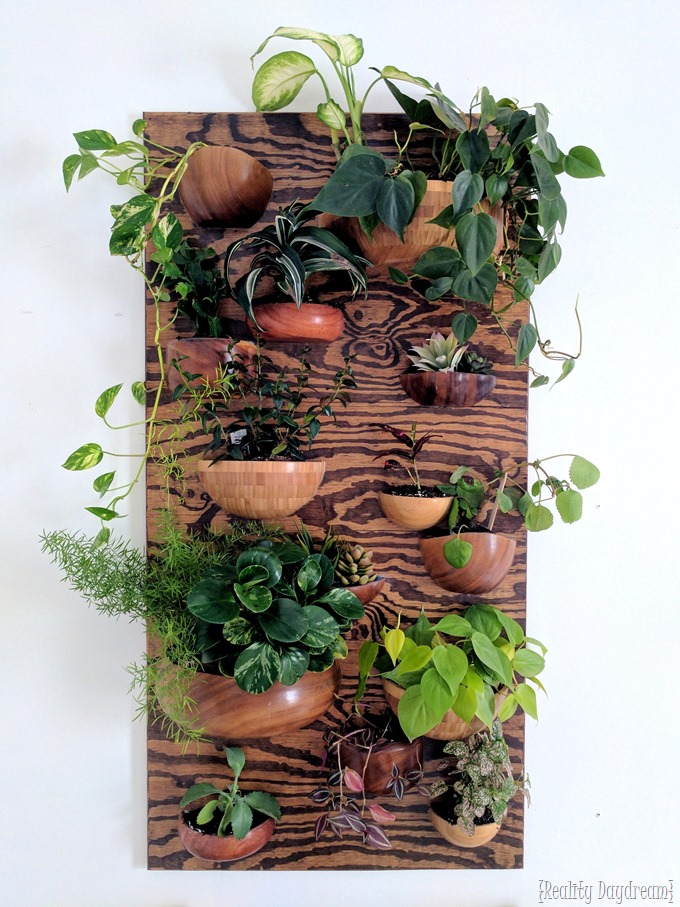
Since each plant is in a little tin foil container, it will be easy for my to pull them out every week or two to check for standing water. Or if I want to put one in a planter in another room for awhile, it will be easy to move them around! But for now, I loooove everything about how this looks in our Master Bedroom.


Also, did you notice we painted the trim in our bedroom?! It’s a super creamy ‘greige’ that leans more to the beige than the gray. I love how subtle it is, yet allows the trim to stand apart from the white walls. I’ll be showing more of it in future bedroom posts! Please don’t mind how we’re not finished painting the trim around the closet in the pic above. (OOPSY!) Also, don’t mind
Let me just say that I’m SO COMPLETELY OBSESSED with this ‘living wall’ vertical planter. Like, I keep going upstairs to my room to look at it. I should probably consider making another one for downstairs, huh?!
I do have a couple ‘bowl halves’ leftover, and I have an idea for a scaled-down version of this. Coming soon!
~Bethany
~~~~~~~~~~~~~~~~~~~~~~~
You might also enjoy these other plant-related projects and tutorials I’ve done!
Thanks for pinning!


I love it!
I absolutely love this — and my husband snagged a bunch of wooden bowls from my grandparents’ estate sale. Hope they’re still in our attic!
Such a great idea you are so clever, I would love to do this on a smaller scale with herbs in my kitchen
This is just what I need for my daughter’s patio wall! I’m a plant-aholic and I live with my daughter, SiL and almost 2y/o grandson. All my plants must be out of his reach because he thinks every one I’ve set out needs to be transplanted and have all it’s leaves ripped off. Lol! Shelves are not practical, but this would be so perfect!
Also, I am constantly picking up, then putting back, those wooden bowls at the thrift stores! Now I can buy them and put them to good use! Thank you! Thank you! Thank you!
Yessss! Do it girl! My 2 year old doesn’t really notice my plants yet, so I’m crossing my fingers. HAHA!
You never cease to amaze me!
I love this! I wish I had a wall that got enough sunlight for this 🙁
Amazing. Truly. Thanks so much for sharing!
Thanks Carrie! <3