• Home
  • About
  • Tutorials
  • Recipes
  • Furniture
  • Contact
    • Contact
    • Infertility
    • Disclosure
    • Privacy Policy
  • Shop
    • Facebook
    • Instagram
    • Pinterest

Reality Daydream

The Dream is Free, The Hustle Sold Separately

  • Home
  • About
  • Tutorials
  • Recipes
  • Furniture
  • Contact
    • Contact
    • Infertility
    • Disclosure
    • Privacy Policy
  • Shop

Making a Mug into a Planter… by Drilling a Drainage Hole!

January 13, 2017 by Bethany Sy

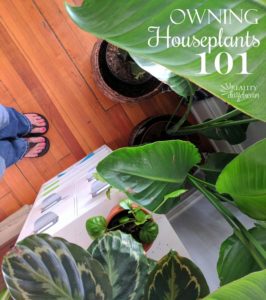
At the beginning of last year, my New Year’s resolution was to acquire more plants and keep them alive. I was pretty successful, and have acquired MANY plants in the last 12 months. Nick would second that… it’s become a bit of an obsession. I love learning about different plants, how to care for them, and how to propagate them, etc! (Psst! I wrote an entire post as a Beginner’s Guide to Keeping Houseplants Alive!

Turn basic ceramic mugs into cute planting pots... by drilling a drainage hole in the bottom with a Diamond Bit! {Reality Daydream}*this post contains affiliate links*

And if there’s one thing I’ve learned about plants… it’s that they need ‘drainage holes’ in their container.

OR THEY WILL DIE.

Every time.

You see, the soil may feel dry on top… so you go to water your thirsty little plant, right?! But the soil at the bottom of the pot (where you can’t see or feel), your plant’s roots are just sitting stagnant in old icky water that you didn’t even know about! The roots eventually rot, the plant dies, and you shed tears of shame and tragic loss of innocent plant life, and declare yourself to have a permanent black thumb.

But! I’m hear to show you how you can make just about any ‘vessel’ a planter!

I found these cute ceramic mugs at Target (here, here, and here) and loved the colors and textures. Nick and I had decided to give each of our Grandmothers a cute plant for Christmas. So I set out to make a mug into a planter!

Turn basic ceramic mugs (or just about any vessel) into planters with holes in the bottom! {Reality Daydream}

After buying these, I was itching to get some plants potted! I headed out to the garage with my diamond drill bit

The beauty of this method is that you can drill drainage holes in so many different types of pots, including glass, ceramic, concrete, granite, travertine, marble, etc!

mugs as planters

Pop that Diamond Bit into your drill press or hand drill, and line everything up just so. Except let’s be honest, the dirt you put in your mug is NOT going to care if your hole is centered, soooo…

Here’s the thing that makes this much different than drilling into wood…YOU HAVE TO ADD WATER. It’s weird. But stay with me.

When drilling through ceramic with your diamond drill bit, BE SURE to add water! {Reality Daydream}

With only slight pressure, start drilling. Continue to apply slight pressure. For these mugs, it took us about 1 minute to drill through. We made a video to show the process… It’s literally 1 minute long. Don’t be intimidated by our intense filmography skills.


P.S… if you’re reading this post in an email or reader, it might not show the video. If that’s the case, click here! If you aren’t subscribed to our email list and would like to get an email each time we publish a new post, click here!

BOOM! We turned this mug into a planter!

mugs as planters1

I like to put a coffee filter down into the bottom of my planters to prevent the fresh/loose soil from trickling out.

Turn ordinary mugs into planters or 'planting pots' by drilling a hole in the bottom with a Diamond Bit {Reality Daydream}

Then add in a bit of soil and your plant, give it a good drink of water, and then pat yourself on the back!

Turn basic ceramic mugs into cute planting pots... by drilling a drainage hole in the bottom with a Diamond Bit! {Reality Daydream}Turn any cute mug into a little planter pot by drilling your own drainage hole with a Diamond Bit! {Reality Daydream}

Fun and easy, right?! And isn’t that plant on the right WEIRD?! It’s called a ‘Pregnant Onion’, which basically looks like a regular onion, only it grows on the top of the soil, and sprouts little babies out the base. SO CUTE. I love weird plants!

Let me know if you give it a try drilling drainage holes for yourself! You can make ANY MUG into a planter! #mindblown …And be sure to check out our other ‘Planter Tutorials’ from our archives! These two are my absolute FAVE! (click the pic below to be taken to that post!)

S

S

Step-by-Step-tutorial-for-these-darling-Cross-Base-Terrariums...-with-faux-succulents-or-real-if

Lots-of-tips-for-curing-your-black-thumb-and-keeping-houseplants-alive-101-Reality-Daydream

Thanks for pinning!

Learn how to make a cute mug (or just about ANYTHING) into a planter pot by drilling drainage holes with a DIamon Bit! {Reality Daydream}

Related:

  • How to fix a hole in the wall!

    Got a hole in your wall that you wish wasn't there? We do! When we…

  • How to Propagate Pothos Plants

    I titled this post 'How to Propagate Pothos Plants' ...but the truth is, this method…

  • Plaster-Hardened Fabric Planters

    I've had this idea in the back of my mind for quite awhile... why not…

About Bethany Sy

Nick and Bethany Sy are the creative free-spirits behind DIY/Lifestyle blog, Reality Daydream. They recently purchased a historic mansion and have been documenting the ups and downs of renovation and making this home their own... all while sharing tips and tutorials along the way! When they found themselves in the trenches of infertility, they started a journey that would prove to be their most important DIY project ever, and have 3 beautiful girls to show for it. <3

« Mid-Century Modern Bookshelf
Kids Playing Card Holder »

Comments

  1. 7

    Rowland Wells says

    July 28, 2020 at 4:33 pm

    The coffee filter is a great idea, you might want to consider re-using used filters. A quick rinse to get some of the oils out would probably make the filter fine for re-use under soil.

    Reply
    • 8

      CYNTHIA J KENDAL says

      February 24, 2021 at 8:42 pm

      I used to use several coffee filters folded up for the base only of indoor and outdoor pots. Now I use cut up rags instead. They all will rot over time, but paper rots faster than folded up fabric like towels.

      Reply
  2. 9

    Joanne says

    October 18, 2019 at 4:39 pm

    Ok.. hopefully this isn’t a ‘stupid question”. I want to be able to make mug /cup planters , but don’t want to have ugly catch trays for the water that eventually will come out the drain holes. I just feel like it takes away from the look/style , when you have some mismatch tray or even a clear plastic tray that will become brittle or cloudy. Any tips or suggestion for an appealing alternative to keep from ruining the surface that I place my little planters?

    Reply
    • 10

      Bethany Sy says

      October 21, 2019 at 12:47 pm

      They make clear plastic catch trays that I use. They aren’t as obvious.

      Reply
    • 11

      Glen Hofmann says

      February 8, 2020 at 3:14 am

      You could use cup and saucer sets where the saucer serves as the drip tray.

      Reply
    • 12

      CYNTHIA J KENDALl says

      February 24, 2021 at 8:49 pm

      Look for an extensive selection of all sized glazed (Important) saucers and trays. Lovely patterns and colors and shapes. That’s what I use for my many small decorative planters.

      Reply
      • 13

        CYNTHIA J KENDALL says

        February 24, 2021 at 8:49 pm

        I found all of mine on Etsy

        Reply
    • 14

      JOy says

      March 24, 2021 at 4:56 pm

      small plate from dollar tree in coordinating color to match the mug.

      Reply
  3. 15

    laura cline says

    May 16, 2017 at 7:13 pm

    Hi,
    What size diamond drill bit did you use to make the holes in mugs?

    Than you,
    Laura

    Reply
    • 16

      Bethany Sy says

      May 16, 2017 at 7:23 pm

      I believe it was 3/8″
      <3

      Reply
  4. 17

    Pamela says

    January 19, 2017 at 8:12 pm

    We have, indeed, been turning various ceramic cache pots into planters by drilling holes in the bottom. One tip we have followed is to start the diamond drill bit at an angle to wear away the shiny finish at one point before putting it on the strict vertical. This prevents the bit from skating around on that shiny finish before it takes hold.

    Reply

Leave a Reply Cancel reply

Your email address will not be published. Required fields are marked *

  • Facebook
  • Instagram
  • Pinterest
  • RSS
  • YouTube
We are Nick and Bethany! Welcome to our blog, Reality Daydream where we share our DIY adventures!

realitydaydream

If ya just need a slab of wood, grab a cutting boa If ya just need a slab of wood, grab a cutting board when you’re at Target or Walmart! They’re made of hard wood!

I used this cutting board to experiment and make some prototypes for a large-scale piece of art I’m doing for our church. It’s got me EXCITED!

Follow along for that project- happening soooon!

@dapproducts @dremel @jet.woodworking
You’ve all seen the video, but here’s some sti You’ve all seen the video, but here’s some still shots of the kitchen wall in all its glory!! 

The Aksel Radius Floating Shelves by @shelfology were the perfect finishing touch! 

Should I do a house tour of our main floor this week?!?! 🙌🌿

#sponsored #floatingshelf #radshelfie
Sometimes we just need to draw out a perfectly sca Sometimes we just need to draw out a perfectly scaled rendering of our design plan to get the hubs on board with our vision. He just couldn’t see it otherwise!

We’re SO THRILLED with how this kitchen wall project turned out. There will be a blog post coming soon with all the details and sources!

What is your MOST FAVORITE FEATURE of the finished wall?!
Do y’all know what room this is now? Comment you Do y’all know what room this is now? Comment your guess below! I’m so glad to have it FINISHED! What a labor of love. 💜

SHARE with a friend that’s renovating so they know they’re not alone!

#renovation #renovationmaison #historichomes #historichouse #historicarchitecture
Load More Follow on Instagram
View of our entryway of our historic mansion that we're slowly renovating and making our own.
Click here for lots of art projects using only wood stain on furniture!!
Please feel free to share or pin my posts! You're welcome to use ONE of my images (no collages or pinnables) with a link back to the corresponding post. Please do not edit or crop that single image in any way. Improper use of my photos, ideas or words is a violation of copyright. Thank you!

Categories

Attention: Almost any do-it-yourself project involves risk of some sort. Your tools, materials, and skills will vary, as will the conditions at your project site. Reality Daydream has made every effort to be complete and accurate in the instructions of the plans on this website. Reality Daydream will not assume any responsibility or liability for damages or losses sustained or incurred in the course of your project or in the use of the item you create. Always follow the manufacturer’s operating instructions in the use of tools, check and follow your local building codes, and observe all commonly accepted safety precautions.


Copyright © 2023 · Modern Blogger Pro On Genesis Framework · Customizations by Sweet Theory Designs · Privacy Policy · Log in