• Home
  • About
  • Tutorials
  • Recipes
  • Furniture
  • Contact
    • Contact
    • Infertility
    • Disclosure
    • Privacy Policy
  • Shop
    • Facebook
    • Instagram
    • Pinterest

Reality Daydream

The Dream is Free, The Hustle Sold Separately

  • Home
  • About
  • Tutorials
  • Recipes
  • Furniture
  • Contact
    • Contact
    • Infertility
    • Disclosure
    • Privacy Policy
  • Shop

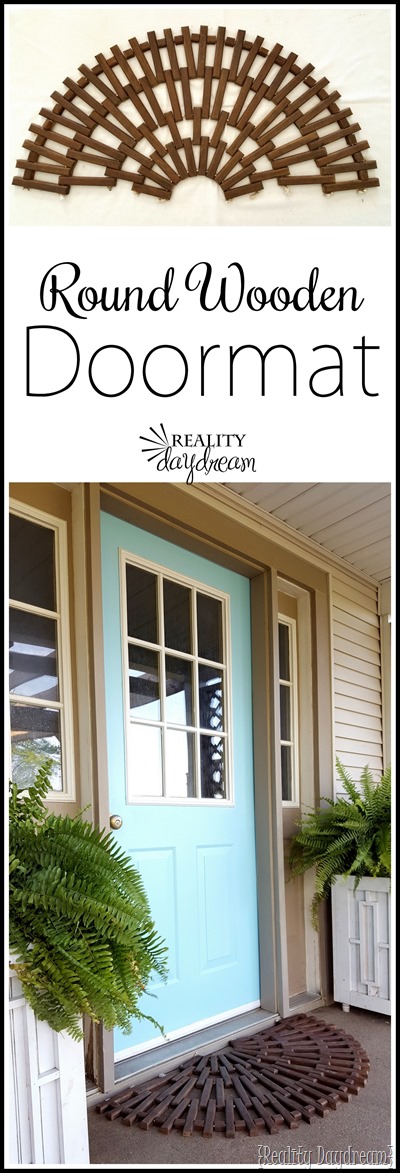
Rounded Wooden Doormat Tutorial

June 9, 2016 by Bethany Sy

My tutorial for our Half Circle Wooden Doormat has been very popular since I posted it almost 2 years ago. I love it when people email us their versions of our project… makes my DIY-lovin’ heart happy. I even noticed that one of my blogging friends from Shades of Blue Interiors knocked one out recently. So awesome!

Since making my first version, I’ve learned a few things about this project and what works and what doesn’t. And since I was building myself a second rounded wooden doormat anyway, I thought ‘why not just post a better-slash-updated tutorial’!

I’m feeling so refreshed this morning, and sitting outside on this very porch typing this blog post. So glorious!

Wooden Doormat Tutorial {Reality Daydream}

This post contains affiliate links. Please see our Disclosure Policy for all the details.

Rounded Wooden Doormat Supplies

  • Board with 1” thickness (we used poplar)
  • 1/4” nylon string
  • 1/4” Roundover Router Bit
  • Stain
  • Sealer
  • 5/16” Drill Bit


Nick ripped down a poplar board (with a 1”thickness) into 1” strips for me. Then I used miter saw (we use this one) to chop those 1” strips into the following dimensions.

wooden door mat1

It’s important that these are cut so that the grain of the wood is going the long way… NOT across. I made that mistake the first time I made this rug, and the rungs started breaking after being out in the elements for a few months.

I used a 1/4” Roundover Bit to round off the 4 edges that will get foot traffic so the rug doesn’t have a ‘sharp’ feeling on those bare feet. Then made piles of the 3 sizes.

20160318_133642

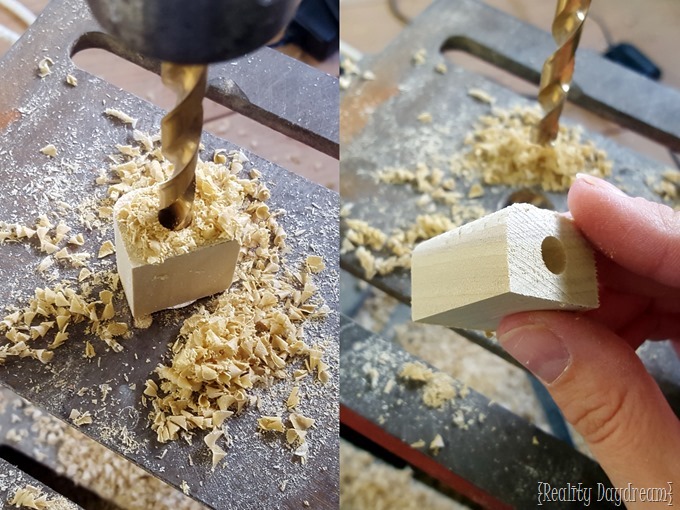
It’s time to drill some holes now! I got the drill press set up with a 5/16” bit, and drilled holes through the little square chunks first (going through the long way).
wooden door mat2

Then I drilled two holes in each of the 5” and 7” rungs, as follows:

Dimensions for Rounded Wooden Doormat {Reality Daydream}

Once all the holes were drilled, some of them had some rough edges so I did a bit of sanding. Then I stained each one using a cotton cloth and a rich Dark Walnut shade.
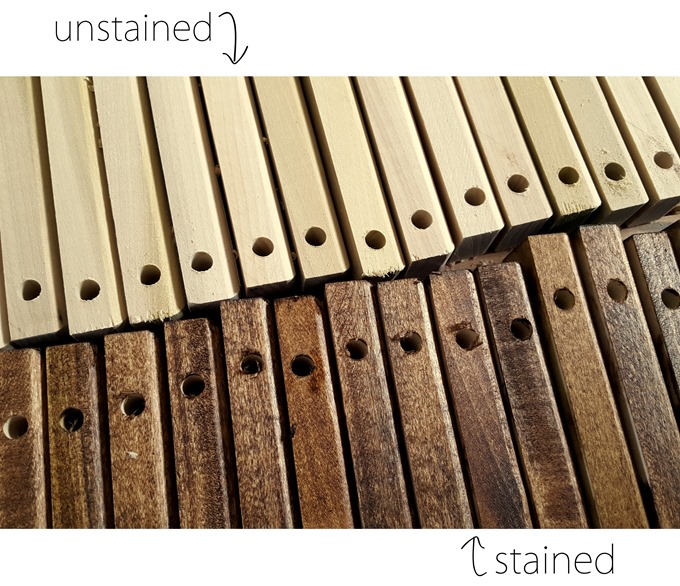
Rounded Wooden Doormat - stained a rich chocolate brown! {Reality Daydream}

Using 1/4” White String, start stringing up your first row. This will be those 10 5” rungs that have a hole drilled 1/2” from both edges. You will want to burn the end of the string to make it easier to string up. You’ll end up burning the edges after knotting anyways to avoid unraveling issues. I just kept a candle burning nearby so I could just hold my string over the flame before starting each row.

Round Wooden Doormat Tutorial {Reality Daydream}

NOTE! Cut your string a lot longer than what you think you’ll need each time. Then just cut off the excess after you have the knot tied at the end of each row. These rows use more string than you think! #lessonlearned

Time to string up the next row! You’ll take the rest of the 5” rungs and alternate stringing through the first row and the new rungs (going through the hole that’s 1/2” from the edge, NOT the one that’s 1”)… like so:

Stringing up a round wooden outdoor rug or doormat {Reality Daydream}

Now that you’ve used up all your 5” pieces, you’ll start stringing up a row of 7” pieces, putting two between each, (on the 1/2” end) like so…

Assembling a DIY Wooden Doormat {Reality Daydream} #round

Then you’ll string up your final row! You’ll alternate between adding 1 and 2 at a time (on the edge with the hole that’s 1” from the edge), like so…

Build your own rounded wooden doormat! {Reality Daydream}

And FINALLY, string on those little squares between each of the rungs on that last row!

Make a rounded wooden doormat! {Reality Daydream}

In hindsight, I should have routed/stained ALL the edges on the little square pieces, because they don’t always stay put and sometimes flip over… showing the unstained side. But it doesn’t bother me enough to take my rug apart and fix it. Hehe!
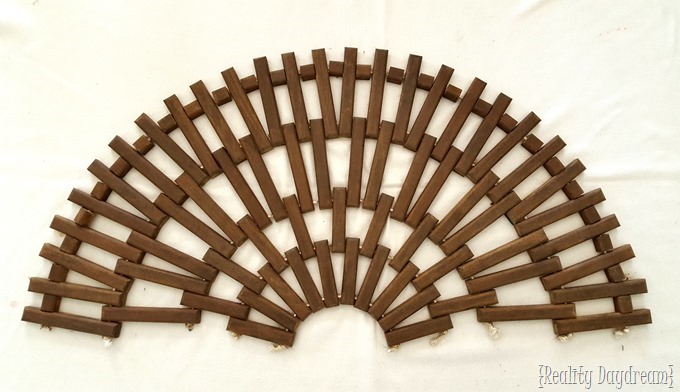
20160608_135533.jpg

After it was completely assembled, I sprayed it with a couple coats of RustOleum Spar Varnish with a Satin sheen. Since the wood isn’t treated for outdoor use, I know this rug won’t last forever. But our covered porch and the varnish should give it a decent life. And by the time it starts to deteriorate, I’ll be ready for something new anyway!

Rounded Wooden Doormat Tutorial - Reality Daydream #curbappeal #outdoor #rug #round

Round Wooden Doormat Tutorial - Reality Daydream #rounded #outdoor #rug #diy

You know I always like to incorporate a little wood and a little texture in all the spaces I design, and this round wooden doormat provides BOTH for our little porchy area!

This bad boy turned out even better than I imagined! It feels like it pulls together this whole space!

Front Door and Porch Goals {Reality Daydream}

I love how the circular shape of the doormat echoes the circular shape of our pergola and patio! And how all the other little elements of the porch all come together in a nice little welcoming package. Be sure to click around and check out these other tutorials!

Rounded Patio and Pergola { Reality Daydream }

Aqua Front Door Paint {Reality Daydream}

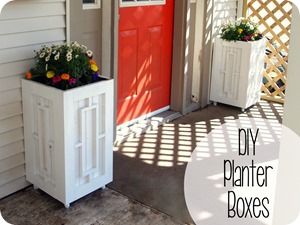
DIY Planter boxes with Geometric trimwork! Click through for the full tutorial! {Sawdust & Embryos}

DIY Native American wooden artwork used as house number sign! {Sawdust and Embryos}DIY Custom Pergola Tutorial (Sawdust and Embryos)Turn-an-old-mailbox-into-a-planter-and-affix-it-to-the-side-of-your-house-Sawdust-&-Embryos_th


Thanks for pinning!

Build your own rounded wooden doormat! - Reality Daydream #round #outdoor #rug #wood #curbappeal

Related:

  • Centerpiece Tray Tutorial
    Wooden Centerpiece Tray Tutorial

    I have a fun and easy building project for you! And while I do end…

  • DIY fabric-wrapped bulletin boards
    DIY Fabric-Covered Bulletin Tutorial

    My kids are getting to the age where they want to tape pictures, cards, notes...…

  • Make this propagation station with test tubes!
    Test Tube Propagation Station Tutorial

    I've been needing to figure out a solution for my overwhelming plant propagation situation for…

About Bethany Sy

Nick and Bethany Sy are the creative free-spirits behind DIY/Lifestyle blog, Reality Daydream. They recently purchased a historic mansion and have been documenting the ups and downs of renovation and making this home their own... all while sharing tips and tutorials along the way! When they found themselves in the trenches of infertility, they started a journey that would prove to be their most important DIY project ever, and have 3 beautiful girls to show for it. <3

« What we’ve been up to, and project sneak peaks!
Monster Toss Yard Game »

Comments

  1. 15

    bjnew says

    June 12, 2016 at 6:58 pm

    How can I print this tutorial for this round wooden doormat?

    Reply
  2. 16

    Rose Mcdonald Carroll Farr says

    June 10, 2016 at 3:17 pm

    I don’t have the ability to rip the board to one inch, is there something that I can buy as 1 by 1 and cut in peices?

    Reply
    • 17

      Beth @ Reality Daydream says

      June 11, 2016 at 12:27 am

      Rose, do you have a miter saw? You could cut your board to 7″ lengths and 5″ lengths, and then slice them into 1″ strips one at a time. Does that make sense?

      Reply
      • 18

        Rose Mcdonald Carroll Farr says

        June 14, 2016 at 7:22 pm

        Yes I do thanks

        Reply
  3. 19

    Ryan says

    June 9, 2016 at 1:06 pm

    Very nicely done. Congrats and thanks for the idea.

    Reply
  4. 20

    Kenz @ Interiors By Kenz says

    June 3, 2014 at 10:36 pm

    This is so cool! I love what a unique piece this is. Your porch is so cute.

    Reply
  5. 21

    Meagan B. says

    May 28, 2014 at 4:27 pm

    This is a great project – love it and will totally be making it this weekend!

    Reply
  6. 22

    Stephanie Taylor says

    May 27, 2014 at 7:35 am

    Beth, I love it!

    Reply
  7. 23

    Heather says

    May 26, 2014 at 7:56 pm

    That is perfect!!

    Reply
  8. 24

    Vikki says

    May 26, 2014 at 9:56 am

    Genius doormat! It looks perfect in your space.
    Vikki in VA

    Reply
  9. 25

    Deb Dugar says

    May 26, 2014 at 8:33 am

    We just acquired the house next door. You have lots of good ideas that I plan to use for both houses. Thanks for being here! Deb

    Reply
  10. 26

    Lisa says

    May 26, 2014 at 7:36 am

    Oh my goodness, this is awesome. And yes, it pulls the space together perfectly!!

    Reply

Trackbacks

  1. DIY Welcome Mats That Are Good for the "Sole" - landeelu.com says:
    February 12, 2016 at 10:00 am

    […] Half-Circle Wooden Doormat DIY Tutorial | Reality Daydream […]

    Reply
  2. Wooden Kilim Wall Art - Sawdust and Embryos says:
    August 20, 2015 at 3:42 pm

    […] to our porchy area since doing this wooden artwork!. The Half Circle Wooden Doormat tutorial is HERE, and the mailbox planter idea is HERE, and those box planters flanking the door? There’s a […]

    Reply
  3. Creative Door Mats You Can Make Yourself | Decorating Your Small Space says:
    June 16, 2015 at 9:17 pm

    […] the idea of a wooden door mat, but want a little more style? Try this half circle door mat tutorial from Beth at ‘Sawdust & Embryos’. Simple instructions walk you through this […]

    Reply
  4. A Tour of our Homestead! - Sawdust and Embryos says:
    May 28, 2015 at 4:28 pm

    […] actual front door rarely gets used. Everyone enters right into the kitchen through this door. The Wooden Doormat, Geometric planters, and Kilim House Number Art were all DIY […]

    Reply

Leave a Reply to Stephanie Taylor Cancel reply

Your email address will not be published. Required fields are marked *

Recipe Rating


  • Facebook
  • Instagram
  • Pinterest
  • RSS
  • YouTube
We are Nick and Bethany! Welcome to our blog, Reality Daydream where we share our DIY adventures!
Click here for lots of art projects using only wood stain on furniture!!
Please feel free to share or pin my posts! You're welcome to use ONE of my images (no collages or pinnables) with a link back to the corresponding post. Please do not edit or crop that single image in any way. Improper use of my photos, ideas or words is a violation of copyright. Thank you!

Categories

Attention: Almost any do-it-yourself project involves risk of some sort. Your tools, materials, and skills will vary, as will the conditions at your project site. Reality Daydream has made every effort to be complete and accurate in the instructions of the plans on this website. Reality Daydream will not assume any responsibility or liability for damages or losses sustained or incurred in the course of your project or in the use of the item you create. Always follow the manufacturer’s operating instructions in the use of tools, check and follow your local building codes, and observe all commonly accepted safety precautions.


Copyright © 2025 · Modern Blogger Pro On Genesis Framework · Customizations by Sweet Theory Designs · Privacy Policy · Log in