For those of you that aren’t familiar with this series… my mom is an art teacher, and she sends the girls a craft in the mail each month. The twins (5 years old) look forward to it sooooo much! This month, she sent all the things needed to make these super cute foil ornaments! The perfect Christmas crafts for kids! (OKAY adults too).

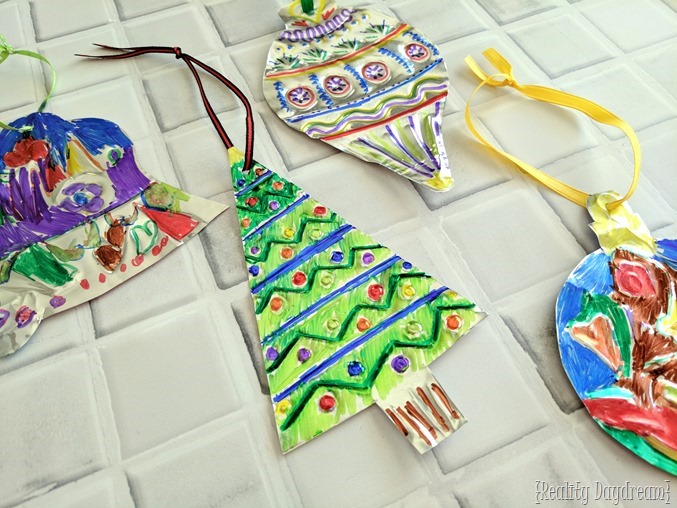
This ‘kids craft’ looked like so much fun that Nick and I each did one too! Can you tell which ones are ours?!
These Embossed Metal Christmas Ornaments are fun and easy, and a super fun craft for kids of any age! The best part is… chances are you already have everything you need to make these!
*this post contains affiliate links*
Supplies for Tooled Metal Christmas Ornaments
- Heavy duty foil or 36 gauge aluminum metal
- Super DULL pencil, or pen cap that comes to only a ‘slight’ point (or if you’re fancy you can use these ball stylus modeling tool)
- Sheet of foam or felt
- Colorful Sharpies
- Ribbon
Start out by cutting your foil or metal into Christmas-y shapes. You could use cookie cutters to trace the shapes onto the foil if you’re not confident in your eyeing abilities. You could do Christmas trees, gingerbread men, ornaments, stars, candy canes, snowflakes… ANY shape!

Gather up your foil shapes, Sharpies, and some scraps of ribbon.

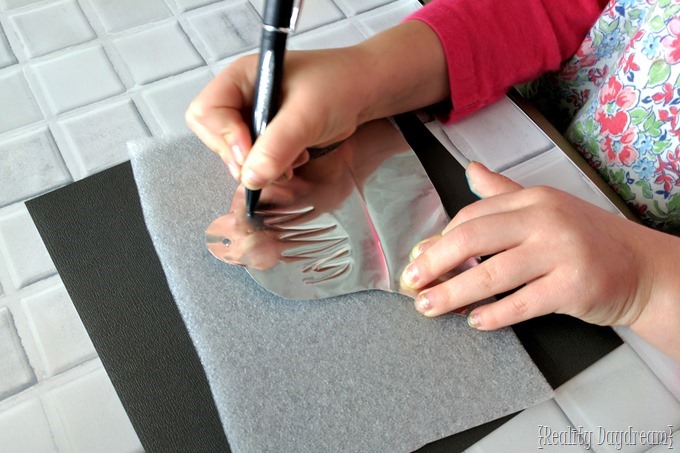
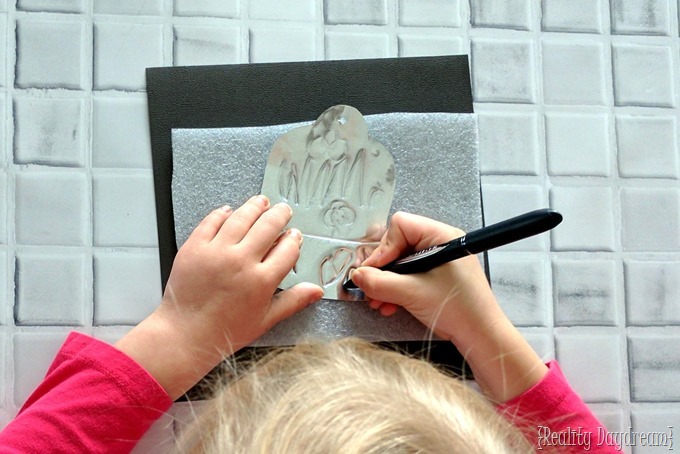
Place your metal shape over the sheet of foam or felt (you might want to fold your felt in half for the extra thickness) and begin pressing designs into the metal with your dull pencil or pen cap (even the tip of your Sharpie cap would work for this!). This is called ‘Tooling’! (you can see some creative examples of this technique here). It creates a beautiful embossed look, while the foam/felt allows some ‘give’ behind the metal. It’s easy to emboss your shapes and designs right onto the ornament!

Repeated patterns are pretty, but also whatever comes out of your 5-year-old’s creative mind is gorgeous too. Just go with it!

You can flip over the ornament and emboss it the opposite direction too! This gives a very cool 3D effect, but just be careful not to go over where you’ve already embossed on the other side. The color with your Sharpies!

Punch a hole at the top of your shape, and loop your ribbon through!


Didn’t they all turn out so unique and fun?! So much color, creativity, and personality in each one! These will make great gift-toppers for grandparents and teachers this year.
If you give these a try, please send pics or tag us @RealityDaydream on social media… we LOVE seeing your projects! And be sure to follow us on Instagram for behind-the-scenes action, inspiration, and project sneak-peeks!
~Bethany
~~~~~~~~~~~~~~~~~~~~~~
Also! Check out these other Christmas-related tutorials from our archives!


I think all of these crafts are wonderful! I have a craft for a simple but easy sled ornament.
I’ve been looking for an easy craft for the twins (5) and baby brother(2.5). We already have all the supplies! Thanks Beth!
YAY you should! Send me pics! <3