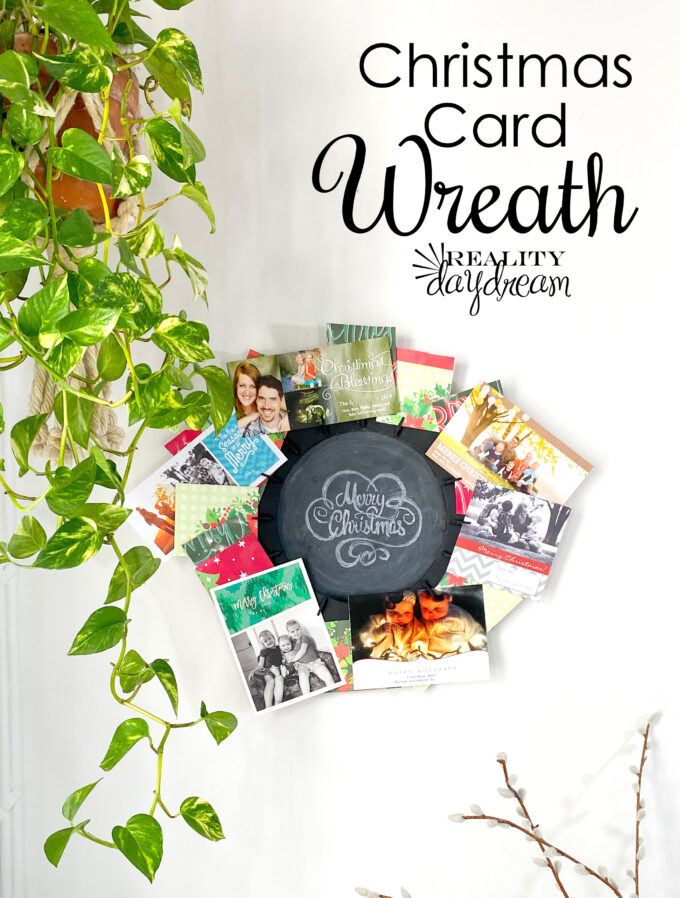
I tend to draw blanks when it comes to festive holiday crafts. As I stalk other blogs, I see all kinds of cute ornaments, garlands, table settings, etc that make me feel like a creative failure. This year especially, I’ve been loving wreaths. And it got me thinkin…
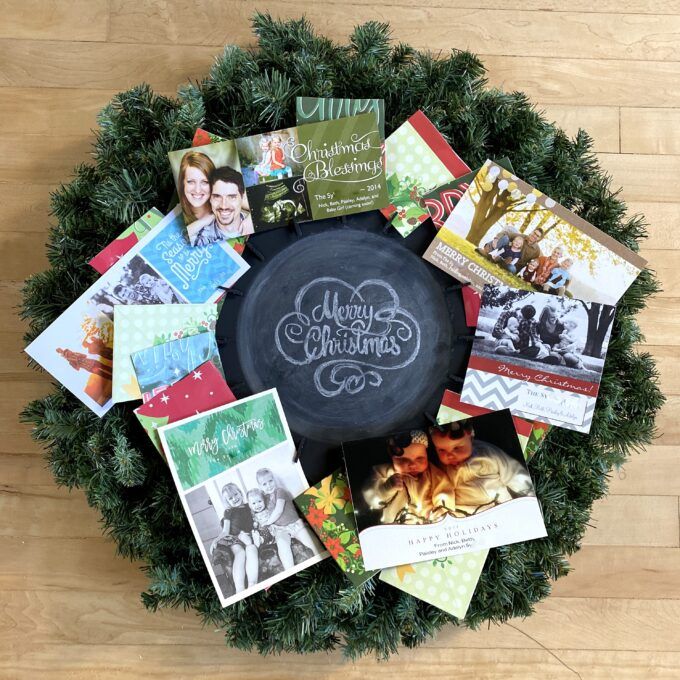
Why not take the same concept as this project with the clothespins, and make it A WREATH for holiday cards! Cute AND functional. And this way you won’t have allll the holiday cards cluttering up your refrigerator.
*This post is sponsored by our friends at DAP! Thank you for supporting the brands that make Reality Daydream possible! This post contains affiliate links.*
I wanted this project to be inexpensive, and not use any power tools so it would be an approachable project for anyone! And because I love a good instant-gratification-project. 😉
We were able to use the leftover clothespins from this project (which would be SUCH a great Grandparent gift idea!), although in hindsight, I would have used some clothespins that are larger (like this) so they could hold a little more weight.
Supplies
- Platter/Charger (with a flat lip going around the edge)
- Mini Clothespins (we used these, but I would recommend using some a little bigger, like these)
- DAP Rapid Fuse w/ Plastic Primer
- Chalkboard Spray Paint (optional)
- Carbon Tracing Paper
- Chalk
- Sawtooth Hook
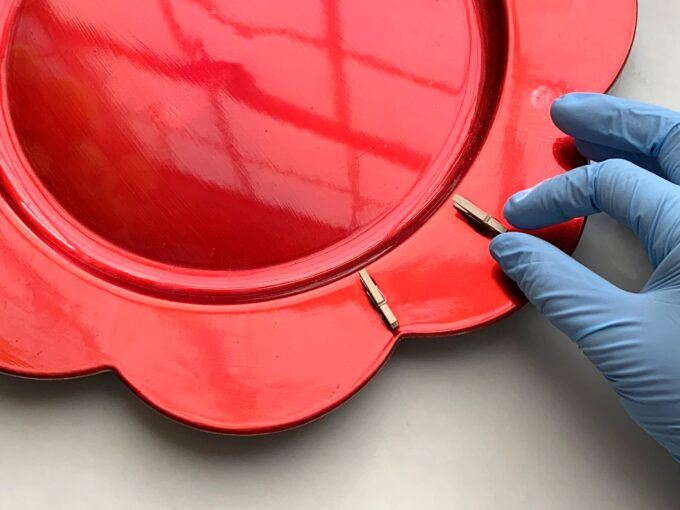
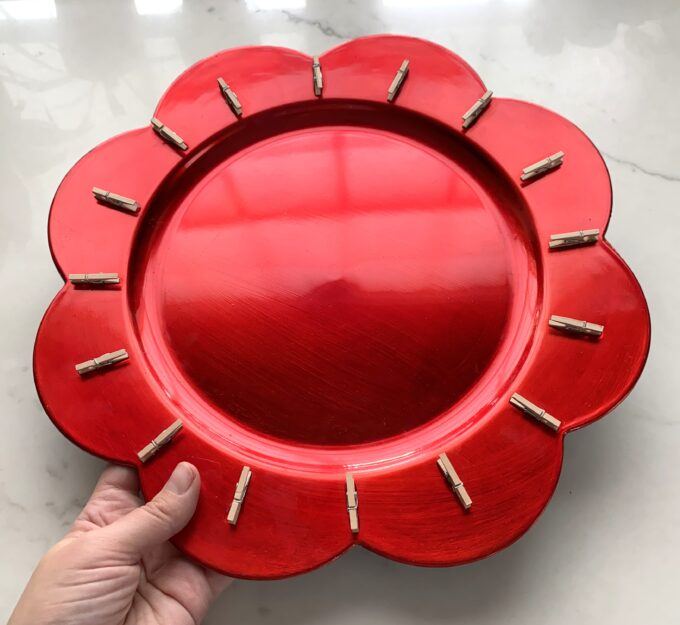
First things first, we’re going to glue on these clothespins around the perimeter of the patter! The scallops along the edges made it easy for me to evenly place them, but if your platter is a perfect circle, you may want to measure out where the clothespins would go (full disclosure… I STILL WOULDN’T) 😉
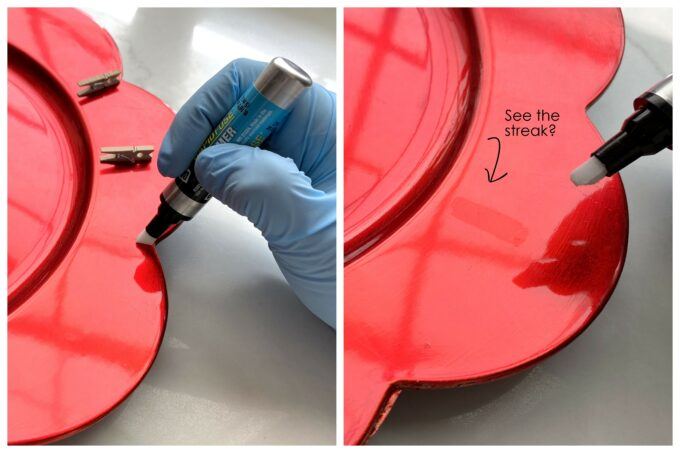
Apply a tiny row of Rapid Fuse glue to your little clothes pin, and set in place on the platter. This glue is so easy to work with, and dries in 30 seconds, so you can move quickly!! (Honestly, we use this stuff all the time and for SO many things. We keep some in our junk drawer and use it often!)

These clothespins aren’t going ANYWHERE.
Next, we’re going to lightly sand that flat area in the middle, and spray paint with this chalkboard spray paint! Yes, it makes anything into a functional chalkboard!
The spray paint goes on looking like a glossy black, but when it dries, it’s the perfect matte of a chalkboard!

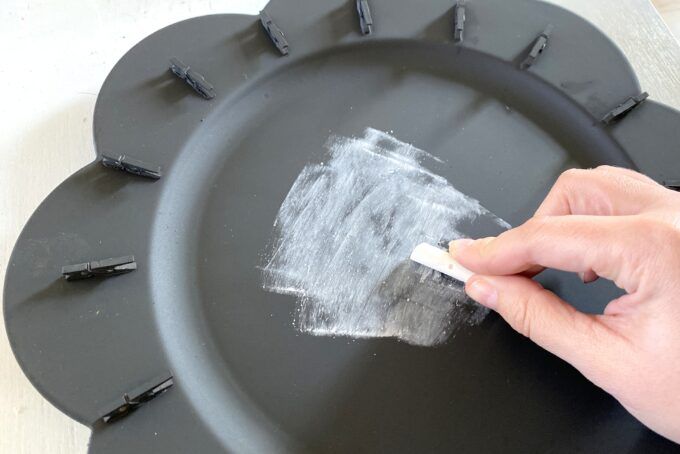
Use the side of a piece of chalk, and season that flat center circle. Then wipe off with a paper towel.
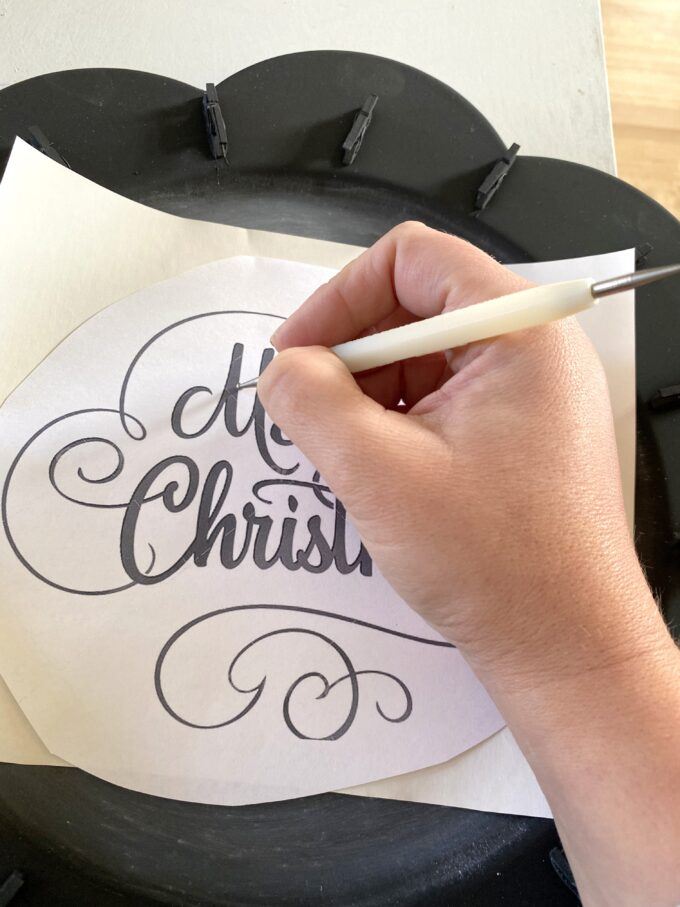
Print out a design you want to transfer onto your chalk wreath. You can just do a google search for ‘Christmas Chalk Art’ and find soooo many great pics to use!

Cut around the edge of the design so it will be easier to make sure it’s centered on your wreath. Then put a piece of Carbon Paper behind it (with the dark side facing down).

I used an embossing stylus to trace over the design, but you could use a pencil or a pen too. Make sure you trace over every part!
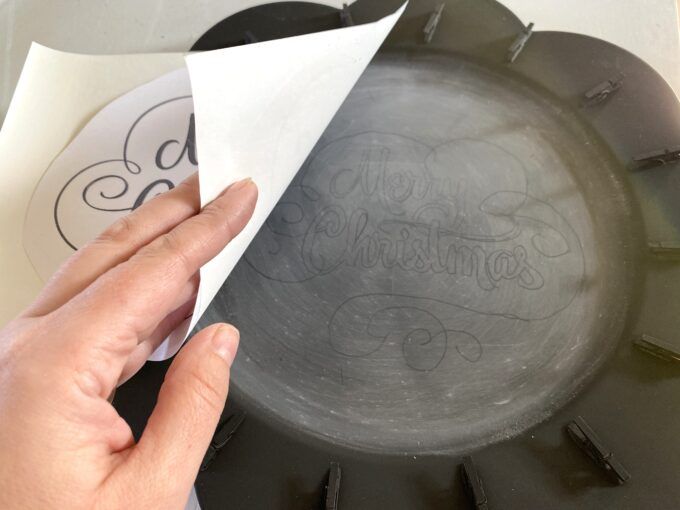
At this point, it’s EASY to just chalk over it with some regular old chalk! You’ll look like a real chalk artist! (okayyyy, I know mine isn’t that great. We can’t be good at everything. 😉

Now that it’s all traced out for you, it’s EASY to pull off some gorgeous chalk art! Even if you have no artsy bones in your body!

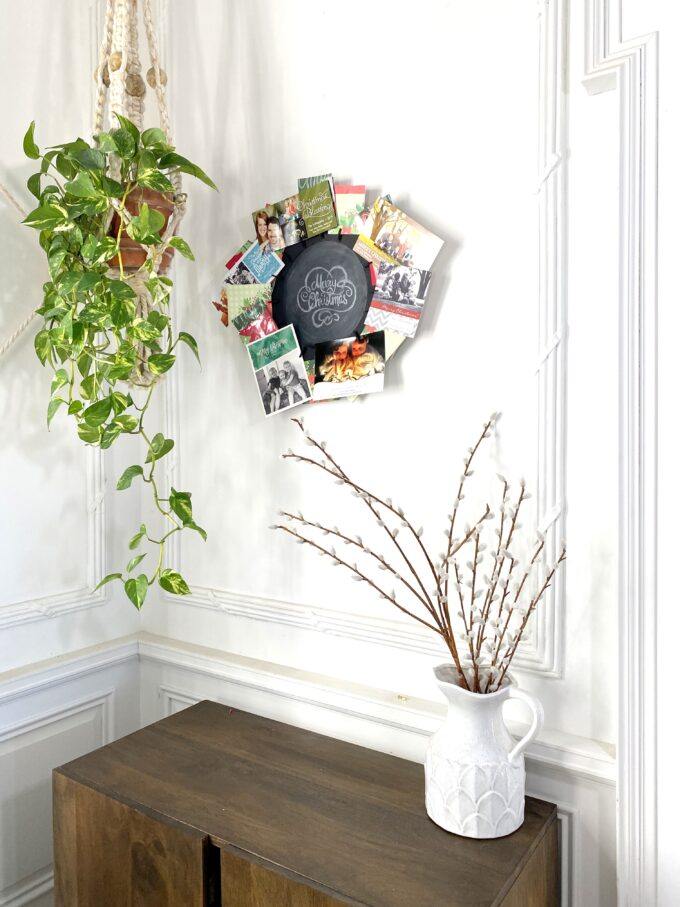
You could even wire it up to an actual wreath! So pretty, right?!
As always, if you give this project a try for yourself (even if you modify the idea and really make it your own) PLEEEASE tag us on social media! We’re @RealityDaydream on both Instagram and Facebook.
~Bethany
~~~~~~~~~~~~~~~~~~~~
Be sure to check out our master list of DIY Handmade Gift Ideas!

Thanks for pinning!!

Related:
-

My kids are getting to the age where they want to tape pictures, cards, notes...…
-

Friends! The holidays are sneaking up on us, aren't they? This year, more than ever,…
-

It's been awhile since I've done a sewing project, and as weird as it sounds,…
What a crafty thing you are! Adorable! I couldn’t have thought of that in a million years! I love it!
Oh My!!! Love this idea!!! SO CUTE!!! Genius!