I got a brilliant idea to make my girls a little something for Christmas (totally inspired by this project from yesteryear), and I figured I should totally share a tutorial while I’m at it! This is such a good DIY gift idea for kiddos of any age or gender!
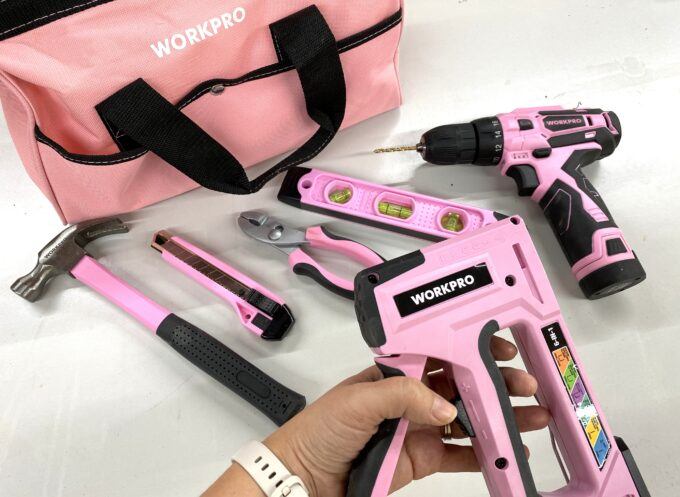
*This post is sponsored by WORKPRO® Tools. Thank you for supporting the fabulous brands that make Reality Daydream possible! This post contains affiliate links.
We love that WORKPRO® Tools partners with the National Breast Cancer Foundation Inc.® to help women by providing early detection, education, and support services to those affected by breast cancer. For every sale of their WORKPRO 12V Pink Cordless Drill and Home Tool Kit (bag included!) $0.25 is donated to NBCF. The WORKPRO® Pink Staple Gun is sold separately, and for that $0.20 is donated to NBCF!
Let’s get started on this project, shall we?!
I had some wooden boxes that I had saved from another project (long story), but you can get some similar here. You just want to make sure that whatever box you choose can fit standard notebook/printer paper and coloring books (8.5×11).


Supplies for Clipboard Box
- Wooden Box
- Clipboard Clips
- 1″ elastic
- Rivets/Rivet Tool
- WORKPRO® Pink Staple Gun
- WORKPRO® Pink Drill
- Paint
- Metal File
I began by painting the inside of my box black This part is completely up to your personal preference. You can leave it unfinished or paint it any color you want! You could also paint the outside of the box as well. I chose to leave that part plain wood. Up to you!

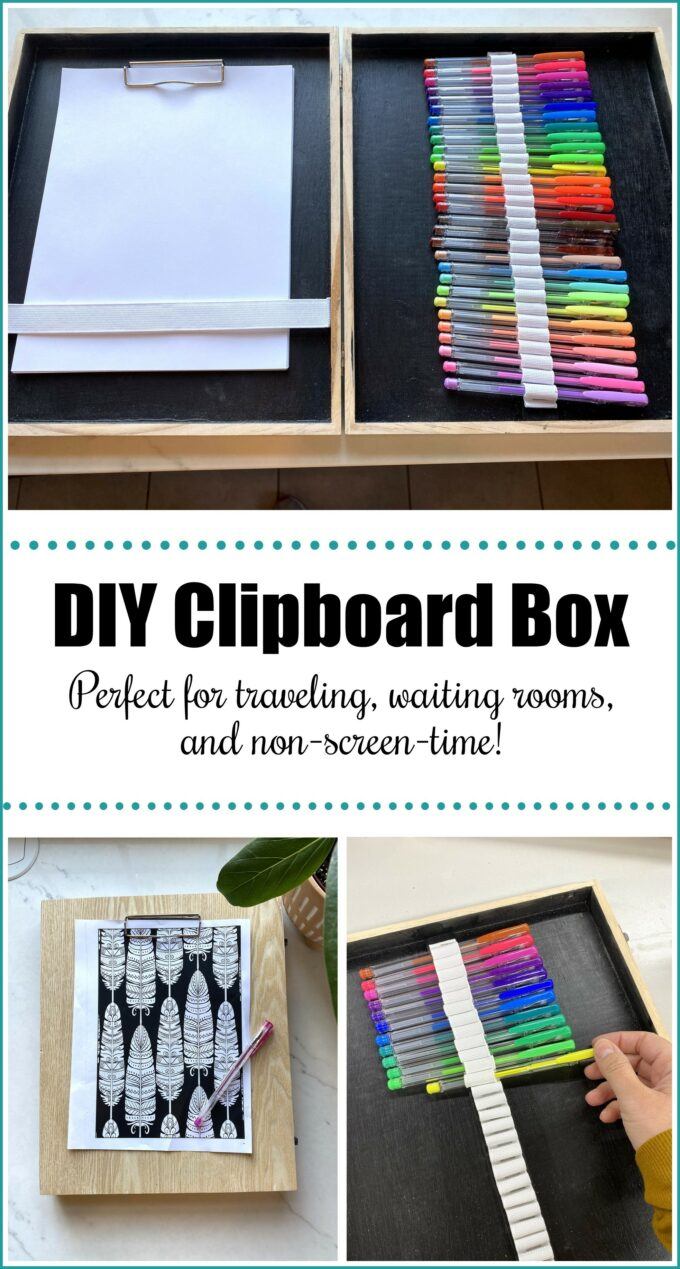
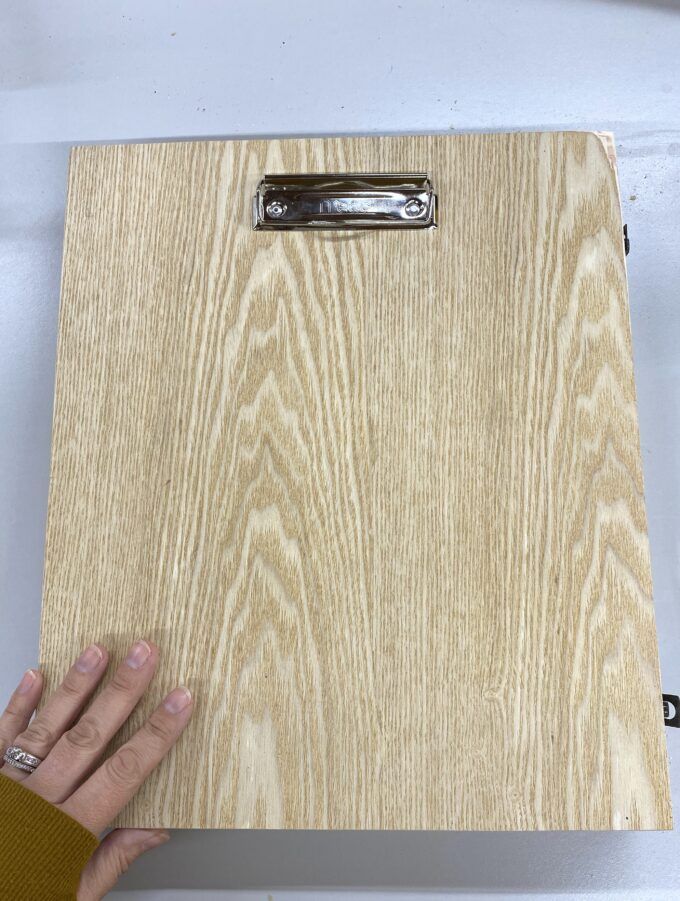
I wanted to make the front of the box a clipboard, and then have all the art supplies inside, but I decided to put a clipboard clip on the inside lid as well! This way the clipboard clips are back to back and provide some stability to the wood, as well as providing more space to keep papers and coloring books that aren’t being used!
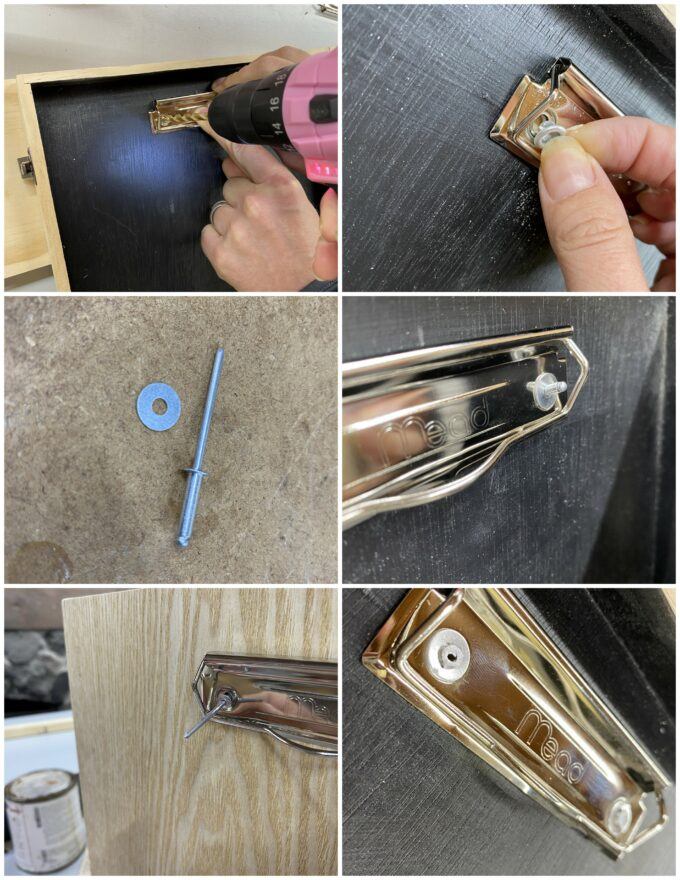
I chose these clipboard clips so they wouldn’t stick out as much.
I found the center for the clipboard clips, and drilled through where the screws would go. Use rivets and this tool to attach them with a quick squeeze. It snaps off the stem too! Then if you have a bit of a sharp edge, hit it with a file to smooth it over.
On the other side of the box, I want to staple some elastic down the center to hold markers or colored pencils, but since my wood is too thin, I decided to glue a paint stick down the center line, and paint it black to blend in. This will give me some extra thickness and strength for the staple gun!


Using 1″ elastic, I folded over the end and stapled it in at the very top of my paint stick. Then used a pencil to measure/guess where my next staple would need to go… and so on and so forth! This was not a carefully measured process. Elastic is stretchy! So err on the smaller side so the writing utensils will be snug and stay in place. If you’re using the chunkier crayola markers, make your loops bigger obviously!
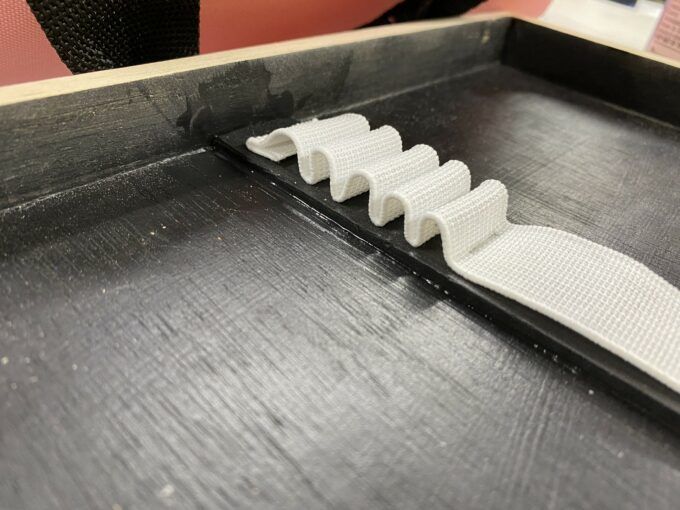

At the bottom, cut off any extra elastic, and fold over the end of the last loop, and staple! How fun is this?!


Time to load this baby up with some markers and coloring materials!

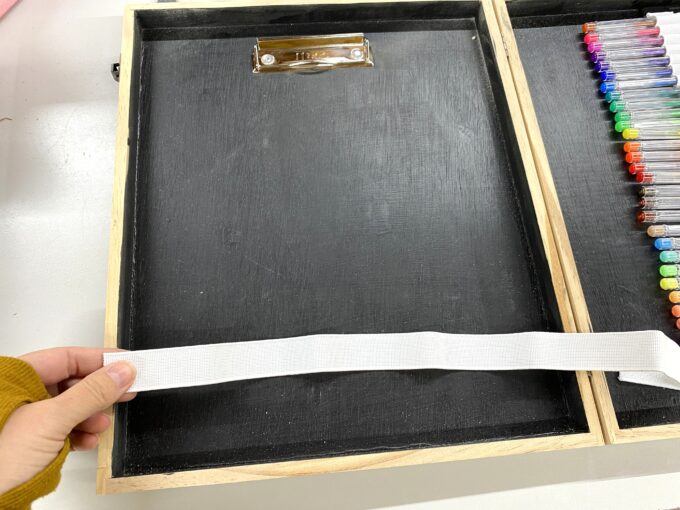
I had some leftover elastic, so I decided to put some across the bottom of the left side to help keep papers in place while the box is being opened and closed.
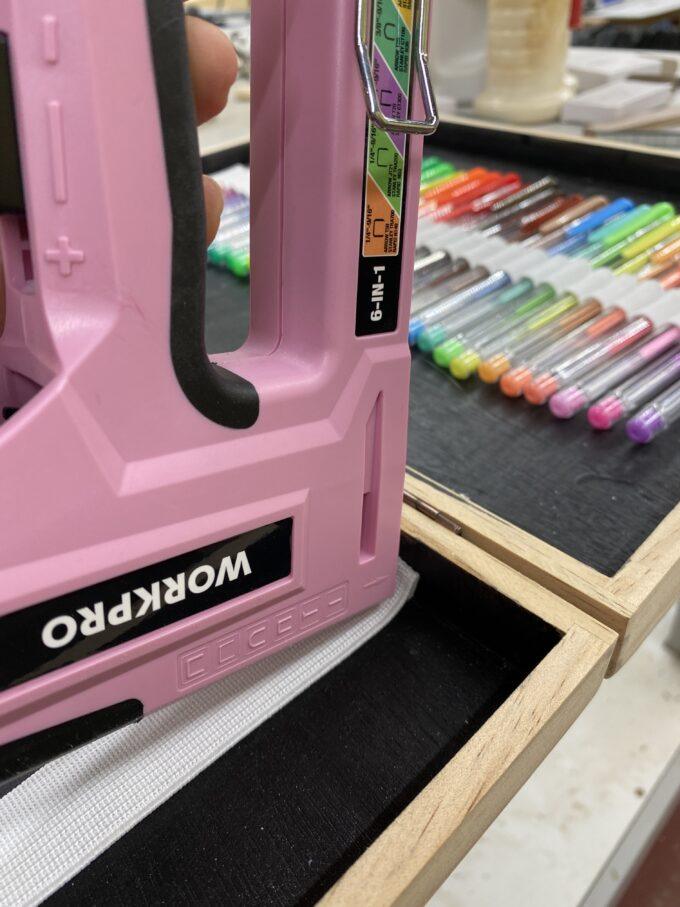
My new WorkPro staple gun is so fun… I want to use it on ALL THE THINGS!
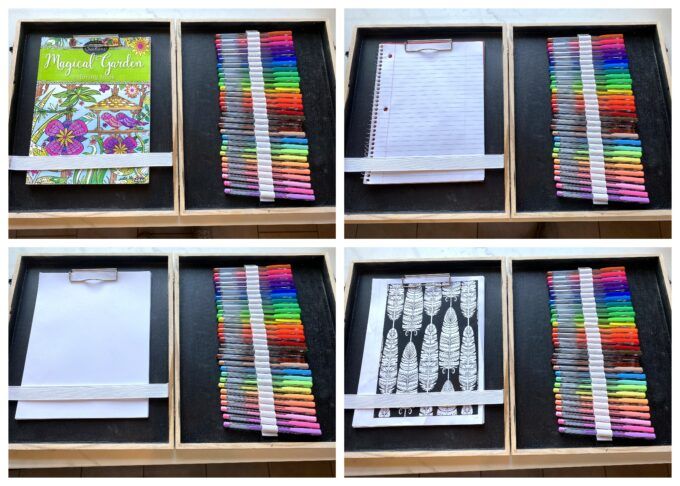
Now you can put in coloring books? Notebooks? Plain paper? Printed coloring pages? Whatever you child loves to do! These are perfect DIY gift ideas and would be so great for a road trip or sitting in a waiting room.
I can’t wait to give these to the girls for Christmas, and see what each one of them uses it for! It brings me so much joy to watch my girls create, so I love to encourage it at every turn!
Check out my other kid-friendly tutorials HERE, and be sure to pin todays project for future reference!

Related:
-

Our daughter has been living with a very small closet that isn't conducive to her…
-

For about 6 months now, our youngest (Cypress - 7) has been struggling with overwhelming…
-

When the twins moved into what used to be the guest bedroom, I knew I…
Use chalkboard paint and they can draw on the box!
Totally!!