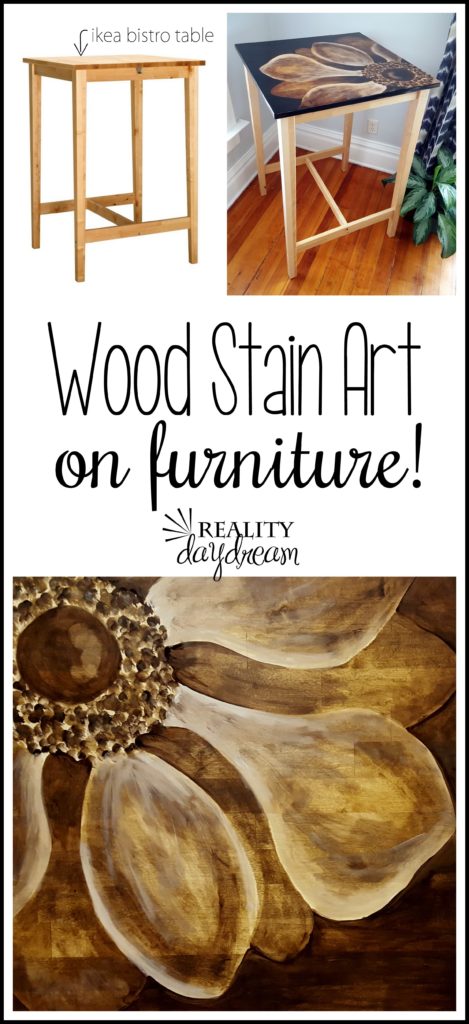
IKEA furniture is the perfect blank slate for an IKEA furniture redo and a great way for you to make it your own! This bistro table turned out amazing, and I hope it inspires you.
Besties!!!!! Yes you! And you and YOU!
I’ve been feeling soooo much better lately, and even managed to escape for a long weekend to Atlanta for the Haven Conference for DIY bloggers! I’ll admit, I almost exclusively went to just see my blogging friends and have a little ‘vacay’. But I also learned a lot and made some new friends. Best of all, this year I didn’t have to teach a class! Nor was I pregnant or toting a baby. So this was a first! Freedommmm!
But also, SO good to be home with the babes again. Would you look at this sweet chub?

Anywho! Today I have a fun furniture transformation to share and add to my extensive archive of furniture makeovers! Let me give you a bit of back story on this one…
Unlike most of my other furniture makeovers, this one was NOT a garage sale / craigslist / thrift store / roadside find. This was a brand new bistro table straight from IKEA! My friend Dana (yes, the gal that does my vinyl for all these projects) and I lost our ever-loving minds and DROVE 4 HOURS just to go to IKEA! Hilarious right? Well we live in Iowa and don’t have the luxury of skipping over to IKEA whenever we feel like it. So we made a weekend of it and had an absolute blast.
 this post contains affiliate links. See our disclosure policy for all the details!
Dana bought this bistro table for her kitchen, and is scouting out some cute stools to go with it. And I said… you can’t buy that unless you’ll agree to let me stain a flower onto it using my Shading with Stain technique. IKEA furniture redo for the win! I was totally joking… but she totally let me!
I started by sanding off the existing finish. It would have taken me sooooo many hours to use my orbital sander… which usually works really well. But IKEA uses some magical sealant that is very hard to remove. So I took my belt sander to it with 40 grit sand paper, and it came of lickety split. Then I had to work my way to 80 grit, 100, 120, 150, and finally 220 so it was super smooth and ready for staining!

I drew out a simple flower onto a transparency and projected it onto the table top with my old school overhead projector. You could totally just draw your flower right out onto the tabletop and skip the projector step, but I don’t trust my free-handing skills on a large scale like that. I would have to keep standing back to see how it looks every couple seconds. Ain’t nobody got time for that.
This stain job took me less time than the large dining table tops I usually do, obviously. The time-lapse video below is only ONE MINUTE! Are you excited to see the outcome?!?!
.
So fun, yeah? I started out with Minwax Provincial, and came back in with RustOleum Dark Walnut, and finished things out with some highlights using Unicorn Spit.
I always get asked about what I seal my tables with… and THIS IS THE STUFF TO USE. You can get it in any sheen, depending on your preferences. The glossier the varnish sheen, the easier it is to clean. Just be sure to follow the directions on the can to the LETTER. This is not the time to cut corners! The durability of your table is at risk! (dramatic much?!)
Have you given this staining technique a try yet? If not, refer to my beginner’s tutorial that also includes a video of me walking you through the whole process step-by-step. People, it’s SO FUN. And what do you have to lose? Doing an IKEA furniture redo is the perfect ‘first piece because it’s not like it’s grannies heirlook dining table, right? But first, practice on a scrap piece of wood until you get the feel for how the stain can be manipulated, and then move on to your IKEA furniture redo. I also have a tutorial on stripping if there’s an existing finish that will need to be removed to get down to the raw wood… otherwise the stain won’t have any woodgrain to soak into!
As always, please email me pics of your work! I looooove seeing what you guys come up with!
~Bethany
Feel free to check out the other projects I’ve done using this same technique with wood stain!
Thanks for pinning this IKEA furniture redo!


Do you water down the unicorn spit stain when you highlight?
Nope! Not at all. But if it seems too thick for your liking, or you want the highlights to be more subtle, you can totally water it down.
I am just in AWE!! How I would love to be able to do what you do!! Thank you so much for sharing these beautiful ideas..
LOVE LOVE LOVE LOVE!!!!! THANK YOU SO MUCH!!! MUAH! (that’s a air kiss since I have a bubble) Thank you so much for your time to do a gorgeous stain!!!! Love it!!!!
ready for another IKEA TRIP?