I’ve been dropping hints about doing a stripping tutorial, and TODAY IS THE DAY!
I think stripping furniture is a universally dreaded task. Understandably! But it’s really not that difficult or time-consuming once you get your supplies together and just go for it! I predict that painted furniture is going to be a thing of the past sooner than later, so we might as well become familiar with the techniques needed to undo all those blasted layers of paint we’ve inflicted on our furniture!
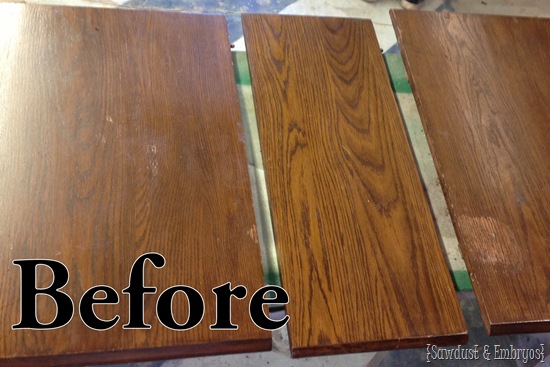
Our new friend Sandy dropped off her tabletop to get a staining treatment done my moi, but before I could do my magic, I needed to strip ‘er down to the raw wood.
Prepare to learn how to disrobe your wood!
I also have a tutorial on stripping painted wood with nooks and crannies, if you’re interested! But today we’re going to focus on the basics and simply tackle the strippage of simple stained/sealed wood.
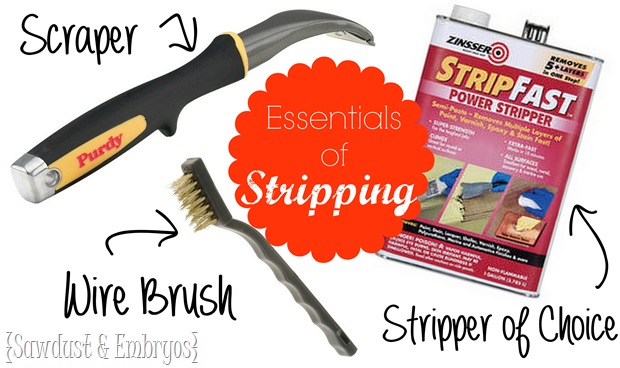
These 3 tools are KEY!
(contains affiliate links)
- Hefty Scraper (we love this one)
- Simple wire brush
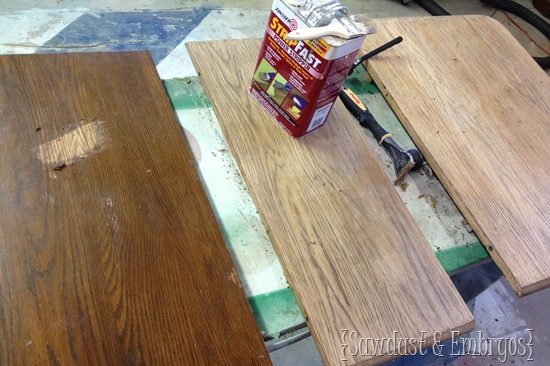
- Stripper (unfortunately our favorite tried and true stripper, pictured in this tutorial, is no longer made. This one is our second fave!)
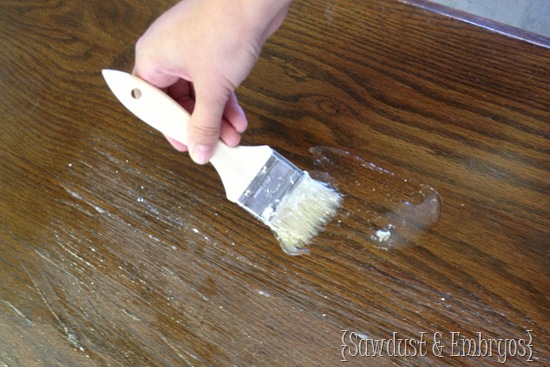
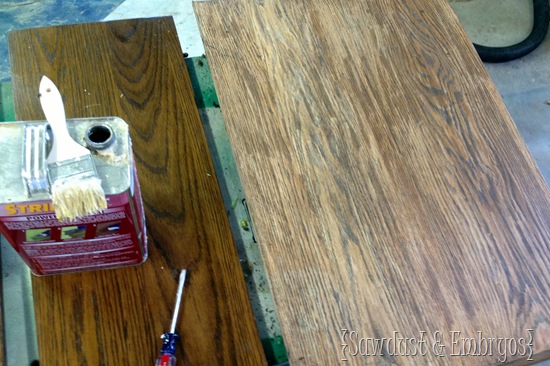
I brushed on the stripper with a natural bristle chip brush on a 2’x2’ area.
SAFETY NOTE: I recommend wearing gloves and eye protection. I shudder at the thought of getting a spatter in your eyeball)
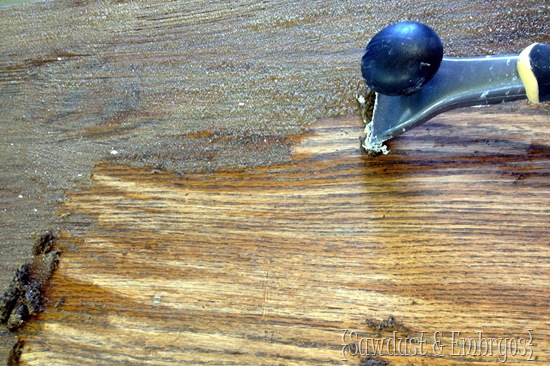
The stripper starts making the finish bubble up within seconds. After finishing my two-foot section, I wait 2-3 minutes, and then start scraping away with my hefty scraper. This thing is like a putty knife on steroids.
Plan on frequently scraping the goobers off your scraper. I keep an empty ice cream bucket handy for the nasties.
The bulk of the finish is gone, but you can see how the wood is still holding onto some of the stain.
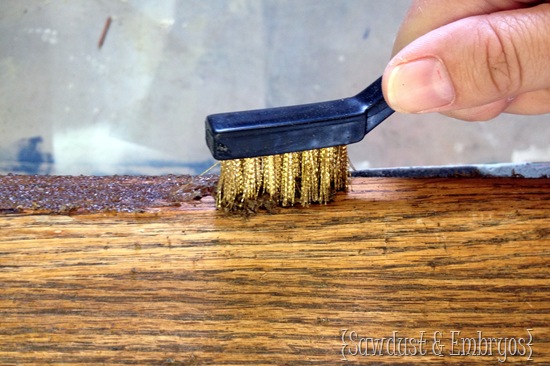
So I repeat step 1 and slop on some more stripper, then scrub at it with the wire brush to really get into the grain of the wood.
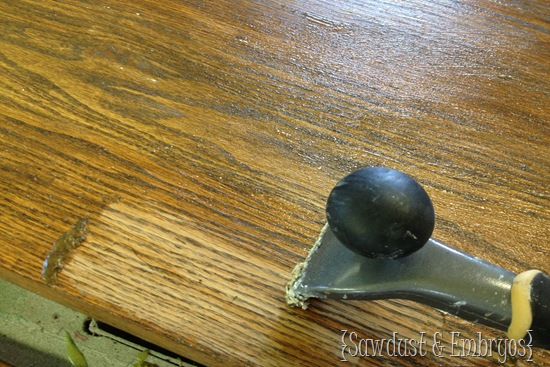
Then scrape one last time.
It’ll be very obvious when the stain is gone. You’ll just know. You’ll feel it in your heart of hearts.
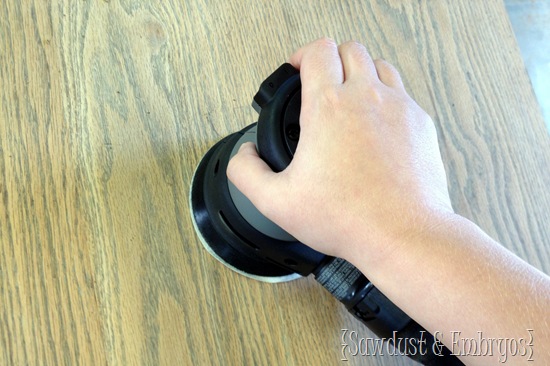
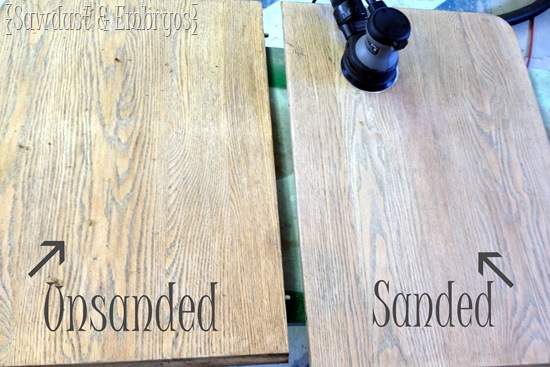
Then sand ‘er down REAL smooth. I start out with 120 grit, and finish off with 220. I used an orbital sander, but it would work just as good sanding by hand. You might just need to use some elbow grease.
Simple as that!
Here’s my quote for the day:
‘Stripping is a dirty job, but sometimes you MUST for the greater good.’
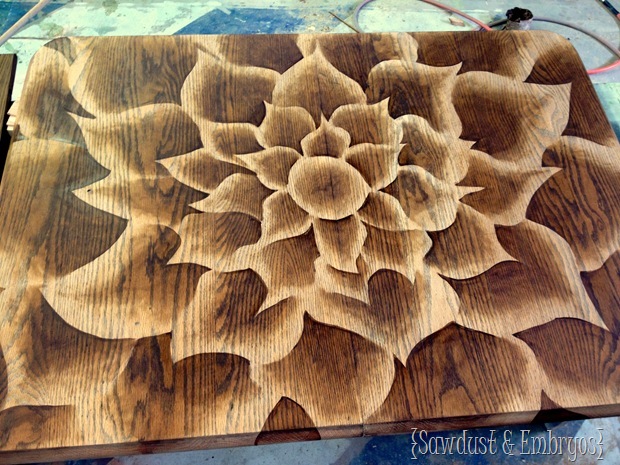
So as not to leave you without an after picture, here’s Sandy’s table with my stained technique! For the full tutorial on that, click here!
And be sure to click here for our tutorial on stripping paint from cracks and crevices, and furniture with ornate detail!



The link to your stripper of choice is coming up item not found on Amazon. Can you WRITE out what the name of the stripper is? Want to make sure I don’t waste time buying an inferior choice if you have a preferred kind. thanks!!
I’d like to know this as well! 🙂
So sorry! Here is a link to what I would use now.
https://amzn.to/42wjIYT
How did I miss this! I’m so sorry! I updated the post with our second-choice stripper. I’ll put it here for you too. Thanks!
https://amzn.to/42wjIYT
I think I was expecting to strip it one time and be done. But now I know I need to repeat! Thank you!!
Yep, it’s a pain, but SO worth it!
Hi Beth!
Just recently found your blog and love it! Where in the world do you find the Zinsser Strip Fast? I have looked at every store in town and online as well. The only place I can find that sells it is Meinards and we don’t have one of those. Did they change the name? Amazon doesn’t even have it. Thanks so much! Jenn
Hey Jenn, I noticed that recently too. It’s been a minute since I’ve stripped any furniture, and I’m guessing it’s been discontinued. Which is a bummer! I know a lot of DIYers love CItriStrip, so that’s something you could try.
Yes, that’s what I have been using but it takes so much longer than the Zinsser you spoke of. 🙂 Bummer! Thanks so much for getting back to me!
I think it’s been discontinued because it is so toxic.
You do realize that that this paint stripper is made almost entirely of methylene chloride right? This is an extremely dangerous chemical and can cause serious health effects. It can enter the body through skin contact and inhalation. Telling people they don’t have to wear a respirator is dangerous and irresponsible. You are also not wearing any gloves to prevent skin contact! This is something that cause fetal development and reproductive issues and can be transferred through breast milk. You need to read the Safety Data Sheet on these types of chemicals before you use them and protect yourself.
You only want to strip a piece if you’re planning to stain it. If you’re just wanting to paint, you could degloss (to help the primer stick better) or just sand with 220 grit to cut down the sheen before priming. Does that make sense?
I need to strip my living room and dining room floors help
HI Debbie! I’m afraid we have no experience refinishing floors. I’ll have to refer you to good ol’ Google! 😉
Wow this is genius! Thank you SO MUCH for sharing it and taking the time to teach us. Whaaaat?! You should be Sainted for this woman? And you reply to everyone too?! You are a Godsend!!!!!
You’re so sweet! Stripping is no fun (LOL!) but it’s worth it! 🙂
this is by far the coolest thing I have seen! I’m going to try with my night stand!!!!! maybe I can make something out of this!!!
Will this work on veneers?
Have you experimented with colored stains? (Other than brown shades?)
Hi, question, what tools do you use to strip spindles and even more challenging, louvers?
Thanks!!
Hey Yvonne! We use wire brushes to get into nooks and crannies. We wrote another post on how to strip those details! Here’s the link: https://realitydaydream.com/2013/08/we-stripped-our-front-door-tutorial-on.html
Why not just sand it down? What does stripping do that sanding it down doesn’t?
It’s just a lot faster and is less dusty. Especially if there are several layers of paint… or lead-based paint.
I have a drop lief table that was my dads and as a smoker he left several cigarette burns and in order to repair the table I had to strip it down. Stripper of choice for me is cutz-it and it does. I also like to use laquor thinner as a final wash, It really removes what is left easily. Any way back to the table. What a wonderful idea for the table top. It will really make it the centerpiece I wanted. Thanks for the Flower design I hope you don’t mind my using it. I also learned the art of stain shading on my own while restoring a ceder chest my husband picked up for $20.00. It has molding on the front that makes a design and when i got it it was all one color. I chose to stain the molding a very light oak while the rest is a dark cherry. it really made the molding pop. I was diagnosed with ankylosing spondylilis and have been in a wheel chair for ten years but the love of restoring beautiful wood has kept me going. I wonder if a black and white photo could be blown up and used a a pattern for putting a face or faces of loved ones on the wood. One thing I have learned over the years you can always take it off and start again. Keep on staining.
Thank you for giving the information. I would like to tell that I was searching this type of information only.
outdoor chaise lounge
Yayayay! We’ll be like long-lost sista’s meeting for the first time! What? Oh! And I’ll be the one hiding behind my giant 6’8″ husband. Hands off! HEHE! 🙂
Hey Beth! Just saw that you will be at Haven this year. Me too! Can’t wait to meet you in person! 🙂
–Lindsey@BetterAfter
I so wish this had been around when I stipped the table I’m working on. I ended up with chemical burns. The kind I used ate up two pairs of latex gloves and a pair of rubber gloves. It was horrible!
Yes Melissa, that’s the thing about any stripper that actually WORKS… you have to protect your skin! There are special chemical resistant gloves you can buy, but I just use rubber gloves until they start breaking down and then I call it a day (or put a new pair on) because I’m cheap like that.
Thanks Bethany for the stripper recommendation, I’m going to hunt that down (and hope I can get it here, unlike a lot of US paints). It’s decades since I’ve used paint stripper but I have a reclaimed timber from a painted wardrobe that I want to make into a blanket box and it’s going to take more than a light sanding.
Your stain technique was the inspiration for my chest of drawers (http://28gumtrees.wordpress.com/2013/06/22/chestoration/). Luckily that chest was so lightly varnished I went straight to the sander and had it clean in an afternoon.
Looking forward to the paint strip tute,
cheers
Minuet
Minuet! That dresser you posted is AMAZING!
Why thank you. High praise coming from someone of your talents. I have a heap of projects I must get up on the blog. Maybe if more people were following me I’d be more inspired to post. Maybe if I posted more, more people would see it. Vicious circle isn’t it 😉 Right, I’m off to do an update.
Do you rub that little metal brush over the entire thing?
I have stripped a few pieces that were painted, and always end up with a horrid gunky mess. My tools, gloves, and the furniture itself have been covered with little chunks of dried stripper and paint. How do you avoid this? You make the process look so clean! How much different is the method when something is painted rather than stained?
Thanks!
Sarah… stripping stained/sealed furniture is MUCH easier (and less messy) than stripping paint. So you’re not alone! I’m planning to write a second tutorial for stripping paint that involves a few more steps. Stay tuned!
I was just thinking the other day that I needed to do some searching on your blog to see if you’d ever done a stripping tutorial! Thanks for reading my mind! 🙂
I think I’ll just go ahead and add ‘mind-reading’ to my professional resume. 🙂 What are ya gonna strip Meg?
How long does this take Bethany? Like how long does a coffee table take compared to a dresser, compared to a dining room table?
Welllll, this dining table (just the top surface) took me a full afternoon, but I took a couple breaks. If there were legs, it would have probably taken another afternoon (depending on how much detail the legs had). It’ll take longer if you’re actually stripping paint instead of a simple sealed/stained surface. For a dresser with no detail (cracks/crevices) and no paint, I would plan for 4-5 hours.
Very nice table. This makes it seem easy to strip wood.
Good! That’s what I was hoping to accomplish! Thanks for the nice comment Mindy! 🙂
I see furniture I like the bones of but with ugly paint fairly regularly- this is inspiring…
I agree! Don’t be intimidated by stripping! (gosh… that really does sound bad!)
I am intimidated by stripping… maybe because the only time I ever tried it was on a dresser that turned out to be about 100 years old with about 100 layers of sad paint on it. Yes. The paint was sad. It was infectious, and actually made me sad too. It is still sitting in the back house/work area partially unfinished. Maybe I will try again.
@thedailydali, I KNOW how frustrating many layers of paint can be… but when that woodgrain starts popping through, it’s all so worth it! Whatever progress you made last time will give you a headstart this time. GO FOR IT! 🙂 And don’t be sad!
Great tutorial! I bet this will bring some interesting SEO your way 😉 haha! I’ve never stripped anything before, but I have been toying with the idea of stripping our dining table of it’s horrid honey oak blanket it’s wearing. Long live wood grain!
HAHA… right? That’s ok. I like to turn heads. 🙂 Also, honey oak? …there are no words. Strip that sucker! Or save yourself some time and just strip the top and give it a dark stain, and paint the base a fun color! I’ve been thinking about doing that with our kitchen table (SHHHH don’t tell Nick!). 🙂