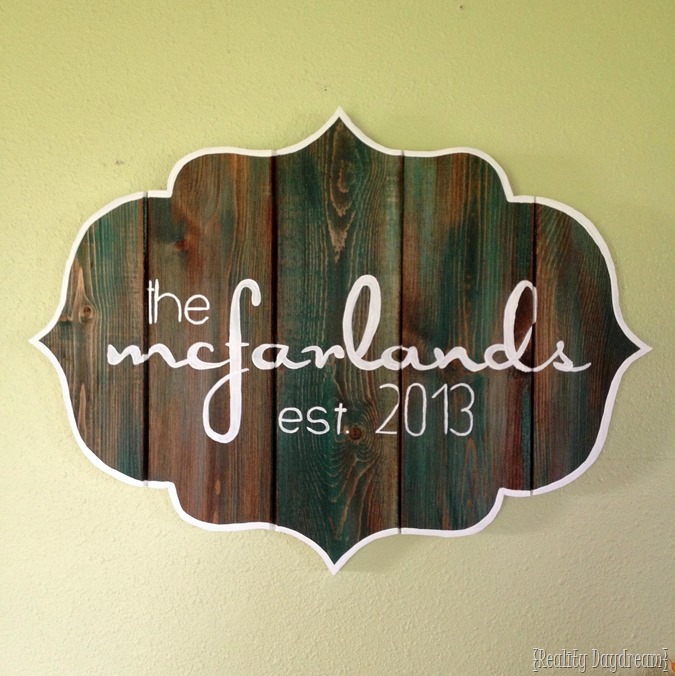
Nick and I like to MAKE gifts as often as possible… because it’s cheaper more personal. And well, WE JUST LIKE MAKING STUFF. Geez.
So when we get invited to a wedding, I love to make a little something personal for the bride and groom. (Unless I procrastinate, in which case we stop by Target on the way to your wedding and buy a coffee maker and a gift bag. #keepinitreal)
 This post contains affiliate links.
We began by rounding off the edges with a router, then painted, sanded and stained to make them look like rugged old ‘barn boards’ (step-by-step tutorial for that process HERE).
.
You could use 1×4 OR 1×6 pine boards for this. The one pictured above is 1×4’s, but for the tutorial below, you’ll notice the boards are wider… 1×6’s! Just a different look.
Supplies for Bracket-Shaped Barn Board Sign
- 1×6 or 1×4 pine boards
- Leftover latex paint in any color
- Stain
- White acrylic paint
- Chalk Marker
- Scroll Saw (or a Jigsaw would work too)
- Sealer (optional… only necessary if it will be displayed outside)
- Heavy duty Wall hooks
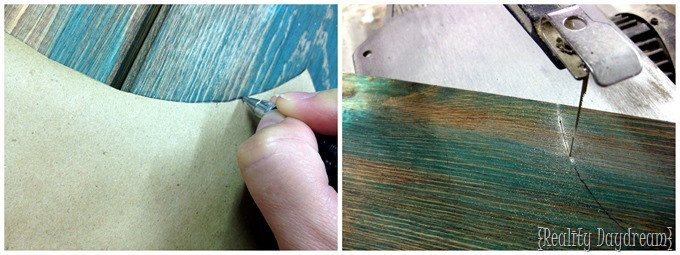
Now that I have some SWEET ‘old boards’ to work with, I found a bracket design that I liked (just googled around till I found one I liked) and projected the image onto some paper on the wall using my overhead projector. I made sure the projected image wasn’t longer than the length of my boards (27” wide in this case). Then traced with a pencil and cut it out with scissors.

I laid out my paper-bracket-shape onto my boards (making sure it’s centered) and traced AGAIN with a pencil. Then I cut each board separately on my scroll saw. (This is the one I use and it’s A.M.A.Z.I.N.G. But if you’re looking for a more mid-range (read: less expensive) then this one is also great quality and handles well! Whatever you do, don’t buy a scroll saw in the $100-$200 range. You’ll regret it for sure.) It was WAY easier than if I had waited till the boards were all nailed together as one big piece.

It was at this point that I knew this was going to turn out A.M.A.Z.I.N.G. I just knew.

Nick slapped on a substrate using 1/4” plywood cut to size and the nail gun (our trusty RYOBI Airstrike). This holds all the boards together securely! Just make sure the brad nails you use aren’t longer than the thickness of your sign! And we used one of these as a wall-hanger thingamajig.

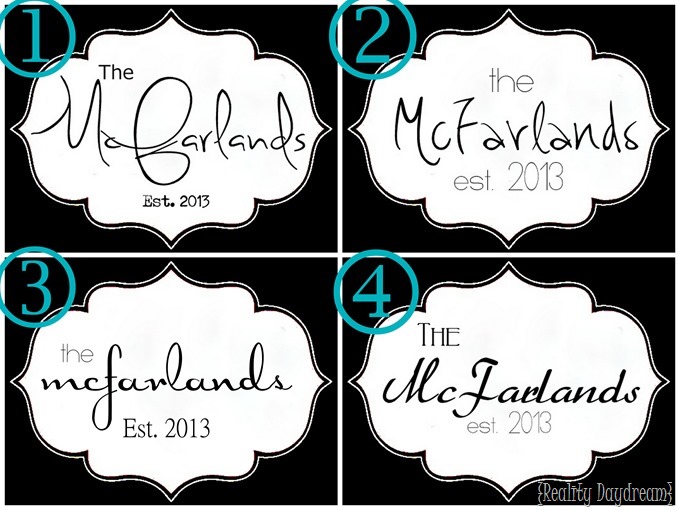
Oh my gosh… this part of the story cracks me up. Do you follow us on Facebook? If so, you may remember voting on which font you like best of these 4 options I whipped up. So I posted this image on Facebook and then went to bed. When I woke up in the morning OVER A THOUSAND PEOPLE HAD COMMENTED! Whaaaaaaaa? I know right?

One thing I know for sure, you guys like to share your opinion. I super-wish there was a way for Facebook to tally and show me a bar graph of the answers. But I feel like I read a good number of them, and sincerely felt like #3 was the winner. I still went back and forth for a day or so… but in the end decided to trust you guys and went with #3… only I changed the ‘est 2013’ to the same font as the ‘the’.

For those of you that are wondering, this font is called Doris Day, and doesn’t have capital letters. I like it enough without it that I went with it!
Printed this sucker out onto a transparency, projected it with my old-school overhead projector, and traced it onto the sign. I used to use a white colored pencil for this, but I’ve since found that a white chalk marker works WAYYYY better and doesn’t get snagged by the woodgrain like a colored pencil does.

There was a period of about 6 minutes where I COULD NOT LOCATE ANY WHITE PAINT. I about had a panic attack… because this is like a beautiful blank-slate-of–a-coloring-book-page. It was calling to me.

But then I found it and went to town. A steady hand is all you need! I did two coats. I use just basic white acrylic paint. If you’re going to display yours outside, be sure to seal it with a good water-based sealer (like this stuff).

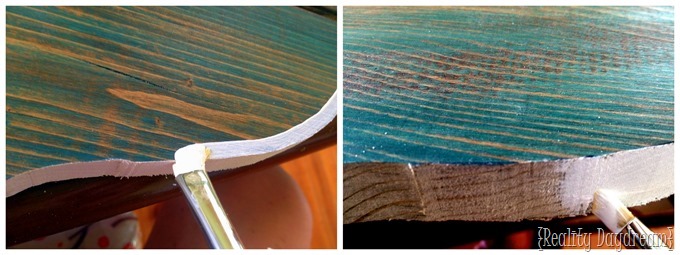
Then, Nick suggested that I paint a white border around the outside edge… SUCH a good idea.

I mean… I freaking love this.

If my last name was McFarland and I got married in the year 2013, I would totally keep it. And it would live on my gallery wall. And I would buy Natalie a coffee maker as a wedding gift instead.
But alas…

I’ve made my share of these Bracket-Shaped Barn Board Signs, and it never gets old! They’re so fun to make! I like to play around with different fonts and designs too. You can EVEN put the boards horizontal or at an angle! The sky is the limit!

Be sure to check out all my other tutorials that involve my signature ‘barn board’ technique!
And here’s a bunch of awesome projects and tutorials I’ve done using my SCROLL SAW!
Thanks for pinning today’s tutorial!


Gorgeous!
I am loving this board! Do ya’ll sell them?
Thanks Tiffany! YES! We sell them on our Etsy Shop! Here’s the link:
https://www.etsy.com/shop/SyWoodInk?ref=si_shop
Thank you!! I can’t wait to check them out. I may be placing an order soon 🙂
Can you explain a little more about using the transparency. Once it is printed, how do you trace “through” it to make the guide marks on the wood?… or are you cutting out the pattern/words and tracing around them?. I can usually figure these things out, but I’m confused and “thick-headed” on this one! Thank you for your patience!
HI Marilyn, sorry I wasn’t more clear on that! After we printed on a transparency, we projected the image using an overhead projector and traced it the size we wanted. Does that make sense?
Absolutely makes sense; I completely understand now.! Thank you for your quick response and for your fun, informative, and creative site. Have a great day!
Did you put the picture hanger on the plywood backerboard or on the actual 1x4s? Thanks for sharing your project. I love it.
Kim, we put the hanger on the 1/4″ back board because it covers the majority of the back of the sign. Does that make sense?
love it!!!!! im glad you went with option #3. its a winner!!
You’re getting so famous and popular! 🙂 Thanks for taking the time to still talk to us like we’re really friends! You rock, sista!
Fantastic project. You can do a poll on Facebook.
Love this idea! Just found your blog today and I’m hooked. What an inspiring and fun blog.
Bethany, facebook has an ‘ask a question’ feature built in that WILL tally and graph for you! Free! You should use it next time for sure. I’m sure you can find it now that you know it’s there, but if you need any help let me know 🙂 -Nikki Hinton (vlogmom1 on insta) nichole (dot) hinton (@) gmail
Wow. This is seriously stunning! I love the teal wash on it. AND THE WHITE BOARDER! It really pops. You are such a great woodworker and artist.
She is going to LOVE this gift. Also, you and your sister have the exact same face! Cute 🙂
I love it! Will it be available on your etsy shop?
PS My little sister went with your little sister to Nepal.
No way! That’s crazy! I had to stalk you a bit to figure out who you were, but I totally remember you and your twin sister from High School!
I was looking at the pic of you and your hubs… and I said to Nick.
me: ‘I don’t know this girl, but she’s married to Sarah Epley’s husband’s brother!’
nick: who’s husband’s brother?
me: Sarah! Lindsey’s sister!
nick: OH! So the chick is married to lindsey’s sister’s husband’s brother?
me: YES
🙂
🙂 Classic.
I’ve been secretly following your blog for awhile. 🙂
I
LOVE
IT!
Ever since finding you blog i’ve wanted to buy a projector (our libraries in Broward County, FL do not have any to lend). and of course since your introduced your frist scroll saw project i’ve also wanted one!
I don’t know what my husband will do with me and my many project ideas!
I absolutely love this sign! and I want one! and of course I also want a manp (made with scroll saw). I WANT TOOLS! 😉
Thanks for the tutorial Bethany! Pinning it!
Hmmmm! Maybe I’ll work on wrangling giveaways for a scroll saw and overhead projector! 🙂
love love love this- the white around the edge really makes it look amazing 🙂
I would love one of these in the Iowa state shape. Wouldn’t that be cool?
Totally! That can be arranged!
I just finished my own version of your barn board sign for a friend’s bridal shower tomorrow. I absolutely love it, and don’t want to see it go. I will post a picture to instagram as soon as I give it to her tomorrow. 🙂 Thanks so much for sharing!
Sweeeeet! Yes please tag me on IG when you post it!
I’M. IN. LOVE! Can’t wait until it’s up because I will be checking it out for myself! Awesome job!
PS – Doris Day font? Most adorable font EVER.. great name too
I know! I use it a lot… one of my faves!
This is awesome! You’re so talented.
Wow! I love it! That came out SO nice.. you have such a steady hand when it comes to the paintin’. I love how you attached the pieces too, that should be nice and sturdy. Awesome hanging bracket too, I’ve been shopping around for a good bracket for my string pieces, and that’s looking pretty nice.
Great work as usual you guys! Pinned it 😀
I love this! I want one!!!
OMG…can’t wait to order mine for next year….
You are SOOOO unbelievably talented. Seriously, you and Nick are like the superstars of creativity!!! I just love, love, love this!
LOVE IT! I have never thought of making a sign cut this shape, it looks great!