If you don’t already, you should subscribe to our blog so you get an email every time we publish a new blog post (not more than 2 times a week… TOPS)! You can also follow us on Facebook and Instagram so you don’t miss ANY of this madness!
There are sooooo many different methods and techniques out there for distressing or aging wood to look like rugged old barn boards. But I’ve tried them all… and I’m going to show you the absolute EASIEST and most customizable way for you to make your NEW boards look like legitimate old wood.
 This post contains affiliate links.
We used cheap pine 1×4’s. SO CHEAP!
I took my little intern with me, and we had a lesson on how to spot cupping issues when choosing lumber. (she’s a quick learner)


You could use any type of wood for this, but I love pine because it has awesome wood grain and I love how it accepts the stain.
Not to mention CHEAP.
Did I add that pine is inexpensive?
Oh yeah… and it doesn’t cost very much either!
Next, I ran them through the router with a 1/4” Roundover Bit to knock off those crisp edges. You could also just hit ‘em with a sander too for the same (ish) effect.

I whipped out some random quarts of paint I had lying around from previous projects. Mint, turquoise, white, and charcoal gray. I know there will be a handful of you that want EXACT colors, but it just doesn’t matter. Just grab a handful of colors that are along the lines of the color scheme you’re going for, and roll with it! I specifically like adding in white to any color combo though because it really adds contrast in the end. You’ll see!

(NOTE: use semi-gloss for the white, because if you use flat or even satin, it will soak up the stain tooooo much! The sheen doesn’t matter for the other colors)
Next, I just haphazardly dry-brushed on the paint, using 2 or 3 colors on each board. Just be random, my friends. And don’t slop on too much. It’s ok if the board is showing here and there.

After letting the paint dry overnight, I went at it with 80 grit sandpaper on my Cordless Orbital Sander. You’ll see that the wood grain pops through FAST! It doesn’t take much sanding!

Some boards I sanded more than others. The key is to be random. And just truly not care.

You could almost stop there, because they look pretty weathered and all… but the last step is what really gives it something special! I promise!
After sanding and dusting all the sawdust off, I stained with a medium brown stain (Minwax Provincial to be exact). You can go with a lighter stain too… if you don’t want it to be such a dark rich color.

Rather than applying the stain with a brush, I just wiped it on with a cloth and wiped it off immediately with one swift motion! You don’t want that stain to soak in too long.

That’s it: {PAINT} {SAND} {STAIN}
Are you crying tears of joy? I KNEW it!
Wouldn’t this technique look amazing these barn doors on we designed and built? (barn door hardware and installation post here)
And now that you’ve wasted all these minutes reading this tutorial, you can see the whole process time-lapse-style all squished into 1 minute and 4 seconds.
Make NEW wood look like OLD distressed Barn Boards!
And here are some examples of how we used this technique to make old distressed barn boards for actual projects!
 Credenza Makeover (you have GOT to see the before!)
 Barn Wood Family Sign
 Circle Monogram (indoor or outdoor!)
 made from barn boards ...you could make ANY STATE! {Reality Daydream}") Barn Board State Cut-out
Barn Board State Cut-outThe possibilities are endless! And it’s such a SIMPLE technique! As always, if you give it a try, be sure to send pics or tag me on social media! (@realitydaydream) I love seeing what you guys come up with in your various DIY projects. So fun! Now go forth and be creative!
~Bethany
OH! And check out our very eclectic portfolio of furniture transformations… using soooo many different FUN techniques! And each one has a TUTORIAL with it!

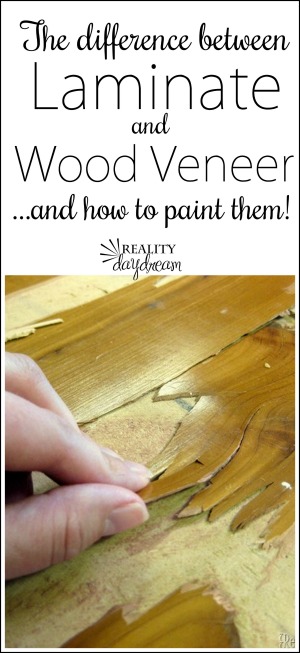
We also have a post that helps you determine whether your furniture is Laminate or Wood Veneer (and what the difference is!)

.~~~~~~~~~~~~~~~~
For your Pinning pleasure!


Related:
-

If you follow us on the 'gram, you know I've been stripping the finish off…
-

We love the original wood of our library, and wanted to find a desk that…
-

We've been needing to update our coffee table situation in the living room for awhile…
This is fantastic and I can’t wait to try it. I’m going to try this on a finished table that I have by sanding all the current finish off first. The big challenges for me will be the “be random” and “don’t care” but I’m up for it! Thanks for sharing this!
Have you tried apply a 2nd coat of stain? I am contemplating it right now… thought?
Can you apply a clear matte spray over it to help preserve it?
Yes totally!
When applying the stain do you apply all over board or just in certain areas?
All over! Then wipe it off!
Did you use just a towel to apply and remove stain?
I actually just followed your instructions to do this project and it came out so much better than I ever expected!!!! Omg I LOVE LOVE LOVE your website, you hv no idea how much your ideas helped me
I’m not sure how to post a pic but thanks so much I love my table top!!!
How did you attach them to the wall?
What a fun diy project. These diy barn boards will be perfect for making wall signs.
Could you have first used a wire brush on the wood to bring out the grain (I saw someone else do that)?
Also, instead of a brown stain, would a grey have given a more weathered look?
I am 90% sure I want to try this for my bedroom faux shiplap accent wall. Probably 1/2 the cost, PLUS it will be in the weathered colors (blues, tans) I want, rather than what Home Depot or Menards decide it should be, were I to buy prefinished shiplap planks.
I guess it wouldn’t hurt to buy different stains and paint colors, and just spend a day experimenting.
Yes definitely experiment with different stain and paint shades to get the look you’re going for! Gray stain will definitely give you a more ‘driftwood’ look. 🙂 As dor using a wire brush, you can totally do that! There are LOTS of different ways to distress wood to make it look old.
Tim did you ever try that. I would love to see pictures of a wall done with wood done in this style.
I used your technique with Christmas colors to create a wall shelf for hanging all of our Christmas stockings. With 3 kids w/spouses and 5 grandkids all coming to our house for Christmas every year I needed to figure out a solution other than the mantle. I had spray cans of burgundy red and hunter green on hand, and also pints of matte black and gloss white. I even had Provincial stain on hand! Following your directions, I think the shelf came out really nice. Even the store bought corbels responded well to the technique. I used cabinet knobs for the hooks and further embellished with various crosses to complete the Christmas theme. I love it! Wish I could send you pictures.
I would love to see your project!
Love the aesthetic, Bethany. Keep making beautiful things!
Hi Bethany! I love this look! I am building a TV console and would like to add a little color. I have just stained the TV console. What it be possible to do the paint on top of the stain or will it not work?
Yes you can paint right on top of stain!
I live in a 1955 era cape…the extra bedroom upstairs is paneled 3/4 of the way up with finished knotty pine. I want to do this to it! Should I just sand it down, and then go with your process from there? That’s kind of what I’m thinking! (It’s stained and varnished, I’m pretty sure…typical old knotty pine paneling.)
Thanks,
Kelly
Yes totally! It might be a pain to sand through the existing finish of the knotty pine, but if you use a belt sander it should go pretty fast. PLEASE send pics when you’re done!!! beth@realitydaydream.com
Hi. I am finally refinishing my cabinet with this technique. So far So Awesome!!!! One question. Said cabinet has 4 drawers over 4 doors. I have already painted applying in ling strokes up and down the boards. Do I apply paint up and down on the drawers as well or across them? I don’t want them to look weird sitting right above the doors. Thank you
I’m not sure I fully understand what you’re asking, but the rule of thumb I always go by is to brush on the paint in the direction of the wood grain. You can’t go wrong!
Did you use regular paint or chalk paint to do the rustic pine boards (mint, turquoise, white and charcoal grey) I LOVE these colours and am hoping to use this to cover my kitchen island with a diy farmhouse style wood countertop.
It’s just regular latex wall paint! <3
I am trying this on some scrap wood to see if I can do it. Did you put on one color, let it dry and then put another on top of it or did you just apply all the colors at once? I want to do this for the potting shed my husband is building me. I will be using 6, 8, and 12″ boards. I hope I can do. Yours looks great! Thanks for the info.
Hey Connie! I didn’t wait for each coat of paint to dry, but I also didn’t mind if my paint brush got different tints of paint in each of my pots of paint. It’s totally up to you! I can’t wait to see how this technique looks on your potting shed. Please send pictures when you’re done! beth@realitydaydream.com
Thank you. I will
I LOVE the old barn door look. Any suggestions on how to achieve this with a prepainted (apple green) piece? Without having to completely sand down to bare wood to start from scratch?
Hey Holli! Absolutely! Just skip the first step of painting (since yours is already painted) …OR if you wanted to add a bit more paint in another color that would be fine too! Then sand and stain the way the rest of the tutorial reads. I hope this helps! Send pics when you’re done! beth@realityDaydream.com
Yes I hate this green lol. So I can just paint over with desired colors and go from there?
Have you ever used the pine pallet boards for this? It would work the same way right?
I would think so, yes!
From your high speed video, it looks like you put the different colored paints all on at the same time. Is this correct? I would think you would have to let different colors dry or they would just all run together.
I didn’t let them dry between coats… just slapped on different layers. Yes there was a little blending, but it doesn’t matter. They key to this technique is being reckless! 😉
Would pine be suitable for flooring or do you think the wood is too soft?
Thanks! Dana
I have a friend that did pine flooring and absolutely loves it several years later!
https://www.theshabbycreekcottage.com/making-your-own-flooring-with-pine.html
I would like to use red hues instead of blue, any suggestions would be appreciated?
Just use a couple different shades of red and blues, and haphazardly slap them on the wood. There’s no science to it at ALL. 😉
Thank you SO MUCH for this tip!
We had a drop ceiling in our kitchen/dining room. It was done before we bought the house, and when I peeked under the tiles, the ceiling looked a little grim.
About 2 weeks ago, my wife came to me and asked if we could change the ceiling tiles as they were getting old and dirty. We found some faux barn board tiles that we both liked, but they were $25 each (about $6.25/sf). I did some online research and found your post. I recreated it by creating large plywood panels with birch plywood strips attached to them. I used the same aging process as you described, and I varied and mixed the stains to create a complex palette.
The results were AMAZING!
Thank you. I couldn’t have done it without your advice.
BTW, I recreated the ceiling for about $1/SF, and it looks better.
That’s amazing! I would LOVE to see pictures! You should come join our DIY group on Facebook and share pics of your project!
https://www.facebook.com/groups/DIYRealityDaydream/
Hi Beth,
Do you think this tutorial would work to make a “barnwood wall” (over my painted drywall wall)? Would you recommend using the same 1×4 pine boards, or something different? And If I do like a 15′ wall, do you have any recommendations (other than staggaring the seams) about how to place the boards on the wall to make it look good? What would you recommend for a top coat/finish?
Thank you!
Oh – and one more question — would you recommend nailing them into the wall, or would something different look better? I’ve never DIY’d before, so I have a hard time picturing the finished product. 🙂 THanks!
As long as you stagger the seams to look as random as possible, I think it will look awesome! I would try to use a matte or ‘flat’ finish polyurethane. I know for sure they make it in water-based versions in both Minwax and RustOleum. As for your other question, If you can get your hands on a nail gut or a pin nailer, that would by FAR be the best way to affix these boards into place. It will go really fast, and you will hardly be able to see the nails! Perhaps you can rent these at your local home improvement store?
Oh my god!!! I did this to make 3 little canvas with animal silhouettes for my newborn’s room and it is fabulous!!!! Really a no brainer! I followed your instructions and it is gorgeous! Thanks a LOT!!
Yay! That’s amazing! I would LOVE to see pics! You can email me at beth@realitydaydream.com
Hello – I am doing this on the top of an old wood table. I sanded the old finish off so it was bare wood, painted with latex paint, sanded the paint down, and used the same stain you did…..it seems like the stain just sits on top of the paint in some places and in others the paint looks like a neon color next to the darker stained sections (especially the minty paint) even though it was applied evenly. Any thoughts? Thanks!
This might be happening because you’re using a very glossy paint?
Hi, thanks for this great tutorial. I am planning to do a DIY project (my first DIY) and have couple of questions.
1. Did you chose treated OAK wood or untreated for this project?
2. I would like to use same wood (OAK) and get different colour patterns. In you video you have used a medium brown stain. I am planning to have different color shades on each wood board. What would you recommend for different color shades for example: Light Blue or Light Green or Red colors?
Thank you for for the tutorial once again and thanks for your help.
I simply used untreated pine 1x4s. You could absolutely use different shades of stain on different boards. That could look awesome! Pleeeeease send me pics when you’re done! beth@realitydaydream.com
Thank-you for the great tutorial. I love this look, but not the price tag attached to the new imported products you can find in-store(s). Plan on doing this on a pine buffet bar/table to update its look…and then a bookshelf…..and then whatever else my heart desires.
I just tried this technique and I am wondering if the grit of the sandpaper makes a difference in the darkness of the wood after staining? I used a very fine sanding block and not 100% happy with the finish.
Hmmmm, that’s strange. You were right to use a very fine sanding block. The only thing I can think of is that the species of wood your using isn’t ideal for this technique. For example, oak and walnut (hardwoods) promote more ‘bleeding’ into the wood grain than woods like pine or poplar. Something to think about!
Thank you. Good website. Will be doing a couple of bookcases.
Beautiful work! Wondering what you put on the wood to protect it after you were finished…I am doing a kitchen table ..i obviously want to protect it as we will be eating on it etc…I dont like the look of varnish…I have heard about wax paste…and I love the look… would it protect enough?
I’ve never used wax to seal furniture, so I can’t speak on its durability. But I know a lot of others that use it and love it! Another option is a flat-sheen polyurethane if its the glossiness of varnish that you don’t love.
Bonjour,
Je suis en France et je ne trouve pas de Minwax Wood finish, pouvez vous me dire ce qui compose ce produit s’il vous plait, afion de trouver un équivalent! merci beaucoup d’avance!
What grit number sand paper do you use?
For this project we use 80 grit!
Hi I wanted to ask, after painting what type number sand paper did you use to distress ?
For this project we used 80 grit!
This is an absolutely amazing idea, Thank you for sharing 🙂
Thank you! And it’s SO easy!!
I am doing a wall next week love this !
Ooooo YAY! Email me pics when you’re done!
I have a question! What kind of colored paint did you use? Is it oil based?
It’s just latex!
I cannot wait to try this
Absolutely gorgeous! This tutorial was very helpful!
Question … did you finish the ends of the wood boards? I’d like to make some signs, but I don’t intend to paint the edge white as you did. I guess I should stain the ends then too? Thoughts?
Yes, I would stain the edges in that case. Or you might find that you like the look of the raw wood edges too. Either way!
Thanks! That’s what I did. Not quite finished yet though.
(It’s on Instagram under sjlsanderson, if you’d like to see.)
I love it!! great sense of humor by the way. right when I got done reading it I saw “and now you can see the video!” lol love it thanks for sharing!!
I used your technique while refurbishing my headboard and foot board . Came out spectacular!!! I wish I could post a pic. I finished it with Minwax finishing paste wax. I am so pleased!
YAY exciting! I can’t wait to see pics! <3
I hate to be a bother but I have a question regarding the paint and stain. Did you have any issues with the paint (any finish) becoming sticky afterwards? A few years back I tried a similar technique but found that, even after several days, the areas that were lightly painted were very sticky. I stumbled across another blog post similar to yours and others had the same issues. So to be clear, use a semi-gloss latex for the white and the oil based stain, correct?
Hey Natasha, I haven’t had that problem, but I can see how it would be frustrating! I wonder if the paint isn’t fully dry enough before the stain is added? Or maybe the sheen of the paint isn’t getting sanded off enough? It’s hard to troubleshoot from afar. I wish I could help more!
I wonder did you use an oil based stain on top of a latex paint? if so that could be the problem as they are not compatible.
I’m new to dig and this tutorial is awesome! Have you ever transposed photos to wood and stained with clear? I have 3 great wave style 6″ x 63″ mirror strips I want to try your method here and there and put paris and family photographs. I’d like to make the pictures part of the wood. Any suggestions would be appreciated!
Sylvie, I’ve never tried images transfers on wood, but I’ve always wanted to! Maybe I should play around with it sometime soon! If you give it a go, let me know!
Sylvie, I’ve never tried images transfers on wood, but I’ve always wanted to! Maybe I should play around with it sometime soon! If you give it a go, let me know!
What store did you buy the wood at?
The big home improvement store near us is Menards (I think they’re only in the midwest) so that’s where we get most of our lumber. 🙂
I agree with Sara 🙂 Easy peasy way to make rustic wood barnboards. I’m working on the right color combination for my daughter’s room at the lake house. Still have some tweaking to do with laying the paint on and sanding enough. https://goo.gl/photos/6zvSJdC2ydjimdBQ7 I used 3 different stains in the image and ended up with a rosewood (the top 2 boards). Thanks for sharing Beth!
Loooooooove how it turned out! <3
L Ryan, those are BEAUTIFUL!!! Do you mind emailing me (julieholder615@gmail.com) and telling me what kind of paint/stain you used? I’m going for this look right now!
Thanks!
Hi L Ryan, would you also email me with the colors and stain you used?
Your colors are beautiful. Did you use the same colors on every board? Do you mind telling me the colors and the stain color you used?
Oh girl, it’s just some leftover cans of paint I had laying around. But the exact colors are not important. If you want this exact same look, use a teal, and aqua, and white, and just haphazardly slop it on the boards. Use a slightly different combination of colors on each board!
This tutorial is PERFECT! I know it is older, but you are still helping others. We took apart a deck this summer and had a ton of leftover wood. I am using this method (with grey and white paint and a weathered oak stain) on boards. We are going to put those around our breakfast bar. It is going to be beautiful I think!
Ooooo pleeeease send pics when you’re done!!!
Looks like your applying the stain with steel wool, or are you sanding lightly after staining.
When I do my boards, and before I give it a light poly seal, I use the steel wool to smooth out the stain and paint.
I just use a cotton cloth to apply stain.
Can you tell me what color stain you used?
I believe I used Rustoleum Dark Walnut!
Hi Thanks for the info. I refinished a wood growth chart using your steps, but blended the paint a bit more, more so because this was my first try at it. I liked the results so much, I made a video and blog post of it. I gave you a shout out. I didn’t realize this was so easy! Thank you.
Awwww YAY Lisa! Thanks for leaving such a sweet comment! And yes, it’s me writing 99% of the posts. Occasionally Nick will write a really complicated woodworking tutorial, but we always state it clearly that he’s writing. 🙂 WELCOME to Reality Daydream!!
I just read an article about how American barns are disappearing so it does my heart good to see people NOT using real barn wood. Yay you!
Oh my word! How did I miss this comment?! I would looooove to see your barn door Ashley! Can you email me a pic? beth@realitydaydream.com
Yes, how does she? I would like to see it also!!
Can I use wood from a pallet?
Yes totally! The more woodgrain, the cooler it looks though, so pick the pieces with lots of awesome woodgrain!
This is gorgeous!! Would a cherry finish poly stain work alright??
Hey saw this cross posted on my friends, addicted 2 diy, blog. Had to try it out on my twins high chair I built for them, can’t post pics here but would like to share it with you and get your input. Thx
Yay! I cant want to seee! You can email me at beth@realitydaydream.com
Thanks so much for this post!! I’m using your technique on a new wood barn door! It is going to look fantastic if I can pull this off! You make it very easy to follow…. I just found your blog and I’m so excited!!!
Yayayay! Send pics when you’re done!
Beautiful!
Thanks!
Question: does it matter if the paint is water or oil base?
Nope! It shouldn’t matter as long as it’s completely dry before sanding / staining.
Thank you! this looks super easy and consistent.
We want to do this on the floor but have a matte yet soft finish. do you have any suggestions for a protective yet clean overlay? poly? wax?
Brian, I’m not a huge fan of wax, and haven’t used it enough to speak on that. But if you’re wanting a matte finish, you could go with this poly I’ve used and loved: (aff link) http://amzn.to/1TZ9v17
Yes. Waterbased can be the base under polyurethane. But as top coat, waterbase can only be use it on top of waterbased. Never topcoat waterbase over polyurethane
I used a mixture of vinegar water and dissolved steel wool for my final stain. Now that’s cheap! And looks crazy awesome
I love that technique too!
Yes! You can absolutely use oil-based sealers over water-based paints. As long as it is thoroughly dry before applying the sealer!
EEEK! I am so glad I found this. I have a project to do and I have been trying to figure out what colors to do and I think I finally figured it out using this technique. I am using old pallets so I hope I get the same effect (if not I will go with pine). Hopefully can get started on it this weekend after a quick trip to the hardware store for a little stain and brush.
I love this and am considering using this method to turn an existing kitchen table into a “barn wood table top”. How would you recommend that I attach the wood boards to the existing tabletop? And how would you recommend that I seal it? I really appreciate your thoughts!
Ooo this would be a great way to update an old table! I would just screw the boards straight to the table top!
What is the best product for sealing my wood? I’m using this technique for my adirondack chair in my backyard. I don’t want the wood shiny with varnish. I want the matte, rustic look.
I usually prefer Minwax’s sealants, but as far as I know they don’t have a matte sheen yet. RustOleum does though… I’m just not 100% sure on the durability factor>> http://amzn.to/21SceI5 (aff link)
Hi..I absolutely love this!! Thank you for sharing I’m in the middle of countless projects right now. Ha what’s one more, rrriiiiggghhhttt!! But could you tell me what colors you used? Thank you.
They’re just random cans of paint… you don’t need exact colors to get the same result! 🙂
They say you can make wood have an aged look if you use vinegar and steel wool. Should give it that old rustic look..
Yes I love that method too! It gives a completely different look!
What would you use just for staining instead of paint? They are trying to get Appaloosa color on Knotty Alder wood
The old antiquing kits we used was acrylic paint with a thinned oil based stain. I still love that combo. That takes a bright red and makes it an old weathered barn red… Can use black or browns for the stain. I am going to try this though. I have many things that will work with your technique . Thanks!
did you us a oil or latex paint? wonder if a chalk paint would work?
I used latex, but I think chalk paint would work too. The white won’t be as bright because flat sheen paints really suck the stain up. If you want a bright white to pop link it does in my example pics, I would use a satin or semi-gloss. You can combine chalk paint and latex too, since they’re both water based. Hope this helps! Let me know if you have any other questions! 😉
Hi Beth! I tried it and it didnt work for me, I followed all the steps. When I sanded it takes all the paint away. Did you make something to the board before painting it?
Do you use a regular sand paper or an orbit sander?
Thank you!
It’s so weird that it isn’t working for you! Were you HAND-sanding with 80 grit sandpaper? Don’t use an orbital or belt sander! Let me know some details and I’ll help trouble-shoot what the issue might be
Thanks Beth, I HAND-sanded with 80 grit sandpaper as it says in the post. I’ll try a lighter sand and let you know how it works. Thanks!!
That’s soooo strange. I just don’t know what to make of it. I’ve used this technique so many times, and it always turns out the same. I’m sorry I don’t know how to help you. 🙁
Hi Nancy! Unfortunately I wrote this post almost 4 years ago and can’t remember exactly which paint colors I used. It was back before I knew I should write all that stuff out in the blog post. Haha! The good news is that this technique for ‘aging wood’ is very forgiving. If you use some blues and grays, you’ll likely come out with a very similar shade/outcome. Hope this helps!
Love this! Exactly what was in my head. Just did not know which steps to take to get there. (and I will also be incorporating a couple shades of gray…tehehehe. Thank you for this post and Pin!
I just started my own blog, do you mind if I share your link on my blog. I made a coat rack out of a 4’4′ using this technique
Certainly! Thanks for sharing! Can’t wait to see your coat rack!
I paid $100 dollars for 2 very small wood boards to use for photography! OMG I haven’t seen this before, I am ready to tell my boss that I need the rest of the day off and to run to home depot!
Great project, Beth! I’m very excited to try it with an accent wall. If you were doing this against a stucco (outdoor) wall, would you nail/glue a thin layer of plywood against the wall first, or do you think gluing & nailing each wood board would be enough? I’m worried the glue won’t take with the stucco wall being so bumpy. Thanks!
Where did you find the boards so cheap?
We bought these 1×4’s at Menards… which is a big home improvement store in the Midwest (if you’re not familiar) 🙂
Did you stain each board entirely or just portions of each board? Looks beautiful!
I stained each board entirely. They turned out so awesome! I hope you give it a try.
Did you use latex or oil based paint
We used latex in a flat sheen.
I was thinking of doing this to the floor in my flower shop but I heard that the urethane may turn the paint yellow. Have you had any experience with this?
Hey just wondered did you use flat, gloss, or satin paint or does it matter? Doing our bathroom walls like this and cant wait to do it:-) yours look beautiful!!
Definitely use flat paint, it will look more like genuine old wood! Good luck!
I love this! If I were doing this for my floors, would I need to also seal it with something else as well?
Thanks!
I would definitely seal a floor with some kind of heavy duty flooring urethane. And I would use a hardwood instead of pine to prevent denting. Good luck! Send us pics when you’re done!!
Thanks so much! We are only using pine because we got a ton of skids which we have used to build our whole stick frame for our house ( It’s a tiny house, 8×20 ft/160 sf)! The left over pieces are perfect sizes for flooring… I am worried about denting but it’s also what we already have.. :S
Cool! This is going to be such an amazing project! I can’t wait to see pics!
Was wondering were the other part of this tutorial was? Wanting to make one for a wedding gift.
Thanks
Oh no! I’m so sorry! I must have forgotten to go back and add that link! Here ya go
https://realitydaydream.com/2012/11/barn-boards-thoughtful-diy-gift-ideas.html
Awesome…. and I love your sense of humor.
About to do a small plaque and I am thinking of trying this distress method! I was wondering if I could use regular acrylic paint for the first step, or does it need to be paint that goes on wood/walls? Thanks
Beth you can use any paint !! Be sure to send us pics when you’re done! 🙂
ive been wanting to use barn boards to make a headboard. know that i know how easy it is, i can start this weekend! pretty pumped!
hopefully after i finish current project of refinishing my wicker chair!
Ooo fun! Send pics when your done!!
Wow, I just found your site. It’s so inspiring.
Thanks.
I love this Beth!
I can not wait to try your method and the one posted by Nine Red.
Thank You for posting such a cool idea.
Diane
Oh my god, the tears of joy are all over my keyboard. These are beautiful! Have you heard of the tea/steel wool/vinegar trick for “aging” wood? That’s a handy tip too. Check it! http://ninered.blogspot.com/2012/05/how-to-aged-wood.html
Beth,
Those are the prettiest barn boards I’ve ever seen!
Chris
love it, can’t wait to see what you did with these. Mary in NY (I’m a big hugger, not too emotional)
How easy! When I want barn boards, I just start taking my fence down. Your method is much easier than that 🙂