• Home
  • About
  • Tutorials
  • Recipes
  • Furniture
  • Contact
    • Contact
    • Infertility
    • Disclosure
    • Privacy Policy
  • Shop
    • Facebook
    • Instagram
    • Pinterest

Reality Daydream

The Dream is Free, The Hustle Sold Separately

  • Home
  • About
  • Tutorials
  • Recipes
  • Furniture
  • Contact
    • Contact
    • Infertility
    • Disclosure
    • Privacy Policy
  • Shop

Butterfly Silhouette Clock

October 30, 2015 by Bethany Sy

A couple weeks ago, I shared this little corner of the twins’ room that I added some ledge shelves and this children’s Murphy desk that seemed to be a huge hit! Several of you even said you were inspired to build an adult-height version. I’ve been thinking about adding one as a ‘standing desk’ for myself in the studio… we’ll see.

Build your own Murphy Table for kids... it's like a wall-mounted secretary desk with all that storage inside! {Sawdust and Embryos}

Anyway, when I shared this reveal, I promised to eventually throw down a tutorial for that butterfly clock, and today? I’m prepared to deliver!

How to make your own butterfly 'cutout' clock... where it looks like the butterflies are flying out of the clock! {Sawdust & Embryos}

Awhile back I had pinned this clock to my inspiration board because I loved how unique it was… never even looking at the price until recently… FIVE HUNDRED DOLLARS. #nothanks

How to make your own cut-out butterfly clock!source

So naturally, I set out to make one myself! I searched google for ‘Butterfly Silhouette’ and it gave me tonnnns to choose from! Here’s a screenshot to show you how much variety there is.

Fullscreen capture 10302015 63131 AM

As long as you’re not making this clock to sell, you don’t need to get permission to use these shapes. Pick 3 and print them in various sizes on regular printer paper. Then cut ‘em out!! Don’t worry about the antennae.

Make your own butterfly clock {Sawdust and Embryos}

Then gather up your wood (I used a 24” slab of plywood) a bowl, and a fine-point sharpie!

How to make your own butterfly clock {Sawdust and Embryos}

Visualize the bowl as the round clock, and lay out your butterflies how you want them. Remember that the ones that look like they’re coming out of the clock won’t be stuck where you’re putting them now. That’s just where they will appear to have ‘come from’.

How to make your own butterfly 'cutout' clock... where it looks like the butterflies are flying out of the clock! {Sawdust and Embryos}

Making your own butterfly silhouette clock! {Sawdust and Embryos}

Now you’re ready to pull out that scroll saw! (This is the one I use and it’s A.M.A.Z.I.N.G. But if you’re looking for a more mid-range (read: less expensive) then this one is also great quality and handles well! Whatever you do, don’t buy a scroll saw in the $100-$200 range. You’ll regret it for sure.)  I’ve been getting a lot of use out of this bad boy lately… it’s just one of those tools that allows you to make SO MANY creative things, without having to actually build something.

Make your own butterfly cutout clock {Sawdust and Embryos}

I know it’s annoying when people say things are easier than they look… but you literally just cut along the lines and turn your board as you go to stay on the line. Kinda like sewing!

butterfly clock-002

Not bad ‘eh? This took me about 30 minutes to cut out.

Cut-out Butterfly Clock using a scroll saw {Sawdust and Embryos}

I painted just the face (not the sides) with a few light mists of RustOleum Bright Gold, and then drilled a hole in the center. You’ll want to make sure your drill bit is about the same size as the shaft of the clock kit that you purchased,

When you add a clock kit, the part in the back sticks out a good 3/4” …and I wanted my clock to sit closer to the wall. This part is optional, but I opted to route out a section in the back for the clock guts to sit down into.

butterfly clock-003

As you can see, it doesn’t have to be perfect, because it’s on the back!

Then slap on the clock hands according to the instructions on the package (if you need help with this, I have more detailed instructions on this post)

How to make your own butterfly 'cutout' clock... where it looks like the butterflies are flying out of the clock! (Sawdust & Embryos)

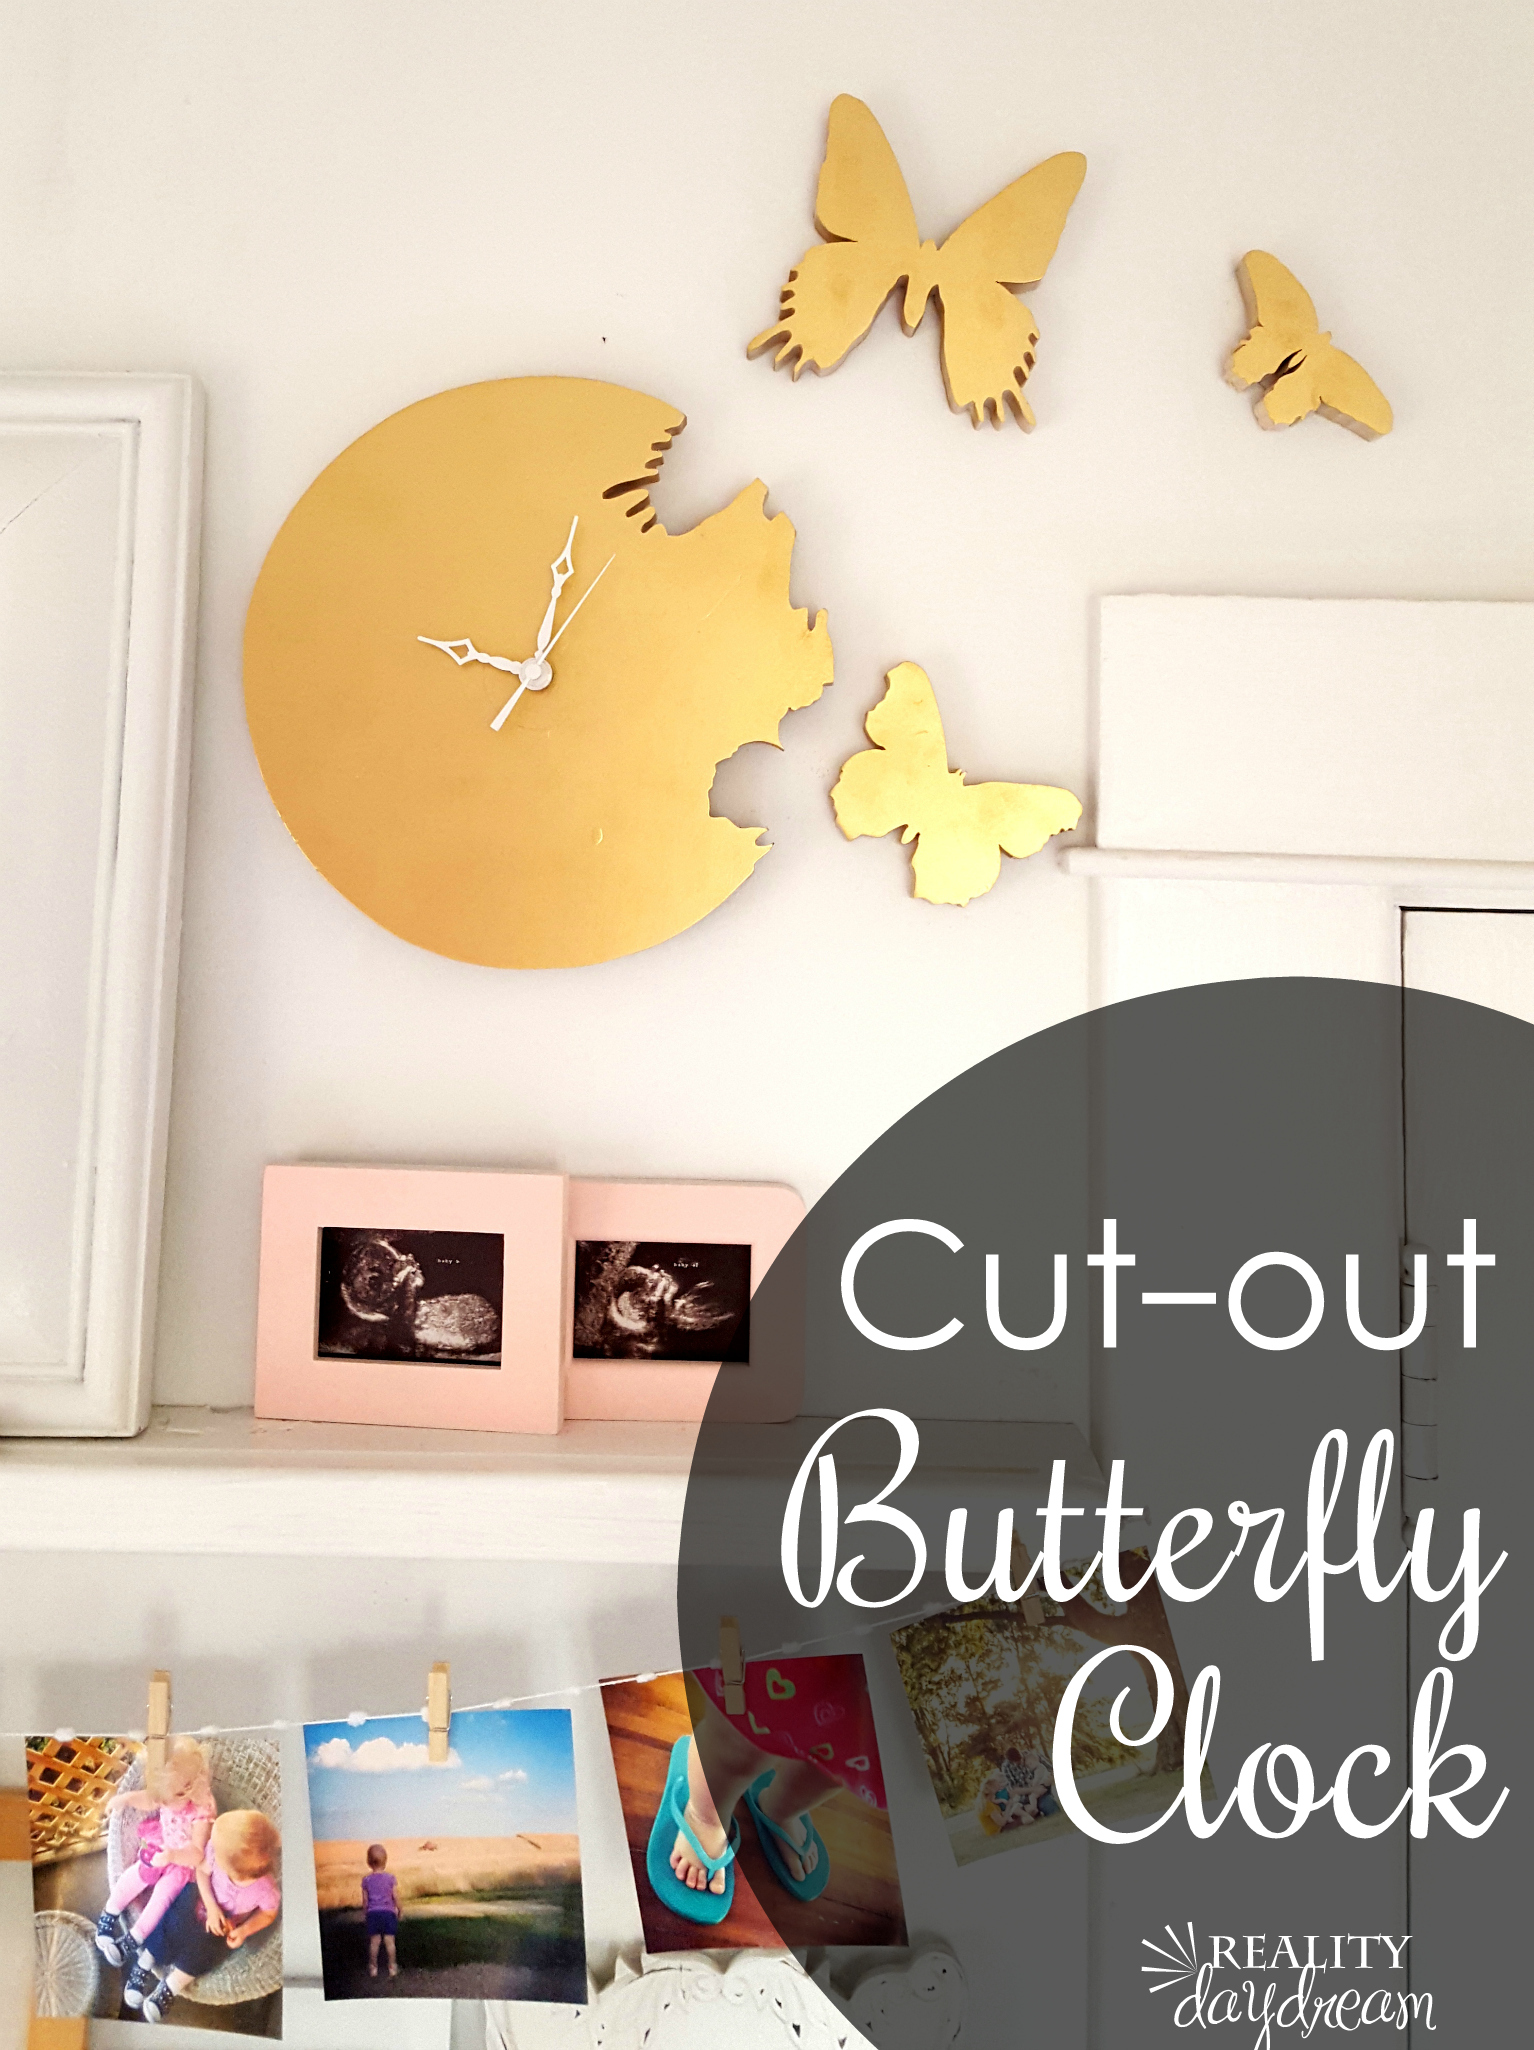
I put a comb hook on the back of the clock for easy hanging, and used 3M’s extreme mounting tape to affix the butterflies into place. This product isn’t repositionable, so make sure you put them where you want them!

Make your own butterfly clock {Sawdust & Embryos}

Obviously this isn’t a good clock for teaching littles to tell time. The girls said ‘where’s the numbers?’ …haha! But this one is more for me than them. #keepingitreal

How to make your own butterfly 'cutout' clock... where it looks like the butterflies are flying out of the clock! (Sawdust and Embryos)

This project was so simple… and I love that it can be modified so many different ways! Your clock could be any shape, and you could have dragonflies or fairies or WHATEVER YOU WANT flying away from it. So fun!

As always, if you try one of our projects, pleeeease share pics with us! Happy weekend!

Sawdust-Embryos_thumb2

Thanks for pinning!

How to make your own butterfly 'cutout' clock... where it looks like the butterflies are flying out of the clock! {Sawdust & Embryos}*this post contains affiliate links


Related:

  • DIY Scroll Saw Family Silhouette Sign

    Hello hello friends! Things have been wild as we've been navigating the holiday season, schedules,…

  • Coffee Table / Lego Table

    We've been needing to update our coffee table situation in the living room for awhile…

  • Kids Closet Storage Ideas

    When the twins moved into what used to be the guest bedroom, I knew I…

About Bethany Sy

Nick and Bethany Sy are the creative free-spirits behind DIY/Lifestyle blog, Reality Daydream. They recently purchased a historic mansion and have been documenting the ups and downs of renovation and making this home their own... all while sharing tips and tutorials along the way! When they found themselves in the trenches of infertility, they started a journey that would prove to be their most important DIY project ever, and have 3 beautiful girls to show for it. <3

« Cheesy Cruncheroni Casserole
Classic Candied Pecans »

Comments

  1. 3

    Jane says

    August 21, 2016 at 3:23 am

    Wow I totally love this!!! 🙂

    Reply
  2. 4

    dana dashoop says

    November 3, 2015 at 9:18 am

    LOOOOOVE!!! AWESOME SAUCE!!!!!!!

    Reply
  3. 5

    Lidia Romeo says

    November 2, 2015 at 8:14 am

    Any chance you could re-make and sell one of these gorgeous clocks? 🙂

    Reply

Leave a Reply to dana dashoop Cancel reply

Your email address will not be published. Required fields are marked *

Recipe Rating


  • Facebook
  • Instagram
  • Pinterest
  • RSS
  • YouTube
We are Nick and Bethany! Welcome to our blog, Reality Daydream where we share our DIY adventures!
Click here for lots of art projects using only wood stain on furniture!!
Please feel free to share or pin my posts! You're welcome to use ONE of my images (no collages or pinnables) with a link back to the corresponding post. Please do not edit or crop that single image in any way. Improper use of my photos, ideas or words is a violation of copyright. Thank you!

Categories

Attention: Almost any do-it-yourself project involves risk of some sort. Your tools, materials, and skills will vary, as will the conditions at your project site. Reality Daydream has made every effort to be complete and accurate in the instructions of the plans on this website. Reality Daydream will not assume any responsibility or liability for damages or losses sustained or incurred in the course of your project or in the use of the item you create. Always follow the manufacturer’s operating instructions in the use of tools, check and follow your local building codes, and observe all commonly accepted safety precautions.


Copyright © 2025 · Modern Blogger Pro On Genesis Framework · Customizations by Sweet Theory Designs · Privacy Policy · Log in