This past weekend, we were ‘refreshing’ and rearranging DIY floating shelves in our upstairs bathroom, and remembering how bleak and cave-like this area above the toilet once was. Remember this?
 *this post contains affiliate links*
Adding chunky white DIY floating shelves above the toilet was a game changer for this small bathroom’s style AND function. I went back into our blog archives to find that old post, and found that we didn’t do a very good job of explaining how we built these. So I’m going to re-write the tutorial to make things more clear!

When we were in the planning stages of this, Nick and I sat down and talked about what we wanted, and this was our list of must-haves.
- Full Width
- Evenly Spaced
- Not Deeper than the toilet’s tank
- Chunky
- Floating
- White
Let’s get started building these DIY Floating Shelves!
Instructions for Building DIY Floating Shelves
First things first, we took some measurements of the area that we wanted the shelving to be. For us it is as follows: Width 42”, Depth 8” Thickness 3”. We started out by cutting the boards to size, subtracting the thickness of the ‘skin’ (more on this below). We subtracted 1/2” (2 1/2”) in from the thickness and a 1/4” from the overall depth (7 3/4”). In addition we took off a 1/4” from the width for ease of installation (41 3/4”).
Once you have your front and back boards cut to width (41 3/4”), you will want to cut some cross members. We used a quantity of 4 evenly spaced. These will need to be cut to your desired depth (7 3/4”) minus your front and back boards thickness (3/4” + 3/4” = 1 1/2”) (7 3/4” – 1 1/2” = 6 1/4”). When everything is glued together it will equal your desired depth (8”).
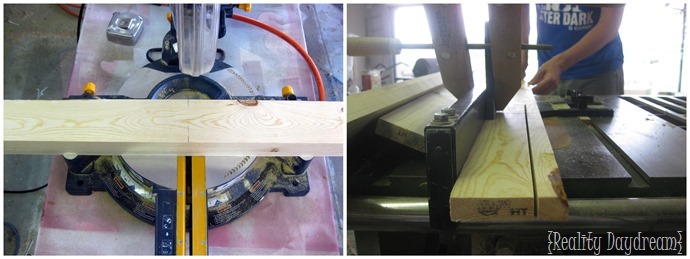
* Notice the feather boards in the picture to the right. Not only is this done to help prevent the board from kicking back by keeping the board in line with the blade and in the event a board is kicked back the feather boards will pin the board against the fence and table, it also allows a more consistent cut by providing even pressure toward the fence and table of the saw.
With a square, we laid out where our cross members are going to be Then gluing and stapling (1/4” x 1 1/4” crown staples) the cross members to the back board. Finally,we flipped the shelf over, glued, checked the cross members for square, and stapled the front.

* We use staples for these DIY Floating Shelves because it is what we have on hand. And it allows us to continue working without having to wait for glue dry times. Any type of fastener would work. Although I would caution using screws as it will likely split the wood (drill a pilot hole first) or just glue and clamp.
Next we devised a plan on how to make this these shelves truly appear floating. We have done these in the past for the girls’ nursery using a different means. But this time I wanted to make them in such a way that they would be easily removable and even possibly adjustable. We cut strips of wood for the back and sides of each shelf (1/2” X 3/8”) keeping the end grain of the wood parallel with the front face of the strips. This gives it strength and keeps it from splitting when installed. Then we used a router to cut a slightly larger groove in the shelves (sides and back). You can also use a dado blade and table saw, then check for fit. You want to have a little wiggle room.
If you are not comfortable cutting small strips of wood check your local hobby/hardware stores. Many times they have small rectangular or square stock on hand. Probably with the dowels or other craft wood supplies.
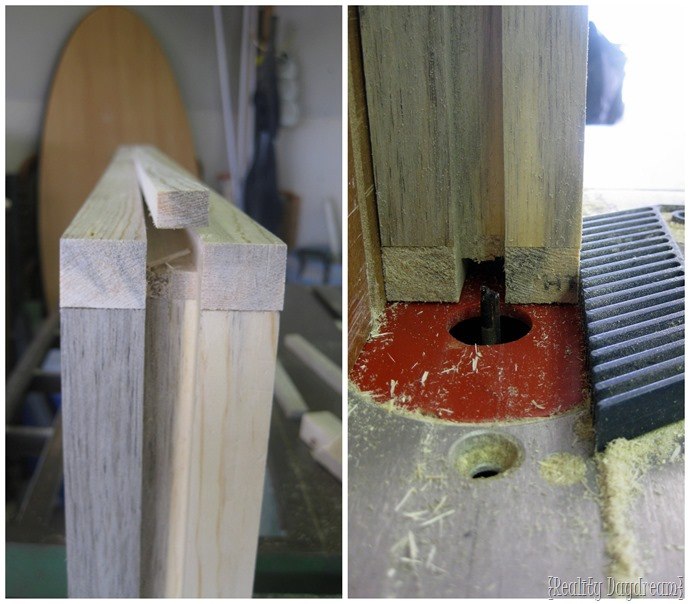
Can you see things starting to take shape? We took our DIY Floating Shelves shelves into the bathroom, measured the locations of where we wanted them leveled the strips out. Then drilled a pilot hole and nailed them into place. Then we checked the fit of the shelves. Marking and making additional cuts to improve the fit of each shelf.

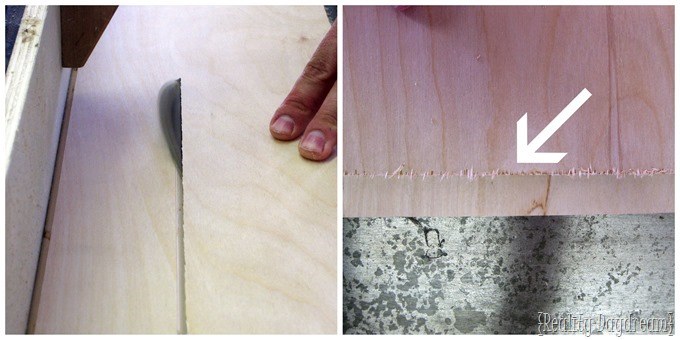
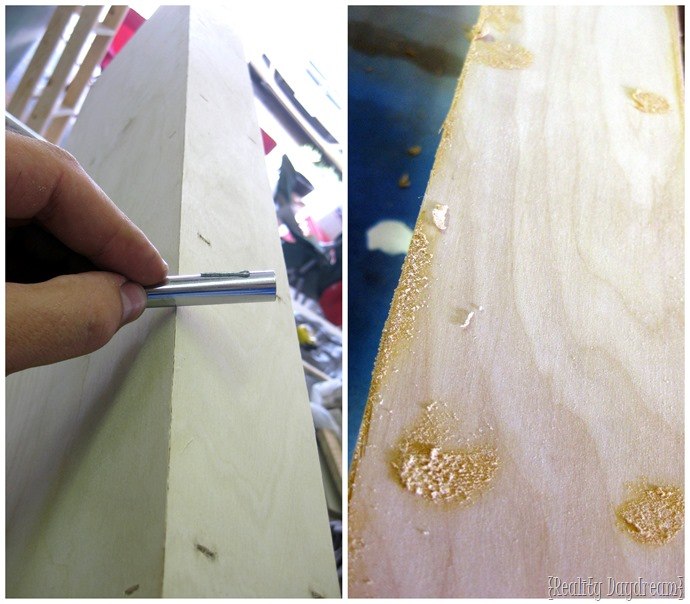
Using 1/4” birch plywood, we measure and cut the ‘skin’ to size. I clamp a piece of plywood onto my fence when I cut angles to keep the wood from sliding under the fence.
It’s ok if there’s some chip-out on the bottom side (pictured below). We just made sure these cuts where on the inside of the shelf.
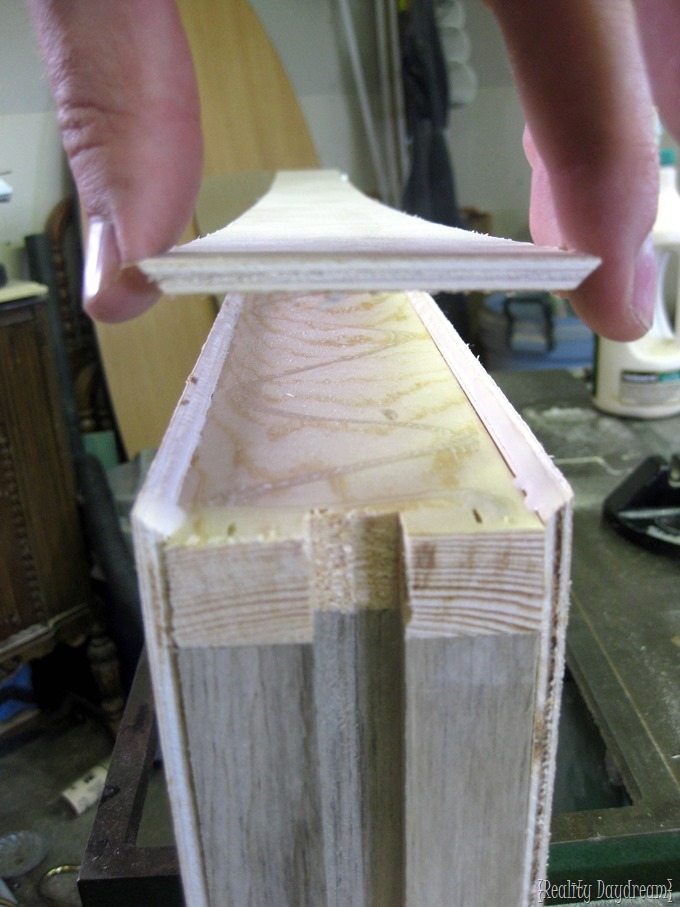
With the skins cut, glue the top of the shelf’s skeleton and lay the skin on it. Start lining up the 45* angle on the front and work your way down stapling (1/4”x5/8” crown staples) every 4-5”. Then staple the rest, spacing your staples 6-8” apart. Repeat on the back!

Once we were done with the top and bottom, we measured and cut the front just slightly larger then needed test fit. Then glue the back and the 45* angle and staple into place.
Lastly, we burnish the edges as we did on our crown moulding tutorial. Then fill the staple indentations with wood filler.
We sanded, primed, and painted glossy white. Then slid these bad boys into their place in the bathroom!

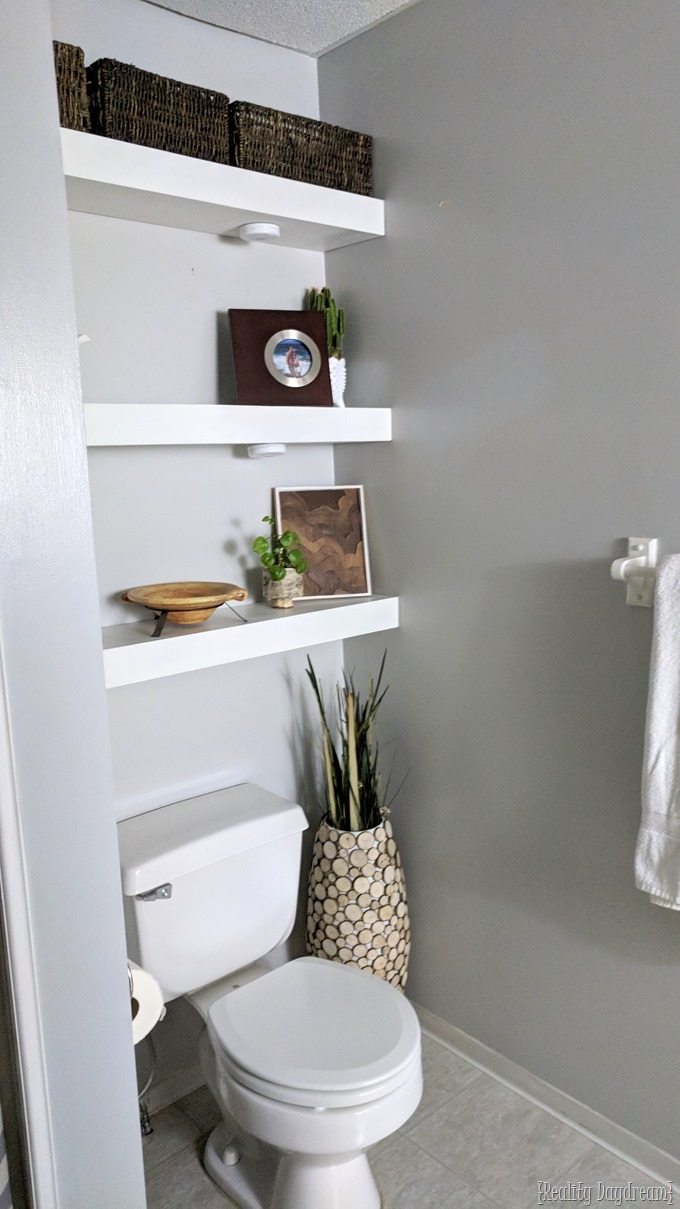
We picked up some baskets for storage and some Puck Lights on a whim, and decided that it makes ALL THE DIFFERENCE! We love it hardcore.


As always, feel free to ask any questions at all! And be sure to check out the other shelving tutorial where we made Massive Oversized DIY Pegboard Shelves!
If you don’t already, you should subscribe to our blog so you get an email every time we publish a new blog post (not more than 2 times a week… TOPS)! You can also follow us on Facebook and Instagram so you don’t miss ANY of this madness!
Thanks for pinning!


Ikea sells these as well, easier then to make it
They wouldn’t be full width this is much nicer and more cost effective.
The problem with the ones from Ikea though is that they aren’t custom fitted, and I don’t think the mounting for them will work if you trim them.The floating wall-to-wall shelf look is really nice, so unless your walls are exactly the same width apart as the Ikea shelves (which I think are 43.25″), you gotta make them yourself.
Very nice. Have you considered making the lights inset?
I love it! It sure changes the look of the bathroom. Thank you for sharing.
Wow!!!! What a difference and decorated beautifully
How far apart are your shelving. And how high from the top of the commode did you place your first Shelf?
Hey Lisa! The bottom shelf is 14″ above the toilet, and the space between the other shelves is 16″. Sorry it took me so long to reply!
You inspired us! We followed your terrific directions and made a wonderful alcove space behind our toilet. Thank you.
Yay that’s exciting! You should email me pictures so I can see! <3
beth@realitydaydream.com
Hi! We’re definitely going to do this in our bathroom! How high above the toilet does the first shelf start and what is the distance between each of the shelves? Thanks!!
Hillary! Sorry for the delay! The first shelf has 14″ between it and the toilet. Then there’s another 14″ between each other the shelves above!
Thank you! That’s very helpful!
This is exactly what I want to do over the toilet in our master bath. Thank you so much!
I love these! How far apart are the shelves (sorry if you stated it, and I missed it) 🙂
WOW! I am seriously impressed. This looks so amazing. Thanks for giving us the daytime and nighttime look too. What a difference a day makes.
love this!!!!! Puck lites are awesome!!! not too bright to blind you (for those night trips to the bathroom) but more light than a night lite (so you don’t miss the target)
glad I got to see it in person!!!
Dana
dashoop@hotmail.com
Love it! It makes the space look SO much bigger!
You both never fail to amaze me! I wish you both could come remodel our home! : ) I love it looks amazing!
These look great! Those puck lights are surprisingly bright, great job!
I love those floating shelves, I wish you could fly out and do that to my bathroom.
So luxurious! I’m sure the questionable aimers will have NO PROBLEM AT ALL! I love it. It looks fantastic!!!
WOW! I thought the first shelf was cute, but this is BAM!!! I love it! And happy birthday to your girls!
-andi
That looks really great and functional too! You guys do such good work 🙂
That looks beautiful!
Happy Birthday girlies!
huge difference!! I love the look of built ins 🙂
HAPPY BIRTHDAY TO THE LITTLE LADIES!!
That looks great! Happy birthday to your girls!!
Wow. This looks great! The lights really add a lot. This looks like a hotel. No, this looks NICER than a hotel. Great job!
Love it! I wish I had somewhere to do that! I think you should paint the back wall turquoise to match your backsplash. That white would sure pop off of that! Tell your two sweeties Happy Birthday!
Ohhhh holy whoa! Those look amazing!!! Way to go you two 🙂
And a very happy birthday to your girls!