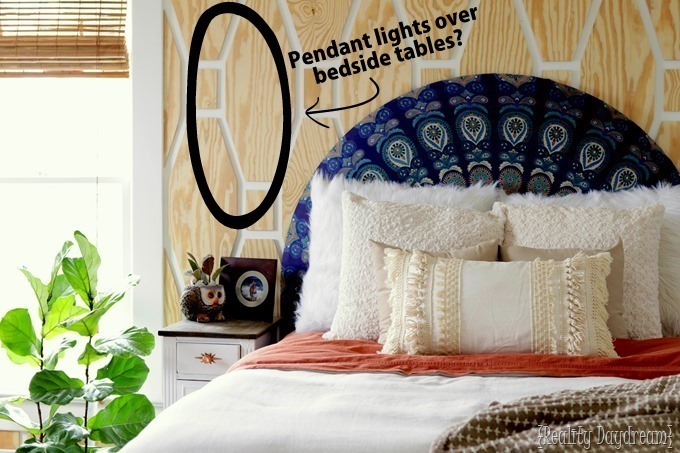
Last spring, when we were working on our ‘Master Suite’ and adding the Upholstered Round Mandala Headboard and the plywood wall treatment, etc, you might remember us hinting at plans for some pendant lighting ‘coming soon’
Well, ‘SOON’ is a relative term right?!
The truth is, in the midst of this project was when I was diagnosed with Lyme Disease and was very sick in the summer. These wooden pendant lights got put on the back burner (a dusty corner of the garage). And even when I was feeling better, the idea of working on these reminded me too much of being so sick. Typing that out now sounds so silly… but it is what it is. And now, almost a year later, THEY’RE DONE! And wholly awesome.

Nick is the one that really took initiative to get the ball rolling again, and I’m so grateful for him. This tutorial is written by both of us! The electrical part is FOR SURE alllll him. Let’s get into it!
*This post is sponsored by Rockler and contains affiliate links. Thank you for supporting the fabulous brands that make Reality Daydream possible!*
Supplies for DIY Wooden Pendant Lights
- Wood blanks for turning (or buy them here)
- Lathe
- Carbide Turning Tools
- Forstner Bits
- Suuuuuper long drill bit (3/8” x 12 bit)
- Triple-socket pendant lighting kit
- Welded Rings
- Ceiling Hook
- Wood Stain
- Heat Shrink Tubing
- Welder’s Glue
- Zipties
- Lamp wire 18-2
We glued up some scraps of wood to make our ‘turning blanks’. Nick even went to the extra fancy effort of slicing off the squared corners because octagons are closer to being round than a square, right?

Connect opposite corners with a straight-edge to create an ‘X’ on each end. This gives you the exact center! Then load that sucker up on your Lathe, using your marks to make sure that everything is lined up, centered, and ready to turn! It’s hard to see in the pic below, but there’s a center point on the chuck that you will poke directly into the middle of your ‘X’.
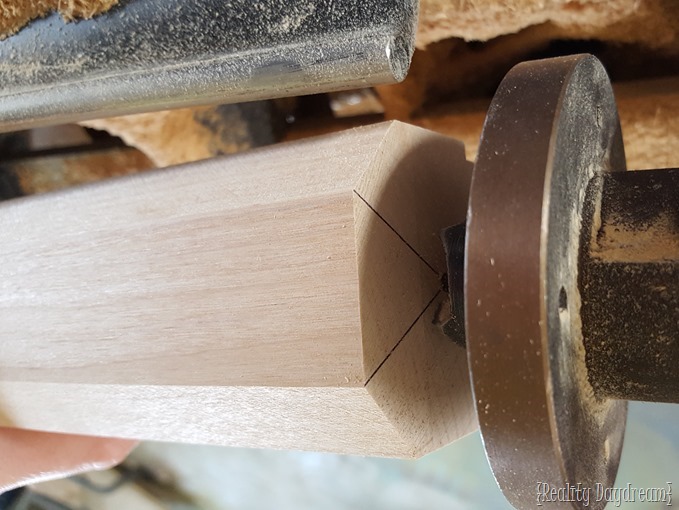
I like to start out with my square carbide tip tool and very gently start chipping away at your blank. Slowly but surely, it becomes round!

But before we get to the decorative wood turning, we need to drill a hole straight through the shaft of these suckas. We inserted the 3/8-12” drill bit into the drill chuck, turned on the lathe, and adjusted the tail stock quill to extend the drill bit through the wood blank. It’s weird because the wood is spinning, NOT the drill bit. But it has the same effect as the drill bit spinning!
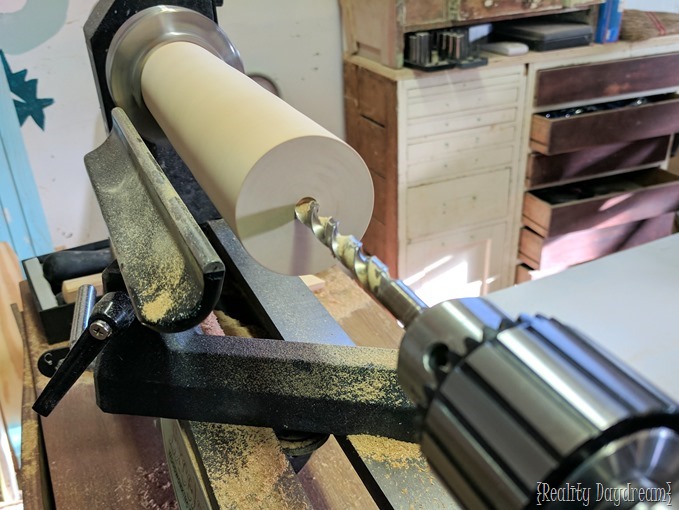
On 3 of the 6 turning blanks, you want to start out by making a space for the light socket to sit. Using a Forstner bit the diameter of the light socket, drill to the depth of your light socket.

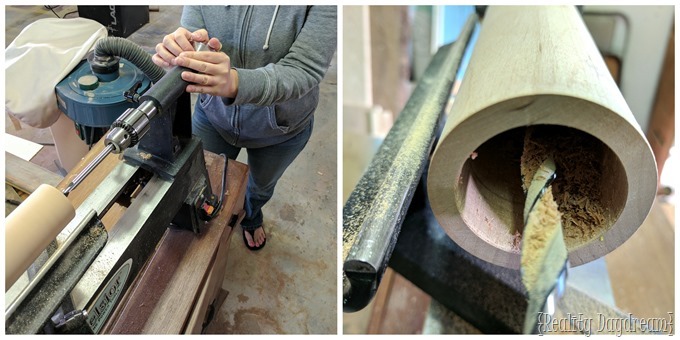
Then comes the FUN part… playing around with patterns, textures, depth and designs! It’s so fun watching different beautiful curves form before your eyes. And there are endless possibilities for what you can do! For each cluster of 3 pendant lights, we turned 6 blanks (two for each single pendant), and each and every one was different! The next few pics are of me turning one of the parts that doesn’t have the opening for the light socket.
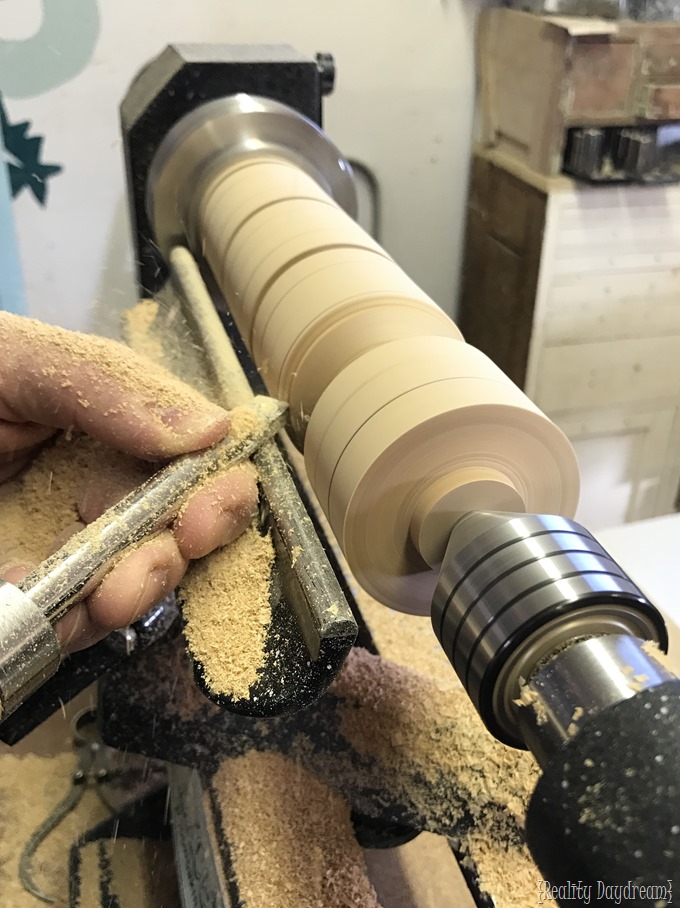

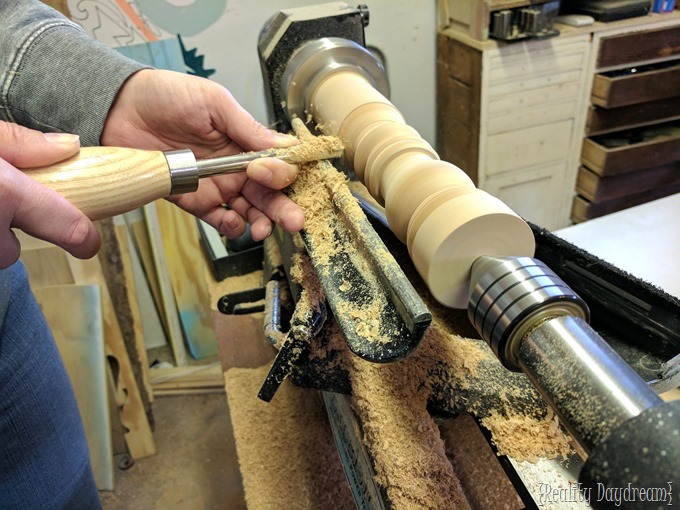
Everything looks smooth and perfect when the lathe is actively spinning, so stop it every so often to evaluate your progress and see which areas need a little more attention. When you feel like it looks good, it’s time to sand! Sanding on the lathe is SO EASY because you just hold the sandpaper on the piece while it’s spinning, and it basically sands itself!

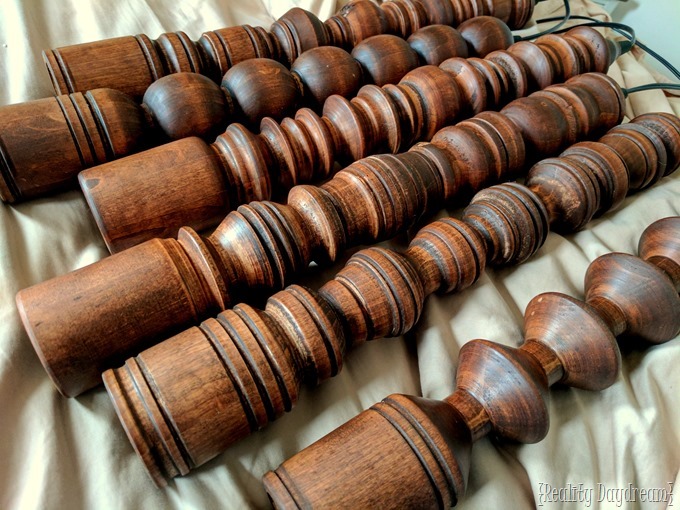
Here’s a pile of finished pendants that are ready for wiring and staining. You can see which ones we left the area for the light socket. If you do decide to do some decorative turning on that part, just makes sure you keep it shallow, because if you go too deep, it’ll go all the way through!

MEANWHILE:
Hey Gang, Nick here… I did the wiring on this beast because, well it’s what I do. Remember the Wine Rack Bomb Project? I can assure you this is not going to be that complex, however, just to help out I attached one of my lovely drawings, which should help. I am sure you all will be fine. But as with anything, if you are not comfortable, snag an electrician friend or hobbyist to wire this up for you.
Disclaimer: working on this while it is plugged in can electrocute you… We are not professionals and if you do not know what you are doing, you should hire a professional.
Proceeding…
We bought this light kit, it has 1 plug and 3 light sockets, genius right?
When we opened it we soon realized that it would need to be modified, because the wires were 8” or less and obviously not long enough for our long wooden pendants. We removed the connectors(1), then unscrewed the strain relief(2), popped the top of the light socket off (3), removed the wires by pushing down wire connecter with a tiny screwdriver (4-5) and made a smiley face ![]() (6).
(6).
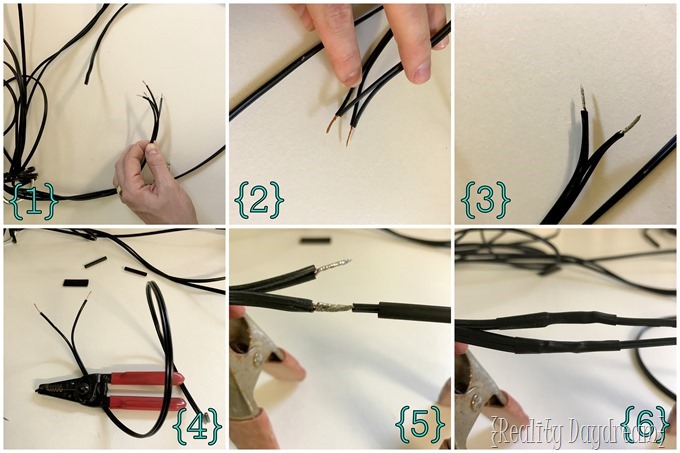
We bought a spool of 18-2 wire, cut six pieces 6’ long. Then we peeled the one end of each strand apart (1), stripped the wire back about a 1/2” (2-3), and soldered the ends(4). 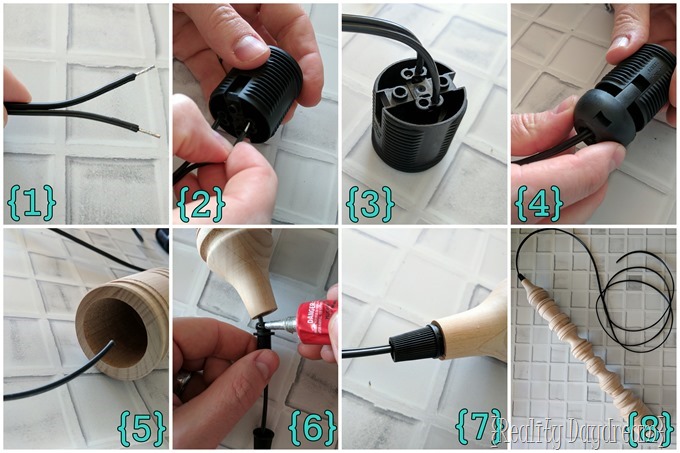
We pushed the soldered ends back into the light socket(2-3), give them a tug to make sure they are in, snap the socket end back in place (4), feed the wire back through the pendent(5), Glue the strain relief in place using welder’s glue (6), tighten strain relief (7), and enjoy (8)! Now repeat, times seven.

The socket will fit right up inside and won’t be visible, but perfectly accessible when it comes time to put in a bulb. We hung ours in the garage so they would be ready for staining! We wiped on stain with a cloth, and used a spray poly after the stain was good and dry.


We used this hook in the ceiling and hung a 2” welded ring to it. If you are as fortunate as my wife, get your Smokin-Hot-Ruggedly-Awesome-Diy-Crazed-Man-Child to climb his rock-hard-shirt-splitting body onto the bed, meanwhile sit back sip your mojito and instruct him where to put your wooden pendants.
Whew, is it hot in here… JK lady’s.
One at a time, set the height of the pendant and zip-tie them to the welded ring. We then looped the remaining wires though the hoop a couple times to meet. Then repeat on the other side. You can download/print this handy drawing I made for your convenience.
Now, let the fun begin!
We brought the lights back into the shop, cut the wires light 2 and 3 about 18” away from the welded ring. Then stripped the wires about a half inch from the end.
Twist the Neutral Wires together (Hint: they will have ridges if it is lamp wire or marked with a white stripe, etc)(2), then twist the common wires together (2), Solder the wires, Common-Common, Neutral – Neutral (3), get an extra wire the length of the remaining wire on light, peel apart twist and solder that wires ends (4), Add heat shrink tubing to the wires and slide them back away from any heat, solder the 3 common wires together, now the 3 neutral wires together (5), Slide the heat shrink tubing over the exposed joint and heat it up, causing it to shrink (6).
This is what our heat shrink tubing looks like before we solder the joint.
Then we repeated that same process to wire the outlet plug. We left enough wire from the plug, so that the switch, that came with the kit, is in a reachable spot.
Ok that is enough teasing, I am going to turn this back over to my sweet lady!

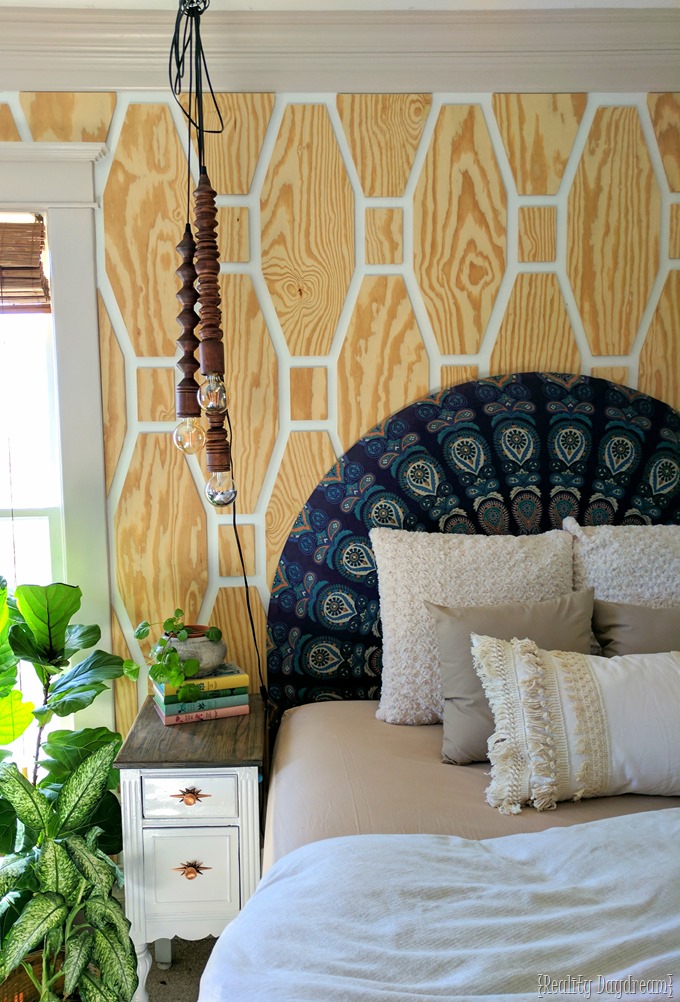
This is one of those things that really adds a WOW factor when you walk in the room. I wish you could see them in person, because they look SO AWESOME.


I know this tutorial is pretty in-depth. And if you decide to tackle it, it will definitely serve you well to already have a knowledge of using a lathe and wiring. But we tried our very best to share the nitty-gritty details of how to make them from start to finish! If you have any questions at all, you can email us at beth@realitydaydream.com.
And if this tutorial is a little too ‘DIY’ for you, I found SO MANY amazing pendant lighting ideas just by searching around a little bit. Would you believe most of these are from Etsy? I love supporting other makers! No judgments if you purchase instead of making. <3

1 / 2 / 3 / 4 / 5 / 6 / 7 / 8 / 9 / 10 / 11 / 12 / 13 / 14 / 15 / 16 / 17 / 18 / 19 / 20
Thanks for pinning!




Those are the coolest lights ever! (I like Nick’s description of himself, LOL)
Lol RIGHT? In his dreams. (and mine) 😉