I’m pretty excited about things going down in our master bedroom. I’m speaking mostly of the rated-G things… like lighting, wall treatments, and chunky crown molding.
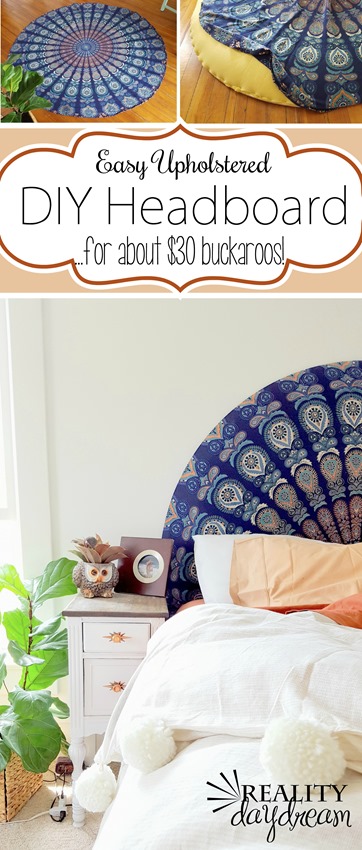
We’re a little ways from an actual room reveal, but I’m ready to reveal the headboard. It cost exactly $30 to make.
NOTE: I think this headboard would also be great in a kids room! And I included it in a roundup of ideas for upholstered headboards for kids!
 *this post contains affiliate links! See our disclosure for more deets*
I had found these round mandala tapestries and fell off my chair at how awesome and inexpensive they are. I ordered this one, and the dimensions were perfect for a queen size headboard!

There’s not much you could do to adapt this to a king size boho headboard, but you could easily cut a few inches off the outside to fit a full or twin headboard!
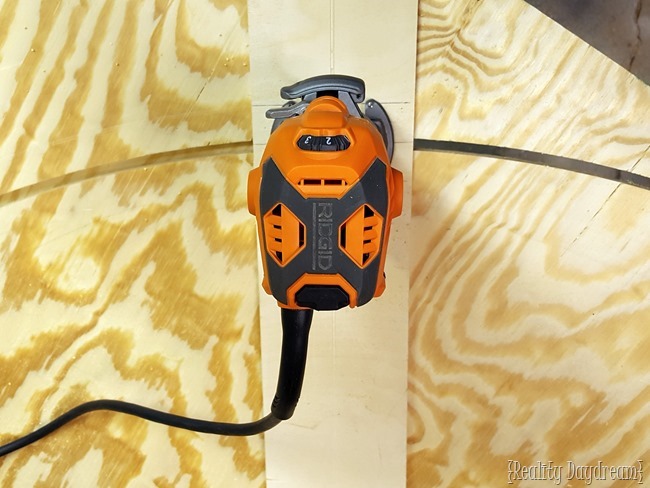
We snagged some 1/2” plywood from our local home improvement store. My plan was to use a string to draw out a perfect half circle and then cut with my jigsaw, but Nick saw an opportunity to make this project more complicated (and therefore more fun)… so there’s a jig:

So this long/narrow piece of wood… one end has the trim router affixed to it, and the other end is screwed in to our center of the plywood. This way we can slide it in a perfect circle while routing a groove.

We did several passes, lowering the bit on the router each time… until we were through!


This will be the FASTEST UPHOLSTERY JOB in the history of evah. Are ya ready?
Egg crate foam. It’s cheap.

I had enough to do two layers, so I folded it in half and laid the rounded plywood on top so I could cut the foam in the exact shape of the back board.

Using my upholstery staple gun, I stapled the first layer of foam about 2-3 inches from the edge… with the bumpy side of the foam down.

Then I stapled the second layer of foam right up to the edge of the wood.

I laid out my round tapestry, pretty side down… and the carefully lowered my round board onto it, being intentional about having 3-4” of the tapestry showing so I could fold it over and staple.

I gently pulled before each staple went in. But don’t pull too hard or you’ll mess up the center! I stapled about every 4”, and then came back around and put another staple between the others. So it ended up having staples every 2 inches or so. This process went SO FAST! I had this thing upholstered start-to-finish in about a half hour!

So our bedroom went from looking like this…

To this…

In just a couple hours!
Of course my new duvet cover helps (those giant pom poms kill me!), but I think the headboard makes the biggest impact. I’m so in love.
We used interlocking flushmounts to pop this thing up onto the wall. So simple and sturdy!
I can’t wait to show you the ‘treatment’ we’re doing to that wall, and a tutorial on the chunky crown molding! This room is slowly coming together and has me all giddy and feeling boho chic!
~Bethany
~~~~~~~~~~~~~~~~~~~~~~~
UPDATE! We added pattern to the wall behind the headboard with geometric shapes cut from plywood!!! Click here for the tutorial and more pics! And be sure to follow along on this room transformation here.
If boho chic isn’t your jam, but you desperately need an upholstered headboard… check out my other easy upholstered headboard tutorial! Let’s just say this one involves pool noodles. 😉
Or if you’re more confident in your upholstery skillz, and need a diamond tufted storage ottoman, then this tutorial might be for you!
Thanks for pinning this project!


I plan on making one!! Just one question, how did you mount it to the wall, did you use wood screws and/or did you also use a board in the back attached to the wall? I’m a bit lost on how to attach it to the wall.
We just used a french cleat to affix it to the wall. I’d love to see pics when you’re done!!
Thank you!! I finally got my router and board(s). One more question if you don’t mind. Did you just cut from one side of the plyboard to the other and it happen to be the perfect measurement of the tapestry and queen size bed? Or did you measure it prior? And I’ll be making this in next week or so. Thanks again!!
I don’t remember, but I would measure to double check. 😉
This looks great! Are the tapestries pretty cozy…say for a throw if you’re chilly on a patio? Such a great find im.about to buy too many…headboard came out awesome!
Jesse! Where have you been?! I miss you and your blog! 😉
These tapestries definitely arent snuggly. Theyre like a bed sheet… maybe slightly thicker.
Love IT!!!!!! As pretty as a Peacock!!! EXCELLENT JOB!!!
am I the only one that things of dancing a jig….. when I read that a jig was made??? 😉
LOVE that one!!!
love this, bethany! it’s gorgeous- great idea!
Thank you Cassie! <3 <3
I read your article about 7 minutes ago, and am now the proud owner of a mandala tapestry… Damn you and damn amazon lol
YESSS! Which one did you order? They didn’t have such an awesome selection when I bought mine a month ago.