Ya’ll, it’s been HOT where we live. Like Arizona-in-the-early-spring-hot. Like hotter than what we’re accustomed to in Iowa. But we survived the weekend, and lost a combined total of 3 meeeeeellion pounds in sweat, as a family.
That’s a lie actually.
But at least the sweat we produced was coupled with sunscreen and FUN.

Nick and I designed a potting bench together to fit our needs. I wanted a lot of surface area to use as ‘counter space’ for potting plants, along with some shelving and places for hooks. Nick’s desires were nothing more than to hide the nasty garbage cans. Can you blame him? I mean…

WOOF, right? It’s a humbling thing when you post a picture of your unfortunate garbage can situation onto the world wide web. But the after will make it ALL WORTH IT! Trust me!
Potting Bench with Garbage Can Enclosure
*This post is sponsored by BuildSomething.com. Thank you for supporting the fabulous brands that make Reality Daydream possible! This post contains affiliate links*
This potting bench is a pretty simple straight-forward build, and all the building plans are available over on BuildSomething.com! Be sure to hop on over there and see our step-by-step process, materials list, and lots of helpful pictures too!
I’ll share a bit of the process below as well so you get a feel for how this Potting Bench Garbage Can Enclosure goes together!
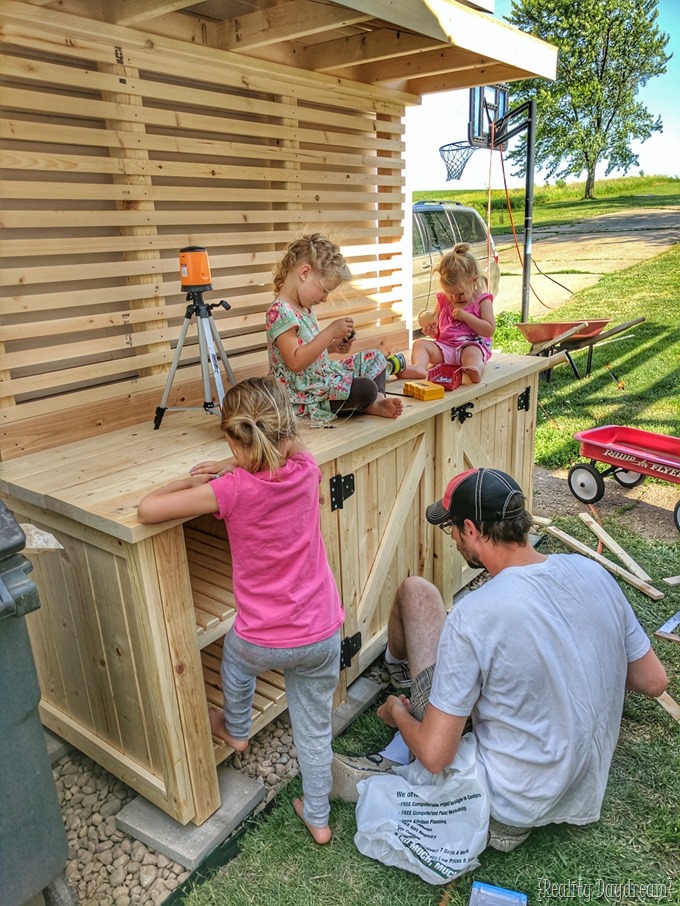
We dug up the sod and leveled things off in preparation, filling it up with river rocks and adding some leftover 12×12 pavers from our DIY Patio. Pro tip… gather all the children for this step. It may take longer, but it makes for cuter pictures. You could even invite the neighbor kids if you don’t have any of your very own.

Measure and cut all the components of the legs, and assemble with pocket holes using your Kreg Jig! Times four.

Cut leg dividers and leg braces, pepper them with pocket holes, and this thing starts taking shape!

We used 2×8’s for the bench top. After cutting them to size, we added pocket holes every 10 inches, and glued & screwed them into place. Make sure you maintain the correct spacing of the legs at the front of the bench top!

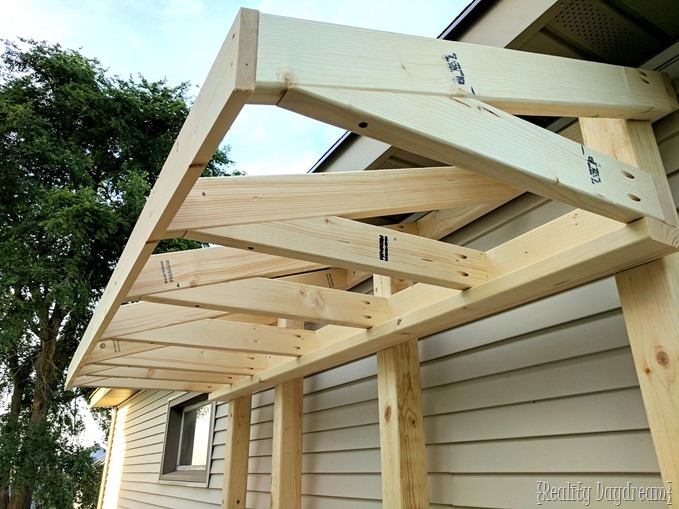
Time for the roof! Or is it an ‘awning’? Whatever you call it, the actual plans with dimensions and angles will be really helpful, so I’ll just let you consult those! It’s not every potting bench that has a roof, my friends.

It’s also not every girl that has a 6’8” husband who’s willing to build sh*t for her, soooo…. I’m grateful.

We cut all the slats using the table saw and miter saw, with an angle on the top edge to serve as a ‘french cleat’. Start from the bottom and go up, using spacers to make sure they’re consistent and level!

In looking at the building plans, you’ll find that the sides and door fronts are very similar. Boards pocket-holed together and framed. The doors have an angle brace… mostly for looks.

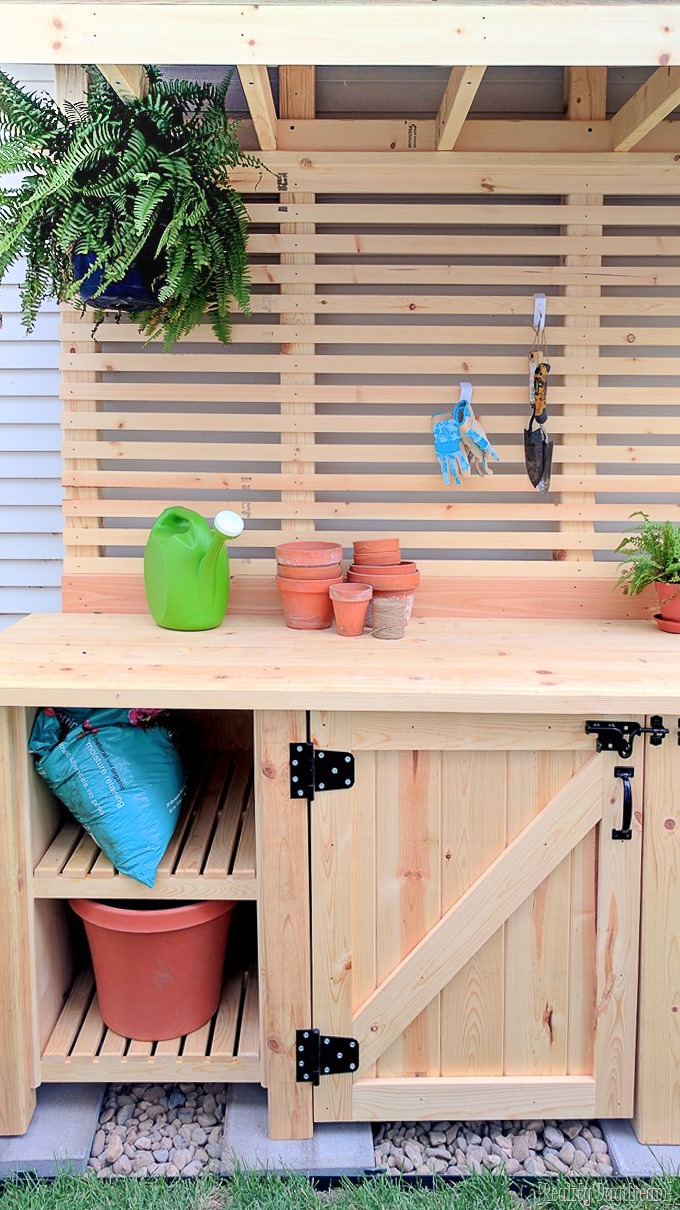
Next we cut out and assembled the components for the shelves, and assembled! I love that the slats mirror the slats we used as the back board!

That’s it, y’all! We added hinges, slide bolt latch, and handles.
The family that works together, stays together. Now that doesn’t rhyme at all, so disregard.

And soon we’ll be painting this thing and adding some shingles to the roof ‘awning’. So stay tuned for that!

Ain’t she pretty?!


And I love that our nasty garbage cans are enclosed completely. NOBODY HAS TO KNOW!

Paint job and shingles coming soon, so STAY TUNED! <3
UPDATE! Come see how it turned out after painting and adding shingles! <3
~Bethany
~~~~~~~~~~~~~~~~~~~~~~~~~~~~~~~~~~~~~~~~~~~~~~~
Thanks for pinning!


Thank you so much for the inspiration!!
Nice potting bench. So what happened to as ll of the takes and shovels? Or is that another project?
Haha yes, they got relocated to the garage.
Hey y’all!!!
Stumbled on your blog while searching for potting shed idea – mine is not very usable and with all my “furlough time” I thought I’d rebuild it (and the tool shed to match) – and got lost for a few hours watching your home/family progress over the past couple years. WOW! I just love your home! Thanks for all the inspiration. I was already planning on using wood slats for the back of my potting bench to match the air conditioner cover I just built, but now…. thanks to y’all…. I know to miter them. AND add doors!!!
Best,
James
Thanks for leaving such a nice comment James!
Hello, I am looking to make this and don’t have any tools. Can you tell me which Kreg clamp I should get and which Kreg jig you used. I don’t want to buy one and then it is the wrong size.
Thanks for any help!
Really like the potting bench. Looking to do something similar. What kind of wood did you use for this project?
We used pine! And it’s held up nicely over the years!
I’m ready to build my own potting area and google brought me to your site. I have to say the picture of your two girls on the bench absolutely made my day!
You’re so sweet! They love to ‘help’ 😉
Love it!!! But don’t see a place for the hot mess of items you showed like the big trash can, all your shovels and post hole digger. Are you going to add on to it for those items?
That’s true, and we were wishing we had designed a feature to hold those items too. We’re in the process of building a small shed for our riding lawn mower, so we’re planning to put those in there eventually. For now they’re in a corner of the garage. 😉
This is awesome. did you shingle the roof or put any protective coating on it… or does it rain where you live?
I’m trying to build something similiar but just don’t want it to get water damaged too much.
ah… nevermind, I see you said shingles coming soon. I was “reading” the pictures and not the words. sorry! your blog has me getting motivated.
Actually we just published the post where we paint and add shingles. Head to this post for the finished product!
https://realitydaydream.com/the-painting-of-the-potting-bench/
This is the prettiest potting bench ever. I don’t have a 6’8 hubby of my own. Do you loan yours out? I’m thinking this is too much to do on my own, but there are elements I can use. Definitely not as large. Love, love, love it!!!
Love it! I wish I had something like that. Our garage cans are provided by our boro and even bigger than that. So it wouldn’t entirely work for us.
Bethany,
Another benefit is that now animals can’t get into your trash. Love this and wish my circumstances would allow for one.
Maureen
Gorgeous ! Gorgeous and functional, too ! What talent – that hubby of your s!! And his helpers are adorable !
I love this so much!!!
Wow! That is beautifully built and has a dual purpose. Your husband and his assistants are quite talented.
Hi Bethany!
Great design!
It appears that you “pin” area field overlaps the link for the building plans. The “pin” area must come first in the code so it activates when you hover over the “plans” banner and the plans won’t download. Try separating the download link far enough away from the “pin” field so it is accessible.
Susan, I’m having a hard time understanding what you’re meaning. But I definitely want to fix any problems there might be. Can you email me a screenshot? beth@realitydaydream.com
Susan, I had to read your comment a few times to understand what you meant, but here is the link if Bethany hasn’t already responded. Here is the link you were looking for. https://www.buildsomething.com/plans/PA426D7DCBB467D18/Potting-Bench-with-Hidden-Garbage-Enclosure
Very nice, the little helpers are beautiful!