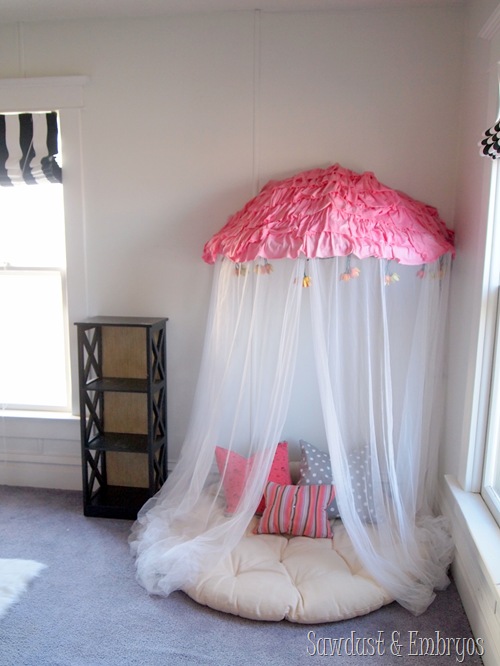
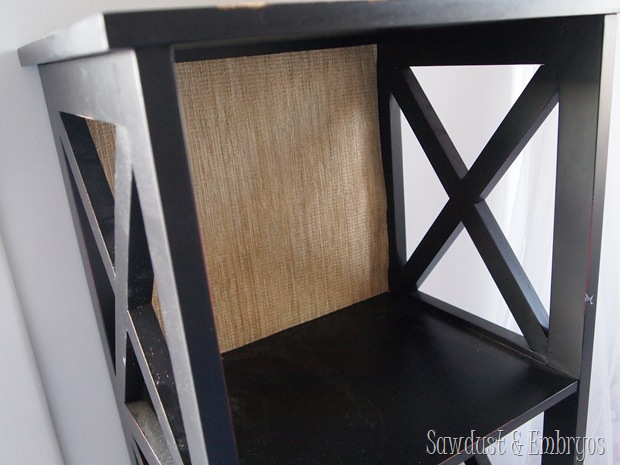
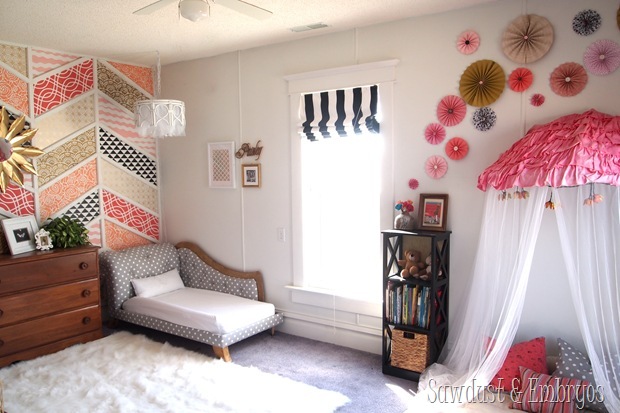
In addition to the dollhouse progress, we’ve been working on little finishing touches for the girls room to make it feel more personal and… finished. Ever since we added the papason canopy ‘reading nook’, I knew I wanted some sort of book storage nearby. I pinned this awhile back as an idea for cute book storage, but then I fell upon this black ‘x-shelf’ at a miraculous winter garage sale.
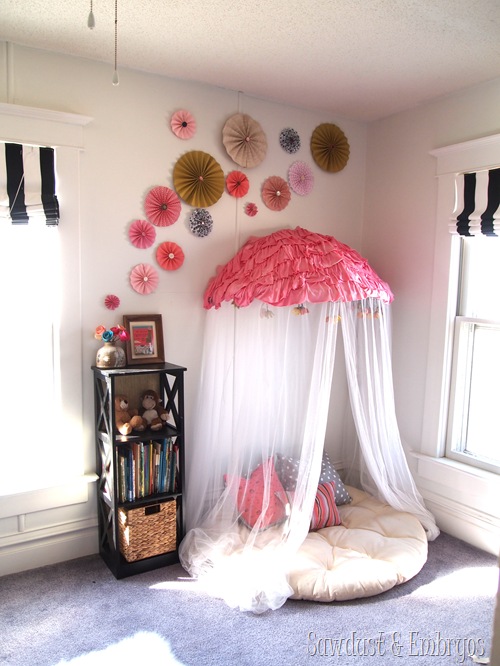
It fits perfectly in that little space between the canopy and the window, and is accessible to little girls snuggling and laughing and reading together under the twinkle lights of their reading nook. I cut some faux ‘grass cloth’ (shelf liners) to size and hot-glued them on the backing of the shelf for some contrast. (don’t mind the dust… OOPS!)
But the area above the bookshelf and canopy was proving to be difficult for me. Originally I thought I would hang the girls’ vinyl stencil artwork there, along with a few other pics to form a collage… but after holding some frames up there, it just didn’t look right. They were too big and bulky, and I just couldn’t find an arrangement that I liked.
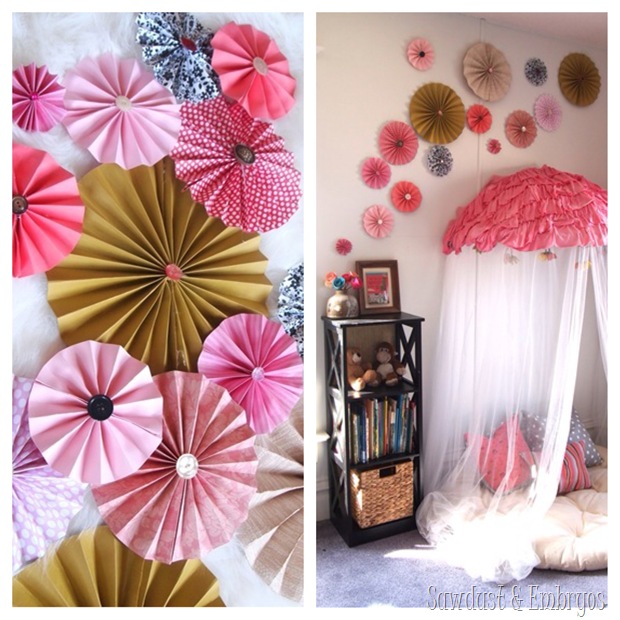
And so I made some pinwheels.
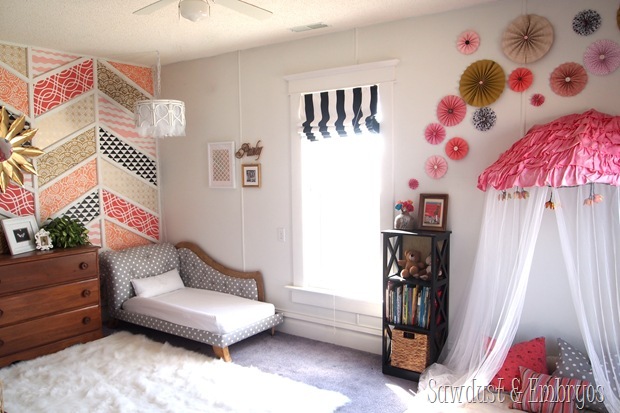
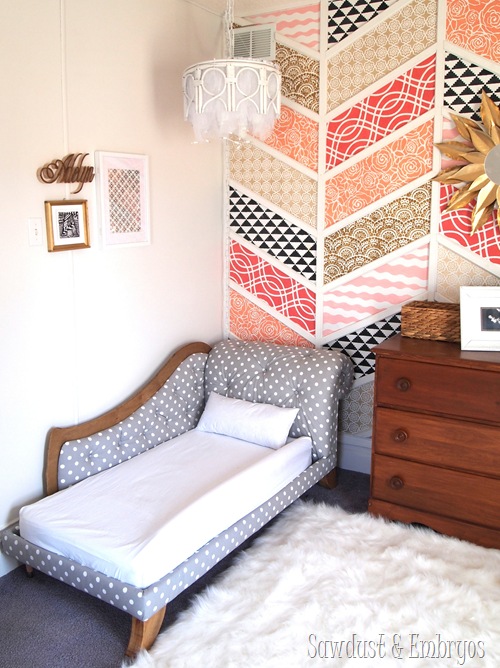
These are super easy… and they added the whimsy and pattern that I wanted to balance from the boldness of the stenciled herringbone accent wall. Don’t worry, the girls’ artwork (and some other sentimental art) has a special place in the room that you’ll see at the end of this post).
Here’s what you need for your pinwheels!
- scissors
- glue gun/sticks
- square scrapbooking paper
- plastic straws (or popsicle sticks)
- old buttons or beads (optional)
I made lots of different sizes, but I’m going to show you the full tutorial for the medium size pinwheel. (I’ll briefly show how to make the other sizes further down).
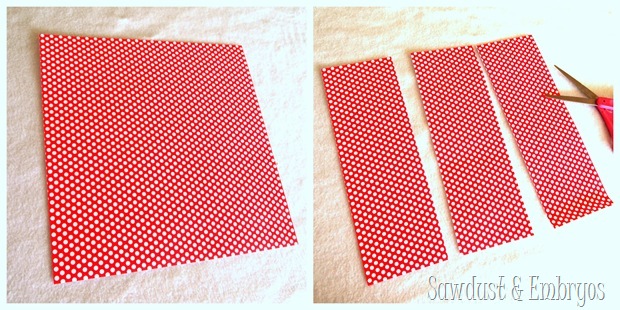
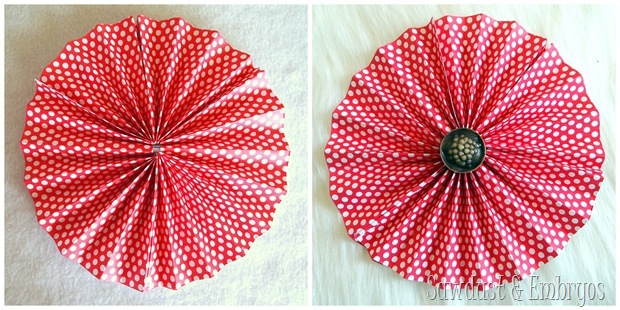
Take your scrapbook paper and cut it into 3rds. (for some reason this polka-dotted paper looks red in pics, but it’s actually more of a coral)
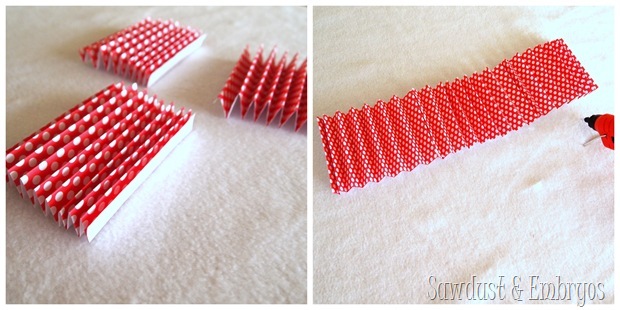
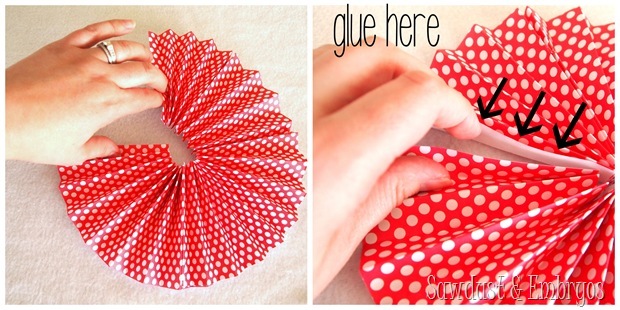
Fold each of the 3 strips into little accordions (I did about half-inch folds). Then, using a hot glue gun, glue the ends together to form one long accordion.
Bring the two ends together… forming a circle! Glue the seam together.
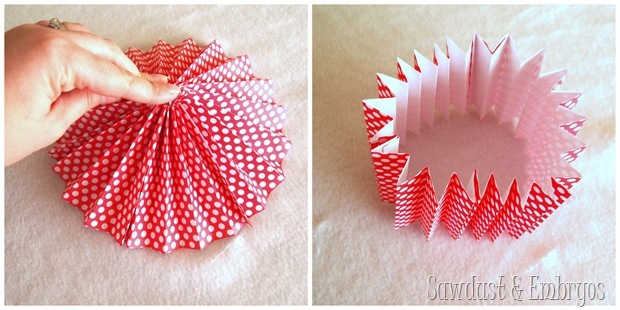
Your pinwheel doesn’t have any stability in the center, so it will pop up like a little teepee. NO WORRIES!
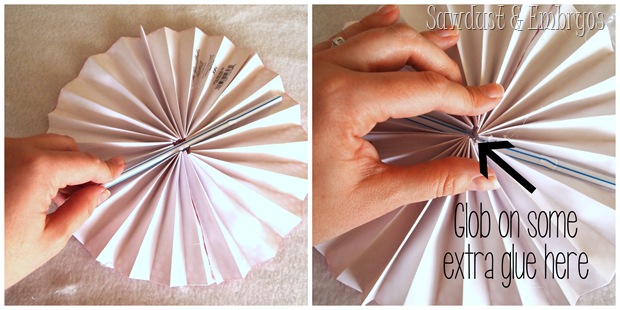
Take your plastic straw (or popsicle stick) and hot glue it on the back going straight across the center.
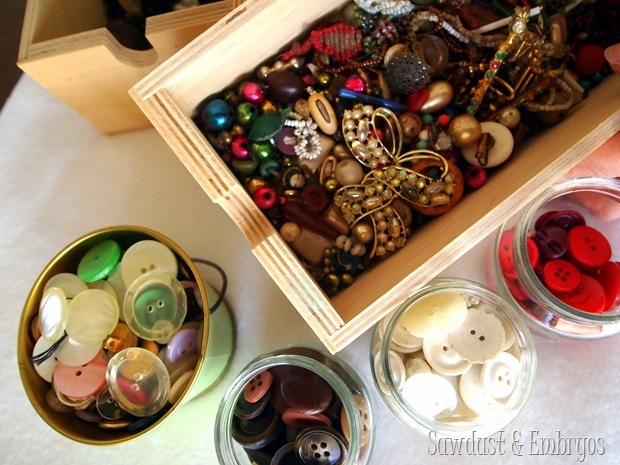
Flip it over and VOILA! You can do like I did and glue on a button or a gem of some kind to cover the little hole and add a little bling.
I like the custom touch that it adds!
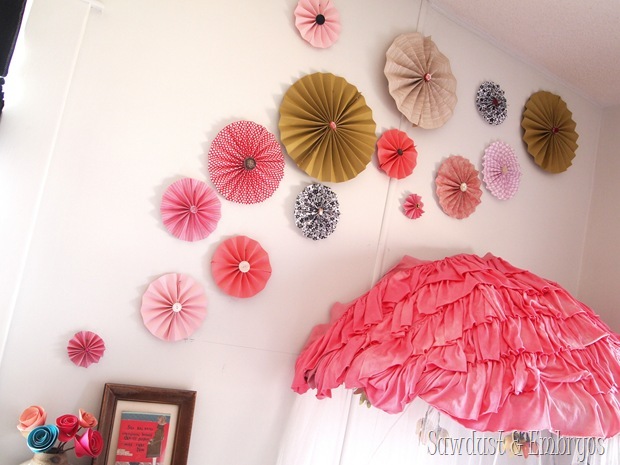
I love the whimsy and color that these bring to this side of the room. It definitely balances to boldness of the accent wall.
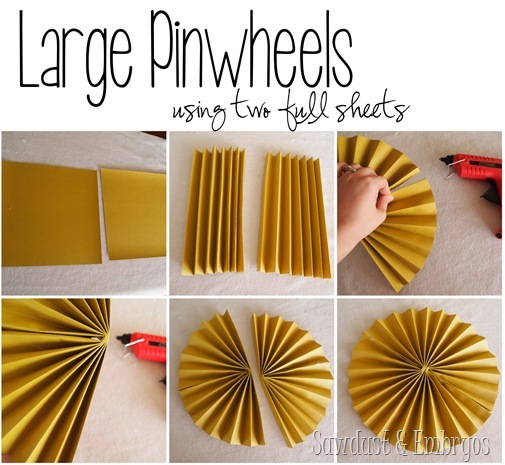
For the large pinwheels, you need two sheets of scrapbook paper, and you do two half circles and glue them together (no need for the plastic straw).
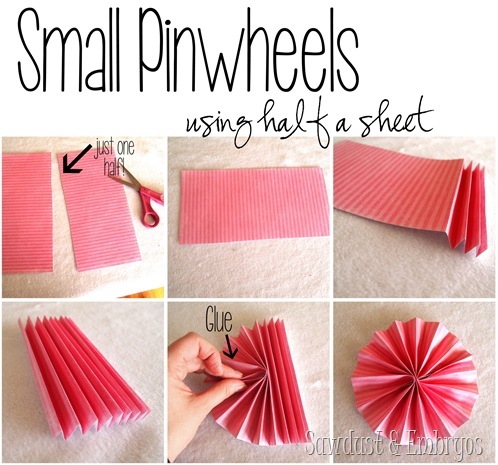
The small pinwheels were made using one half of a sheet of scrapbooking paper. After I folded it into an accordion, I pinched it in the center and fanned out each side one at a time, gluing the edges together… like so:
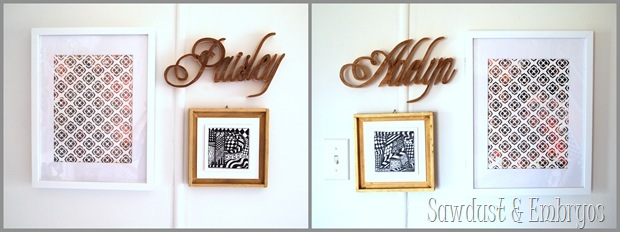
Not to worry about the girls’ adorable paintings. I decided to make them their own mini collages on the wall above their respective beds. Especially since this room is very symmetrical, and both beds are identical… I wanted them to know that they DO have their own bed (if they so choose to sleep in it).
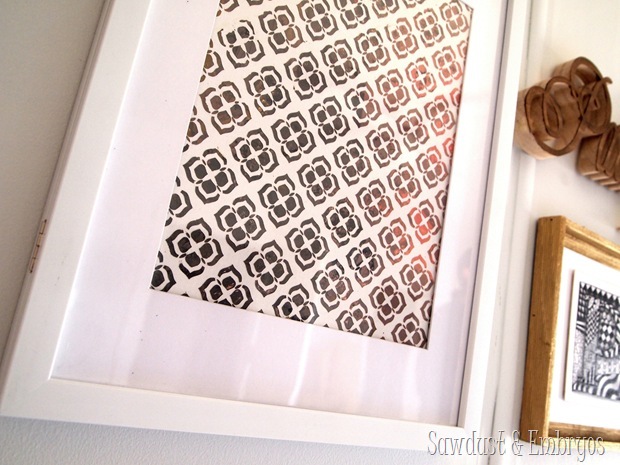
As you know, the patterned paintings were done by the girls using vinyl as a stencil, and with the same paint as the accent wall colors.
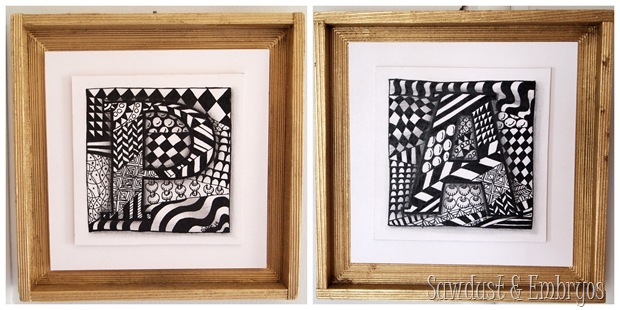
The black and white pieces of art are the first letters of the girls’ name if you look closely. My talented and creative Mother in Law Diane made these for the girls. This type of art is called ‘Zentangle’.
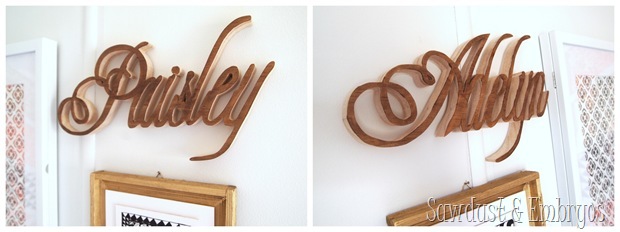
And finally, using one of my new favorite fonts (Champagne!), I cut out their names with my scroll saw after using my overhead projector to trace their names on a piece of pine. I stained just the top surface with the same shade of stain that we used on the trim of the mini fainting couches.
We’re actually making these available on our Etsy Shop if you’re interested.
These pictures are reminding me that I need to finish their bedding soon! I’ve had a couple recent sewing failures, so I need to work up my adrenaline and just finish… ya know?! It’s gonna be super cute.
Cause the truth is, this room needs to be MOVE-IN READY. Like turn-key. ASAP. It pains me to even type this, but the girls could start throwing themselves out of the crib at any moment. This adorable room of theirs could be occupied any one of these nights. I’m anxiously awaiting and anxiously dreading it all at the same time.
Did your toddler(s) have a smooth transition from crib to toddler/twin bed? Do you have any helpful tips or favorite wine coolers you could suggest to me?
Come check out all the other projects that we’ve done in this room! We’ve poured our heart and soul into this room, and have DIYed almost everything in it. It’s been such an amazing labor of love for your sweet girls. Click the image below!




Wow! so cute! where did you get those polka dot chaises?! Must have!
We built and upholstered the chaise couches ourselves (as toddler beds for our twins)! We wrote a very detailed 3-part tutorial. Here’s the link! https://realitydaydream.com/2013/09/inspiration-and-construction-of-toddler-beds-part-1.html
How did you attach these to the wall? I love them!!
Too stinkin cute! I never would have thought of making pinwheels, and they look so simple!! I love everything you’ve done in their little room. Sometimes I wish you had little boys so I could use your ideas in my own home! Every time I look at your blog it just makes me want a girl so I can decorate a fluffy girly room 🙂
Hey, love everything you have done to your children’s rooms. Awesome work.
Have a ?
How did you hang the pinwheels on the wall?
Thanks
Oh! I definitely should have mentioned that in the post! I just used push-pins toward the top of each pinwheel.
Oh I LOVE those pinwheels. They really balance the room out. The scale is perfect. And their wooden names???? You are a scrollsaw goddess! They are incredible. Your talent blows me away.
THanks! I agree… was glad that it made the room feel more balanced! 🙂
I absolutely love how this room is coming along 🙂 So cute!! thanks for sharing I never thought about making the pinwheels from scrapbook paper or really making them at all. My little man did so well when we switched him from his crib to the toddler daybed version of his crib and then to his big boy (full size) bed and I was scared to do it but we didn’t have a choice, my baby girl was due & I wasn’t going to be allowed to lift him since she was born via c-section. Hopefully it will go smoothly for y’all too!
I’m glad that your little buddy had an easy transition! Those are the stories I need to remember! 🙂
love the pinwheels! i’ve done something like this before but had such a hard time keeping them hung on the walls. what did you use to keep them in place??
Brittany, we just used simple thumb-tacks or ‘push-pins’ toward the top of each pinwheel!
I LOVE how this room is coming together. This room is my favorite room in your house. And the scary thing is that I can describe all the rooms in your house… miles away, from a computer… 🙂
The pinwheels look very doable but create a big effect!
And I love the wooden names! Great jigsawing.
You’re so sweet Mindy! You’d probably feel right at home if you came over, huh? 😉
Oh and ditto on the camera. We never had one, so I just got a cheap I one when we did toddler beds. It worked.
What a great idea! I have four year old twins. One was a launcher at 18 months. We used a crib tent for her (sadly, now they are recalled). Her sister never once tried it. We let them go to toddler beds at 3 but made it into a big honor. Seriously talked it up for months. They were so excited and proud that they did amazing. No issues. A month ago we got bunk beds. They’ve decided to share a bed now!
HAHA… a launcher! Perfect description. 🙂 I’ve never heard that approach of making it a huge honor to be in a big-bed… and talking it up for awhile beforehand. Great suggestion!
I’m a new reader…this is GORGEOUS! I love the pinwheels! (And everything else.)
My son transitioned slowly. We put him in his bed before he learned to climb out of the crib, and then told him he could only sleep in the big boy bed if he was big enough to stay there. So sometimes he got exiled back to the crib, sometimes not, and sometimes he asked to sleep there instead (weirdly enough).
Hi Pearl! Welcome to our blog… haha! 🙂
I like how you made your son’s transition flexible instead of cold turkey. I think we might lean in that direction… we’ll see! Thanks for the advice!
Bethany – you and Nick are so unbelievably talented! You need to have your own show on HGTV! With your keen eye for design and Nick’s talent, the whole darn HGTV world would love you to death! Beautiful job on the girl’s room. I can’t wait to see how they love their bedrooms! You need really to share when they are moved into their big girl rooms!
Thank you Renee! I think Nick would LOVE having a TV show… but I’m not one to get in front of the camera. I think you’d be surprised by how incredibly awkward I am in real life. 🙂 HAHA! I guess we’ll deal with that if HGTV ever comes a-knockin. 🙂
Hi Bethany! I just love everything you are doing in your girls’ room! Those pinwheels are awesome and look so easy. And of course, the herringbone wall is FAB!
We had a very easy and successful transition when we moved our twin girls from their cribs to their toddler beds (at 2 1/2 years) and then into their big girl twin bed on their 3rd birthday.
I was super worried about them getting out of bed to play with each other. I think the key is that we have an awesome camera in their room and pair it with an iPhone app. It allows us to see them so clearly (sooooooooooo much better AND cheaper than the baby video monitors) and we can talk through it. We explained to them that big girls stay in bed and that mommy and daddy can watch them in the camera, so we would know if they got out of bed.
We also gave them each a pillow when they moved into their toddler beds, which they thought was AWESOME. We explained that pillows are for big girls and big girls STAY IN BED until we come to get them. If they got out of bed, we would have to take their pillows for that nap/night time.
Our girls are now 3 years 3 months old and they have only gotten out of bed ONE TIME. It’s seriously amazing. I am not sure what exactly motivates them to stay in bed, since we have not “threatened” taking their pillows away after the first couple of days. Maybe it’s the camera. Maybe they would have stayed in bed no matter what we said. Who knows?! I just know I was super worried about it and it was the easiest transition ever.
If you want info on the camera and app we use, shoot me an email. One of the best parts is that we can also take videos of what the camera is seeing through the app and we have some of the best videos of them singing and talking to each other. So fun!
LOVE this idea of the camera! I just emailed you. 🙂
You definitely can add “decorator” to the end of your list of accomplishments. The room is getting cuter and cuter everyday. Our GD#3 just moved to her big girl bed. Sometimes in the night you can hear her dollie sing “ring around the rosey”. DD is having a few little problems but I’m sure The O will settle down soon.
You’re so sweet Sandy!
The room looks great and those pinwheels are perfect for that space! We had to put our daughter in a bed quite suddenly after she climbed out of her crib and up onto her changing table (the crib & changing table are attached). I walked in to get her one morning and saw her sitting there. Yikes. Anyway, we’ve had some trouble with the transition, but it’s mostly because she doesn’t want to be alone and comes to find us. I’m thinking that will be less of an issue with your girls since they have each other. It also takes her a bit of time to fall asleep but I find that if I hang out with her (I usually climb into bed with her) she’ll relax and fall asleep. I heard the same thing from friends, as well; the advice I got was to get into bed with them for a little while, but eventually move further and further out of the room and they should get used to it. Our only other issue was that she started to wake up in the night after the transition, but she’s also a lot younger than your girls (switched to a bed at 12 months, she’s almost 17 months now) so they should cope better with it. Wish I had some more advice – best of luck to you!
Holy cow… 12 months! It sounds like she switched like a champ considering her young age. I should give the girls more credit… I’m sure they’ll do fine. I think I’m mostly worried about one keeping the other one up. 🙂
We just recently transitioned our little guy into a new room in preparation for the new baby coming. He’s in what used to be the guest room which already had a dresser and a queen sized bed in it. We decided to keep the bed but just took the frame away and he’s now sleeping on the mattress on the floor. He’s the only 2 year old I know that has a queen bed all to himself! We did it cold-turkey. I thought about just starting with naps and slowly transitioning to nights in the big bed but thought that might confuse him. I was so nervous about this change and worried that it would cause some serious dispruptions in his (and my) sleep but he has proved me wrong! He sleeps better in the big bed than he did in his crib! It helped that we kept the decor the same. We moved his curtains and rug and all the wall hangings from his old room into his new room. I think once he saw that we did that he understood that he was a big boy now and that was his room!
Good luck with transitioning your girls and try not to stress too much about it!
That’s so cute… what a big boy! I hope the girls prove me wrong too. 🙂
I la la love how this room is coming together and all of the unique pieces work so well together! We just transitioned our 19 mo. old from her crib to a toddler bed and so far the transition is going well. I was advised to hold off as long as possible, but she seemed ready and she has a little brother coming in less than two months. We had the toddler bed in another room for a while so she was able to climb on it and get comfortable with it for a while. Then we simply replaced the crib with the bed one night (during spring break so if we had rough nights we could manage). She has a lot of stuffed animals she sleeps with so we kept those and she really seems to enjoy her big girl bed. There have been some challenges during naptime where she gets out of bed and reads for an hour, but I started telling her to “stay in her bed” and the past few days have been better. Obviously this is only child, I have no idea how it works with twins. Hopefully when it is time for you all the transition goes beautifully. Again, LOVE their sweet room.
Thanks for the suggestions! Such great info! And congrats on your pregnancy! 🙂
How stinkin’ cute is this room?!?!?!? Seriously, I have 15 half-finished projects for both of our kids’ rooms. Also, I’ve had empty frames in our hallway for 2 years. I need some of your design motivation! Actually, I probably need something more like Divine motivation.
Katy! Do not dismay! I have empty frames all over my house! And we have TONNNNS of unfinished projects… so yep. You’re not alone! 🙂