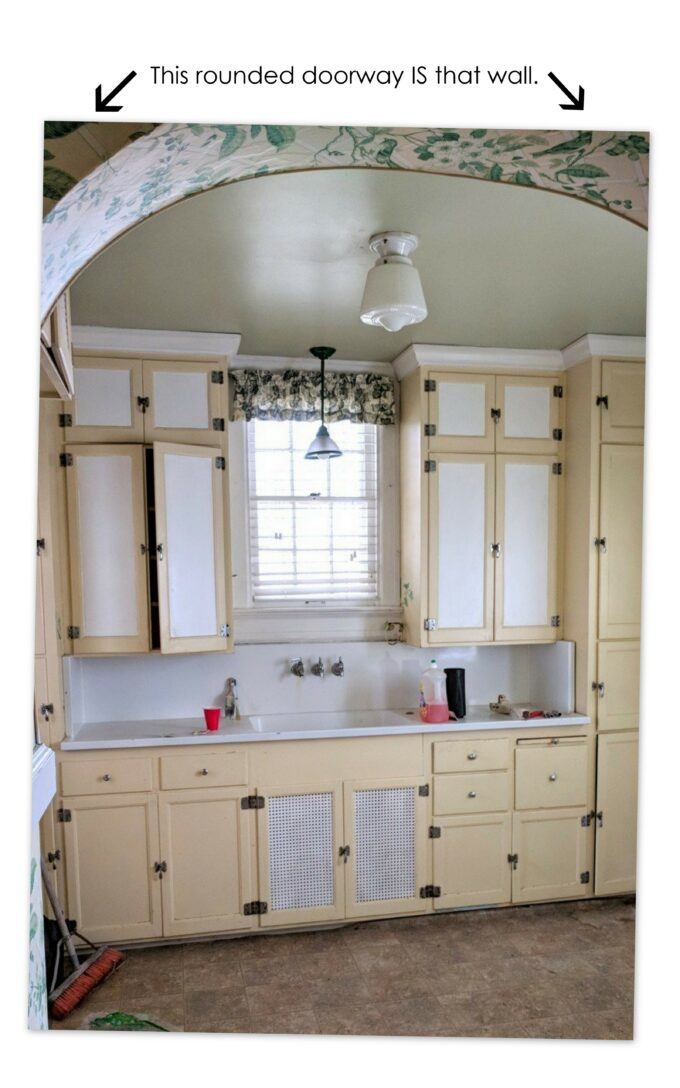
Before I dive right into what we did to THE WALL, let’s discuss how the wall came to be. It was once the entrance into the original kitchen. A very small, tragic kitchen that was all but falling off the house.
*This post contains affiliate links.*
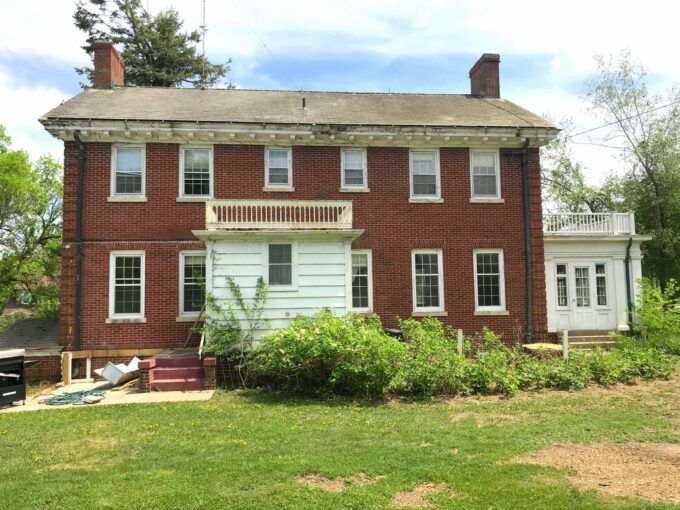
Here’s a view of the original kitchen from the outside. Yes, that little white box in the middle is the entire kitchen.
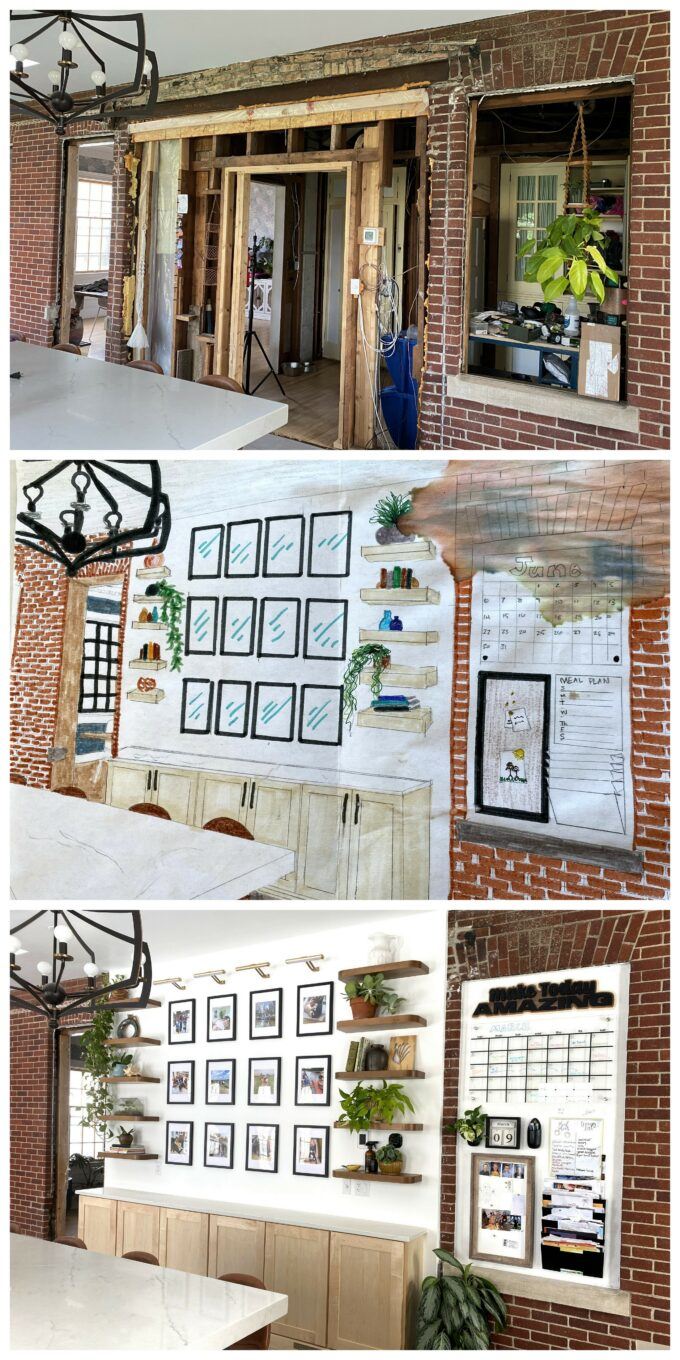
When drawing up plans for the new kitchen with our architect, the original plan was to keep that doorway where it is…

But when the kitchen was done, we realized that the flow of the house had changed, since 3 exterior windows are now interior doorways. We realized this didn’t need to be a doorway anymore, and we needed to figure out another plan.
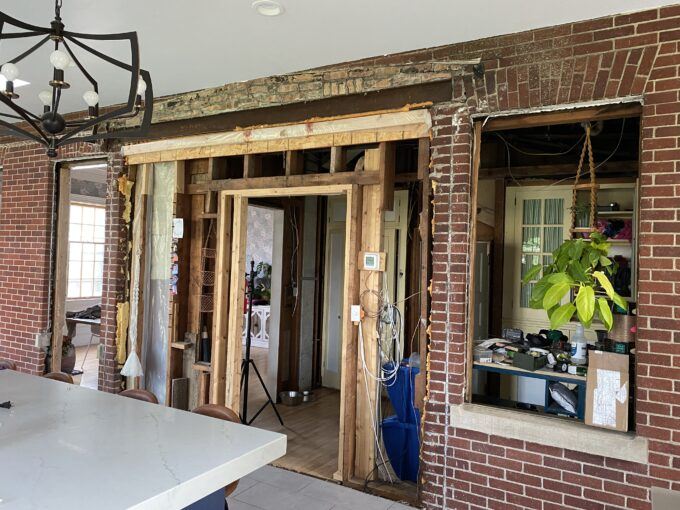
We just lived with this situation for 2 years. It wasn’t a priority since we had finished the kitchen and were so happy to have running water and appliances after living without a kitchen for 9 months.
We tossed around the idea of trying to find a close match to the original brick and just brick the whole wall solid, but it would have been nearly impossible to make it look like the original old/historic bricks.
I decided to draw up a sketch of an idea that I had, and Nick loved it! Don’t mind the water smudge.

Onward! Now that we have a plan, we started framing up the wall, drywalling, and mudding. This was a slow process over the course of several months.

Nick built cabinets from scratch to match our maple kitchen cabinets.

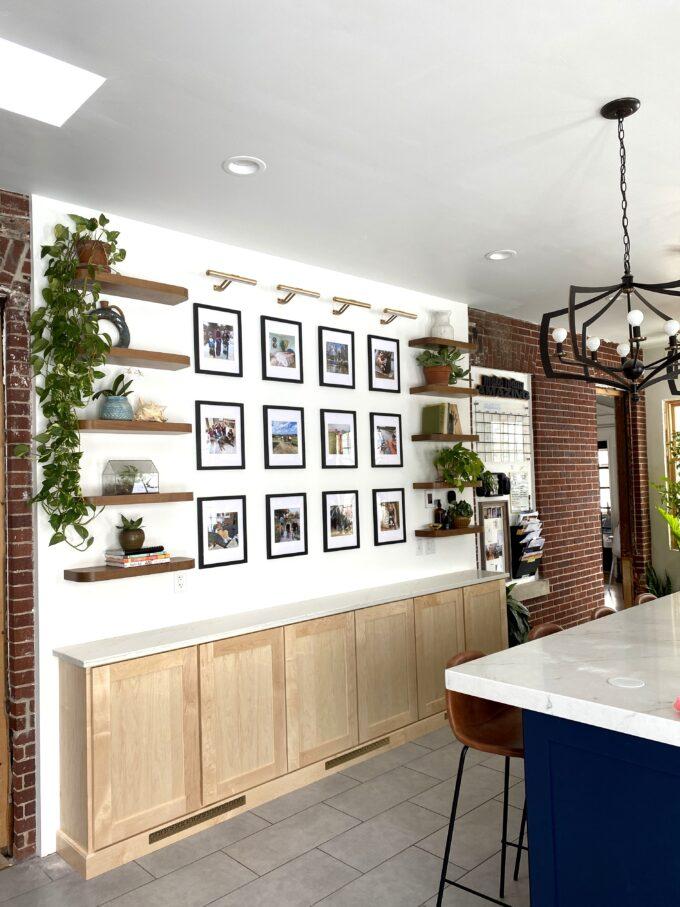
I ordered some 11×14 frames on Amazon to use for my gallery wall (they come in sets of 6, so you only need to buy 2!). I was inspired by Erin’s Monthly Photo Wall where she has an 8×10 photo for each month of the year, and changes one pic out each month. Since I wanted to be able to choose pics that were portrait OR landscape, I had custom mattes cut at Hobby Lobby with an 8×8 opening. That way the pictures could be either direction and you’d never know it!

We could have made our own floating shelves (it wouldn’t be the first time) but we were spent after building those cabinets from scratch. We decided to get these BEAUTIFUL shelves from Shelfology (gifted). They’re solid wood, and so high quality! We went with the Aksel Radius Floating Shelf, and we are SMITTEN.
It was a risk choosing a different wood tone than the maple cabinets, but I knew I wanted the two woods to contrast each other and provide a “mid-tone” between the cabinets and the black of the frames. I’m so glad I took that risk!


Oh, you spied those SWEET picture lights up there? Also an Amazon find! They’re rechargeable and have a remote so they don’t need to be hardwired. So classy!
Here’s a finished view of the whole wall! As you can see, we made that window area into a command center, and it’s so handy to have a central station to organize mail and our schedules!
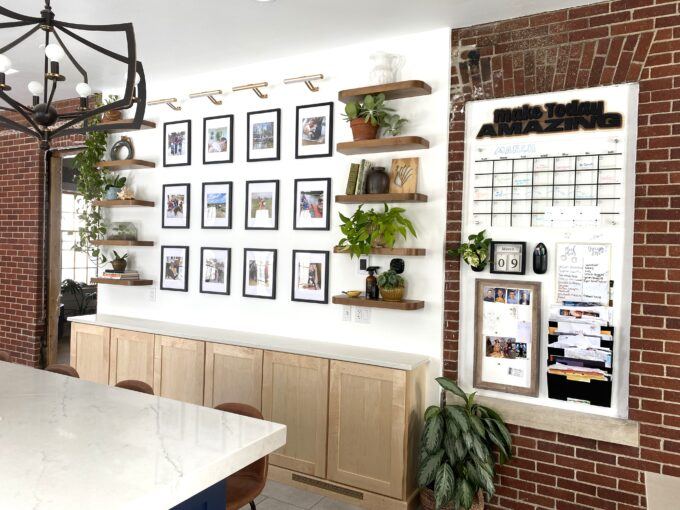
We’re SO HAPPY with how this all turned out! And now it feels like our kitchen is truly complete! (although there are a few small things like trim around doorways that still need to be done)

I’m so glad I took the time to make that sketch, because it helped us visualize the space, and it was so fun to watch it become a reality over the past 9 months!
Thanks for coming along for the journey with us! And if you don’t already, please follow us on Instagram, and see these projects happen live in our Stories! We document every step of our projects (and everyday life), and have so much fun with it.
See you over on Instagram!
Bethany


Leave a Reply