Dear friends… do you want to see something gross?
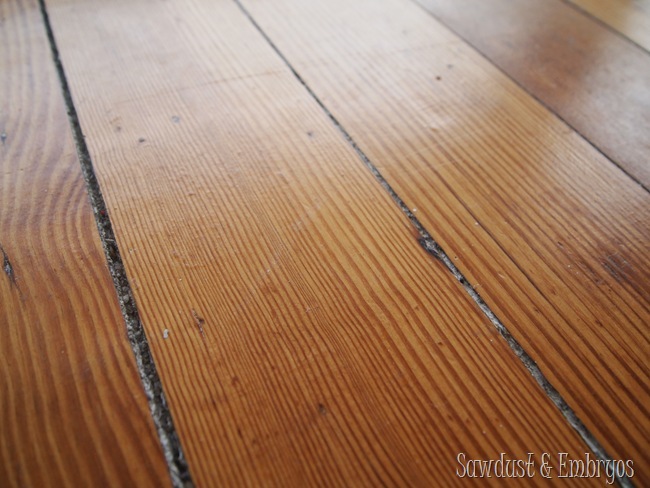
What you’re looking at is the grody cracks in our 114-year-old hardwood floors. I’m not sure if our forefathers installed them with spaces between them because that was a popular home décor trend in the late 1800’s, or if the wood has shriveled and shrank over the centuries. I could probably do a quick google search and find out… but I truly don’t care what the reason is.
I just want it to be fixed.
However! Being the sentimental sap that I am, I love the fact that our old homestead has the original hardwood floors (I lamented about it here), and often think about the many memories that have been made here on these floors. Different families, different generations.
In fact, we’ve heard from neighbors that our house was abandoned for many years, and there was a family of raccoons making memories on these floors. And motorcycle gangs used to party here and get busted by the police. NOT EVEN JOKING. I won’t even tell you about the guy at the gas station that told us he once brought his prom date to our abandoned house. *covering ears* LALALALALA
Awhile back, I asked you guys on our Facebook page how many of you have an area rug under your dining table. Y’all were pretty divided on that Facebook poll… having a variety of reasons why you prefer having a rug or not. My friend Katie from On the Banks of Squaw Creek even guest-posted here on why she loves her dining room rug.
I love the look of it, and how it seems to ground a room… but with my toddlers (and the amount of spaghetti that flies through the air), I feel that spending a couple hundred bucks on a rug would be a major judgment fail.
But then again, a rug might be easier to clean those crusty raisin-packed cracks in the wood floor?
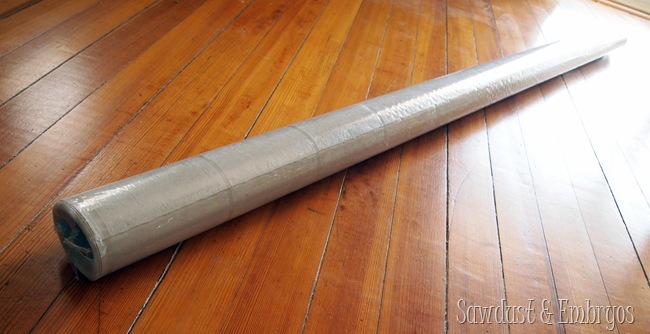
I may never know… because instead I spent $20 on a 5×7 linoleum remnant at my local home improvement store.
You heard me. LINOLEUM!
A few of you suggested painting linoleum as a rug, and I could have just drop-kicked myself for not thinking of it myself. I’ve painted curtains, bedsheets, and carpet (twice), why not paint linoleum?
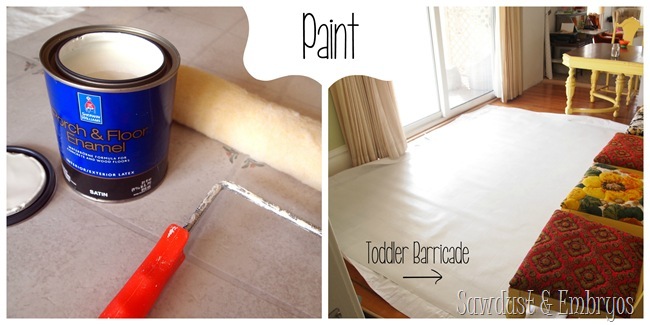
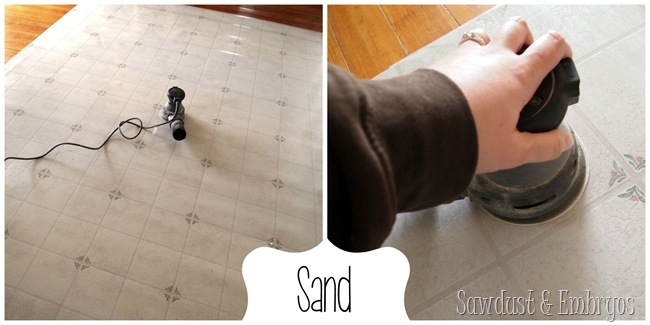
I knew that because of the glossy nature of the surface, it would need to be sanded down a little to dull it up to accept paint. I used my trusty orbital sander with 220 grit. It literally took 5 minutes.
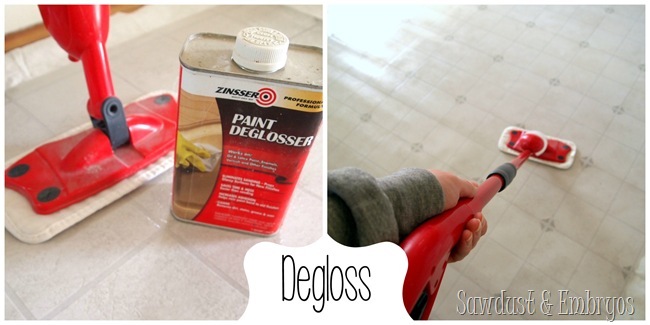
Then, just to make sure all the sheen was truly gone, and to get things SUPER clean for painting… I wiped ‘er down with this deglossing solution using my mop!
After that dried (a few minutes) I started painting! I used Sherwin Williams ‘Porch Paint’ which is supposed to be THE MOST DURABLE paint of all time. It has primer in it too, so I didn’t have to worry about that step. I literally just dumped some paint on, and started spreading it around with a roller. It took 2 coats to fully cover the mauve flowers 🙂
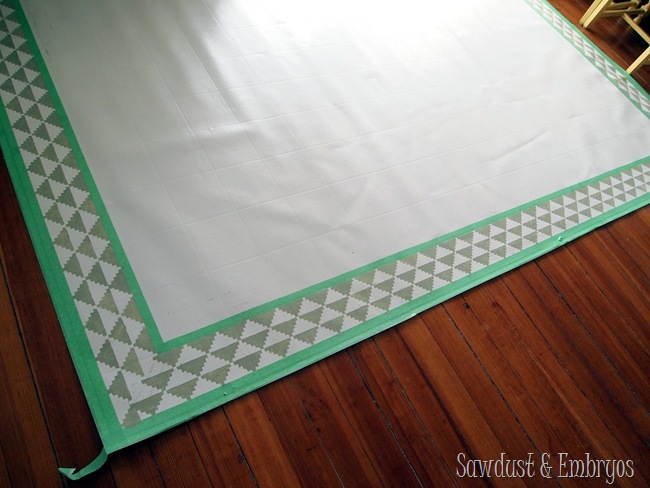
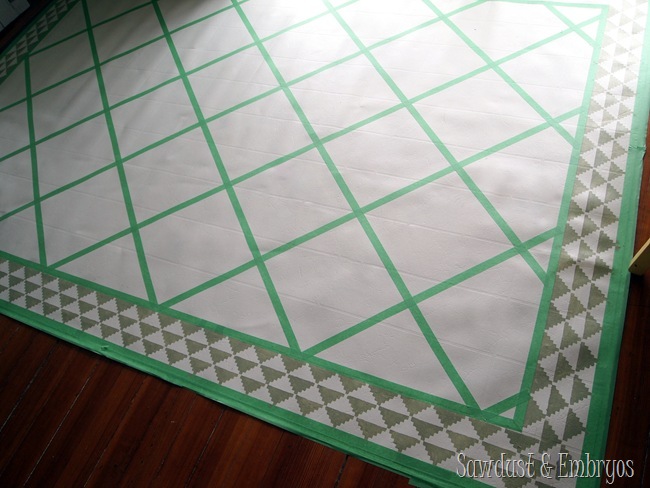
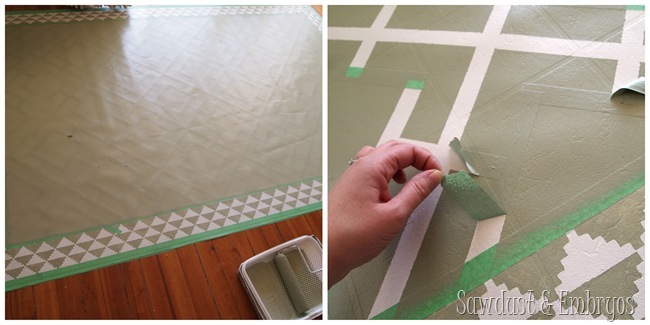
 I wanted my ‘rug’ to look like an actual area rug, so I taped off a border with some painters tape, and stenciled around the edge with a stencil I already had (from the girls’ patchwork stenciled wall)… it’s called Step Up Triangle by Royal Design Studios.
The color is ‘Clary Sage’ by Sherwin Williams (also Porch Paint).
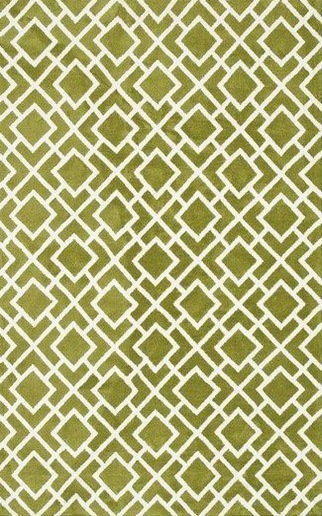
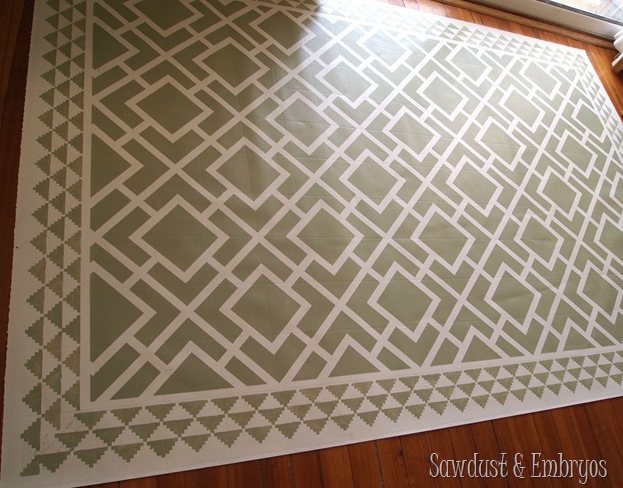
I wanted a geometric pattern in the center of the rug. I went back and forth between a handful of different patterns, but in the end I decided on this one:
I almost didn’t choose this one, because it felt complicated. But I recruited my master measure-er and it turned out to be a lot easier than I thought. First we taped off a large grid. There was no measuring involved for this because we just used the slight indentations from the painted-over pattern as a guide (corner to corner).
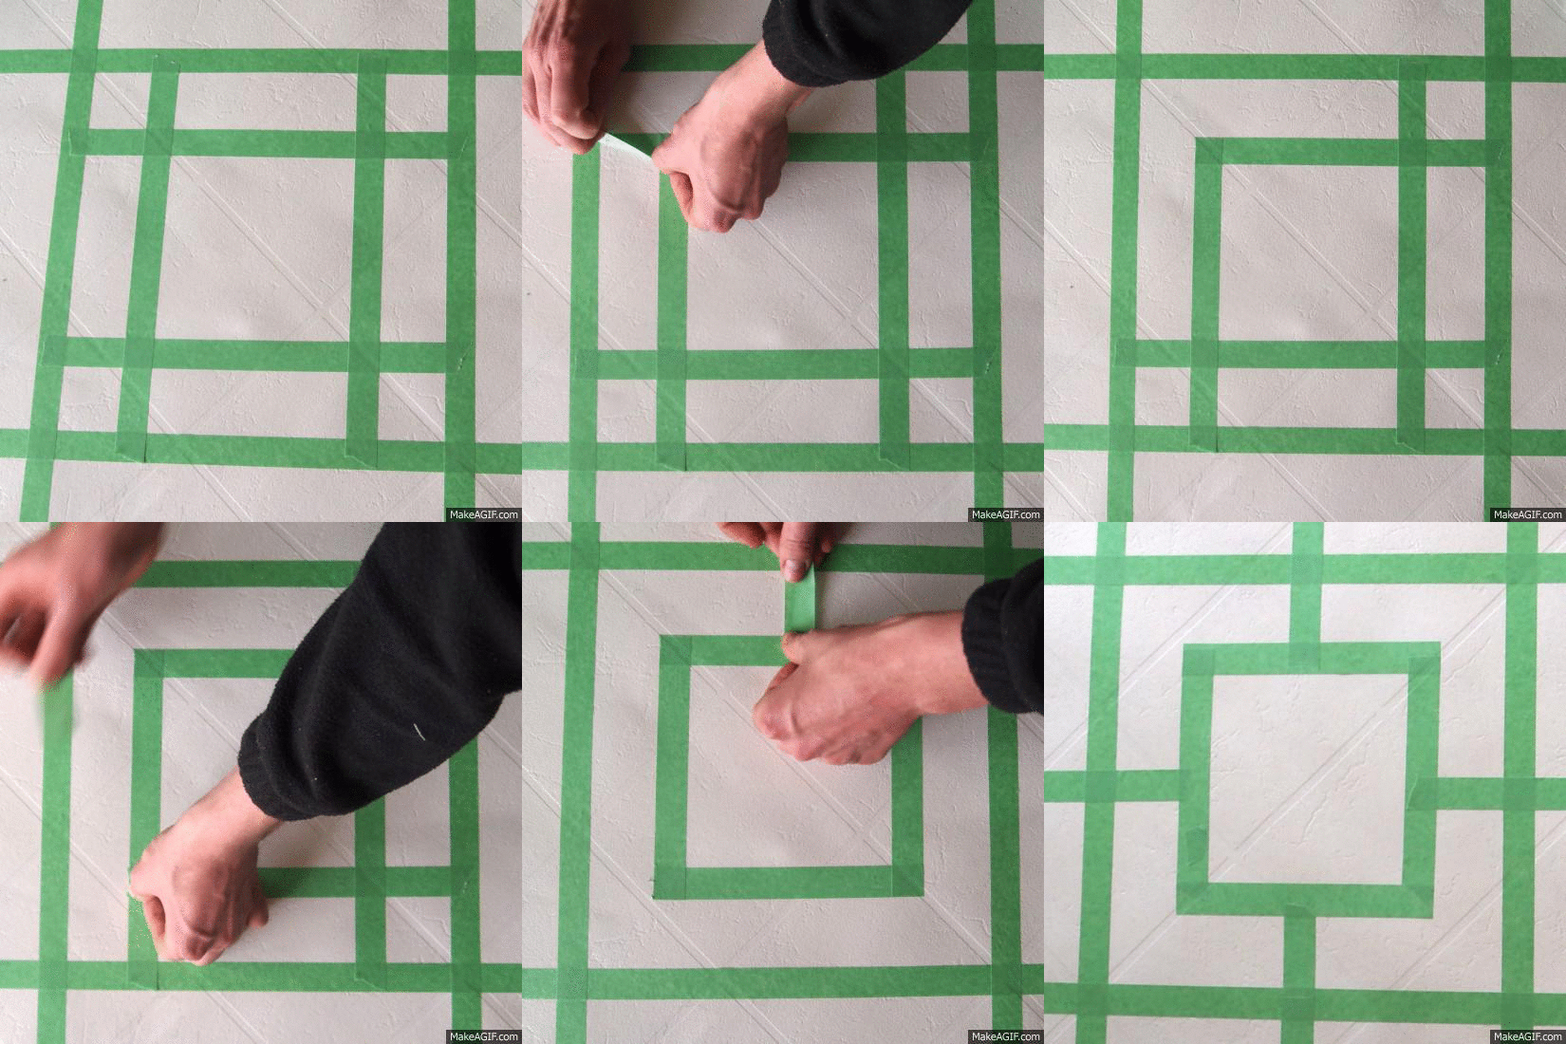
The next part we didn’t measure for either, to be honest. We probably should have, but we just eyed it. If you look at the inspiration rug, the lines aren’t perfect either. Here’s a little GIF of how we did each square. Once we figured out that we could remove a few pieces of tape and just put them in a different place… things got simple!
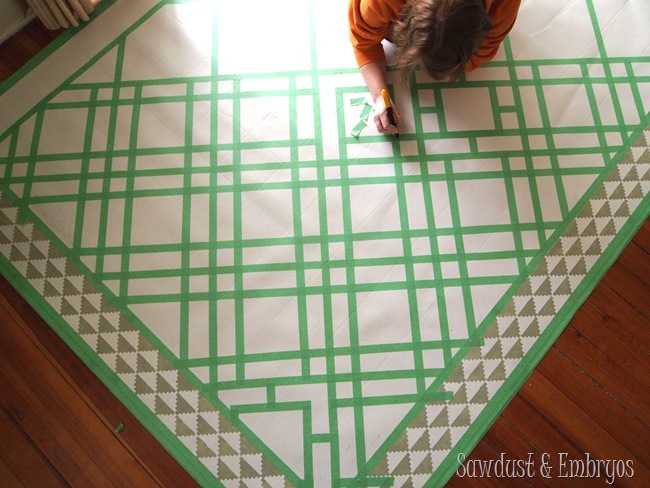
Did you get that? After we did a few that way, we realized that we could pretty much tape off half of our ‘rug’ at a time and then go back and slice/replace pieces of tape. Using a razor blade made this a lot easier than our initial tearing technique.
Then I rolled on the same ‘Clary Sage’ (SW Porch Paint) with a roller. Just one coat this time! It has really good coverage! Then after about a half hour, we started peeling back the tape. The lines were pretty darn crisp considering the off-brand cheapo painters tape we used.
I love this ‘putty’ gray/green color. It feels really neutral without being too boring!
We rolled on a coat of Minwax Polycrylic just to seal things up and make it even more durable/wipeable.
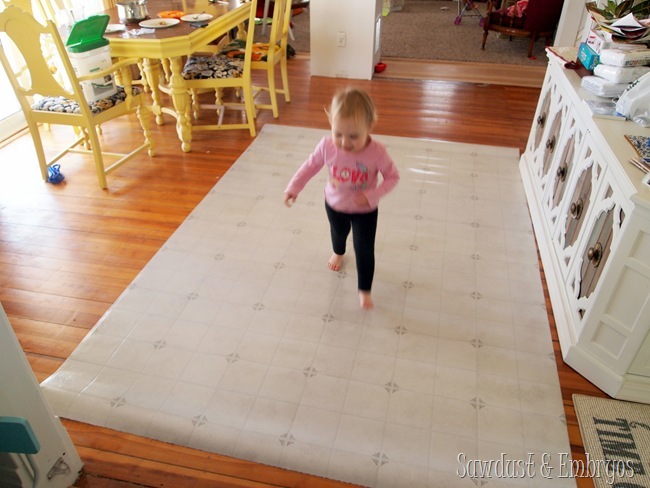
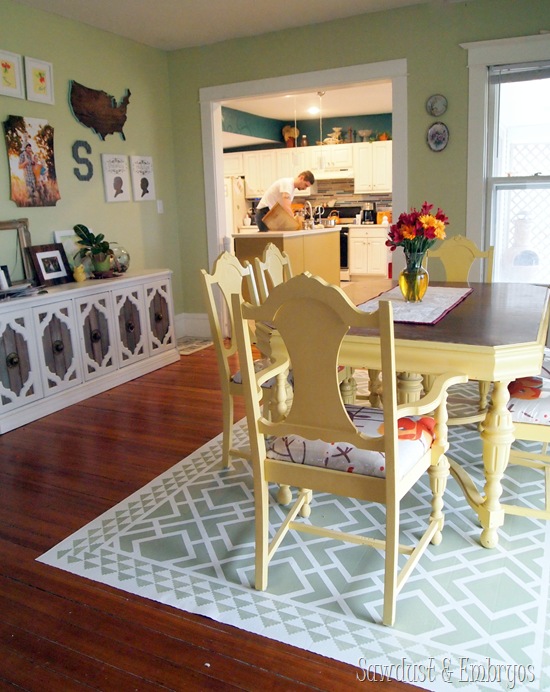
We’ve been putting this new ‘rug’ through rug-boot-camp for the past couple weeks, and it’s holding strong! I’ve cleaned up lasagna explosions and smashed grapes… even BLOOD (don’t worry, it was my blood… from the chisel incident). It wipes up as clean as could be. It’s a DIY miracle.
Did you notice my fine piece of man-meat doing the dishes in the background of that pic? What’s hotter than a man doing dishes?
I realize that the ‘Celery’ color of the walls clash a bit, but we’ll be repainting the walls sometime soon. Haven’t settled on a color yet.
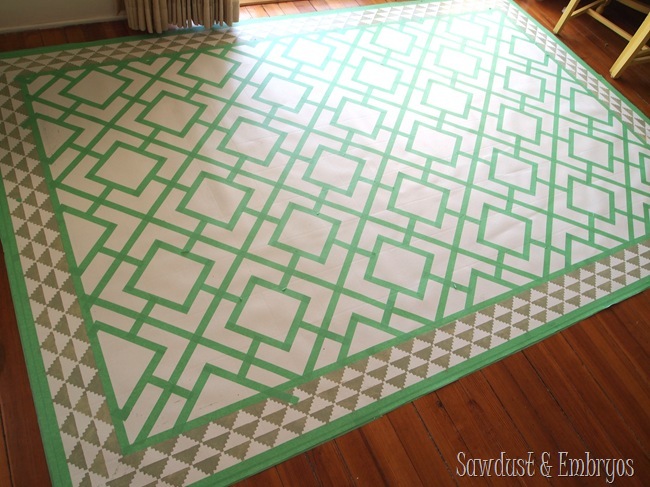
Um, doesn’t this totally look like a rug?
So there you have it… a super affordable (and FAR more durable) solution to the dining room rug dilemma. I couldn’t be happier with the outcome! I’m a real sucker for simple(ish) and CHEAP projects that make a big statement and are functional as well.
UPDATE! We published a full post about how we feel about our linoleum rug a month later! Check it out here!
Have you been painting any non-traditional items lately? Have you ever tried to open a can of paint with a chisel? I’m guessing not, because that would be foolish.




Best tutorial on doing VINYL floorcloth that I’ve found, thanks so much.
Wondering if this could be done with thicker craft vinyl–like that used for a Cricuit. I know most traditional floorcloths are made with canvas, so it should be okay that it’s thinner, right?
Ask because I inherited some large sheets, and would be a cheap way to do this.
Thanks! Can’t wait to get started.
That’s an interesting idea Jessica! I don’t know because I’ve never used vinyl on the floor, but there might be some insight out there on Google. I worry that it wouldn’t be durable, or that the edges would start to peel up. But maybe not! If you give it a go, let me know how it turns out!
Could you use this on an outside deck?
I would think so! But I’ve never tried it so I can’t say for sure.
What hardware store can I buy linoleum flooring…for approx., $20.00, as you stated?
We got ours from Menards! But if you’re not in the midwest, I’m sure you could find them at Lowes or Home Depot too!
try a Habitat for Humanity Restore store. I got a high quality (albeit rather dirty) 10×10 remnant for $25.
Oh my gosh, that’s so cool! I love knowing that! <3
It looks nice. But isn’t it vinyl? (Not the same as linoleum. Vinyl has synthetic estrogens.) Anyway, thanks for the pictures and your how-to steps.
I was going to ask the same question. Vinyl is petroleum based; linoleum is a natural product made from linseed oil – HUGE difference. This looks to be sheet vinyl. I’ve never seen actual sheet linoleum at a big box. If it’s actually linoleum, that’s great. Usually linoelum is thicker and has a jute backing. That would make it much harder to use.
I’m curious if anyone knows how this will fair on carpet? I have a heavy oak dinning set and wonder if the chairs will scratch the paint off? I also have 4 rambunctious boys who are up and down from the table ALL day lol. Will the chairs leave permanent dents from sinking into the carpet?
I love this and it’s gorgeous! But I don’t want to have a constant worry about ruining it 🙂
I’d like to know too! I also have carpet
Sweet!!! This is amazing!!! I have two toddlers and have been searching like mad for a workable solution to our carpeted dining area (ugh! Whoever dreamed up the idea to put beige carpet under a dining room table?!?!?!). Since buying all new hardwood floors for our home is out of the question for now, I wonder if this would work for us? Do you know of anyone who has tried this for a carpeted floor? Would I need to lay down a hard surface first so that the linoleum wouldn’t buckle under the weight of the table (which is similar to yours)? Also, now that you have read others’ advice about painting on the backside of the linoleum, would you recommend that, or does painting on the front side still seem better to you? Also, would you ever sell one? I would buy one from you!!!
Thanks for your help!
Sara
Sara, I’ve never painted the backside of linoleum, so I can’t say… but I’ve heard good things about both. We did find that the edges started to curl and ended up using an area rug tape to hold it in place, which works great! This linoleum rug has been such a life saver for our messy family. You’d definitely want to put down a piece of plywood or something underneath. I’m not sure exactly how that would work… but it makes sense in my head! If you go for it, be sure to let us know how it turns out!!
Hi, Bethany! I read this article and got pretty excited!! I’m moving into an apartment that requires 75% of the beautiful hardwood floors to be covered with carpet (provided), but I want my soon-to-be home to have character instead of just boring white carpet (messy) under the dining room table. I wanted a creative albeit cheap idea to liven up the area under the table. This. Is. Genius. I can’t wait to buy a linoleum remnant and paint on a cool design. Thanks for the inspiration!
WoooHOO! You should totally go for it! It has been SO GREAT for us. 🙂 Send us pics when you’re done!!
WOW! This is utterly AMAZING! I would be so proud of myself if I were you. Not only have you saved yourself a heap of money but also the heartache that goes with finding food mashed up and trodden into that beautiful rug that you paid a small fortune for. BRILLIANT idea, and FABULOUSLY executed! Well done!
Judi in the UK
Your pattern is fantastic! Imitation is the highest form of flattery. I have painted floor cloths on vinyl. It can also be done by flipping over linoleum and priming the back like a canvas. Great dining room idea. Thanks and enjoy!
I love everything you and Nick do! Will a linoleum rug in a mustard/cream combo be available in your Etsy shop soon? I’m buying. Vikki in VA.
I really enjoy reading about all your fun and well done projects! You guys are Ssoooo talented and inspiring! Thanks for sharing.
I love this!! You are so creative!!
really enjoy this one. kudos and thanks for the great post. ~jb
Holy Canolies this is awesome! Where were you 35 years ago when my kids were babies???? I know, I know, you weren’t even around then. This is a fabulous idea for families with little kids or grandma’s that have their grandbabies over all the time. This is going to be a project to tackle in the very near future!!! I do have a question – is there a certain type of linoleum you should look for when purchasing a piece to paint? I assume is smooth as possible would be what you would be the way to go. Bethany – you blow me away with your talent!! Seriously!!!!
I LOVE IT!! Um so really you should sell these… I would buy one for my kitchen in a heartbeat! You’re amazing and I love it that Nick is doing dishes in the bathroom, you’ve trained that man child well! 🙂
I’d have never believed that would actually look good AND hold up well . . . Wow . . . incredible! Truly impressed – as I am almost every time I click thru to your site. May not have been your original idea but you always seem to at least one or many times better the original! Bravo!
Oh — your walls in there — you have to go with a shade of the orange on the chair cushions. Keep it light — but at least get a sample and give it a shot. The yellow and orange with sage is natural and cheery. That’s my vote! 🙂 Thanks for your site – don’t know how you do it all.
Seriously — I don’t know HOW you do it all. 😉
That is phenomenal. The patience it took to tape that design off is commendable! Bravo!
I’ve used vinyl to paint a floor rug in the past, but used the backside of it, which is like a thick paper.
I’m blown away.
this is beyond brilliant!!!! My dining room table sits on carpet (as in laid carpet). And, it’s a very heavy table with a center base (not rectangular with 4 legs like yours). Do you think a linoleum rug like this would work under my table/carpet combo? I’d LOVE nothing more! And have been trying to figure out a solution to crumbs/messes for a while. Thoughts?
P.S. Is your “man-meat” that tall or is he standing on something at the sink doing dishes (or is your sink that short)? He sure looks like a giant here! 🙂
I think this would work just fine under a table with a pedestal base!! You must send pics when you’re done!
And… as funny as it would be to try and tell you that my husband uses a step stool to do the dishes, he is in fact 6 foot 8 inches tall. It’s like hugging a tree trunk. 🙂
jeepers! That *IS* very tall! 😀
First I must conquer resurfacing the decks and patio…..before it gets too hot and humid, because we all know that’s around the corner! Then, I am so doing this! I will send a pic. 🙂 Thanks for such amazing inspiration!
Shut up. This is AMAZING. Love love love the pattern you painted. You are seriously a genius. Now I just feel like an idiot for having a real rug under our table. Even though it was only $20. I’m sure once Ev is eating real food it’s going to be a whole other story.
Psh, you’re not an idiot! HAHA! Remember you can always lay out a tarp under the kiddos. 🙂 Your house is BEAUTIFUL and I wouldn’t change anything about it. 🙂
LOVE this idea!! I have been looking at rugs for months debating on whether I really want to have a rug trashed by kids and pets. We redid our 80-year-old subfloors into “rustic wood floors” this past summer and I would hate to have them scratched. Are you worried that the linoleum will scratch up the floors underneath??
The under side of our linoleum is super soft like felt. I don’t know if they’re all that way though. Our floors are so old and scratched, I don’t ever thing about wear and tear on them. But I can see how you would want to keep your new floors in good condition. I would just make sure to use a linoleum that’s soft on the back like ours!
Mind. Blown. This is so smart, and looks beyond great
Thank you Brittany! I wish I could take credit for the idea 🙂
I like that you always think outside the box.
PS: That ugly stuff in the cracks will be covered in sawdust when you refinish your floors. Maybe there’s a way you can refinish them with the sawdust in the cracks….or just sand that s*%t right off! 🙂
Haha! I love all those ideas Suzanne! The cracks don’t bother me a lot unless I’m looking close or trying to clean a glob of something nasty out. I have a feeling we’ll be living with them for a LONG time. 🙂
This is seriously awesome! Great job guys!
Thanks Abbey! It’s been SUCH a great addition so far. I hope it holds up!
I am also wondering if you put anything underneath it so it doesn’t move around, and if it stays laying flat around the edges, or did you do something so it doesn’t roll up on the edges? Love this idea, great work!
Kathleen we didn’t put anything underneath… And the weight of the table and chairs definitely keep it from sliding around. However I’m a little nervous that the edges will start to curl up over time. Especially in the high traffic areas. We’ll do an update post after some time passes!
*Sigh*, you’re so amazing.
Haha! Thx Rachel… You’re sweet!
NO WAY!!! Omg this is brilliant! Awesome job! My husband and I have a 1 year old…. I think I might have to attempt this!
One year old? YES! you need this! So far it’s been a dream come true with the messy toddlers!
I wish we had thought to do this when they were one. 🙂
Looks great. Maybe you could do your walls the same Clary Sage or go one shade lighter or darker to tie it all in. Whatever color you choose, I’m sure it will look great.
Love that idea! We’re going to wait on the walls until we know what kind of finish we’re going to redo the dining set. One step at a time!! 🙂
Looks awesome! I also want a rug – but don’t want a rug – under the dining room table. This seems like a great solution! Did you have to put anything under it to keep it from moving around?
Haven’t had any sliding issues at all!
Love your finished design! I’ve done this several times with smaller pieces but I just painted on the “wrong” side…. it’s already smooth and with several coats of sealer it turned out great and holds up well!
We thought about doing that too Annette… But we were worried that all those little pores in the back would gather dirt. Have you had any problems with that?
Annette, that’s how I’ve done it in the past as well. It saves the sanding and deglossing steps. Once you have the primer, paint and sealer on there, the little pores in the back are gone. I had a runner in front of my kitchen sink for years with no problems whatsoever. I finally got rid of it because I was bored with it!!!!!
Should add, this prevents the curling up issue as well. Lino only seems to curl one way.
Awesome. There isn’t anything you two can’t conquer. Congrats.
You’re so sweet! Thanks Sandy!
I LOVE this! Our next project is our kitchen. And for the time being our two dogs get gated in the kitchen at night (they don’t have full roam of the house) 3 kids plus two big dogs around the house = an even bigger mess. Our two dogs slobber ALOT a newfoundland and a basset hound. So we end up mopping our floor every morning. I’m not even kidding. Do you think if we painted our already linoleum flooring it would hold up to being mopped every single day?
Yes… I totally do think it would hold up to mopping everyday. Just be sure not to skip any prepping steps. If you go for it, send us pics!!