My parent’s thought it would be great fun to have a kid every two years… for FOURTEEN YEARS.
And that is why I’m 12 years older than my youngest sibling. Josh.
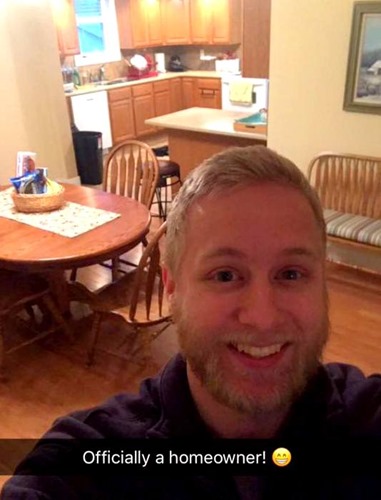
 This pic is something like 13 years old. I still totally look like this, right?
Of all my siblings, Josh and I are the most similar (even though I graduated and moved away when he was 5, and we didn’t really get to know each other until later). We’re like a male/female version of the same person. When there are 7 kids in one family, there’s room for two black sheep… and you guessed it: Josh and I both wore that hat proudly. We were (and still are) hot-headed, opinionated, confident, loyal, and compassionate. We wear our heart on our sleeve.

Josh is so compassionate that he chose to become a Paramedic, because he loves to help people and feel that he has a strong purpose in this world. He recently graduated, got a job in an EMS dept, and bought a house… like a responsible adult. And that’s weird for me, because I legit still think of him as being 4 years old.

I wanted to build him a ‘thing’ as a housewarming gift. And when we got to tour his new house, I saw the vaulted ceiling in his bedroom paired with the weeniest headboard you ever saw (although props to him for having more than just a mattress on the floor. #bachelor). And I knew I needed to build him a big / manly / statement-making headboard.
This post is sponsored by Mohawk, but all project ideas, opinions, blood/sweat/tears are wholly ours. Thank you for supporting the amazing brands that make Reality Daydream possible. This post contains affiliate links.
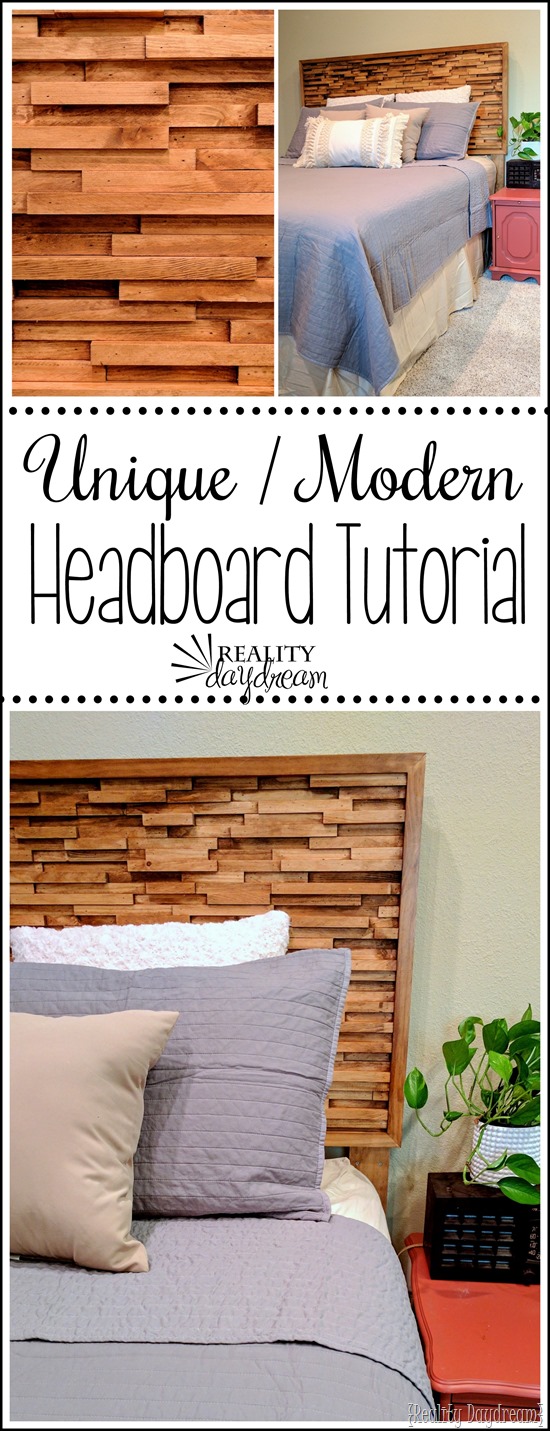
There are a lot of beautiful DIY wooden headboards out there, but we wanted to do something unique and different. We started out by ripping down a bunch of 1×8 pine boards to a 1/4-1 inch varying widths, then cut them into a variety of different lengths… ranging from 3-12 inches.

We built a ‘frame’ using 5/4 x 4’s (ripped in half), with a 1/2”particle board panel as the substrate. We mitered the corners and rabbeted the inside edges (for the substrate, 3/8” x 1/2”) , but you could just butt them up to each other and sand it smooth. Believe me, that won’t be important or noticeable after you start adding all the ‘texture detail’.


Nick and I cranked some tunes and started placing those pieces as random as we could! We put a strip of wood glue on, and then put a 23 gauge headless pin nail in each end using our Grex Nail Gun. This part took a few hours, but it was FUN seeing it slowly come together. And we loved seeing how it reads as a texture. You’ll have to make sure you watch the video above to see how awesome it looks with those pieces going in fast motion!


Finally it’s time for the legs.

The legs are cut from a 5/4 x 4 pine board. the shorter section was cut to length, determined by the height of the bed and the back was board was determined by the height of the bed + the height of the headboard. Then we glued and screwed the two together. We counter-bored eight holes with a 1/4” forstner bit and used Kreg 1 1/2 pan head screws.
Before we pop those legs on, we needed to stain the headboard first! Many times when you’re staining pine, it can have a very weird blotchy appearance. So we avoided that possibility by applying Mohawk’s Wood Conditioner by brushing it on and wiping it off with a cotton cloth.

After that dried, we brushed on the Mohawk Wood Stain (Colonial Maple) and wiped it off as well! This stuff is very thin and dries fast, so you don’t want to let it sit too long. Also, it’s very important that you apply this outdoors or use a respirator mask, as the fumes are very strong.

We finished er off with poly, and boom!

Ain’t that purdy?!

We delivered it to his house to surprise him, and I came stocked with some pillows and a plant for staging… HAHA! That pink night stand is ALL HIS THOUGH. And it makes this gray comforter look a tiny bit lavender.

The fumes are SO BAD until they’ve had time to off-gas (like weeks) so after we took some pics, we hauled that thing back out of there to store in his garage until it has time air out and dry/cure completely.

We looooove how this headboard turned out, and we think Josh does too! Happy home-ownership Josh!
~Bethany
~~~~~~~~~~~~~~~~~~~
Thanks for pinning! <3


Tried to watch a video or observe any of the work being done throughout the page is impossible. These ads are ridiculous. They have my page on my phone and my iPad and you can’t see anything that ads popping up in front of your face everywhere at all that it’s ridiculous. I couldn’t recommend these pages even though you’ve got some pretty cool projects.
I was wondering if you could give me an idea of how much lumber I would need to buy to create this for a queen. At the beginning it’s is stated “a bunch of 1x8s”. I’m new to woodworking and I can’t estimate how much I need. And then you ripped the 5/4x4s in half, was the final size then? Could I buy 2x2s to use instead? Thank you so much for this post. It’s a beautiful headboard!!
It looks great! if it was covered with the epoxy you used on the herringbone table, it would make a fantastic table too!
This is a very unique headboard design and it turned out perfect! Thank you for sharing this. It’s a lot of work but it’s a really great gift and I can see you put a lot of thought into it. It looks like a fun DIY project to do soon!
Thanks Allen! You’re too kind!
WOW!!! That’s gorgeous!
Jackpot! What a great headboard for Josh and I’m sure he loves it and his sister. Ye old brother-in-law ain’t so bad either. LOL Vikki in VA
Beautiful idea. Beautiful gift to real handsome brother.
This turned out really great!
(By the way, we had your cruncheroni noodle casserole again last night. We have it often. I know food blogging is not your thing, but I’d love another pantry-friendly recipe. Also, it makes me feel all mid-western when I eat it! It’s like a cultural food! Being from the West coast, we have only three food types: soups, salads, and tacos.)
Sweetest. Story. Ever. And that headboard…so original and just plain GORGEOUS!!!
Awww THANKS Lidia! <3
Whoa! That sucker took some time but it is gorgeous and well worth every minute. You must love your brother lots! He is very lucky to have you as a sis!
Eh, he’s ok… LOL! I’ll keep him I guess 😉
LOVE this!
<3 Thanks Courtney!
I love this! I’m thinking about doing this above my white mid century modern brick fireplace. Very cool!
Ooooo that would be AMAZING! Pleeeeease send pics if you do!
That headboard is gorgeous! It came out amazing.
You’re so sweet Vanessa!!