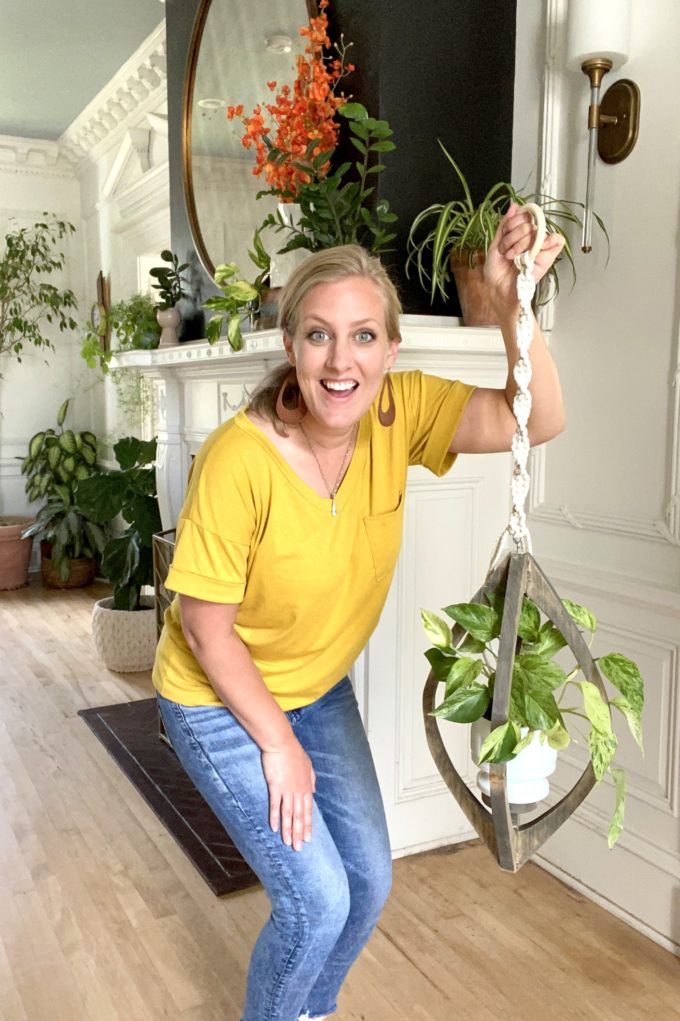
Good day friends! Do ya want to learn how to make these wood and macramè hanging planters today? GOOD! Because I’m gonna teach you!
*This post is sponsored by Mohawk Finishes. Thank you for supporting the fabulous brands that make Reality Daydream possible! This post contains affiliate links.*
I’m always looking for different creative way to display my plants around the house. And hanging plants from the ceiling is a great way to add interest to a room, and draw the eye up… making your ceilings feel taller!
AND ALSO… if floor and shelving space is limited, this is a great way to add plants to a room without taking up any precious space that could be used for storage and furniture!
psssssst! I have some other hanging plant ideas here, and here, as well as some vertical wall planters and sconces here, here, here, and here.
Let’s get started!
Supplies for Wood and Macramè Hanging Planter
- Pine board with 1″ thickness (I used 1×12)
- Scroll saw or Jigsaw
- Wood Glue
- Pin nailer (optional, but handy)
- Macramè Cord (this is the one I used)
- Eye Hook
- Wooden ring for macramè
- Mohawk Stain in ‘Driftwood’
- A PLANT!! (duh)
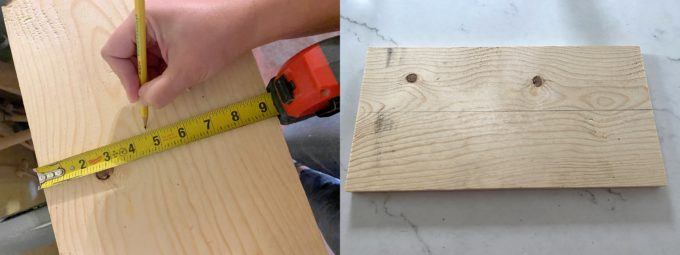
STEP 1
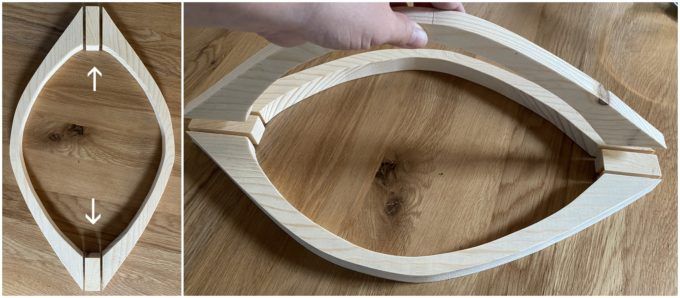
Decide how tall you want your planter, and cut two lengths of that dimension from your board. Find the center horizontally and draw it across with a pencil.
STEP 2
Draw on the shape that you want your plant hanger!
This part is totally up to you. For this particular hanging planter, I just hand-drew on an arch, which will create a teardrop-shaped planter. But if you watch my video tutorial, I try a different shape by cutting a template out. You could make it a perfect circle, add scallops, or ANYTHING YOU WANT!
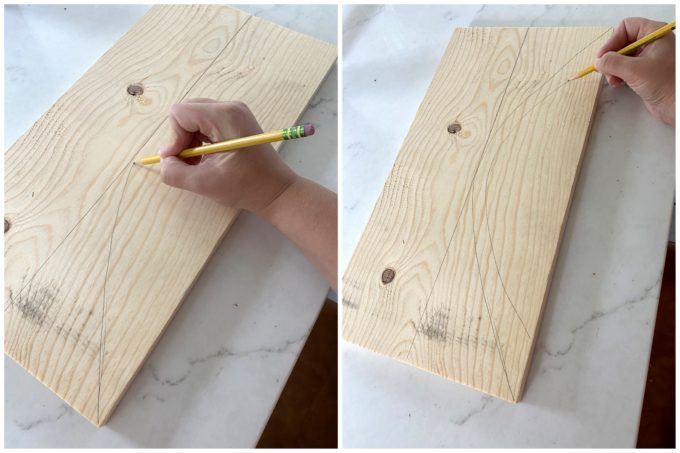
I cut out this first piece before doing anything else. That way I can use that piece to trace the next 3 so they will all be the same!
STEP 3
To cut out this part of my hanging planter, I used my scroll saw. But if you would rather, you could totally use a jigsaw too. Or even and band saw. So many options!!

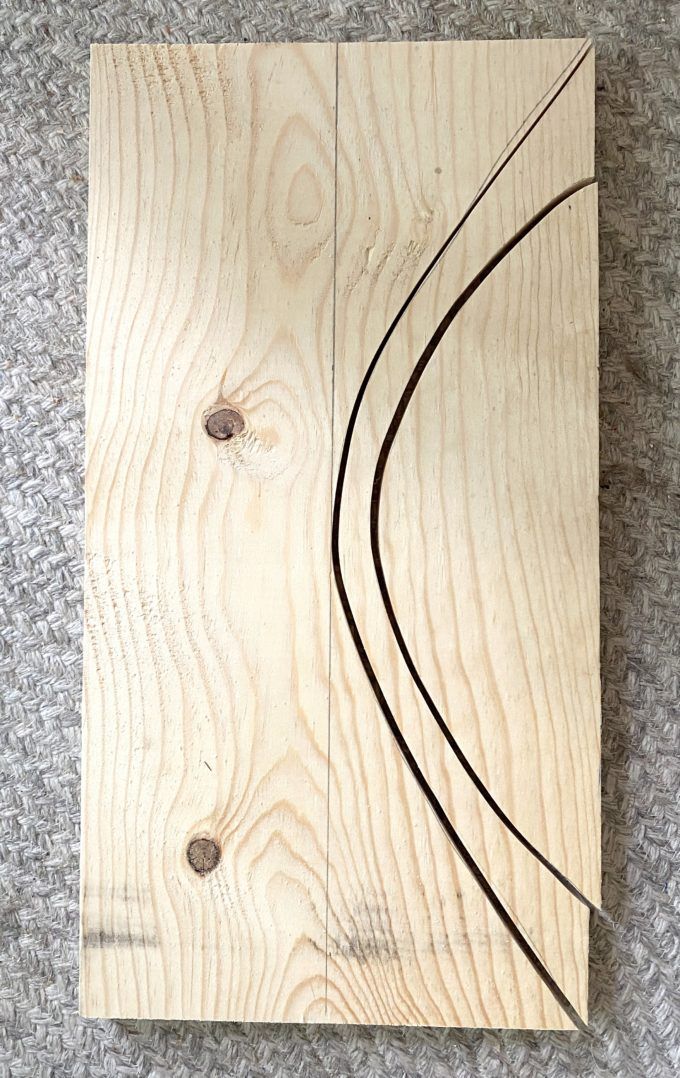
Then use that ‘bow’ to trace the other half and the next two on the other board, and cut them out as well!


STEP 4
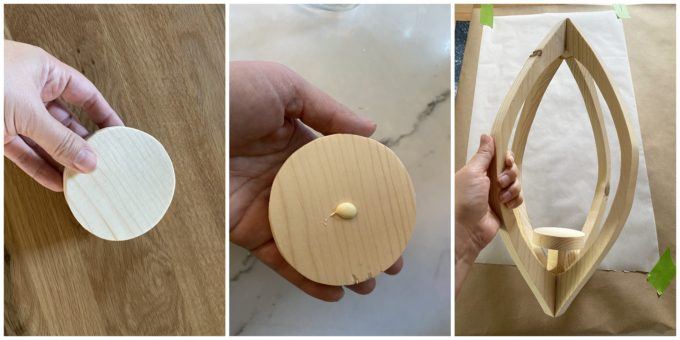
From your scraps of wood leftover from cutting the bows, measure out the lengths you need to create these little notches that will go at the top and bottoms to secure all 4 pieces together. (note the mistake a talk about below before executing this step)
NOTE! In hindsight, I wish I would have cut one of those square pegs about 1/5-2″ longer to act as the ‘pedestal’ for the plant. After assembly, you’ll see that I add an extra length to it.
STEP 5
This assembly step is much easier if you have an extra set of hands. Start gluing the pieces together, and use the pin nailer to hold things together as the glue dries. This would be nearly impossible to use a clamp, so the pin nailer makes it much easier!!
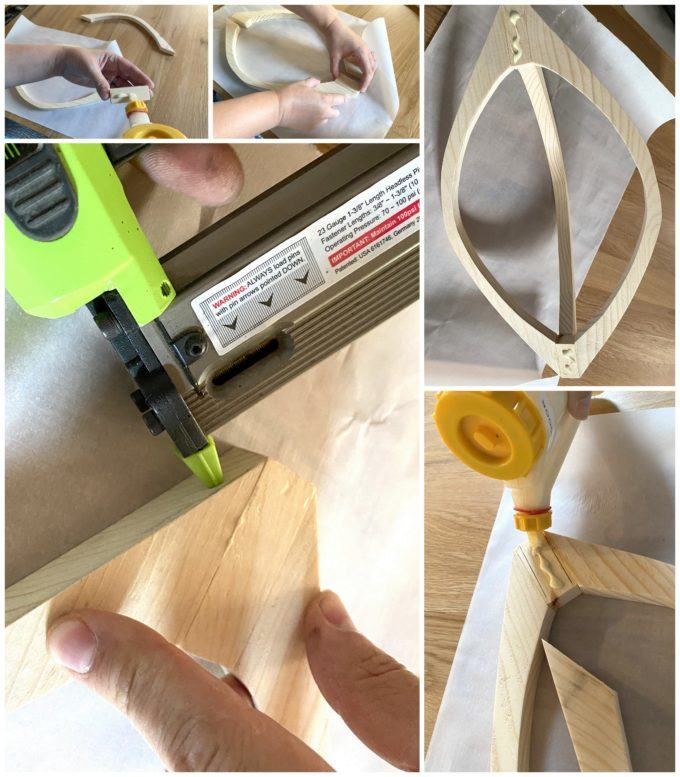
This is the point where I realized I should have made on of the square pegs longer. You live and you learn!
I simply cut more length of peg to extend it, as well as a circle for the top of the pedestal to put the plant on, and glued both in place. I didn’t use the pin nailer for these, so just balanced them perfectly and walked away to let it dry completely.

STEP 6
Time for staining!!
I’ve been searching long and hard for the perfect ‘driftwood’ stain that legit looks like it floated in from the sea. And this stain I found in Mohawk’s Designer Series Stain is sooooooo perfect! The one I’m using is… wait for it… DRIFTWOOD!
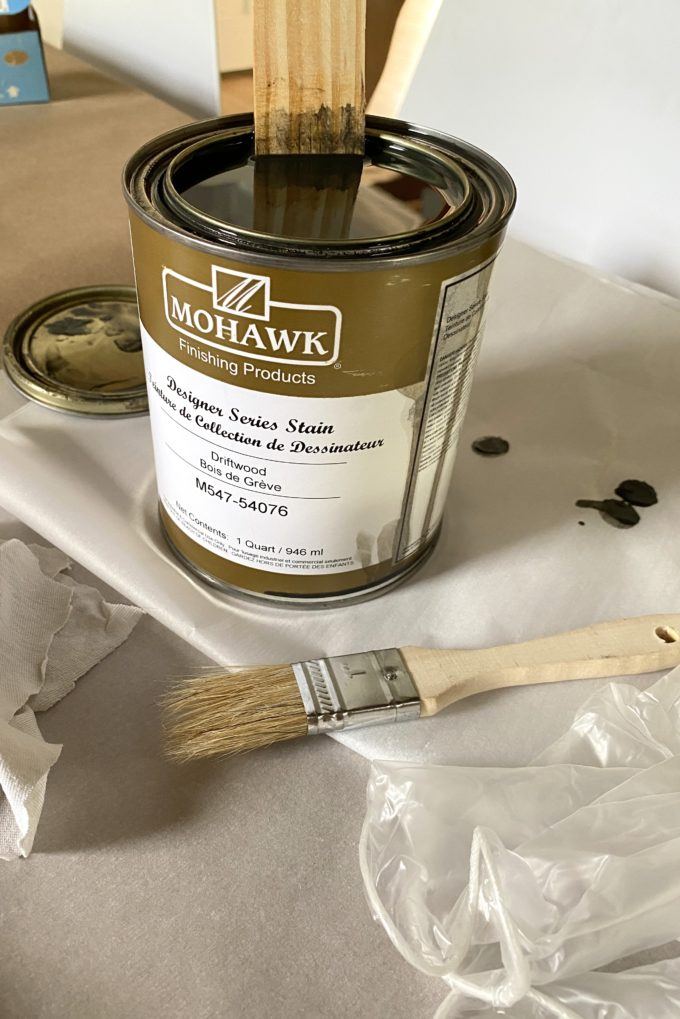
Be sure to stir it well to make sure all the colorant is mixed well, and use a natural bristle brush to brush on the stain, and wipe off with a lint-free cloth. (I just use a cut up piece of one of Nick’s old undershirts… hehe!)
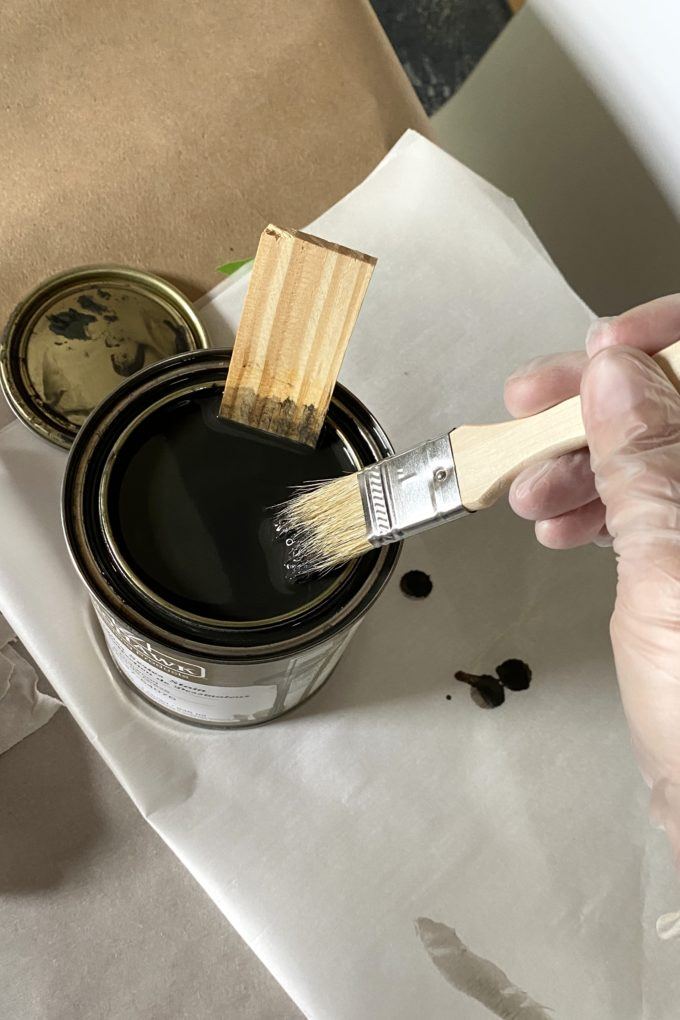

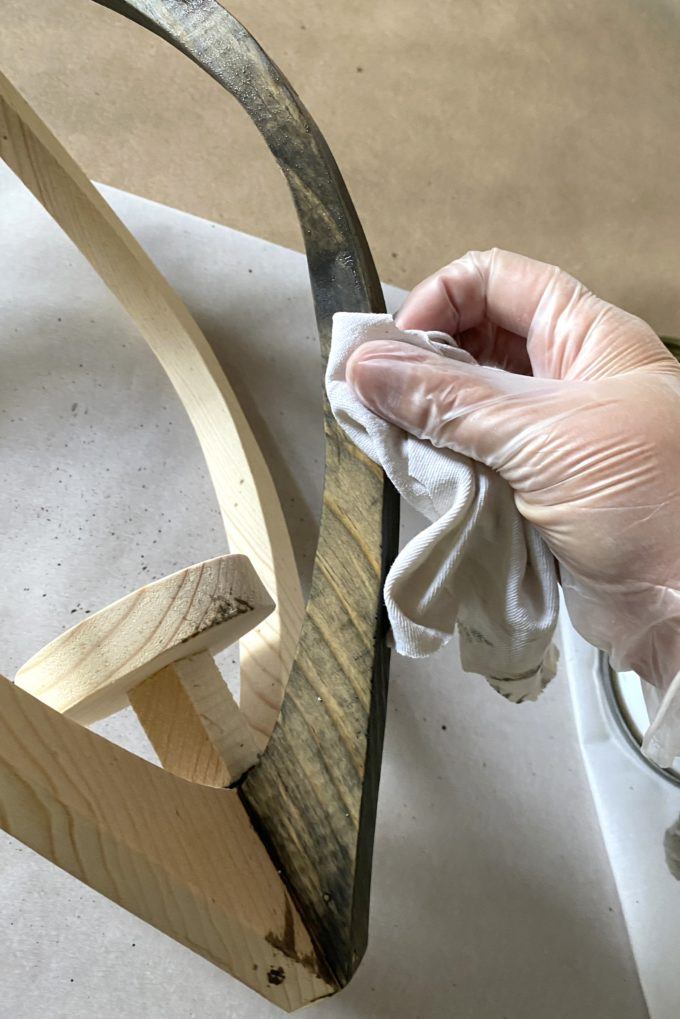
This stain goes on so smooth and provides such a great finish. DOES IN NOT look like some sun-weathered driftwood that came straight from the salty ocean?
STEP 7
You could just use a pretty rope or whatever you want to hang this thing, but I decided to do a simple macramè rope using the half square knot (I teach you how to do this over on THIS POST)!
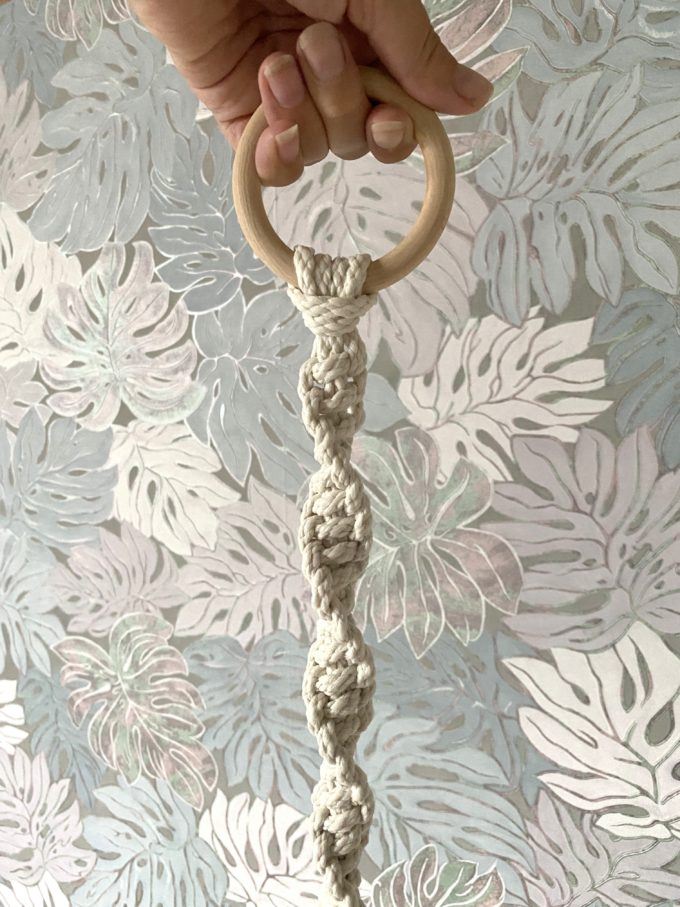
Screw in an eye hook on the top of your planter, and tie the ends of your macramè rope on, and you’re done!!!
Pop a plant in that sucker!!
Check out how all 3 of them look in a grouping!!

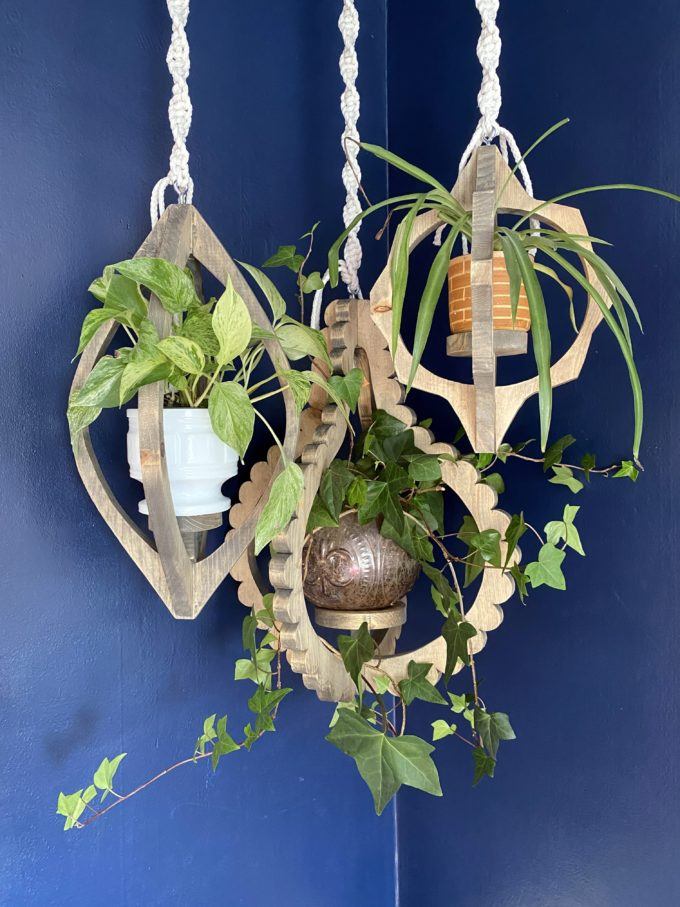
If you want details about how I made the other two shapes, you’ll have to check out my Instagram Stories for the scalloped one (we’re @RealityDaydream, and it’s saved in a Highlight called ‘Hanging Planter), and our YouTube video tutorial for the small hexagon-ish-shaped one!
I hope you enjoyed this tutorial! As always, if you give our projects a try, please show us your work by tagging us on social media (we’re @RealityDaydream on both Facebook and Instagram!
Go forth and be creative!
~Bethany
~~~~~~~~~~~~~~~~~~~~~
Thank you for pinning!

Related:
-

It's been a minute since we've chatted about plants! But don't worry, my plant obsession…
-

I titled this post 'How to Propagate Pothos Plants' ...but the truth is, this method…
-

I've been needing to figure out a solution for my overwhelming plant propagation situation for…
Bethany,
Could you give me the height of the teardrop planter? I know I can make it any size, but I really like the size that you have created. TYIA
Tawn
Bethany,
Stupid me! I skimmed when I read and missed the information you had already posted. But I do have another question- do you keep your scrollsaw in your craftroom? Is there a lot of mess when you use it?
Maureen
Yes! I keep it in my craft room! It does collect dust under and around the scroll saw, but doesn’t float through the air and collect dust elsewhere in the room. 😉
Bethany,
What size cording did you use for the macrame? And where did you take the picture? I don’t remember a room that color blue. Love the color!
Maureen
I have a corner of our guest room painted navy blue just for taking pictures! LOL! I may eventually paint the entire room navy, but Some work needs to be done in that room before it’s ready for paint.