If you ask Cypress what her favorite color is, she will tell you RAINBOW. Not a joke.
While this is absolutely adorable, I’m actually inclined to agree with her. Rainbows are so happy!
*This post is sponsored by our friends at Mohawk Finishes! Thank you for supporting the fabulous brands that make Reality Daydream possible! This post contains affiliate links.*
Supplies for Rainbow Planter Sconce
- 1×10 board, cut to 20″ (you can make this any size you want though!!)
- Large bowl for tracing template
- Scroll saw (or jigsaw or bandsaw)
- 4″ Terra cotta pot
- Cup for tracing template
- Drill
- Miter saw
- Mohawk Ultra Mark Stain Markers
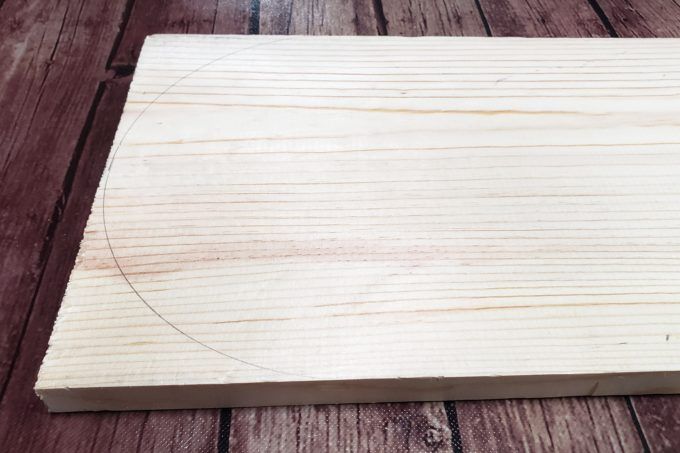
Here’s my slab o’ wood I started out with!

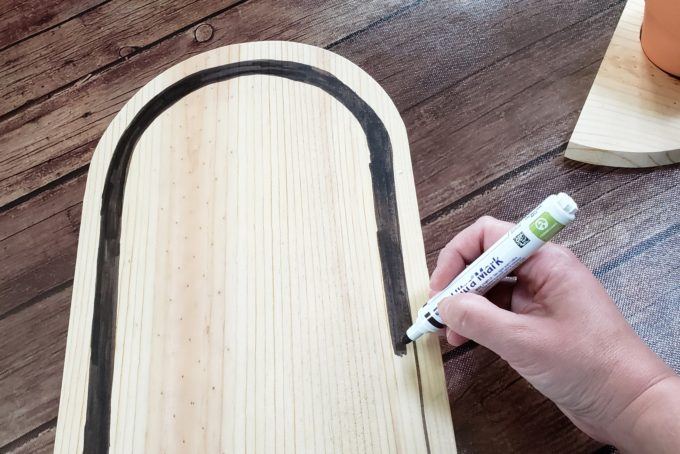
In order to make the top of my rainbow planter rounded (like a rainbow!) I found a bowl that was pretty close to the right size for my perfectly rounded edge! Trace that sucker with a pencil!

This next step… you can use a scroll saw, a jigsaw, or a band saw! Just slice around that curve!

Repeat the same rounded edge on the other side of the board.
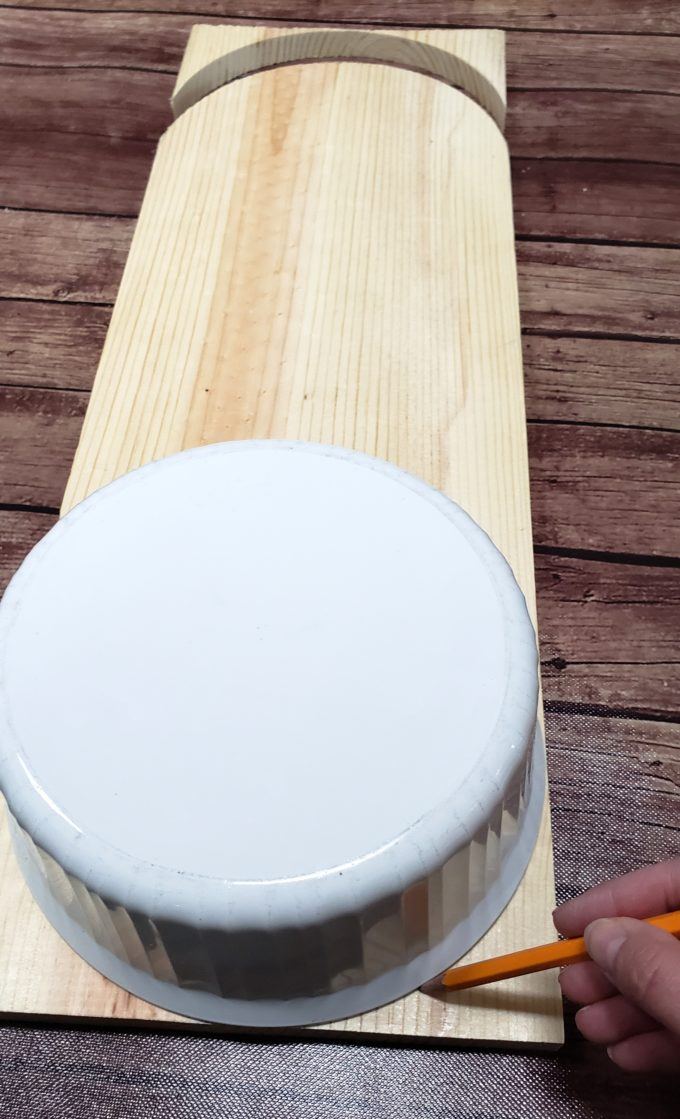
I got out my little dirty terra cotta pot, and looked around until I found a cut with the right size opening to go right up to the lip of the pot. Then I traced the cup onto one side of the board… about 1 inch from the rounded edge.

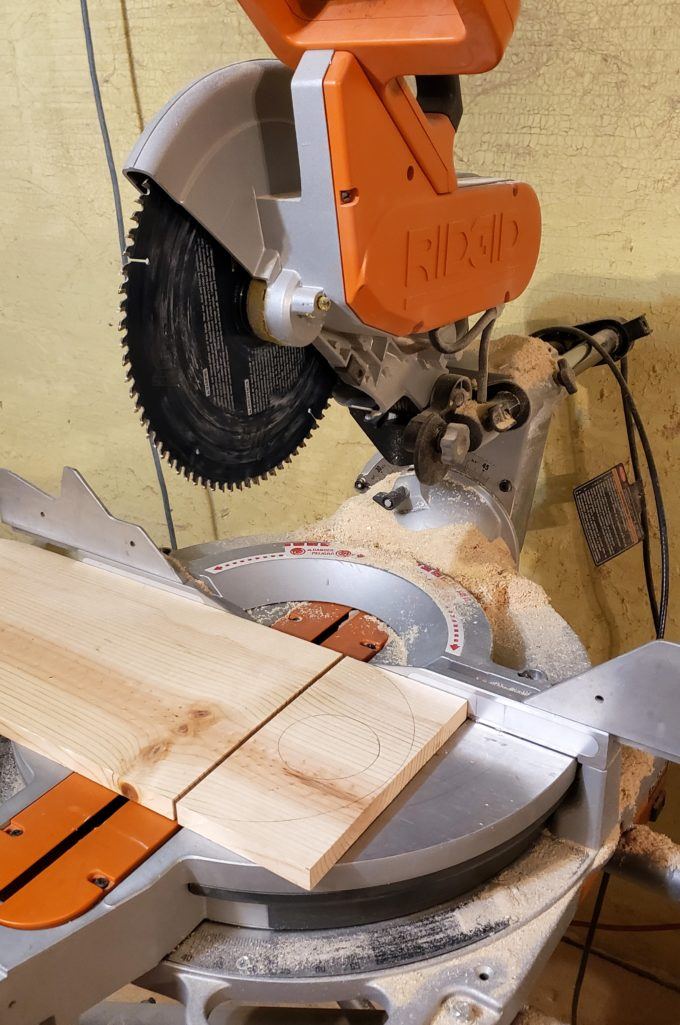
I used the miter saw to cut my board about an inch from the other side of the small circle.
Drill a hole in the circle… just anywhere! This is so you can feed your scroll saw (or jigsaw) blade into the hole. Then cut ‘er out!
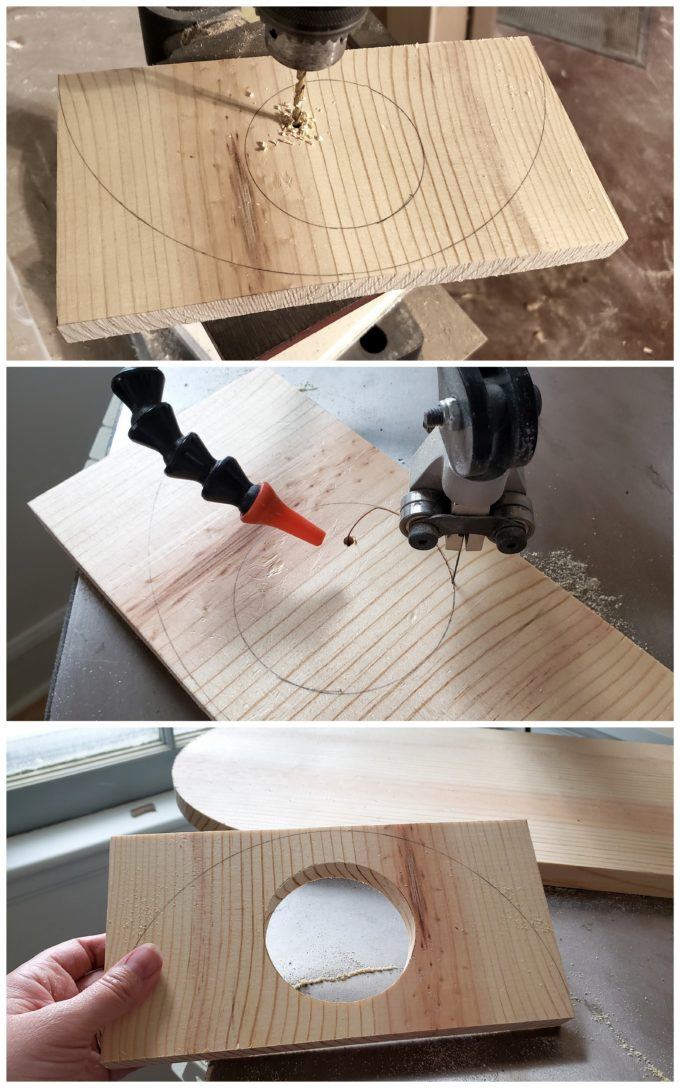
And cut that final half circle line, so it looks like this.
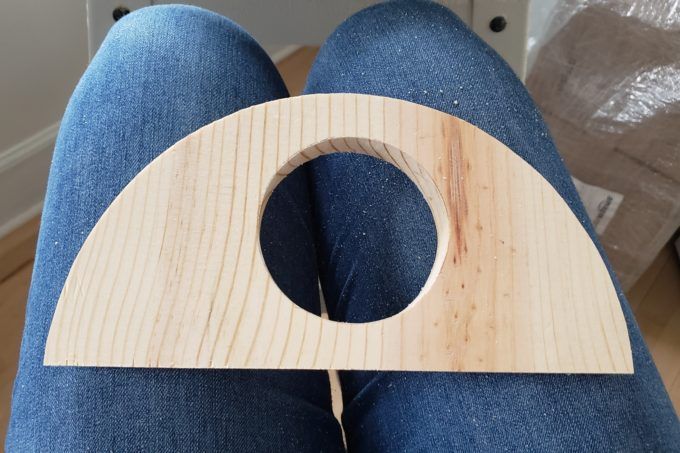
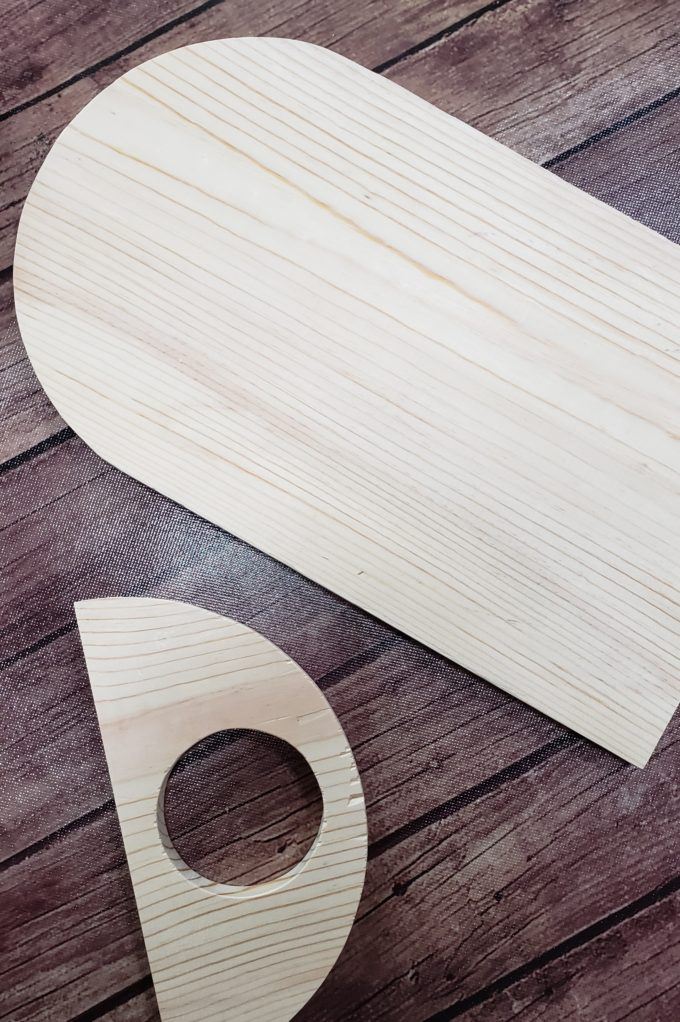
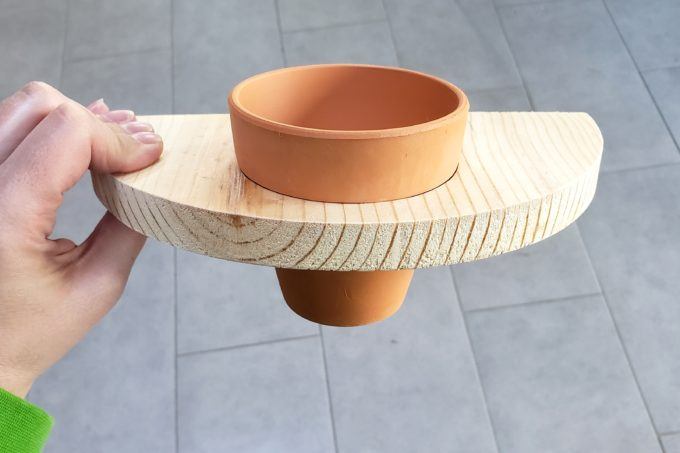
So at this point, our two pieces look like this:
Time to add some COLOR using Mohawk’s Ultra Mark Stain Markers! I’ve used these before (on this project and this project) and they’re SO FUN and easy to work with!
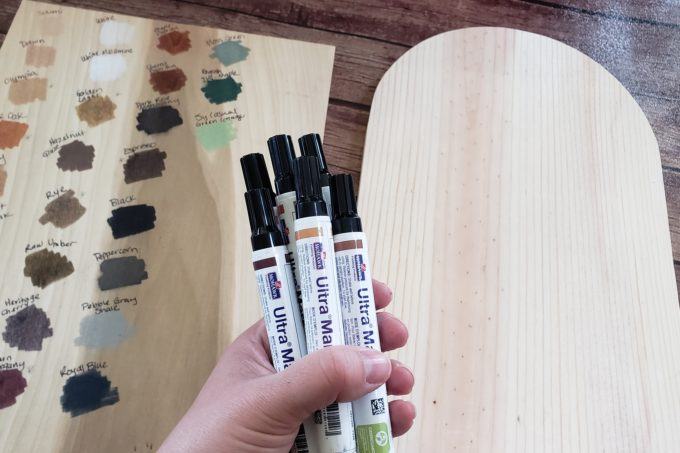
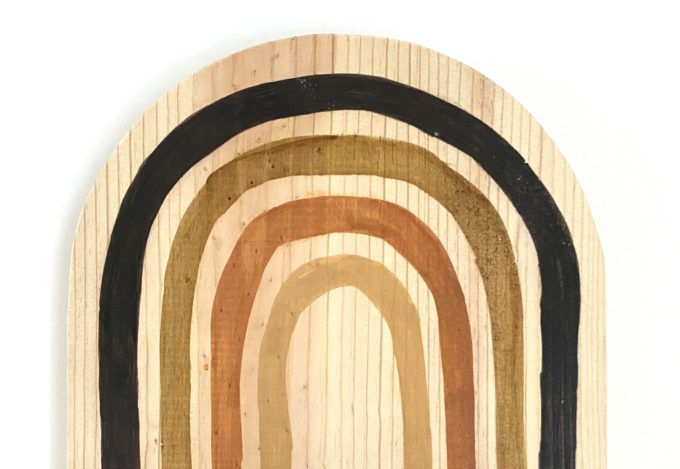
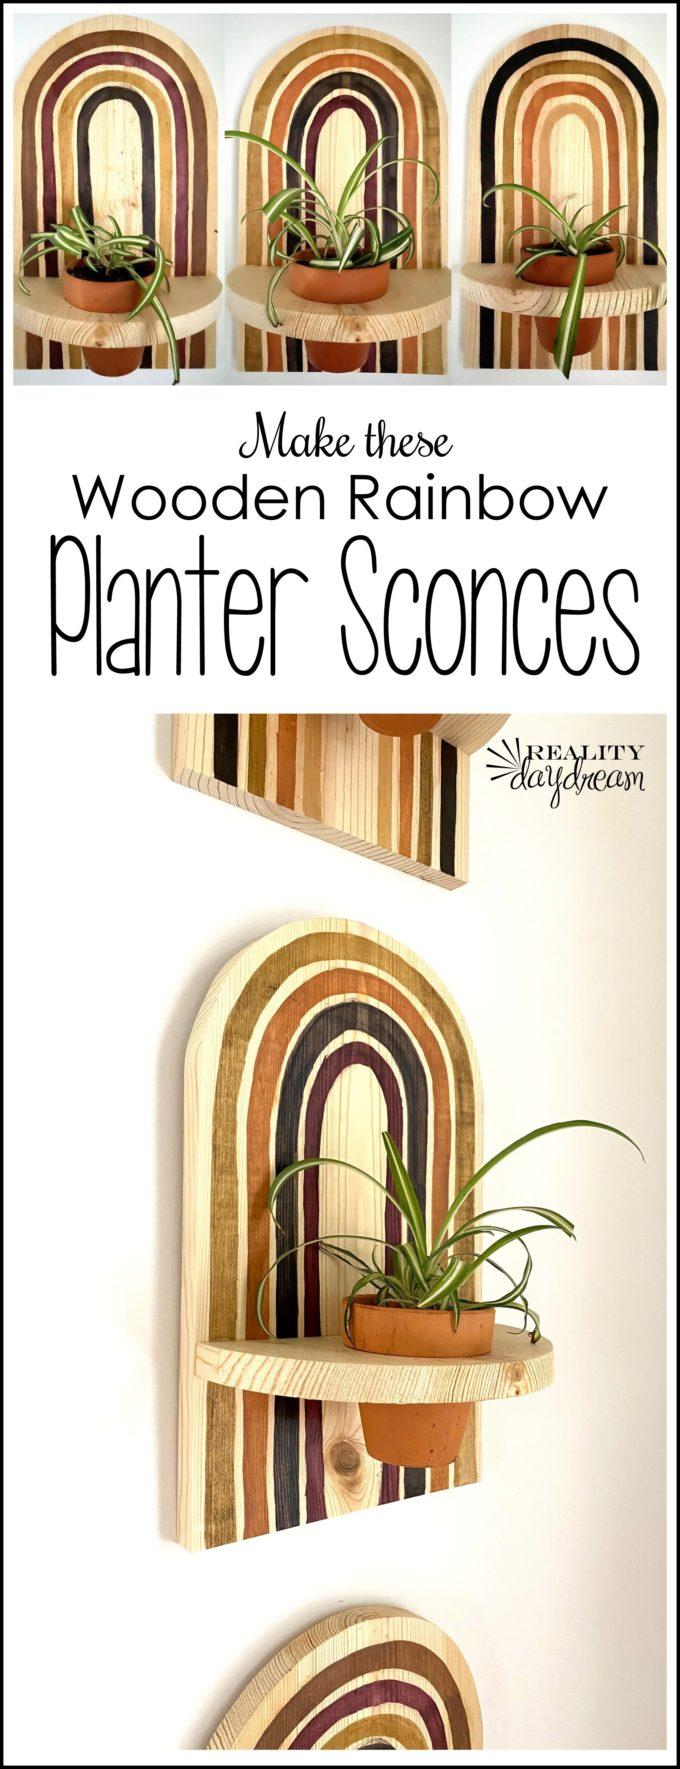
I decided to make a rainbow, using a few different natural wood-toned shades using these stain markers, and it’s SO GOOD! For the first ‘bow’, I used Espresso.
Using these stain markers, it goes on just like wood stain (because it is!) but it’s easier to control. But you still do want to wipe off the excess stain that’s sitting on top of the wood just like you would if you were brushing it on from a can.
Next ‘bow’ is called Golden Lager.

I’m just freehanding this rainbow. I kinda like the wonky/imperfect rainbow look. 😉
Next layer is Spice Oak.

The final ‘bow’ is called Olympia! HOW GORGEOUS IS THIS?!

Now it’s time to turn this thing into an actual functional piece of decor!
It was at this point that I bought some new terra cotta pots, because I wanted to make 3 of these rainbow planters. But the new ones are slightly larger. So I had to cut my circle just a teeeeeeny bit bigger to fit this baby.
Let’s affix this to the rainbow back board!!
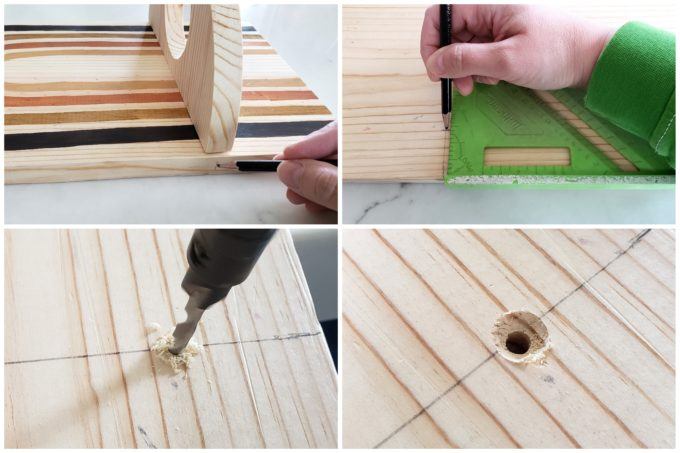
I made a pencil mark on the side about where I wanted the ‘shelfy thing’ to be, and then drew the line all the way across the back with the square. Then I drilled two countersink holes all the way through into the shelfy half-circle as a pilot hole.
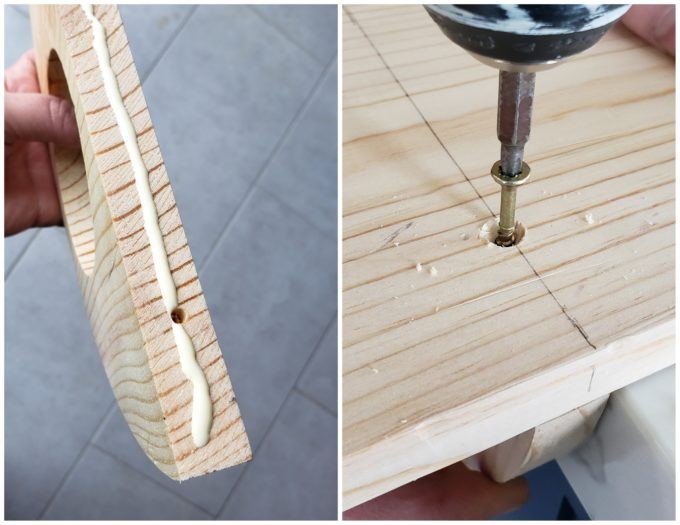
Before I screwed on my shelfie thing though, I put a strip of glue in the edge for extra support. Then screw it in on both sides! This step is way easier if you have a friend (or clamp) to hold the two pieces in place while you screw.
All you need now is a sawtooth hook on the back, and pop that terra cotta planter in place!!!

I potted up some spider plants that I had propogating. They’re babies from a plant that was my late Grandmother’s, and these little plants are so sentimental to me!


Don’t they add so much character to this corner of my living room? And these plants will get great afternoon light!

Can’t wait till those spider plant babies grow big and bushy!
Thanks for following along on this tutorial! And if you decide to make one for yourself, please tag us on social media! We’re @RealityDaydream on Instagram and Facebook!
~Bethany
~~~~~~~~~~~~~~~~~~~~~~~~~~~~~
Be sure to check out our master list of DIY Handmade Gift Ideas!

Thanks for pinning!
Related:
-

We love the original wood of our library, and wanted to find a desk that…
-

Nick and I have dabbled in epoxy here and there, but we've never done anything…
-

We're in the dog days of summer, and it seems like my kids are always…
I just pinned and shared on my facebook page 🙂 Thank You for Your great ideas !
Thank you!
Very brilliant idea! Thank you for sharing the technique in making planter, its a big help.
Love from plaster 27100 0.61
Very pretty!
I love that the plantings are from your late grandmother’s plant. What a sweet remembrance. I like the plant sconces grouped.
Thank you Deanne!! <3