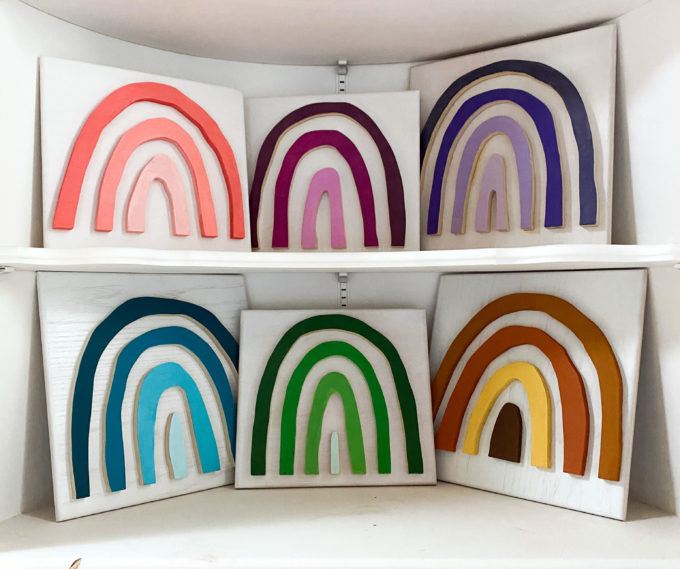
Hi! I’m Paisley, Bethany’s daughter. I just turned 9 years old! Today, I’m making these amazing scroll saw’d rainbows, and I’m going to show you how to make them too! I do admit, they’re not all perfect. But that’s part of the charm, right?
Supplies
- 1/2″ plywood
- pencil
- scroll saw
- acrylic craft paint
- craft paintbrush
- sand paper
- wood glue
- additional plywood slab for mounting
Step 1
First thing we do, is grab the 1/2” of plywood. Using a pencil, lightly draw on your rainbows however big you want. If it doesn’t look right, erase that spot and try again.


Step 2
When your done with drawing, take your board to the scroll saw. Start by the end of the board, where the pencil lines start.

When your done, make sure it looks like below!

Continue cutting each bow until they’re all cut out.

Step 3
Now that are bows are cut out, sanding time is ready. Grab your sand paper and start sanding the edges and corners. As dust is falling from the wood, you might want to make sure that all the prickly wood that was sticking out is getting sanded off. Go Pro!

Continue sanding all bows.
Step 4
Now that we’ve drawn, cut and sanded all bows, you need to grab some acrylic paint while your at it. You can grab any colors. I usually do stuff like Dark purple, Normal purple and Light purple. But I am planning to do Red, Orange, Yellow, Green, Blue and purple. P.S, split the rainbows in half so that there are spaces in both of them.
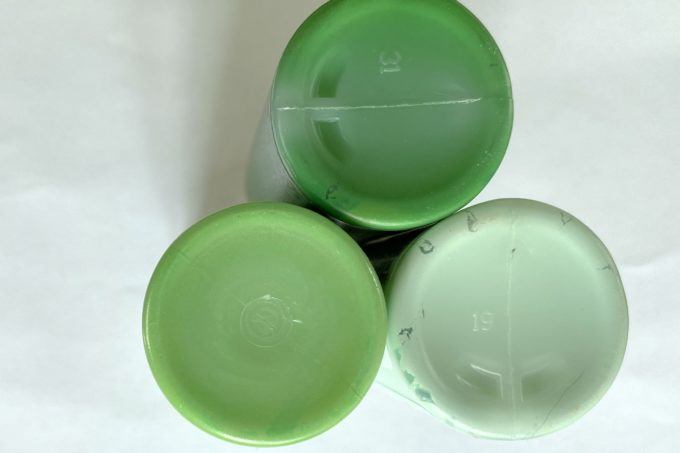
These are the colors of my green rainbow. (You’ll see the green bow in the end.) Set up newspaper on a table and set your rainbows on them. Fill a cup full of water and grab your craft paintbrush. Of course, it’ll be easier if you have a skinny brush, but thick works as long as it fits on your bows. We used a paper plate to pour the paint on, but you can use any thing as long as it works. Use your brush and dip the top into the paint. Lightly brush the paint onto your bow. Make sure there is no blobs. I repeat, NO BLOBS!
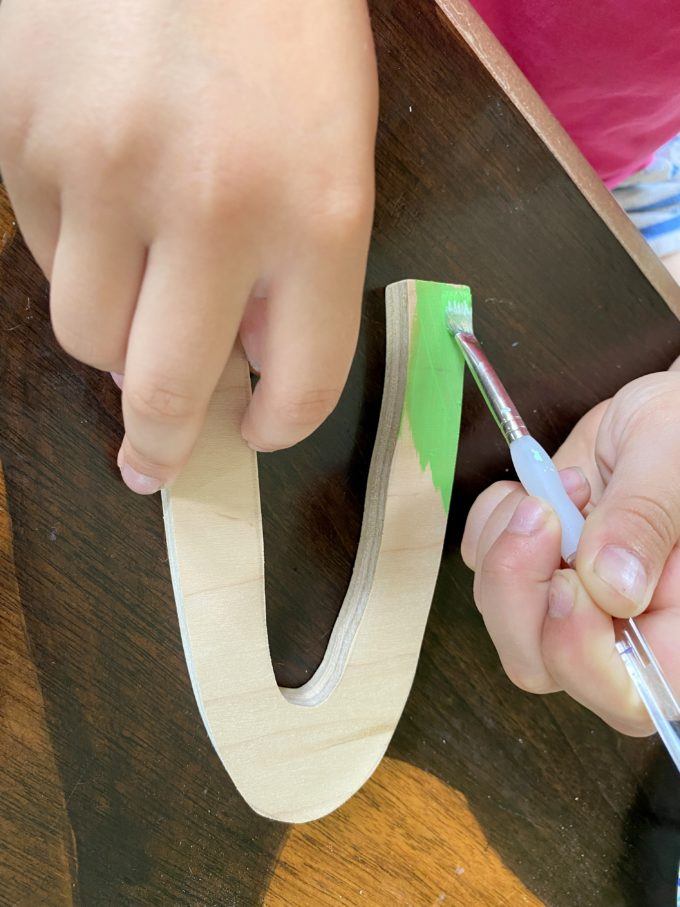
Continue painting until both bows are painted.
Step 5
Let the bows dry for a while and continue your day.
About 10 min later
Sand the edges again to get off the drips of paint. Any how, keep sanding until both the rainbows are finished. It may take minutes, hours or even Years! Okay maybe not hours or years. But we are getting off the point. Keep sanding. Once the rainbows are done with sanding, mount them onto the additional plywood slab. You will need 2 plywood slabs.
Step 6
Grab wood glue. The glue will now say boo! We are going to… glue these rainbows onto these slabs. You need to flip the rainbow over to get the glue onto the bottom. If you don’t feel comfortable doing glue on the floor you can use paper or you can do this on a craft table or outside. Start gluing a thin line on the bottom of a bow. Press it onto the slab.

Keep going until all rainbows are done. And this is really important, KEEP THE GLUE LINE SKINNY!!!!!!!!!!!!!! If you don’t, the glue will press out under the rainbow when you push it. In case your wondering, let’s just say I learn from mistakes. Don’t ask. Really, its a long story. When all the rainbows are glued and put in place, leave them for a while. Your back must be hurting. That’s why we’re stopping. (You should be let in on the secret. The actual reason we’re stopping is because the glue needs to dry.) I don’t mean to be silly, snort its just that, snort this has to giggle be interesting ha ha! right??
Step 7
Once the glue is dry on the wood, it should look like below.

You notice how its quirky and looks super hand drawn? That is the look we were going for.!
Goodbye! I really appreciate being able to right this post! I’m glad you could read and I’m exited to see what you come up with!
~Paisley
~~~~~~~~~~~~~~~~~~~~~
Psssst! Be sure to check out my mom’s other Scroll saw projects and tutorials!
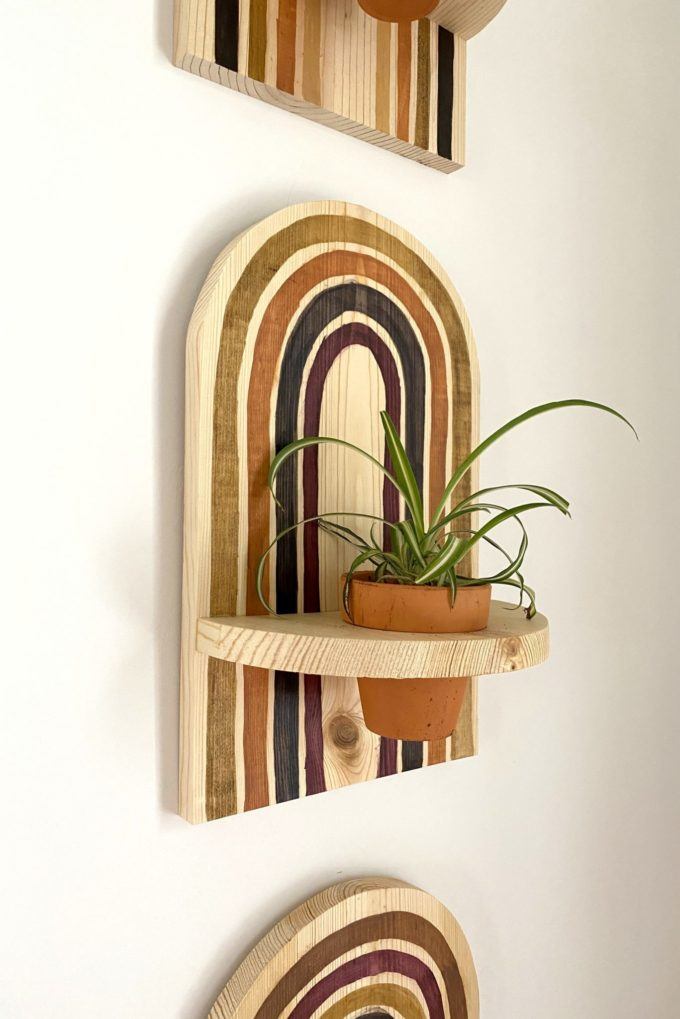
And if you love rainbows like I do, I know you’ll love these Rainbow Wall Planters my mom made that have a very similar vibe to my rainbows!!
~~~~~~~~~~~~~~~~~~~~
Thank you for pinning!

Related:
-

We're in the dog days of summer, and it seems like my kids are always…
-

I have a fun and easy building project for you! And while I do end…
-

Hello hello friends! Things have been wild as we've been navigating the holiday season, schedules,…
Great Job! You are Impressive, Talented, and a Beautiful young girl with serious creative skills. I have been waiting for you to jump in, since the first time your mother posted about your scroll sawing. Kudos to the parents that allow you to try things out! I have smiled the entire tutorial. Thank you for sharing.
Very nice, Paisley. I first saw the video on Instagram. Wow! I love it when your mom made the video go really fast. I am scared of power equipment, but I really should try to be brave. I have a scroll saw in the basement that Grandma got at a garage sale, but I don’t know how to run it. I’ll stick with a drill and table saw for now. I loved reading the blog. Especially when you got silly. I love you and am very proud of you.
That’s the first tutorial I feel I can actually succeed at!! Great job! And you’re a hoot! Keep ’em coming!!
These look SOOO good! Great job, Paisley! Will definitely try this project!
Great project! Nicely done Paisley!
These are so fun Paisley! I love the tonal colors you chose. And you scroll saw like a pro!! I’m 52 and that looks a little daunting to me but you make it look easy! Thank you for writing out all these specific directions. You have an awesome and inspiring mom. ?? ?
Awesome job Paisley! Such an original idea. I can’t wait to see what you do next!
Awesome job Paisley!!! Love it and can’t wait for more tutorials from you!!❤️❤️? ?
What a great project and post! Thanks for inspiring me, Paisley!
Great Job Paisley!! I love each and every one of them..
I love this!! Great job, Paisley!
Wow. You did amazing. Great job!
I love the montage of rainbows! And again, she could be a child DIY instagrammer. Good job! ??
Well done! Awesome job on the step by step tutorial. Amazing!
They look amazing! It was so fun to follow along on Instagram. Great job!
Very cool! You did a great job and your tutorial is easy to follow!
Great job Paisley!!! You are very talented!
Great job Paisley! You explained everything so clearly. The post and video were perfect. Your mom and dad must be so proud!
Wow Paisley what a great job! You explained everything so clearly. The write up and the video were perfect. Your mom and dad must be so proud of you!
Thank you so much for this tutorial, Paisley! I’m going to show my daughter, and I’m sure she will want to go downstairs and make one, too! She’s only 4.5, but I think she will be artsy like you when she gets older.
Beautiful! Nice work!
Thank you for such easy instructions to follow . This was a very well thought out example of your great work. I’m very impressed with your skills on the scroll saw.
I can’t wait to see what your next project will be. The rainbows are creative and beautiful! Great Job Paisley! You are a very talented and smart young lady.
Amber Haldley
OuTsTaAndiNg job Paisley!! You spoke so clearly and it was easy to follow!!!! Loved it!!!
Excellent blog! Well-written, insightful, and charming. Easy to follow instructions. And a great end result! You did a really great job Paisley!
OK, THIS is a life skill. Using power tools, sure, but even more importantly, you were able to write out clear and engaging instructions. Well done! You should be very proud of yourself all around 🙂
What an awesome project! Thanks for sharing your talent.
Your rainbows ? are absolutely beautiful! Great job! I love the colors you chose as well! ???
Excellent job Paisley!
These look awesome, Paisley! Great tip about the glue! I always put too much and it gooshes out.
Go Paisley! You are a natural! These turned out great. Thanks for inspiring us all! ❤️?
Great tutorial, Paisley! Lots of information with your cute sense if humor mixed in. Thanks for the tip on painting…I am always guilty of getting blobs of paint on my projects. Love the purple rainbow! Can’t wait to see your next project!
Love the creativity. At first I though she was going to turn them in a hanging mobile but these are pretty cute as is.
So cool! Very impressed. Wish we had a scroll saw.
These are so cool and you did a fantastic job, Paisley!!! It definitely makes me want to buy a scroll saw!?
Great job!
You did great!! I loved your tutorial ,
Awesome job, girlie! Your artwork looks amazing.
Leading by example! It is a Beautiful thing to see how your girls absorb you and Nick’s crafting/building /skills. Paisley’s simple explanations and techniques are just great , even more so at her age. But even more impressive to me is the way you support and stimulate her imagination and creativity. Watch our Mom ? Wonderful job Paisley!
You did so good Paisley!! ?? also your funny comments are the best!!