I’m finding that when our shop is a hot mess, it makes us dread (and therefore put off) any projects that require us to be in there. This was also the case at the old house, but at least then all we needed to do was go clean it. Our current shop situation is that only half of our tools are unpacked, there’s no work bench, things are strewn all over the room with absolutely no measure of organization. It’s going to be a serious project in and of itself to get that place truly functional. And when we’re living without a kitchen, the shop just ain’t a priority.
All of that is to explain why this project took forrrrevvvverrrr to complete (count my outfit changes in this post!). I just wasn’t motivated to be in that poop pit for more than a half hour at a time. But it’s finally DONE! And it turned out amazing, so naturally I’m kicking myself for not just sucking it up and getting it done a long time ago. #blast
We started out with 3 of these bad boys from IKEA.
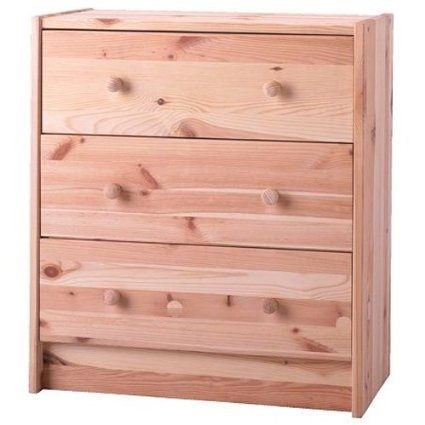
They’re called the RAST dresser, and they can be used as either a very small dresser, or a side table/nightstand (which is how we used them in the girls’ old bedroom… remember these?)
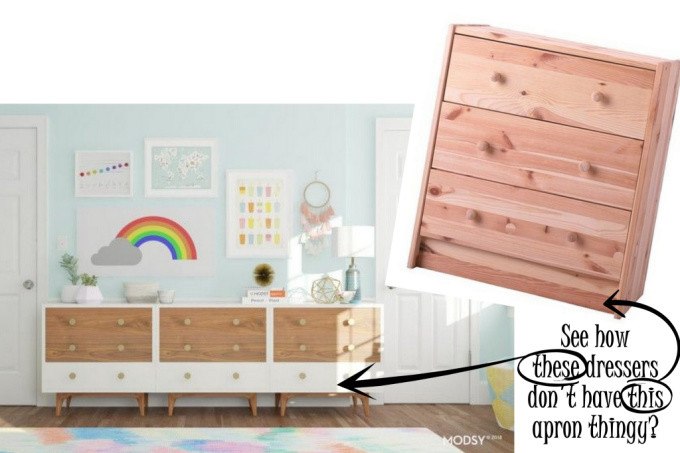
Since they served us so well and are such the perfect size for what we need, we thought it would be good to find a way to incorporate them into the girls’ new room as well. And when MODSY rendered up this amazing idea for their room, we knew we could find a way to make 3 IKEA RAST dressers into this long/narrow dresser. This thing could be used as a buffet or credenza too, right?

*This post is sponsored by National Hardware. Thanks you for supporting the fabulous brands that make Reality Daydream possible! This post contains affiliate links.*
Those dressers in the above computer rendering are also 3 smaller dressers set next to each other. But they’re from JoyBird and cost $850 EACH. I knew I could make the RAST dressers (that ring in at $40 each) to look just like these ONLY BETTER! Because I have a plan to make it look more like one dresser instead of 3!
Are ya ready to see how this comes together?
Triple IKEA RAST Hack
Supplies
- 3 IKEA RAST dressers (they’re cheaper at IKEA but you can also order them on Amazon)
- Mending Plates by National Hardware
- Screws (this size)
- Flexible Caulk
- Circular Saw (this is the one we have)
- Clamp Edge circular saw guide
- Clamps
- Stain (I used this shade)
- White Spray Paint (I used this stuff)
- Polyurethane
- Furniture legs (6)
- Mounting Plates (Angle (4), Straight (2))
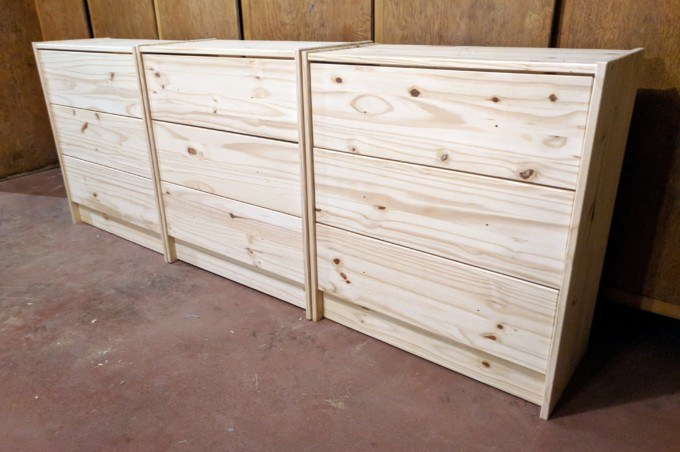
We started out by putting our RAST dressers together according to the instructions.
After staring at the ‘inspiration dresser’ and realizing that I reeeeally didn’t want that apron thing on the bottom of the dressers, I decided to slice them off with my circular saw. This would have been far easier if I had thought to do this before assembly.
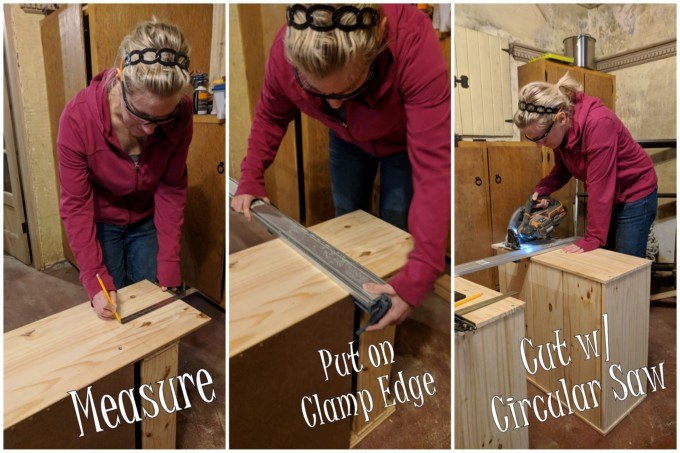
But this new ‘Clamp Edge ‘ tool we found makes it really easy to cut straight lines on the circular saw. I laid my dresser on its side, measured from the bottom to include the 5″ from the blade on my circular saw. Just clamp it on in the right spot (so that your blade lines up with your cut line), and then let it guide your circular saw as you slice and dice. Repeat on all sides of all 3 dressers!
On the two outer dressers, we left a bit of a lip (3/4″) so that when we add a 1/4 board along the bottom of all 3 dressers, the sides will be seamless. This pic below shows the dresser upside down with those end lips sticking up so you can see what I’m talking about.
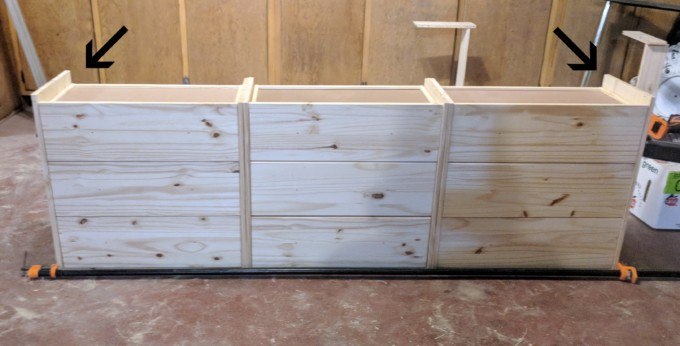
We pipe-clamped these suckers together in preparation for attaching the 3 dressers to each other! The goal is for this to look and function just like a long/narrow dresser. So to make it truly ONE PIECE, we got ourselves these Mending Plates from National Hardware.
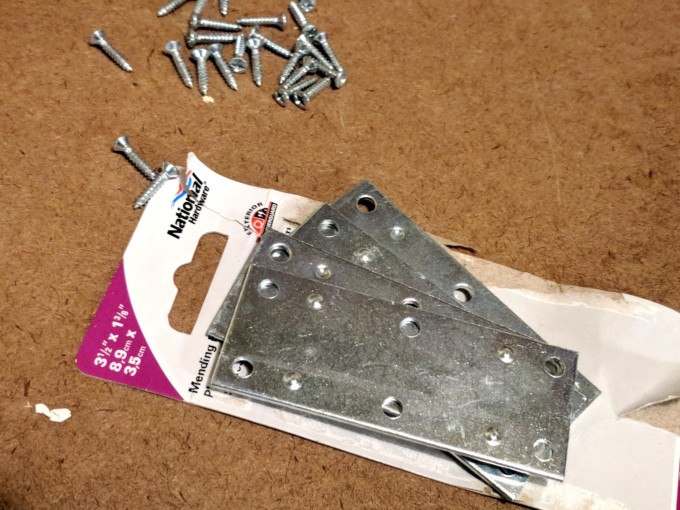
Lay all 3 dressers face down next to each other (and clamped with pipe clamps) and lay out two of these mending plates on each of the two ‘seams’. Drill pilot holes and then screw them down (screws included!). Now THAT’S what I call 3-in-one!

I love that these connectors are so simple to use, yet SO DURABLE and beefy enough that I don’t need to worry about them not holding strong. And SO easy to apply!
Here’s what it looks like at this point (still face down).

To reinforce the front sides of the dressers together, we opened a drawer and put a screw through one side of the dresser to the next; one where the top drawer is, and one where the bottom drawer is. Repeat on the other set of dressers!

We put 1 x 4’s along the bottom front and bottom back and attached with brad nails. This helps with the seamless look, but also gives us a place to put those mid-century legs!
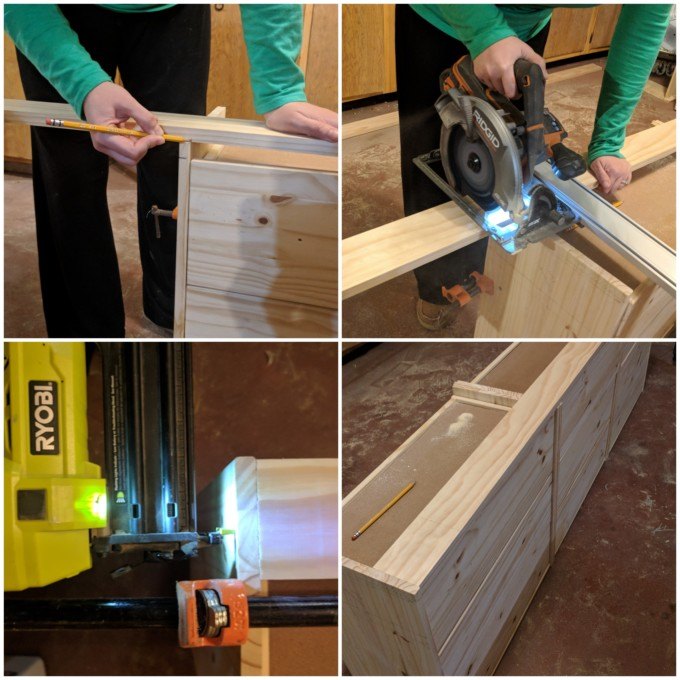


In an effort to make these three dressers truly look like one solid piece, we decided to caulk the seams with this paintable caulk that is also flexible so it won’t crack as the wood flexes and expands over time. I only got a picture of applying the caulk, but not the smoothing that makes it look so flawless. You’ll see how amazing it looks after we add paint!

I took out the top two drawers of each of the 3 dressers and stained with this stain. I love that it’s water based with easy cleanup. And it doesn’t hurt that it smells like jasmine. 🙂 This stain really comes to life after the polyurethane is applied. The finish below looks kinda cloudy because I hadn’t yet sealed them.
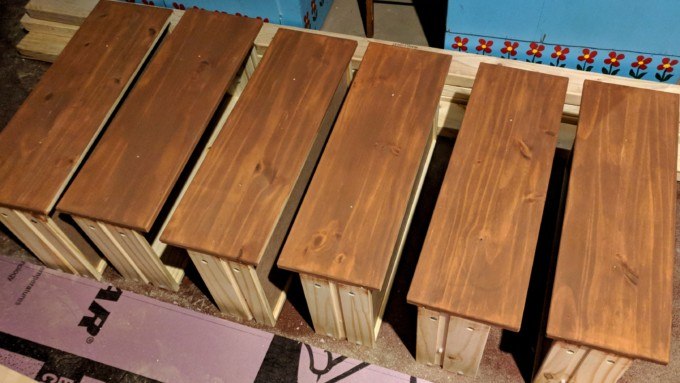
We popped open a window, and painted the body of the dresser(s) white, as well as the bottom drawers using this spraypaint/primer in-one.

Now about the legs… we got some of these simple wooden legs, but I really wanted to go for this kind of look on the legs of this console from West Elm below:

So after screwing on the legs, I traced the perimeter onto a 1/2 piece of pine, and cut it out on my scroll saw. There was some trial and error, but I kept at it until each one looked decent! Then stained them and the legs the same as the drawers. And Nick counterbored some holes and screwed them in from the bottom for me.
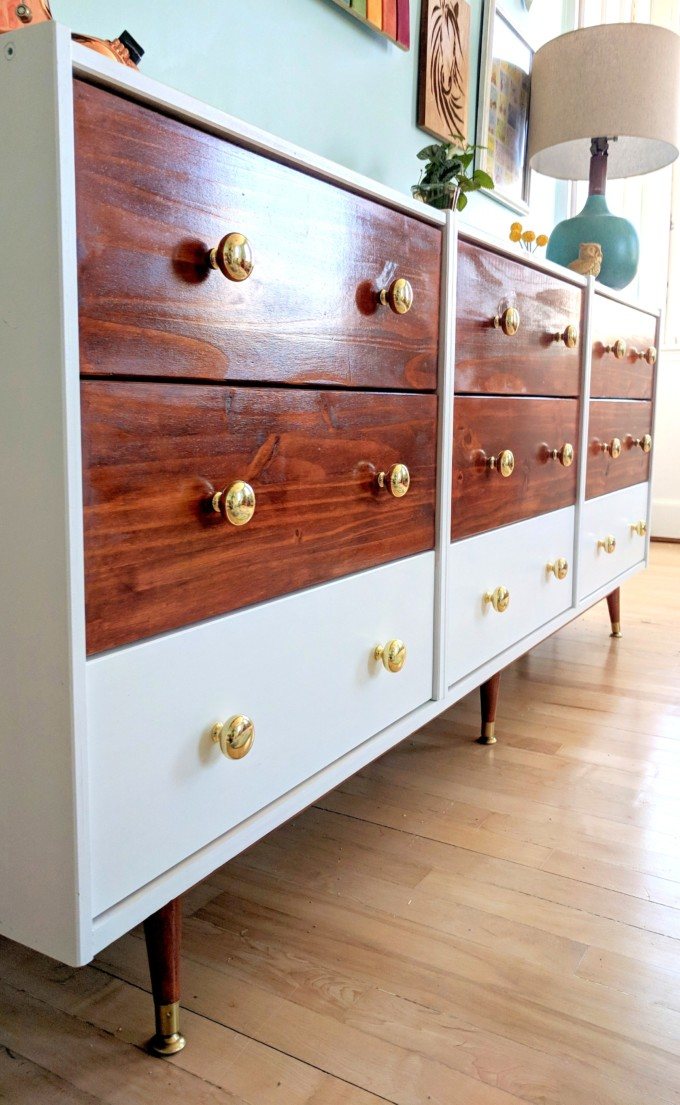
We flipped this baby over and are calling it DONE! It was so satisfying taking this dresser up into the girls room and putting it along this empty wall. (don’t mind that we haven’t put the quarter round back on in this room 😉 )
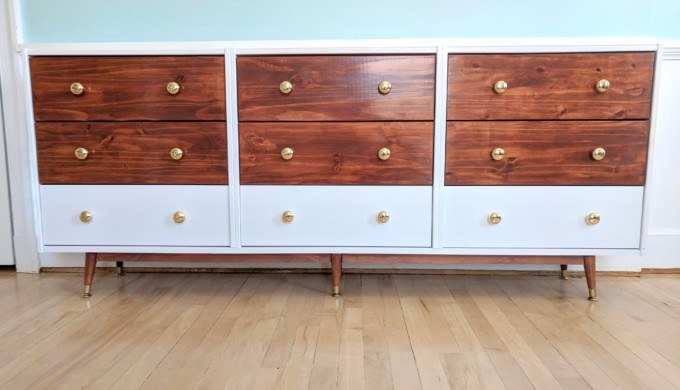
I’m so obsessed with how this turned out. It looks like a high-end bureau or console.
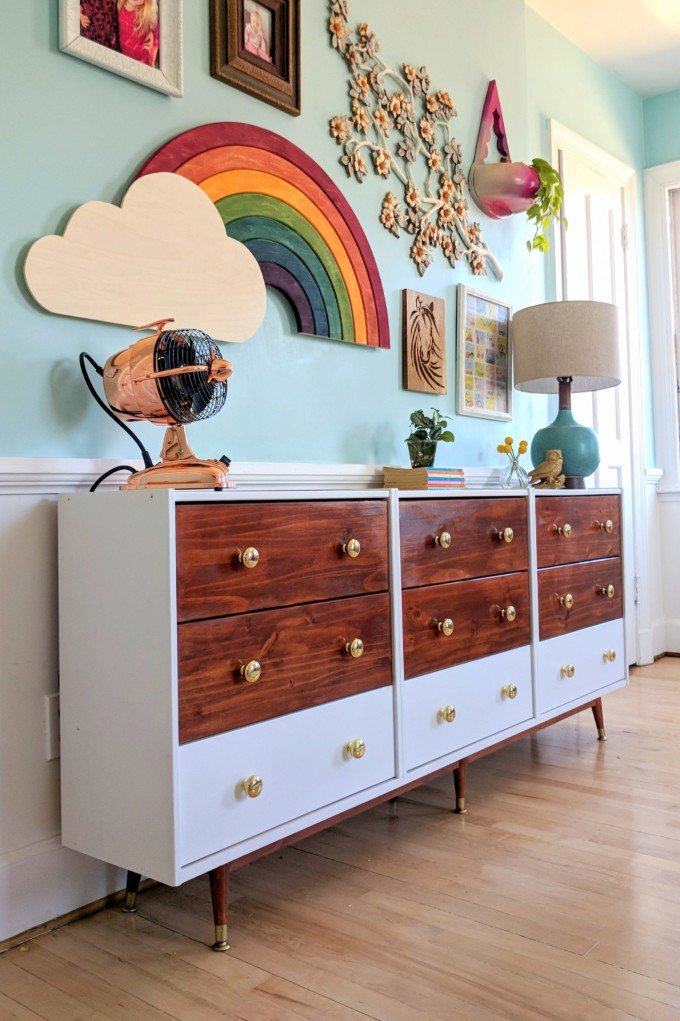
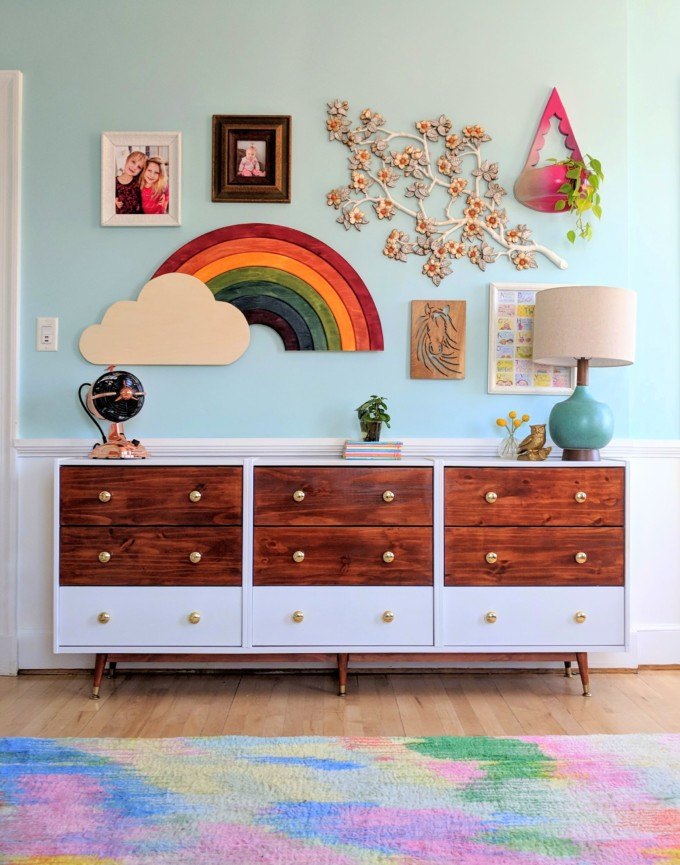
Rug / Rainbow Art Tutorial / Cherry Blossom Wall Art Tutorial / Lamp / Wall Planter Tutorial / Fanimation Urbanjet portable fan
Putting up their gallery wall was so fun! And looking at this picture I’m realizing how many DIY projects are included in this photo. I’ve linked them all above, as well as the things that are purchased. Even that cherry blossom thing that was one of my very first blog posts evah… IT’S FROM 2010! And the wooden horse art Paisley made with the scroll saw, so that’s super special for her to have her own DIY project hanging proudly on her bedroom wall.
We love this 3-in-one dresser, and want to thank National Hardware for partnering with us on this post! We love their wide selection of hardware, and that it’s so quality and well made.
This room has come together slowly but beautifully, and we’re on the home stretch! One more DIY project to knock out, and a light fixture to put into place, and we’ll check this room off as DONE!
Check out the MODSY computer rendering next to the real thing. So fun, right?!

Please check out the other side of the room as well as all the things we’ve done so far in this room for our daughters. So fun to see how far we’ve come!
Thanks for following along!
~Bethany
~~~~~~~~~~~~~~~~~~~~~~~~
Thanks for pinning!

Related:
-

I love the idea of my girls sharing a room; whispering and giggling into the…
-

We just got back from our weekend trip to Muscatine, IA! It was such a…
This is fantastic! Can I ask what the total height is including the legs?
i like this a lot 🙂
Hi! Love this idea, what was the total cost of this project?
Bethany, it looks awesome and your room is so beautiful!
Saw a contour duplicating tool on wikipedeals that is absolutely amazing and couldn’t figure out how to tag you. They aren’t expensive and allow one to scribe just about anything.
LOVE your Ikea hack.
Oh cool! If you see it again send me the link!
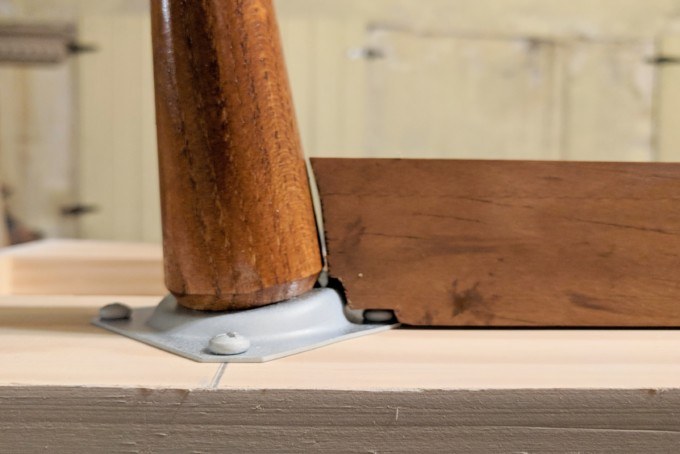
So, about those legs. The ones on the ends angle out. How did you get the one in the middle to be vertical? Is that managed somehow in the mounting bracket?
Yes exactly! For the four ‘corner legs’ we used an angle bracket. And for the two middle legs (front and back) we used a straight bracket!
I love this project so much! I have three daughters now all sharing a room as well (eldest is 7, twin 4 year olds) and this is genius. We’ve been trying to figure out a dresser for them that is budget friendly and this is it! Thank you for sharing so many fantastic projects ❤️
Yay for 3 girls! AND TWINS! <3
Hi Bethany, I’ve loved watching your new house come together-it’s gorgeous! I was wondering about the paint color in the girls’ room? And would you say the online pictures are pretty true to life? My daughter is due for a room remodel… Thanks!
Hey Erica! The wall color is ‘Meander Blue’ by Sherwin Williams, and it’s SUCH the perfect light aqua color. I do think the images are pretty true to color!
Love this tutorial! It looks amazing!
I love Ikea hacks. This is an amazing one! I pinned it. It turned out better than your inspiration!
This might be one of my favorite things you’ve done. I love the white with the wood. It really looks high end!!
This is INSANELY good!!! It almost looks like a vintage MCM piece!!
I think this is one of my favorite things you have knocked out! I wish I had a place to put something like that in my house because I would have one in a minute! It is fabulous! I love the mid-century modern vibe of the piece and it fits perfectly into the girl’s room. You really knocked this one out of the park this time, Beth!