Good morning and good Tuesday to you! I wanted to post yesterday, but I was overcome with the Monday-ness of the day, and ended up wandering aimlessly in my pajamas, eating peanut butter.
But today is a new day! And I have a fun furniture transformation to share!
This is actually an older post from our archives, and I get questions often to share a more detailed tutorial for how to get this ‘planked’ look on tabletops. So I’m going to go for it!
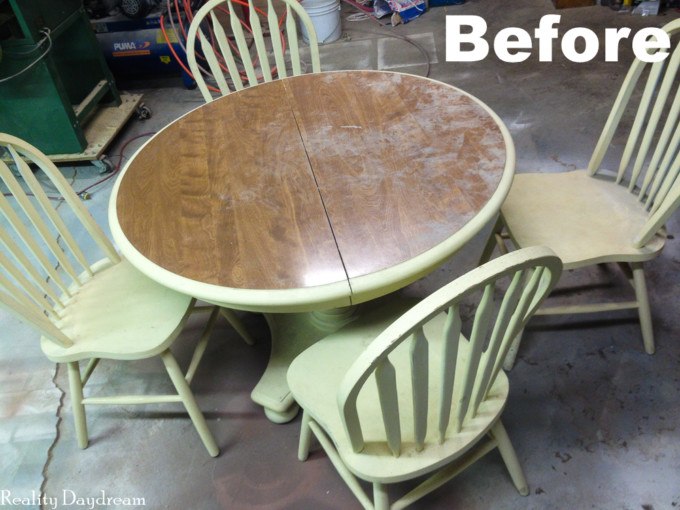
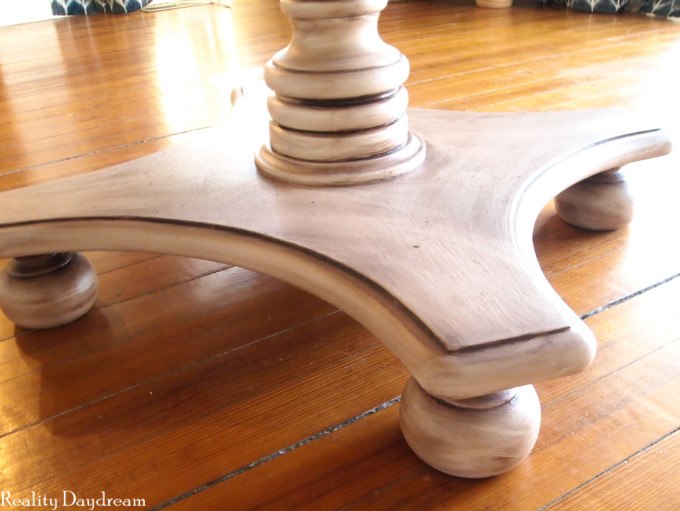
It was a sturdy little set, and I loved the character of the pedestal base. But the top surface is laminate, so my staining technique was out of the question. I just wasn’t having a surge of inspiration.
So it sat. In our garage. For a LONG time. Until on a whim, we decided to paint this bad boy and be done with it.
Because the top was shiny laminate, we needed to sand it to dull it down. Otherwise the primer wouldn’t have anything to grab onto.
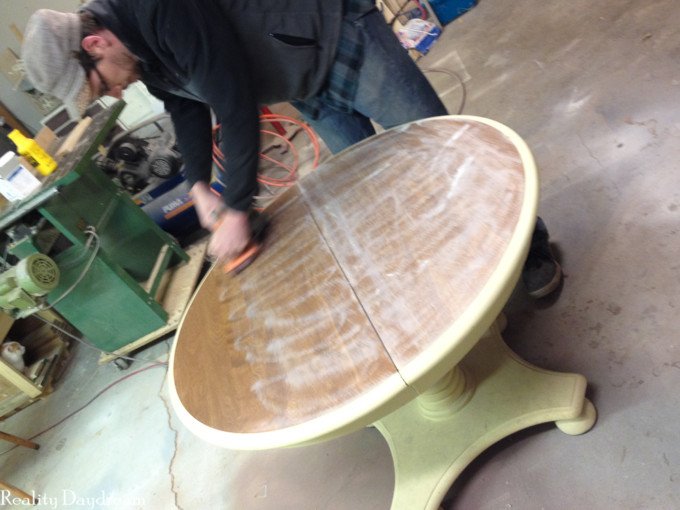
The pale yellow paint was a fairly flat sheen already, so we didn’t worry about sanding that part. If it had been glossy, we definitely would have! We primed and painted white with RustOleum spray paint in a satin sheen.
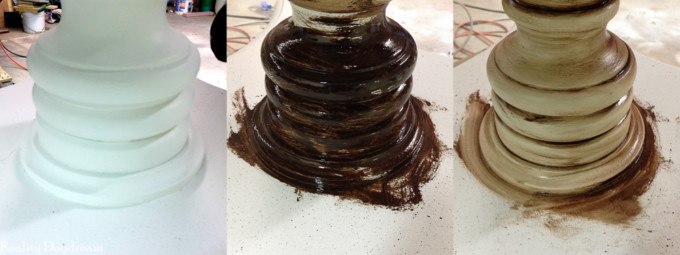
I decided I wanted to paint the table to look kinda driftwood-y Restoration Hardware-esque with white chairs. I’ve been loving this technique I came up with for ‘aging’ wood. I paint raw wood white, then sand it until I can see the woodgrain popping through, then STAIN. But since this table is painted, we skipped the sanding part (since it’s just laminate (plastic) on the top surface instead of) and went right to the staining.
Nick brushed on the stain (we used RustOleum Dark Walnut), and I came behind him and wiped the stain away… leaving it in the cracks and crevices, and aging the crisp white.
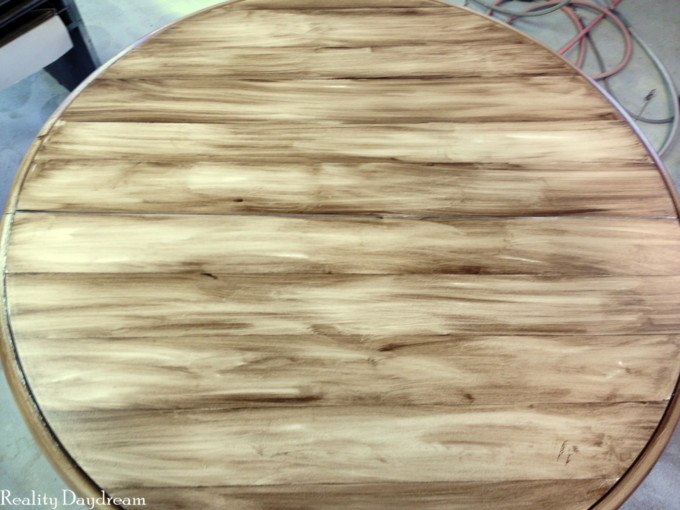
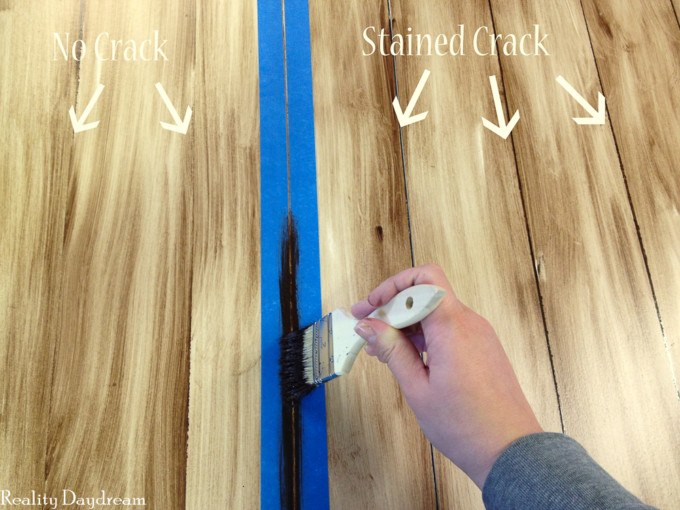
I wanted the top surface to resemble planks, so I taped off every other 4” (ish) to stain individual planks.

Then I brushed on stain and wiped it away with a cotton cloth, using a straight sweeping motion to create a streaky woodgrain look.

I took the tape off right after staining. Then, after that stain had dried (several hours), I came back and taped off the remaining white planks and stained them the same way.

After removing the tape, it was starting to look like individual planks!
I liked where this was going, but I still wanted each individual ‘board’ to stand out from one another more, so I taped off a tiny slice on the cracks of each board, and stained it dark to resemble a crack.
And then it looked like this.

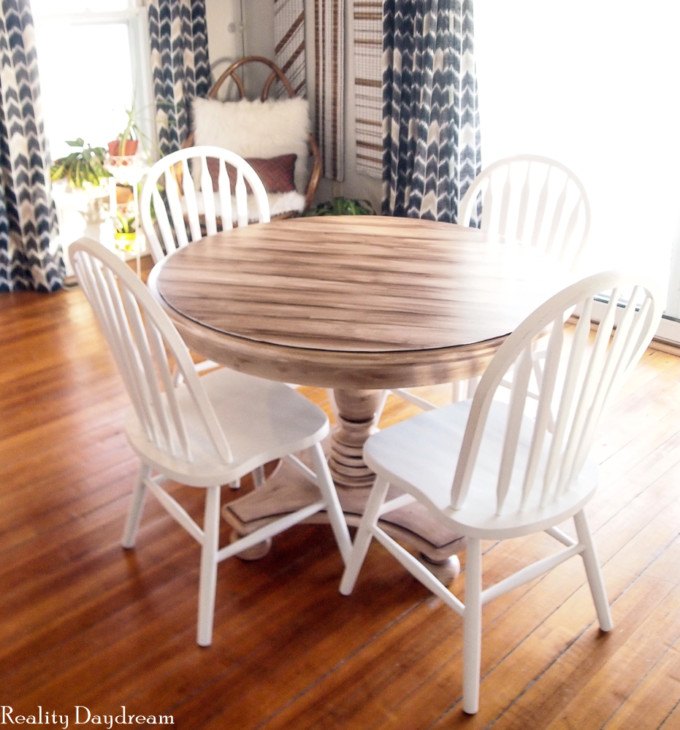
Not bad eh?! Our garage was too nasty to take ‘after pictures’, so we hauled this babe into our dining room (this was at our old house) for a little photoshoot.

I love the distressed wood look with the crisp white chairs. Don’t you think this would look amazing with just about any décor style? I would say it definitely has some farmhouse vibes though for sure.
Here’s a little before/after action.
![]()
This furniture transformation was SO SIMPLE. And if it weren’t for paint drying times, we could have knocked this one out in an afternoon easily. Do you think you’ll give this technique a try?
~Bethany
~~~~~~~~~~~~~~~~~~~~
Also, if you’re looking for a way to update your table with less complex instructions, try our graywashing technique to get that farmhouse look in just an afternoon!

I’m guessing if you love the ‘worn/shabby’ look, you might also love this technique I found to make new pine boards look like old barn wood. If this doesn’t scream farmhouse, I don’t know what does. 😉

Oh! And lots of other painting techniques from our archives here!

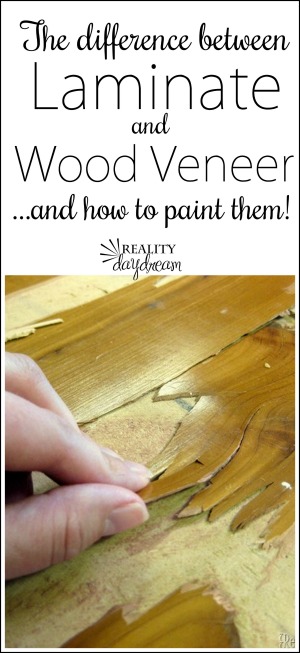
We also have a post that helps you determine whether your furniture is Laminate or Wood Veneer (and what the difference is!)

.~~~~~~~~~~~~~~~~
~~~~~~~~~~~~~~~~~~~~
Be sure to check out all the other furniture transformations we’ve done over the years by clicking the image below!

Thanks for pinning!

Related:
-

We've been needing to update our coffee table situation in the living room for awhile…
-

We love the original wood of our library, and wanted to find a desk that…
-

I've had this idea in the back of my mind for quite awhile... why not…
What a difference – good job!
It is gorgeous! You have the BEST Ideas! Might try this for an old table we have.
Wow! That’s beautiful! I have an old, huge office desk from the 50’s and the top is bubbled. I’ve been looking for a way to make it look new without removing the laminate! Thanks!
How did you paint the chairs that go with the table? The ones painted white shown here with the table.
I absolutely love this and yes please to a video tutorial…….I have a table and chair just like this (well like your starting project) I would so like to do this …….I was unsure because for the laminate top on my table but you have inspired me….thank you sooooo much
I love this! Did you poly after all the staining?
Yes, I did poly when the stain dried. I think I used a satin finish.
Is poly the best top coat to use? Doesn’t it turn white or foggy if it gets wet? I want to do this to my kitchen table and I have 3 kids so I’m going for durability too.
Poly is the way to go! It won’t turn foggy on ya. I wouldn’t set anything hot on it tough… that’s when it turns foggy. But that’s with any table. Do keep in mind that while oil-based poly is the most durable, it does dry with a slight yellowish tint. I always recommend using water-based poly over white paint because the yellow is more obvious in those situations. Hope this all makes sense! <3 PLEASE send pics when you're done!
I love it!
So smart, but could we expect less from you? Love your work!
So you didn’t consider taking the top surface completely off?
Hi. This is truly nice and a great idea I’d like to try. Since it’s been several months. How is your table holding up?
It’s holding up beautifully!
Oh yay, I just got a round table off the side of the road that’s in pretty good shape. I didn’t know what to do with it, until now. YAY!!!
Definitely going to be using this idea!!! Our kitchen table is a family hand-me-down that started life as a nice dining room table. We live in a small-house without a dining room and the kitchen table gets a LOT of wear and tear because it is also a work table for everything from doing homework to kneading bread or paying bills. The wood laminate top has all kinds of nicks and dings in it and the finish is looking awfully dull from being wiped down twenty-seven times a day. My husband doesn’t want me to paint it because he likes the wood look. Your technique will make us both happy – I’ll have a fresh new table-top and he’ll have his wood look.
I am really impressed! Really great job! Thanks for sharing! Thumbs up for the post! Greets, Man With Van Colliers Wood Ltd.visit their site
Can I just say – that was freakin’ amazing!!!
You are like a master painter! Where did you learn all these techniques for painting & staining? It turned out awesome!!
Did I miss a post about the wall hangings behind the egg chair? They look pretty great! As does the table…
Nope you didn’t miss it! That post is still coming. 🙂 Good eye!
I love this so much! I have to ask … how does your painters tape work so well for you? It ALWAYS bleeds for me, making me a very cranky crafter! Any tips and tricks please? (Btw, I have your roman blinds in my sunroom and your headboard in my bedroom, love love love your projects!) 🙂
There’s no such thing as getting a perfect line with painters tape, but Frog Tape or tape with edgelock technology does make a big difference. We’re too cheap to buy that expensive stuff though, so we just use cheap off-brand tape and apply the paint or stain sparingly. The more paint or stain you slather over that tape edge, the more seapage you’ll have. Does that make sense?
GAH!!! You’re an artistic genius. I would put this table in my house in a heartbeat!!! Ship to OK for free…? LOL 🙂
Goodness -you guys are geniuses!
That is beautiful! Did you put a finish on it after finishing the staining?
Not yet… I was too impatient to take pics and post it to the blog! But we’re going to seal it with a RustOleum water-based poly tonight. 🙂
Very on point! This really does look like it stepped right out of RH!
You are a genius at staining. I’m jelly. Love it!!
Very cool transformation! I love how the wood grain look turned out. I’d like to try this technique sometime, so a video tutorial would be lovely! Keep on inspiring us!
I’ll see what I can whip up!
It looks great
Nice job!
this looks awesome– the planks came out so good!! 🙂
Love it! It’s been awhile since we’ve had some furniture transformation candy 🙂
Whoa, it looks great! I love the planking effect. You amaze me with three small children and what you accomplish. Way to go! 🙂 Did you get the quilt back from the long armer yet?
Yes we got it back and it’s beeeeautiful! I need to finish the crib mobile so I can share pics of the whole crib with the quilt hanging and everything. It looks so pretty!