We’re coming up on a year of owning this house. We never dreamed that the kitchen would take this long to complete, but we’ve settled in to the no-kitchen lifestyle (AKA camping in our own house) and I’m not complaining. Our ancestors didn’t have running water or electricity, so I think I can handle cooking in a crockpot and doing dishes with 5-gallon buckets of water from the bathtub until further notice.

Just to give you a timeline refresher of notable events:
- Feb – Took possession of Daydream Manor
- March – Tore off existing kitchen
- June – Had Kitchen basement excavated (KITCHEN HOLE!)
- August – Foundation poured
- October – Framing

Isn’t it crazy to think how stupid-small the original kitchen was? A moment of silence for those who lived with this situation for decades and decades.
The first 3/4 of 2018, things were moving slowly because of flaky contractors and natural disasters, But since framing has been completed, we’ve been tackling everything else ourselves. And by we, I mean Nick… who also has a full time day job. So we can’t be hard on the guy for not installing my pot filler yet.

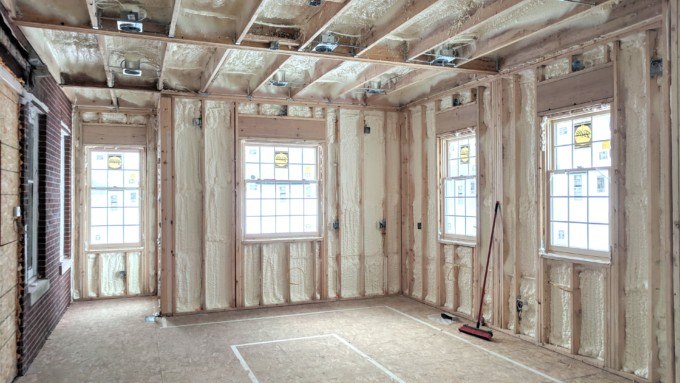
Here’s a view of the kitchen looking toward where the island and L of counters will be. The range will be centered between those two windows on the right (below).

Since that above photo was taken, windows and doors have been installed, as well as roofing membrane and skylights. We needed to quickly get this space enclosed for winter so we can prevent snow drifts where the breakfast bar is supposed to be. Get my drift? <<see what I did there?
Winter may have come late this year, but it’s hitting us hard. The windchill today in Iowa is -45, sooooo…

(Above pic is our Solarium (sunroom) on the south side of the house. We will be mirroring the design/architecture of this room on the kitchen so the exterior flows cohesively)
We finally got some closed cell spray foam insulation sprayed on by our contractor. Honestly it still feels like walking out into subzero temps when we walk into our kitchen. But I’m sure it will help when we add a layer of mineral wool insulation and some Touch N Foam window and door sealant sprayed in. You can feel a physical blast of arctic air if you’re standing within 3 feet of a window or door.
Here’s a look at the same angle of what it will look like when we get cabinets and appliances in!

You can see we changed a couple things since this rendering was made. Mainly the fact that there’s one large window on that far wall instead of two small windows. NATURAL LIGHT WINS EVERY TIME!
Also, counter to ceiling tile is BOMB. And we made a decision on which tile we’re going with! I can’t stop caressing it and whispering sweet nothings to it.

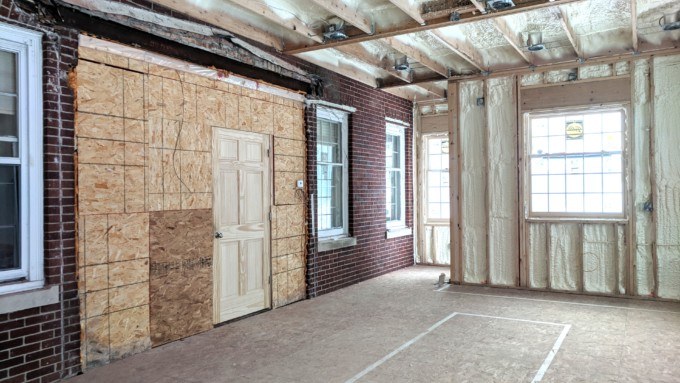
This temporary doorway is framed in where the original large rounded doorway was to the original kitchen (you can see what it looked like here).
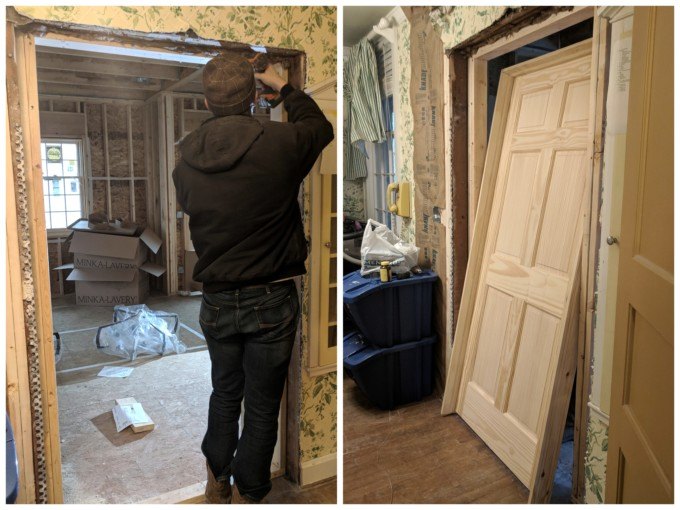
Eventually, we will open it back up to be a wide open (possibly rounded again to honor the architecture) doorway to the kitchen again. This is where it is on the other side.
This post is sponsored by DAP. Thank you for supporting the fabulous brands that make Reality Daydream possible! This post contains affiliate links)
Nick has been spending countless hours working in our frigid kitchen, doing things that are necessary but don’t provide as much visible progress. Things like roughing in electrical outlets, recessed lighting, pendants, stove, washer/dryer. SO MANY WIRES EVERYWHERE! Also plumbing rough-in for sump pump and washer so far. And it’s a good thing that we have the sump pump running, because when all this snow melts… WOOF.
When we went to apply the DAP Touch ‘n Foam No Warp Window and Door Sealant, we couldn’t believe what a difference it made in keeping this space warmer and draft-free. But before I get too far down the rabbit hole of how awesome it is, let me show you how easy (and dare I say FUN) it is to spray in.
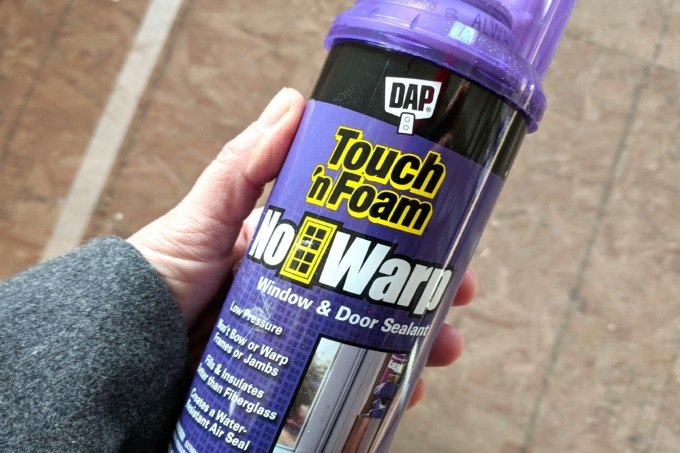
This stuff is fun to work with! Just apply a small amount along the cracks around windows and doors, and over the next half hour or so, it expands SO MUCH and absolutely fills the entirety of the crack and then some!

We love that it creates a water-resistant air seal and won’t bow or warp frames or jambs. And when we go to drywall (SOON!), all we have to do is take a utility knife and slice off all the excess foam insulation so it’s flush with the framing and ready to be wrapped in sweet sweet drywall.

Now we can keep the kitchen comfortably warm enough to work and play.

We also wasted no time installing our new August Smart Lock Pro in the mudroom that connects the kitchen with the garage. Although we’re honoring the history and architecture of this house as much as possible, we’re also planning to bring it subtly into the 21st Century by adding lots of ‘smart’ features! This makes it extremely convenient to use, which is what really stood out when we were looking through some top-rated options here. This new lock allows us to lock and unlock our door (and grant temporary access to guests!)… all with our smart phone. My personal favorite feature is that when we pull in the driveway, the lock senses that our phones are nearby, and it automatically unlocks for us as we’re walking up to the door! Game changer when you’re carrying groceries and a small child.

I know it’s borderline insanity how extraordinarily excited I get about all these little bits of progress, but it adds up! LOOK HOW FAR WE’VE COME! 
I can’t tell you how much it means to us that you guys are following along on this journey as we pour our hearts and souls into this historic home. I hope our girls will have fond memories of this time, and I hope they grow up with a strong sense of work ethic and know that they can do ANYTHING with YouTube and a stiff drink. I KID! Please do not hate! I’m totally joking!
I do not endorse operating power tools while drinking.
We’ll be over here working away, and we’ll be sure to update you with more progress again soon! If you want more behind-the-scene action of all this going down, be sure to follow our Stories on Instagram (@RealityDayream).
~Bethany
~~~~~~~~~~~~~~~~~~~~~
Be sure to catch up on our kitchen progress up to this point by clicking the images below!


Related:
-

Hey buddies! Nick here! It's been almost 4 years since we purchased this home. And…
-

This is a sponsored post written by me on behalf of Masonite Doors. All opinions…
Great Article. Thank you for sharing. Spray foam insulation is a great, affordable way to improve your home’s energy efficiency and comfort level. Add some spray foam insulation to your attic, and you can save on utility costs and improve your home’s overall energy performance. Check this, https://www.fortmillsprayfoaminsulation.com
I love that your addition is maintaining the original design and style of the home, absolutely beautiful! Love your style! My husband is Dave that dug your basement, and I’ve been trying to keep up following you since then. He loves seeing your progress!
Haha YAY! Dave’s wife! Is it ok that I call him my BFF Dave?! 🙂 We had THE WORST TIME finding an excavator contractor to return our calls or show up when they were supposed to. Your hubs came through for us! 🙂
OMG! That kitchen rendering is amazing. And that tile! We’re starting to plan building in downstairs on our place and I’m so inspired by how much you are doing yourselves. We’re going to start with built in bookshelves and see how we go from there before committing to DIYing I think…
LOVE it all! Speaking from experience (raised twins & a sibling, all boys, on my own), what they see now will help them loads as adults. Everyone who’s ever worked with mine brings up their work ethic, and as teenagers, they easily got jobs because of that.
PS: make sure you never lose your cells!!
So exciting! And I’m in love with your tile!
What an amazing job you are doing. I am loving following you along and it’s a real inspiration.
Wow Bethany! Considering you and Nick are doing most of the kitchen by yourself, I think you have come a really long way! The space itself is amazing and you can see that it is going to have great light in it! You two have done enough renovations to know what you need to do to keep your place tight and warm during our cold Iowa winters and are taking every precaution to make sure that you get it done right! Good for you! One thing – if you think you have enough outlets in the kitchen, add 5 more! You can never have enough outlets! And make sure you have good light when you are cooking. We should have put a spot light just on the stove so I didn’t have to turn the whole bank of lights on when I am cooking. That was one mistake that we made when we remodeled. Oh well, lesson learned! Anyway, it looks wonderful! Can’t wait to see it all finished!
Love the tile!! Can’t wait to see your complete makeover!!!
THAT TILE!!! I’m drooling!