I have fond memories of making snow candles as a kid, and I’ve been hoarding (gathering from yard sales and thrift stores) candles to melt down to do this project with the kiddos!

You can also use paraffin wax for this, and you can also tint the colors of your candles by adding broken crayons! But let’s not get too far ahead of ourselves.
Here’s what you need
- Snow day (bored kids) and at least 8 inches of fresh snow
- Old candles to melt down, or paraffin wax
- pan of water
- glass jars or tin cans (if your candles aren’t already in glass jars)
- Candle Wicks
- a stick from the yard
First things first, but your candles in a pan (I started with my candles that were already in a jar, but you can put yours in a glass jar or tin can), and fill the rest of the pan with water. Bring to a boil and turn down to simmer while the wax slowly melts.

This might take an hour or two, and your house will almost definitely smell like you stumbled into a Bed Bath and Beyond. Once your candles are melted, fish out the old wicks with a plastic fork.

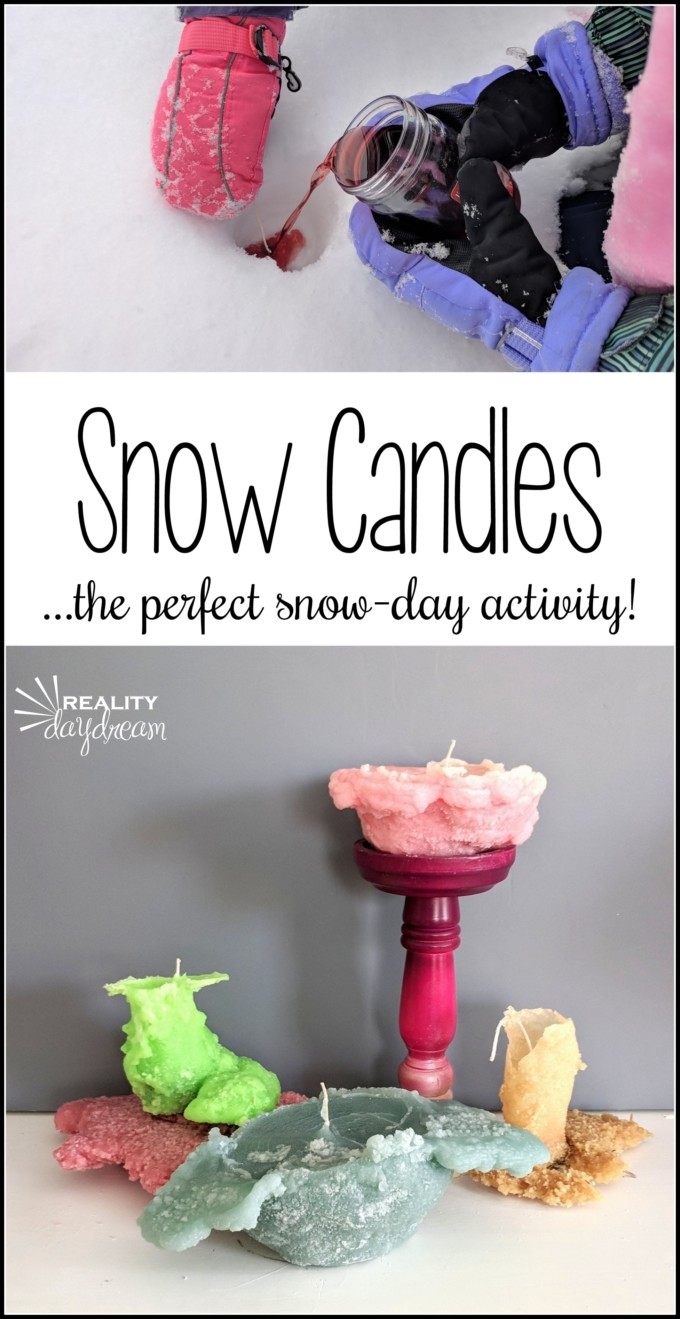
Finally, take your mittened hands, and grab a couple steaming jars of liquid wax, and head for the door.
Let’s talk about making your hole in the snow, because we learned a few things. Don’t choose a pile of snow that’s deeper than 8 inches, because you want to make sure that your hole goes all the way down to the ground.
Additionally, the narrower your hole the better. The first couple candles we did, we used our fist to make a hole by pushing our fist straight down into the snow. This made for really wide/shallow candles. If you want more upright candles, use a butter knife and wiggle it around in the snow a tiny bit so the hole looks like a paper towel tube.
So not like this:

For each candle, I would say we used 20-30 oz of wax, just to give you an idea.

After you’ve filled up your hole with hot wax, put your wick in, and wrap the end around a stick so you don’t have to hold it there for 20 minutes until the wax hardens.

Wait 30 minutes to an hour before digging up your candles! It’s so fun to see what unique sculptures formed under the snow. The girls were SO PUMPED do dig them up!
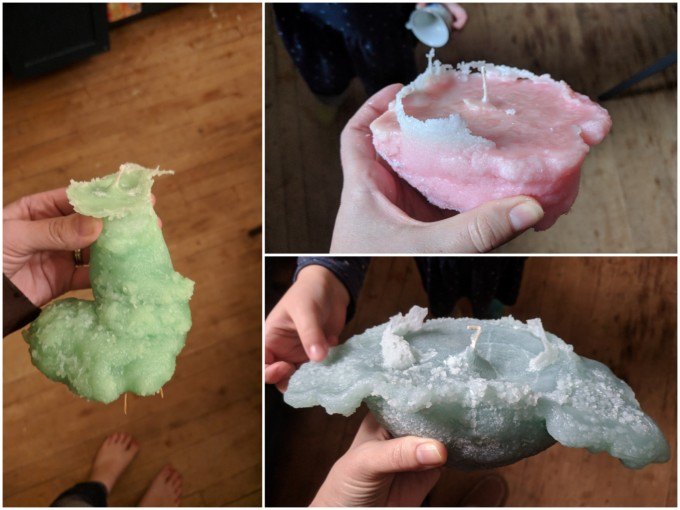
You might need to pick some grass (or dog poop) off the bottom of your candle where it soaked all the way to the earth.

A couple of our candles didn’t sit flat on a surface very well, so we took a hot knife and sliced off the bottom.
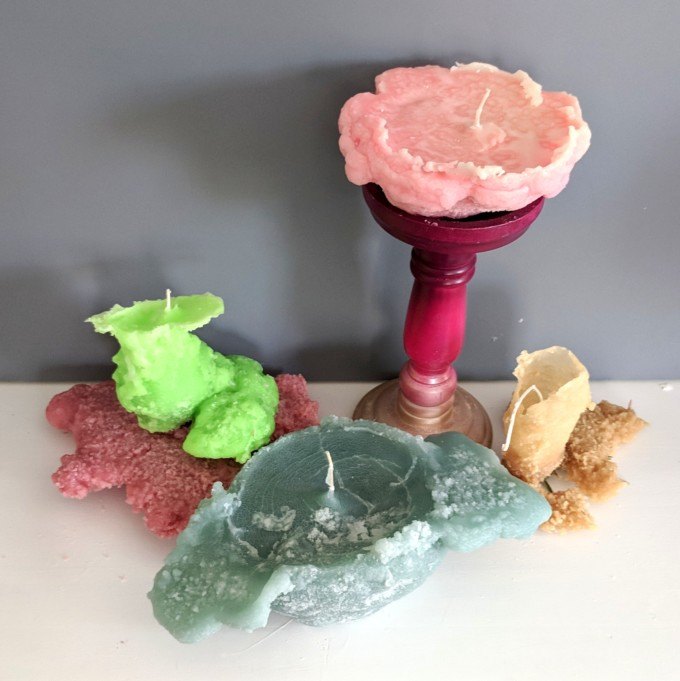
We love the imperfections and how each one is quirky and weird.


The girls are obsessed with everything about this project!


If you give this project a try, be sure to tag us on social media! We’re @RealityDaydream in all the places!
~Bethany
~~~~~~~~~~~~~~~~~~~~~~~~~~~~~
Thanks for pinning!
Related:
-

It never fails! Each spring, when the snow melts, we're always itching to get out…
-

Howdy Hey friends! Now that spring has actually settled in with glorious weather, we are…
-

I've had this idea in the back of my mind for quite awhile... why not…
So neat! Looks like we’ll be able to try this out this week!
This looks amazing! Love the shapes of the candles! ??
Such good memories!
I love this! I am so going to do this with my grand kids. I have a question and maybe this is stupid. Where did you get the wicks? Did you order them on line? Thanks!
On line or at any craft store, like Michaels or AC Moore.