Hey buddies! Nick here! It’s been almost 4 years since we purchased this home. And while we love the character and charm of owning a historical property, it comes with lots of little maintenance needs that sometimes fall to the bottom of our to-do list. Today, we’re going to tackle one of those line items, because we’ve had rainwater occasionally leaking through the solarium roof since we moved in. *cringe*

*This post is sponsored by our friends at DAP. Thank you for supporting the fabulous brands that make Reality Daydream possible!*
Going through a Derecho and EF4 tornado only made matters worse. However, it was never a consistent leak, more of a trickle during heavy rains with lots of wind. Because of this, it never really made it to the top of our to-do list. Until now!
We thought we had solved the problem by replacing the roofing membrane and adding gutters to the room.
The very night that the contractors finished up, we got a doozy of rain. And wouldn’t you know it… the leak was still there. We even dedicated a video showing when we had the contractor drive back from our neighboring state to reinspect the roof.
Did the roof need to be replaced? Yes, it was an absolute disaster, but it also didn’t solve the leak. Our contractor helped us identify that the culprit was the window. It was streaming in when soaked with a hose.

We knew the windows were in bad shape, but we never suspected that they would cause our water infiltration.
Eventually, I want to replace all the metal storm windows with custom wooden Storm/Screen Combination windows. But we have a lot of saving to do before we can afford that.
For now? These storm windows needed to come off to address the issue.

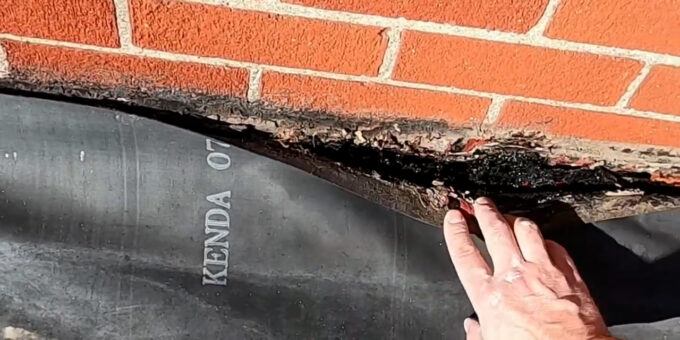
I believe this to be the culprit. The trim around the window has separated, leaving about a half-inch gap. I think this happened due to the many expansion-contraction cycles and the edge being too tight. So we removed it, cut it a little, and reinstalled it. At the same time, we removed all the old caulk that lost its elasticity and cracked.

Surprisingly the wood is all in excellent shape. Yes, it has these deep crevices where the water would sit and penetrate, but after testing its integrity with the corner of the putty knife. Everything felt stiff and solid.
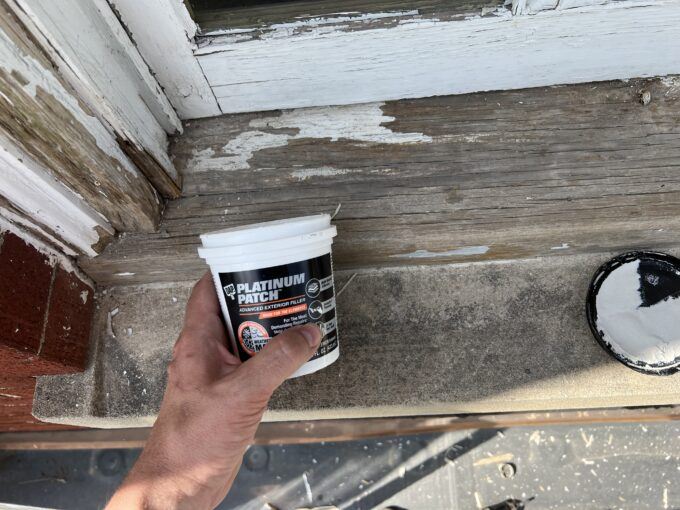
We removed all the loose paint and used DAP Platinum Patch, which is an exterior filler with powerful weatherproof protection. Filling all the voids with this stuff was quick and easy. It dries quickly and has a hydrophobic surface.
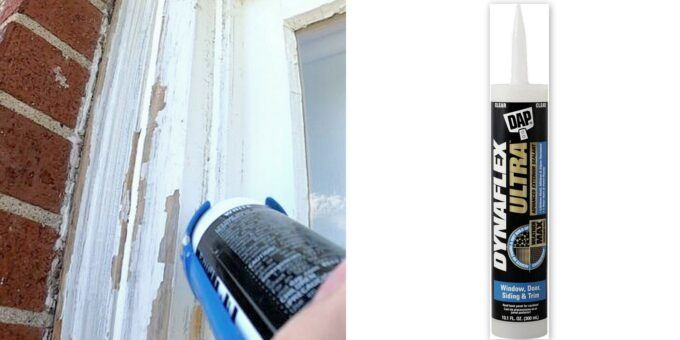
Using DAP’s Dynaflex Ultra, we sealed the Brick mold, blind stop, and the sill. This stuff is great, because its designed to be long-lasting in all types of weather. AND it can be rained on as soon as one hour after application… which is good, because it rained shortly after I finished! It also doesn’t crack and crumble.
Lastly, we primed and painted the trim and sill. It is just insane how much of a difference it makes. This project makes us excited to tackle the rest of the windows. We still need to remove both sashes and reglaze them, but we will save that project for another day.
Not only did we fix the functional issue, it also looks SO much nicer!

Tackling these little maintenance things around the home can seem like a drag, because you don’t see a big visual change and feel that sense of accomplishment. But as homeowners, these things are necessary, and it feels just as good to check them off your list!

We’re so glad we don’t have to deal with rain dripping into our living room anymore, and it feels great knowing that we took the time to do it right!
~Nick
Related:
-

Every spring, I have grand plans of having the most epic vegetable and flower gardens!…
-

Howdy friends! We've been using and abusing our Sven Sofa and Armchair from Article for…
-

Is it too early to call this spring cleaning? The truth is, we've been planning…
Leave a Reply