Back to the Solarium!
Which, if you’re new around here, is the fancy term for ‘Sunroom’. It’s what this room is called on the original blueprints of the house. And we think it sounds awesome, so we’ve adopted it into our everyday language. Because fancy.
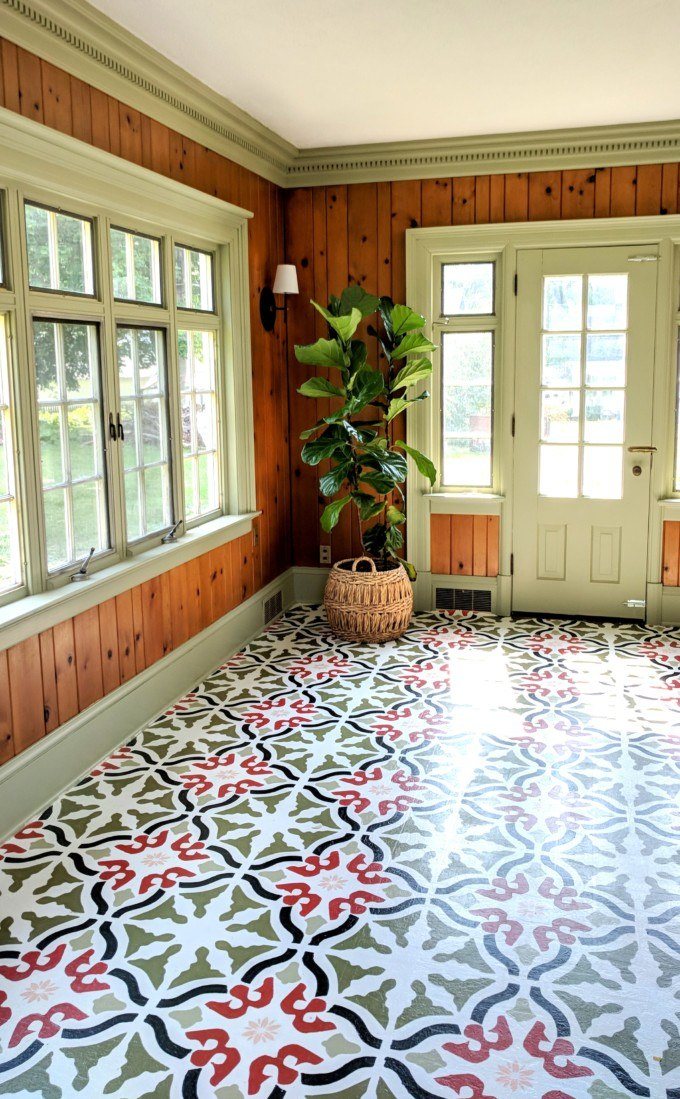
So let’s recap the progress we’ve made so far in the Solarium. First we taped off and painted all of the trim and mullions. Then I primed and painted the floor in preparation for stenciling! (which turned out AMAZING… can I say that?)
*This post is sponsored by our friends at DAP! Thank you for supporting the awesome brands that make Reality Daydream possible! This post contains affiliate links.*
Opposite the big wall o’ windows, there’s a big built-in cabinet situation that you might remember from previous posts.

That big center area looks like it’s an old vintage map, but it’s actually just vintage-y map wallpaper. As in, there are repeats in the pattern. And since it’s flanked by cabinets and shelves, we can only assume that there’s a fireplace behind it. And while that’s a fun idea, even if we know for sure it’s a fireplace, we don’t want to uncover it because we already have 3 fireplaces in this house. And the sunroom isn’t a place we would want an additional one.
PLUS! I have big plans for this space! The wallpapered area has been screaming ‘chalkboard paint!’ at me ever since we first got possession of the house. And since we plan to use this area as a creative space and *cough* homeschooling room (that’s a story for another day), the chalkboard plan is brilliant!
But, first things first, WALLPAPER REMOVAL.
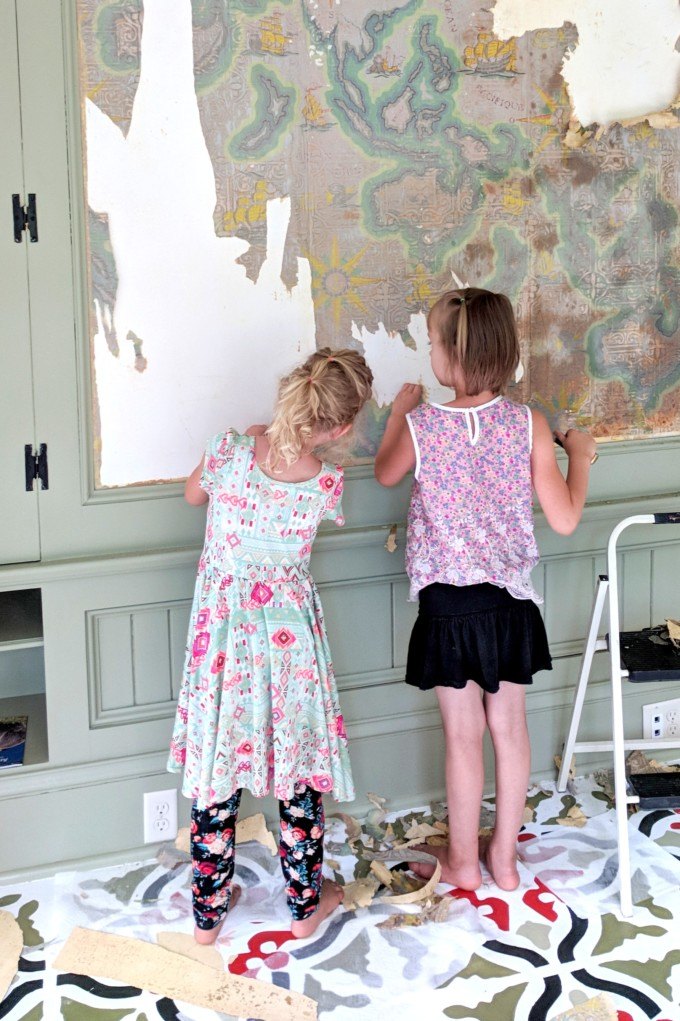
By now, our girls are pros at removing wallpaper. The 3 of us had this all down, cleaned, and prepped in less than an hour.
Wallpaper removal tips:
- Use a spray bottle with HOT water to soak the wallpaper (you may need to score the wallpaper for the moisture to get underneath)
- Scrape with a putty knife
- Just when you think you have the wallpaper removed, you need to repeat the whole process to remove the adhesive.
- The end.
We’re not here to focus on scraping wallpaper though. Let’s chat about ALL THE CRACKS around molding and trim in old houses. It’s like the trim separates from the wall over the years, and it’s sooooo frustrating. But after doing some research, we found theeee best product on the market for this problem.
It’s called Alex Flex Caulk, and we’ve used it all over our house to fill those cracks to make the molding look flawless and seal cracks around windows. This stuff is specifically formulated for this purpose, and actually dries with some flexibility for a crack-proof seal. Because crack is whack.

Being a DIYer with littles, I’ve become increasingly aware of dangerous chemicals in our home. And I’m so grateful that the Alex Flex Caulk is low-odor and water based… making cleanup so easy!

I also love that it’s dry enough to paint over in 30 minutes! Because mama got other things to do than sit around and watch caulk dry all afternoon!
Wipe off excess with your finger or one of these tools, and then wipe with a damp sponge.


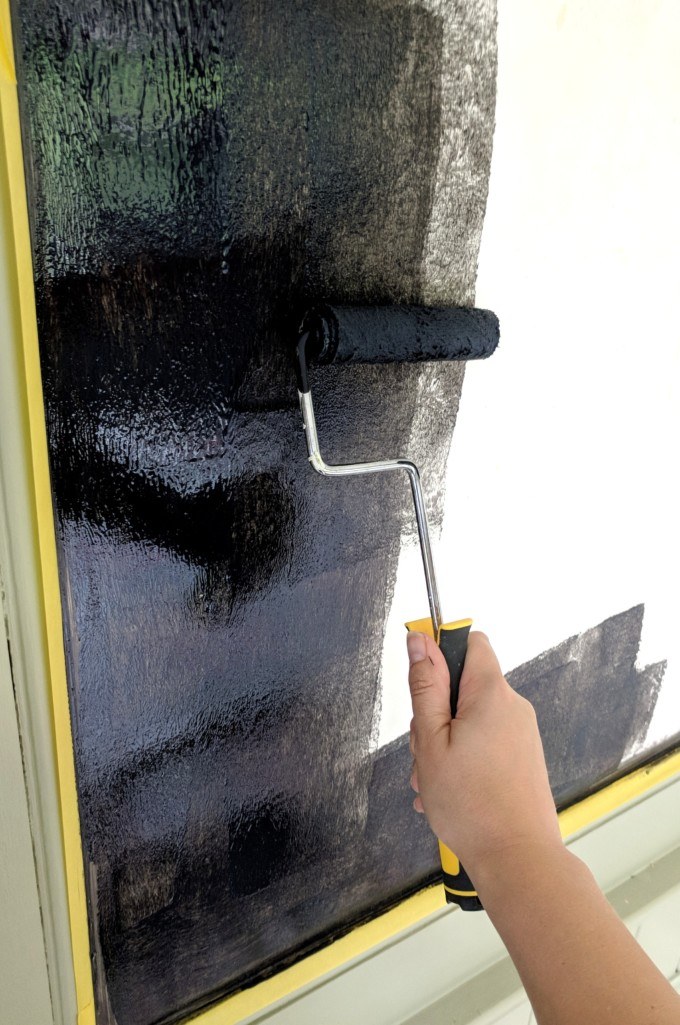
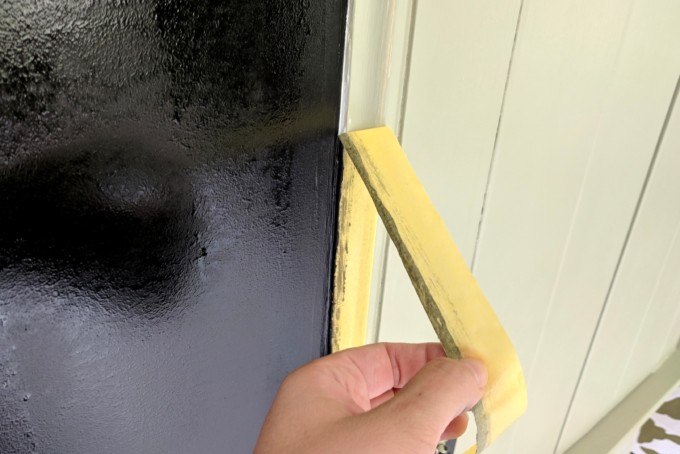
Time to tape off the edges! Since I recently painted all the trim, cabinets and moldings in this room, I decided to use the yellow Frog Tape that’s more gentle for delicate for recently-painted surfaces.

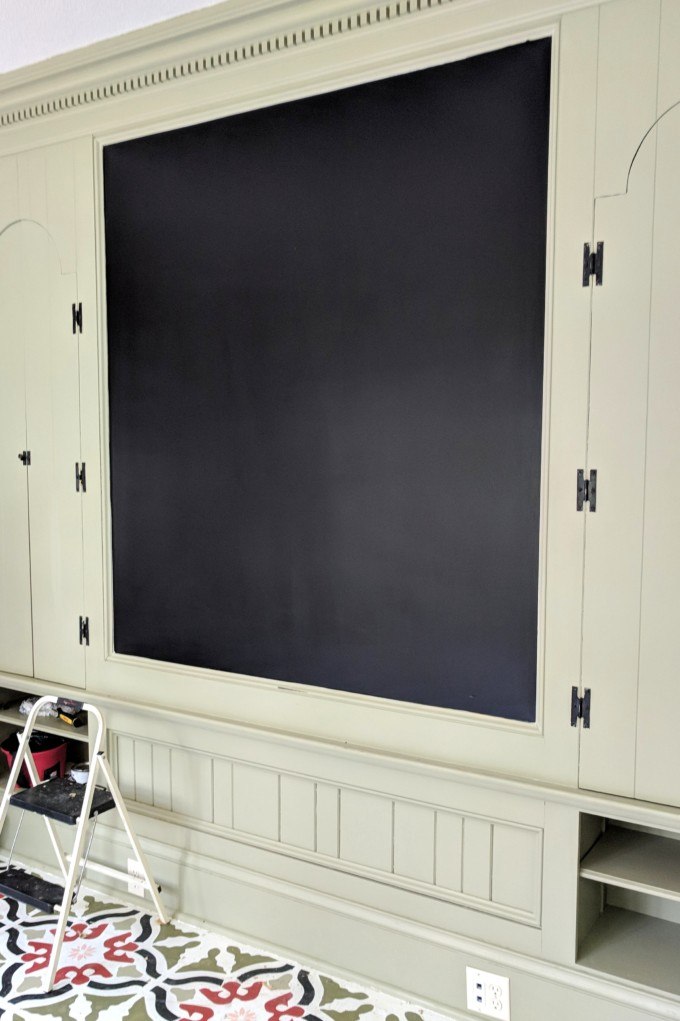
Nick snagged some black chalkboard paint from our local home improvement store. But you can also get tintable chalkboard paint and have it tinted any color you want!

I painted around the edges first with my favorite paint brush, then rolled the rest on with a regular 6″ paint roller, getting as close to the edges as I could to cover up brush strokes.
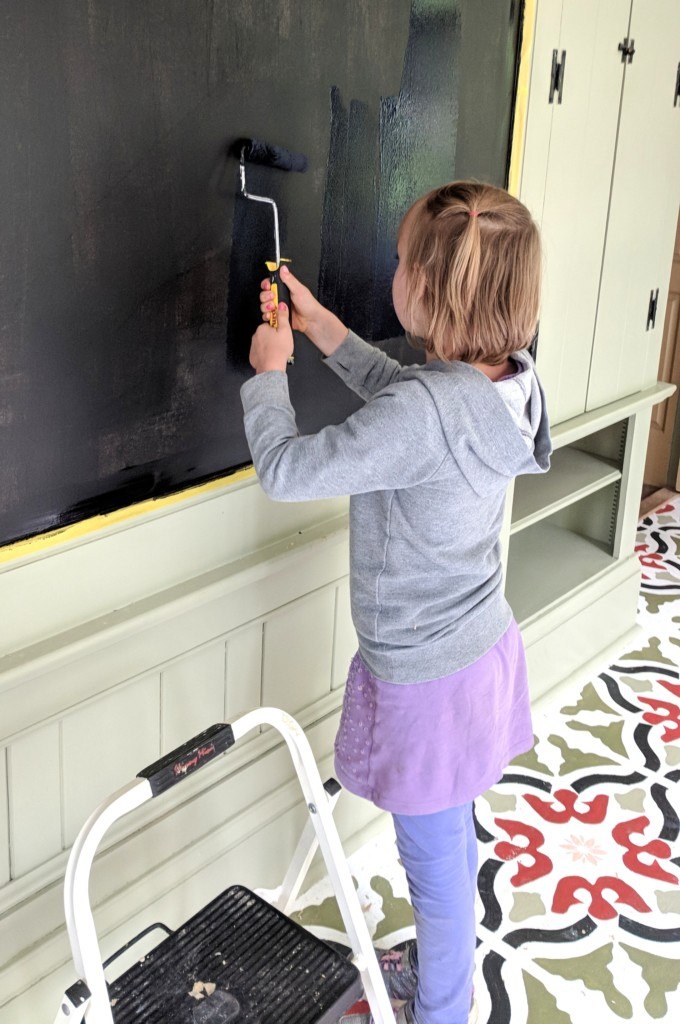
The thing ended up needing 3 coats of chalkboard paint for full coverage, but luckily my enthusiastic helpers were still nearby to help out.
Take the tape off while the chalkboard paint is still wet!
The surface dried completely flawless and smooth, and I can’t stop rubbing my face up against it.
The sisters ‘seasoned’ the bottom half of the chalkboard wall so they could get to drawing.
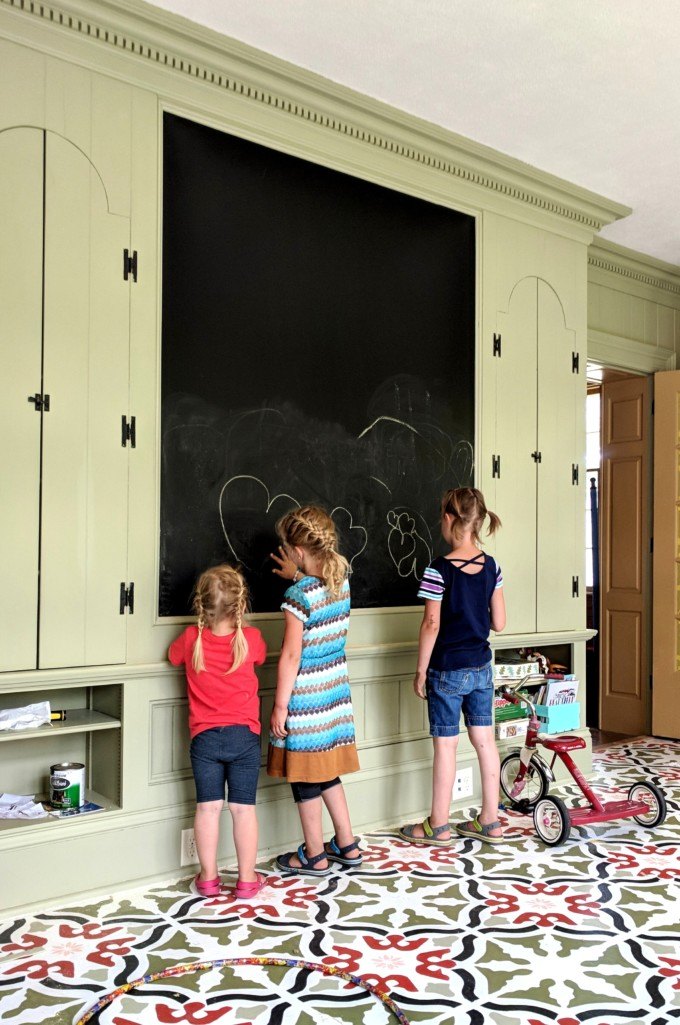
This chalkboard was the best decision ever! The girls spend tons of time quietly drawing in this room now. And I love that the top half of the chalkboard is inaccessible to them so it will always be clean when I need to actually teach them something.
I’m in the planning phases of writing a post explaining our choice to try homeschooling this school year. So watch out for that in the future!
I’m SO READY to start filling this Solarium up with furniture and plants!
~Bethany
~~~~~~~~~~~~~~~~~~~~~
Thanks for pinning!

Related:
-

Hello there! Nick here! Earlier this spring, Beth and I needed to leave town for…
-

Got a hole in your wall that you wish wasn't there? We do! When we…
Bethany, I love your blog! I get excited every time I get an email notification about a new post. Your writing style feels like a conversation over coffee 🙂 Good luck on your journey homeschooling, it was one of the best decisions I’ve made for my children. I wrote about it not to long ago on my blog.
http://www.diywithmyguy.com/healthy-living/why-homeschooling-is-one-of-the-best-decisions-we-have-ever-made/
Awww you’re so sweet Myrtle! And I loved reading your homsechool story. I’m definitely a ‘Hesitant Homeschooler’ too, and am pretty nervous. But so far things are good. I really need to sit down and write a post about why we made our decision. Coming soon!
As someone who removed wallpaper from eight (!) rooms in one house, step three of wallpaper removal made me ?
I love what you have done with the room.
Can’t wait to hear more about the homeschooling!!! The house is coming along beautifully. Loving all the progress updates on Instagram and here as well.
Bethany,
So how close are you guys to moving? It is sounding like it will be fairly soon.
Maureen
Maureen, I’m sad to say that it will still be awhile. We’re so much further behind than we want to be. If I had to guess a move-in date, I would say maybe October?
Wait! Is that the BABY in the pics? What happened–she’s not much of a baby anymore.
That is EXACTLY what I thought!! The older two I was expecting but not the baby!!!