Have you seen those ‘nesting’ cutting boards where the two cutting boards fit together like a glove and look like they’re embracing? I fell in love with this idea, and decided to make my own version of these nesting cutting board for my friend Katie’s birthday!
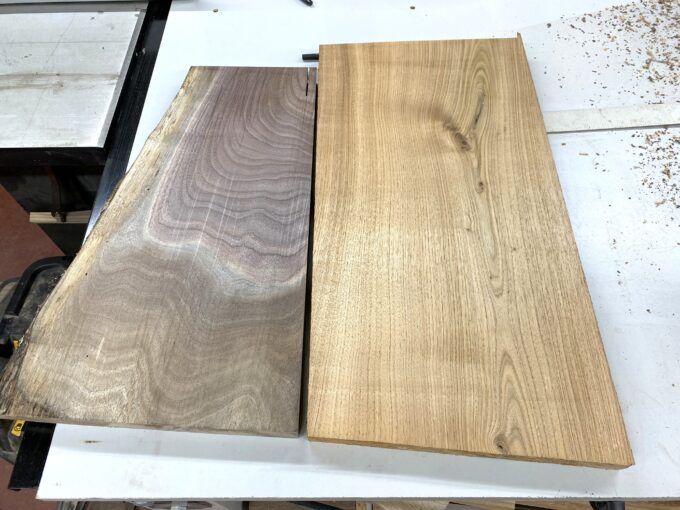
Since we have a ton of wood scraps lying around the wood shop, it wasn’t too hard to find some pieces that would work for this project. I don’t even mind that they’re two totally different species of wood! Walnut and Butternut for the win!
*This post is sponsored by our friends at WORKPRO Tools. Thank you for supporting all the fabulous brands that make Reality Daydream possible! This post contains affiliate links.*
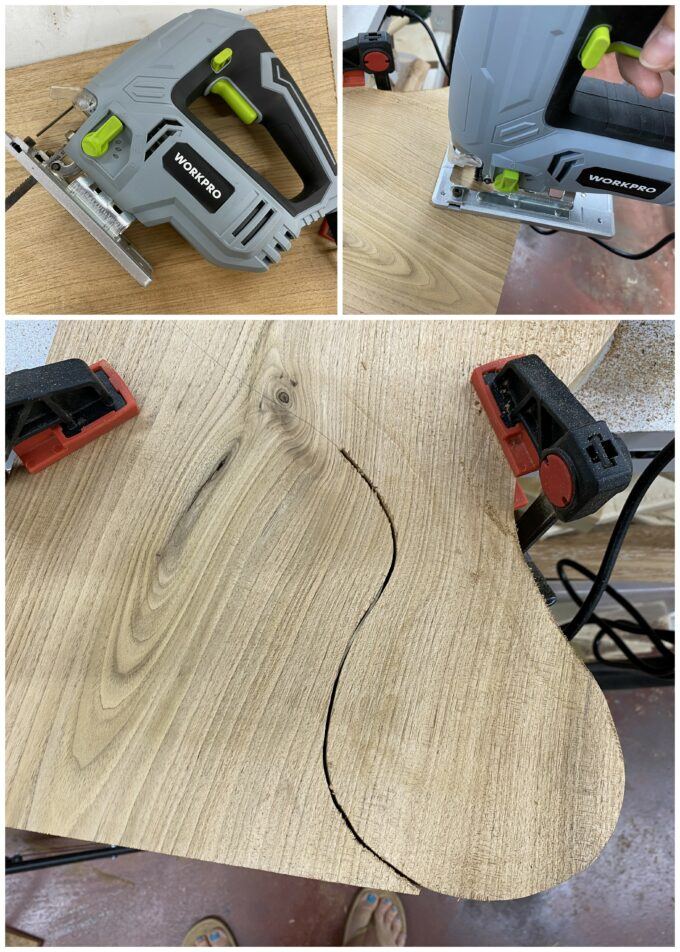
You can do a search on Etsy for Nesting Cutting Boards to get all kinds of inspiration for shape and design. I decided to just go for it and trace out a design. Use a pencil so you can erase and change your mind until you get it right! I recommend just tracing out one board first. Then once you have it cut out, you can use it as a template for the second cutting board so they will perfectly fit together. You’ll see what I mean!

But first, let’s cut this bad boy out using my WORKPRO Jigsaw!
Someone recently asked me which tool I would choose if I could only afford to purchase ONE. I didn’t have to think very long before I settled on the jigsaw! It’s so easy to use, and you can cut straight lines or curves LIKE BUTTAH. Also, how are they so inexpensive?!
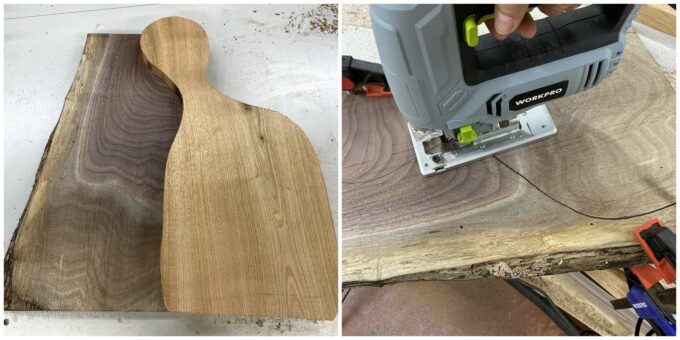
Once I got my first cutting board cut out, I laid it on the edge of the second board so I could trace along that edge. Then I finished off the rest of the design after a couple tries with my pencil.
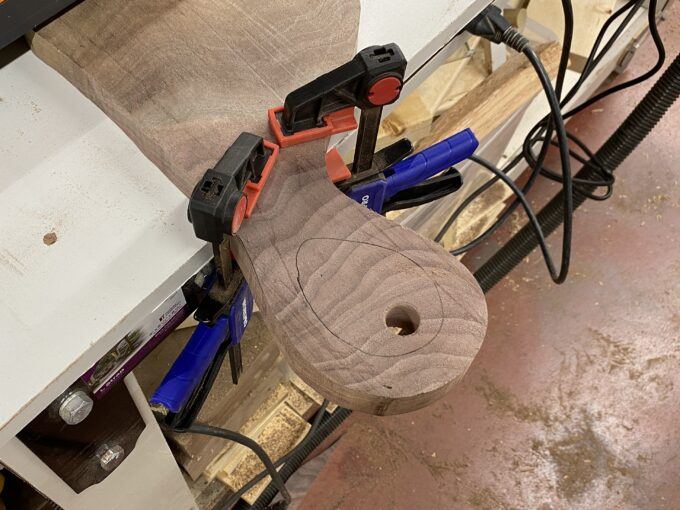
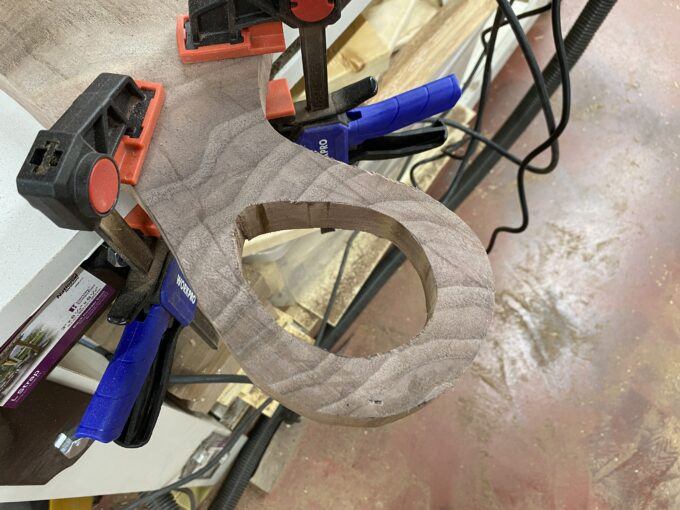
I wanted a wide opening on the handles of my nesting cutting boards, just because I love that look. Once again, I just eyed it and drew an organic shape about an inch from the outside of the handles, and drilled a hole so my jigsaw blade could fit down in there and cut out the handles.

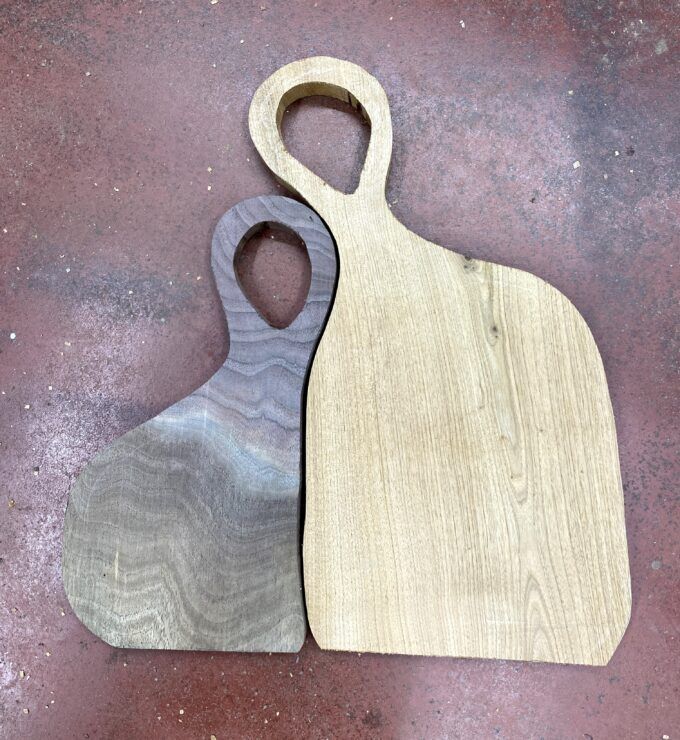
My edges need to be smoothed, but look how fun these are?! I love that there are two different types of wood for these nesting cutting boards! And it looks like a husband/wife hugging. Or mother/child. So cute!
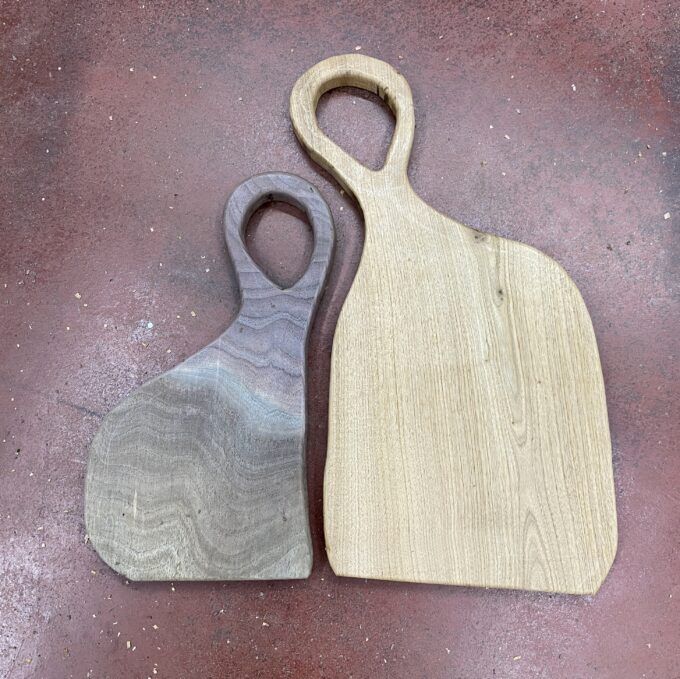
You could absolutely hand-sand these or use an orbital sander. But since we have a router, I decided to route the edges to really round them off and save me time. WORKPRO even has router bits!

Can you tell a difference?!
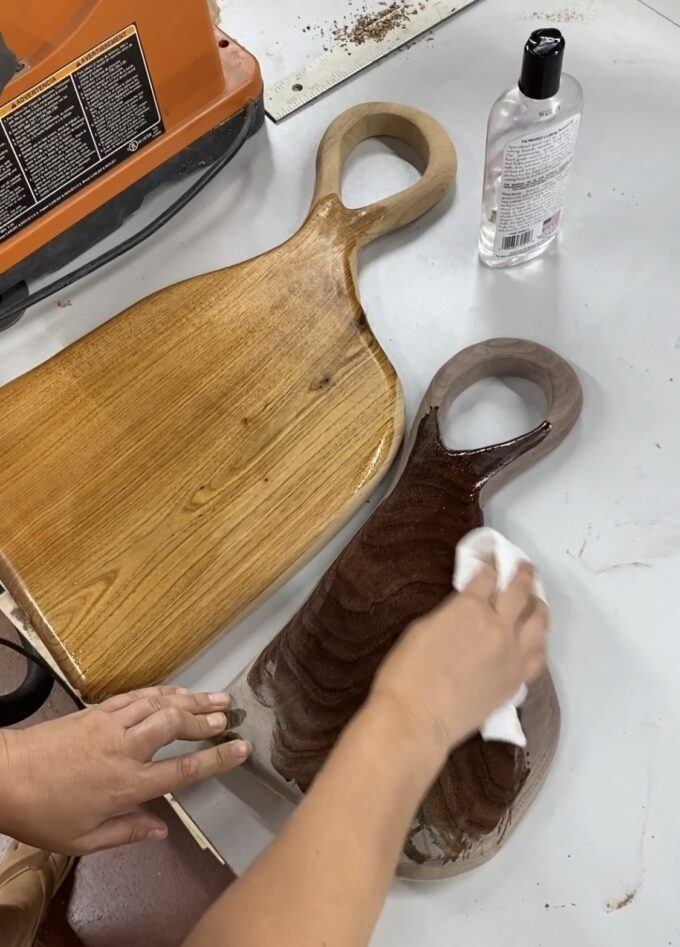
I wiped on a generous amount of food-grade mineral oil, and that gorgeous grain really comes to life! This is my favorite part!
Of course I had to put them in my kitchen to get a good photo, and not I don’t want to give them away as a gift! 😉

But why stop there? Who’s up for a bonus project?
Since my friend Katie is a homesteader and self-proclaimed chicken lady, I decided to make one of those cute wooden egg holders.

I used walnut for the one (above) that I gave Katie, but when I made that one, I was kinda in a hurry and didn’t take the time to document. So I made another one to share the process with you today!
Nick drew out a pattern for me to use, and we’ve made it available to you as a free download! Since it’s longer that basic printer paper, you may need to go to your local printery to have it printed.
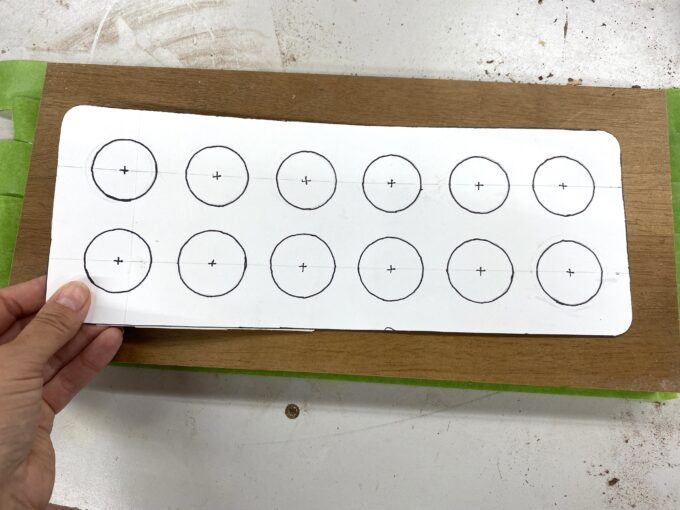
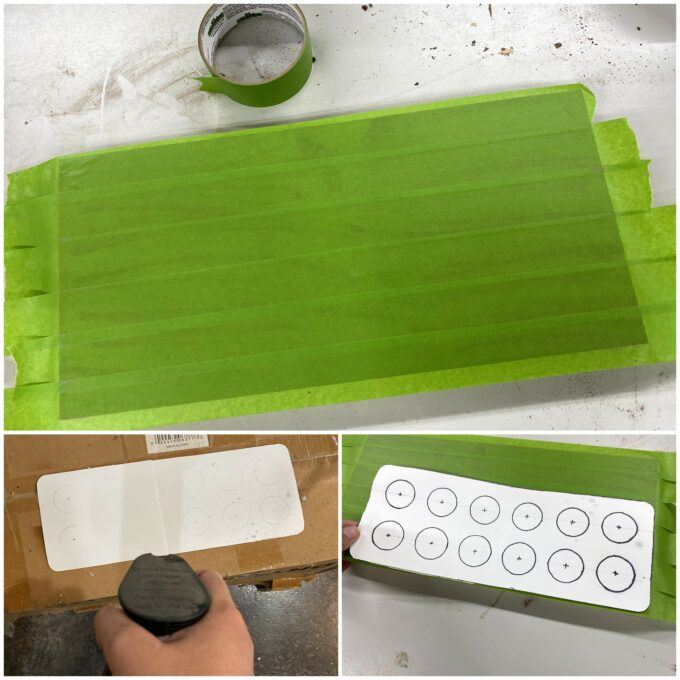
To apply my template, I used the same method that I use or my scroll saw templates by taping off the surface with painters tape first, then spraying the back of the template with spray adhesive and applying it to the taped surface. This will make it easy to remove the template after all our cuts have been made.
Now that our template is on good and strong, we can clamp it down to our work bench and get to cutting! We use these bar clamps.
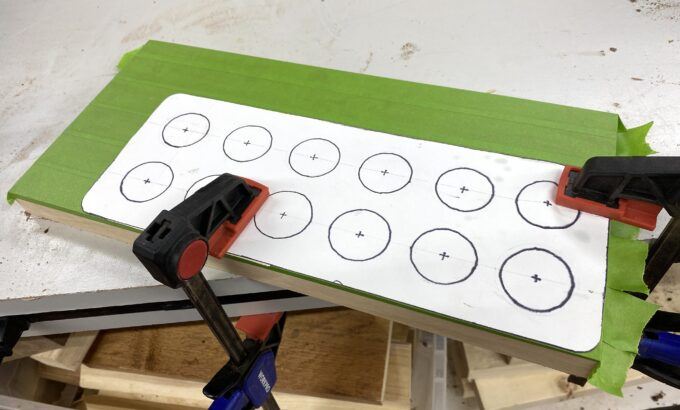
It’s time to get out our handy dandy jigsaw! You can see that I applied my template close to two of the edges of my board so I wouldn’t need to cut those out. Just cut out the other two sides and round off the corners!

And now we can re-clamp, and get ready to use a hole saw and our 20V Drill/Driver. Look at this beautiful beast!

Center that hole saw over one of the circles, and drill away! It’s so fun watching the hole saw in action.

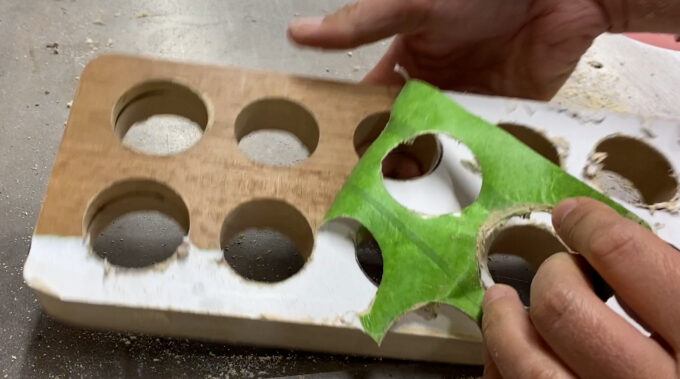
Time to peel off that template! So satisfying! Sorry about the blurry pic. 😉
I used an orbital sander to get that top finish off, an routed all the edges to be rounded (once again, you can hand-sand, it will just be more work).
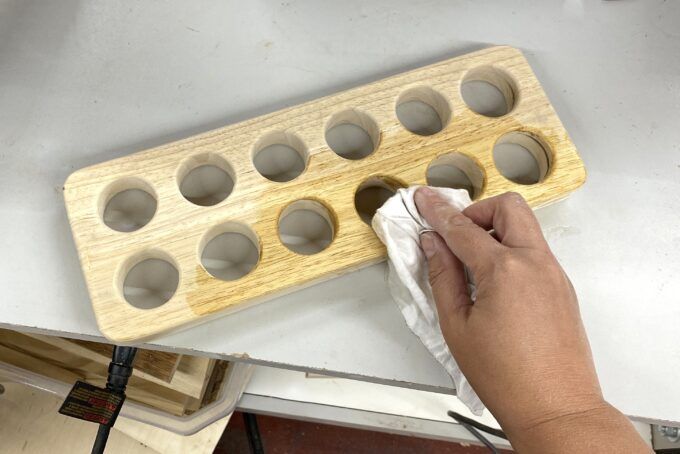
Use food-safe mineral oil to really bring out the woodgrain and provide some protection, and we’re done!
How much do you love this?!


I think these turned out so cute! I love the walnut version best. I hope my friend loves her gifts! The plant is for her too. 😉

If you make either the nesting cutting boards OR the wooden egg tray, please sent me pics! You can tag me on the socials… we’re @RealityDaydream on both Instagram and Facebook!
~Bethany
~~~~~~~~~~~~~~~~~~~~~~~~
Be sure to check out our master list of DIY Handmade Gift Ideas!

Thanks for pinning!!


Related:
-

Making a cutting board almost seems like a right of passage into the world of…
-

I have a fun and easy building project for you! And while I do end…
-

My kids are getting to the age where they want to tape pictures, cards, notes...…
I’m trying to find the template for the egg holder…is it somewhere obvious and I’m just not seeing it?