• Home
  • About
  • Tutorials
  • Recipes
  • Furniture
  • Contact
    • Contact
    • Infertility
    • Disclosure
    • Privacy Policy
  • Shop
    • Facebook
    • Instagram
    • Pinterest

Reality Daydream

The Dream is Free, The Hustle Sold Separately

  • Home
  • About
  • Tutorials
  • Recipes
  • Furniture
  • Contact
    • Contact
    • Infertility
    • Disclosure
    • Privacy Policy
  • Shop

Epoxy Ocean Coasters

June 22, 2023 by Bethany Sy

Ever since I did an ocean epoxy pour for art in our library, I’ve been itching to play with epoxy again. It’s so fun an satisfying! And the waves just look SO REAL and glossy. Do you remember this?

Well, the other day I was at Hobby Lobby and stumbled on these wooden coasters in the clearance aisle, and thought they would be the perfect thing to do a smaller-scale ocean resin art! I hope this project seems even more approachable, if you’re a newbie at resin or epoxy. It’s the perfect way to dip your toes into playing with epoxy art!

Here’s what you need.

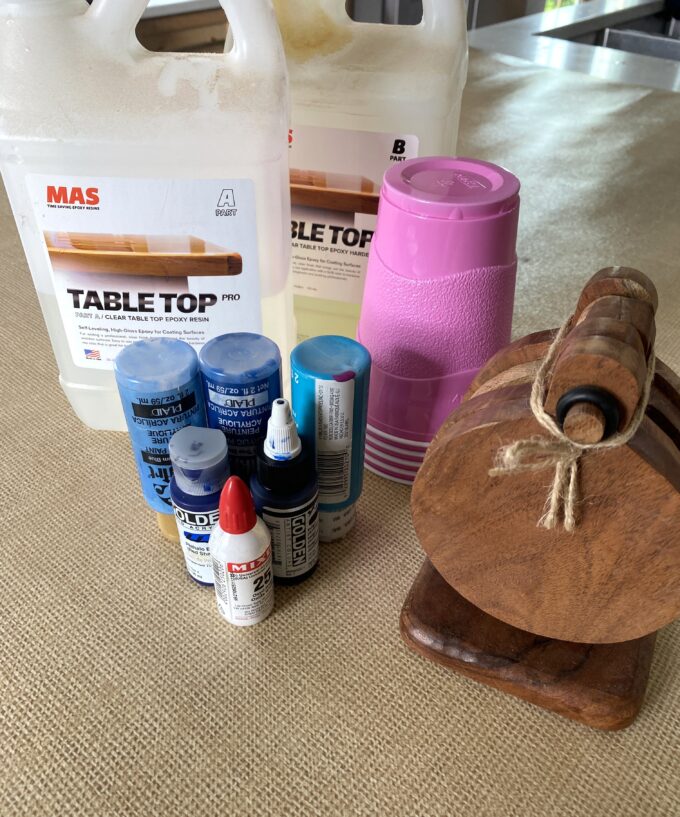
Supplies for Ocean Epoxy Coasters

  • Wooden coasters (similar)
  • Epoxy (note… this stuff seems EXPENSIVE, but you’re only going to use a tiny bit for this project, and it stores well for future projects!)
  • white pigment
  • dark blue pigment
  • medium blue pigment
  • light blue pigment
  • rubber gloves
  • Disposable plastic cups
  • Stir sticks (popsicle sticks work great)
  • Heat gun or blow dryer

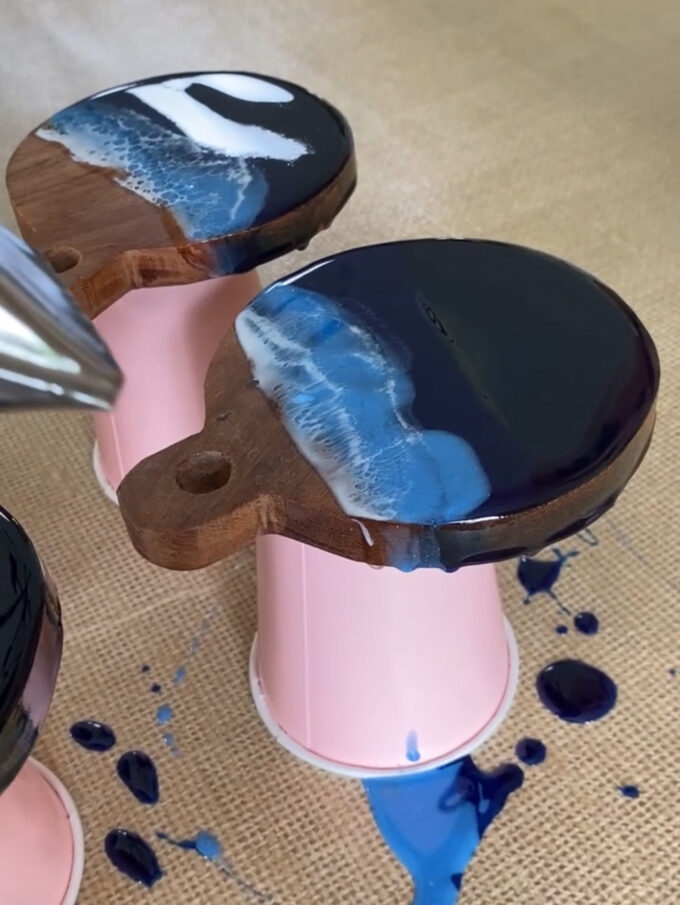
STEP 1 – Prop up your coasters so the epoxy can drip off

Start out by propping your coasters up off the surface. We just put them on some extra cups and that worked out great!

STEP 2 – Mix up Epoxy and pigments!

If you’re using the same brand of epoxy as we are here, mix equal parts of each bottle into one of your cups. For an epoxy project this small, you need about 3/4 cup of each. Mix well with a stir stick.

Pour some epoxy into 4 more cups. One cup should have the most (about 1/2 cup) and the other two should have less 1/3 cup), and the last one should have even less (1/4 cup or less). Make sure you save back tiny bit in the original cup that you mixed the epoxy in. We’re going to leave that one clear!

In the cup with the most epoxy, add a few (4-5) drops of the darkest pigment and stir. In the next two cups that have about 1/3 cup, and medium blue into one, and light blue/teal into the other. Finally, add white to the last cup. Remember, you should still have the original mixing cup that has a teeny bit of unpigmented epoxy.

Step 3 – Pour Epoxy!

Using the darkest blue cup of epoxy, start drizzling on the epoxy so it ends up covering a little more than half of the coaster. Remember, this doesn’t have to be perfect! The oceans and its waves aren’t perfect either!

Use your stir still to spread the epoxy around the edges too. The coverage won’t be great, but that’s ok.

Next, along the edge of the dark blue, come in with the medium blue! Using your stir stick, drizzle a line of medium blue. Then along that edge, drizzle a thin line of light blue, followed by a thin line of clear, followed by a thin line of white.

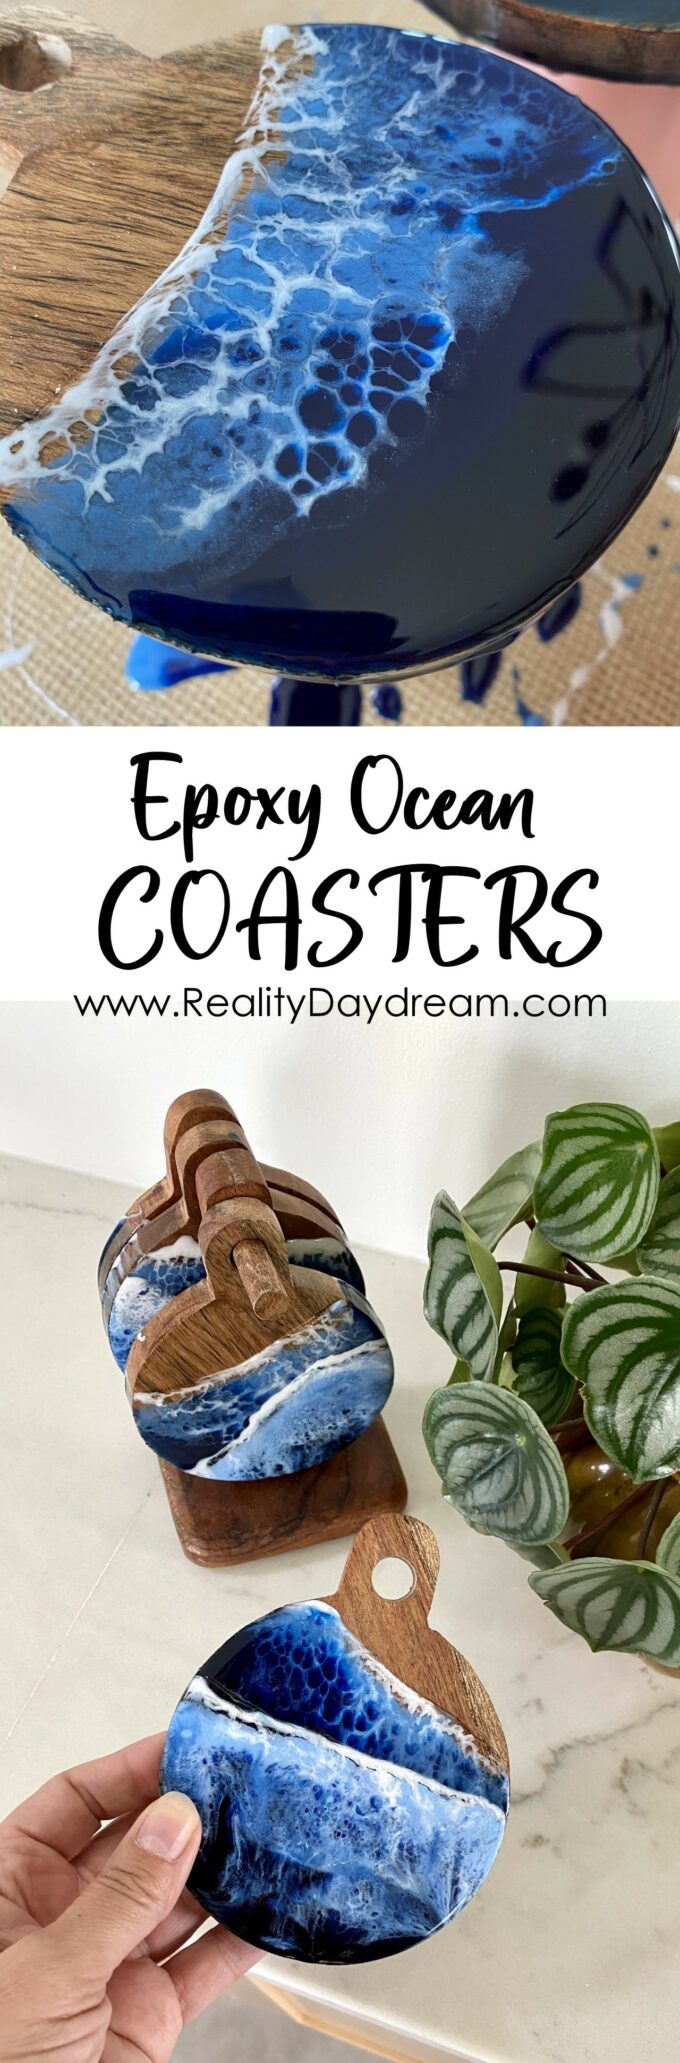
STEP 4 – make waves!

Using a blow dryer or heat gun, start blowing the stripe of white toward the blues. You can blow the wave as much or as little as you want! Each one will be different and have it’s own personality!

You can stop there or add another, smaller wave like I did! I love the layered look. Use the exact same technique for the second ocean epoxy wave.

SO FUN right?! I’m eyeing everything in my house now… what else can I can pour epoxy ocean waves on? It’s so pretty!

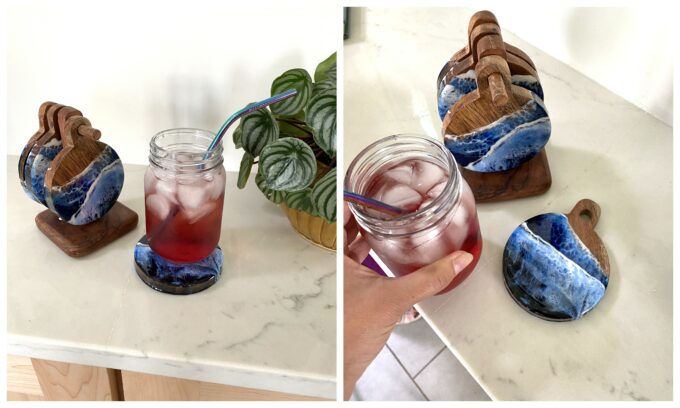
What do you think? Do you think this is a project that you’ll tackle? Or do you have something else in your house that you want to do an ocean wave epoxy treatment to? The sky is the limit!

~Bethany

~~~~~~~~~~~~~

Be sure to check out this other fun coaster project from our archives! What could be cuter than Cactus Coasters!

~~~~~~~~~~~~~~~~~~~~~~~

Thanks for pinning!

Related:

  • Planting up the flower beds!

    Every spring, I have grand plans of having the most epic vegetable and flower gardens!…

  • do the thing notepad - to make your projects easier
    BIG NEWS!

    This has been in the works for awhile, but I'm SO PROUD to share that…

  • Spring Cleaning and Garage Organization

    Is it too early to call this spring cleaning? The truth is, we've been planning…

About Bethany Sy

Nick and Bethany Sy are the creative free-spirits behind DIY/Lifestyle blog, Reality Daydream. They recently purchased a historic mansion and have been documenting the ups and downs of renovation and making this home their own... all while sharing tips and tutorials along the way! When they found themselves in the trenches of infertility, they started a journey that would prove to be their most important DIY project ever, and have 3 beautiful girls to show for it. <3

« What’s happening next door
Prom Birthday Party for Tweens »

Leave a Reply Cancel reply

Your email address will not be published. Required fields are marked *

  • Facebook
  • Instagram
  • Pinterest
  • RSS
  • YouTube
We are Nick and Bethany! Welcome to our blog, Reality Daydream where we share our DIY adventures!

realitydaydream

Hold finger on screen to pause and read! Making l Hold finger on screen to pause and read!

Making lunches is weirdly fun for me. So I snap a pic here and there to share and give ideas! Keep an eye on my stories for more! 🫶

I try to get at least one fruit and one veggie in there. For main dishes, some ideas besides sandwiches are: bagel, noodles with butter/parm, hotdog/bun, quesadillas, chicken nuggets, rotisserie chicken, ham/cheese rolled up in tortilla, and don’t forget about LEFTOVERS!!

My kids would rather have cold leftovers than a sandwich, so they don’t complain. But there’s also thermos containers if you love your kids more than I do. 

Don’t forget a sweet treat! This is a great way to get rid of Halloween or parade candy. 😬
Every summer, I learn a little more about gardenin Every summer, I learn a little more about gardening. This year I learned:

🥒don’t transplant cucumbers after they’re established or it’ll stunt their growth and they won’t climb your trellis
🥕till deeper for carrots so they aren’t short and fat
🥦plant cruciferous veggies earlier in the spring so they’ll have time to mature fully

 🙌Things I finally nailed: tomatoes, watermelon, basil, lettuce/spinach, strawberries, greenbeans. 

What did you learn this year? And what have you mastered?

@vego_garden #vegogarden #sustainabilityyourway 

Pictured are the Vego 17” raised beds (3) 9 in 1 and (2) 6 in 1! Every year we add more!!
It’s so hard to stand by and watch our kiddos no It’s so hard to stand by and watch our kiddos not feel good, am I right?! 

@Dimetapp Cold & Cough is our go-to for itchy, stuffy, runny noses and coughs! And I love that it is alcohol free, trusted by pharmacists, and the kids love that the taste is actually sweet! No more spitting out yucky medicine, here. Exactly what they need to feel better, faster. Now we can finally get back to doing all of the things we love together, like getting crafty at home with some fun DIYs. 

What’s your next DIY project now that we’re all feeling better?!

Use as directed. @dimetapp #DimetappPartner #backtoourregularlyscheduledchaos
Getting the SAME TOP on different colors/sizes and Getting the SAME TOP on different colors/sizes and doing a mommy-daughter try-on session is both incredibly awkward and FUN! 🤣 

I saved the whole Amazon haul to a highlight, and everything is linked in my Amazon storefront! 

Which top is your FAVORITE on each of us?

#amazonhaul #amazontryon #falltryon #cozy #sweaterseason #tryon
Load More Follow on Instagram
View of our entryway of our historic mansion that we're slowly renovating and making our own.
Click here for lots of art projects using only wood stain on furniture!!
Please feel free to share or pin my posts! You're welcome to use ONE of my images (no collages or pinnables) with a link back to the corresponding post. Please do not edit or crop that single image in any way. Improper use of my photos, ideas or words is a violation of copyright. Thank you!

Categories

Attention: Almost any do-it-yourself project involves risk of some sort. Your tools, materials, and skills will vary, as will the conditions at your project site. Reality Daydream has made every effort to be complete and accurate in the instructions of the plans on this website. Reality Daydream will not assume any responsibility or liability for damages or losses sustained or incurred in the course of your project or in the use of the item you create. Always follow the manufacturer’s operating instructions in the use of tools, check and follow your local building codes, and observe all commonly accepted safety precautions.


Copyright © 2023 · Modern Blogger Pro On Genesis Framework · Customizations by Sweet Theory Designs · Privacy Policy · Log in