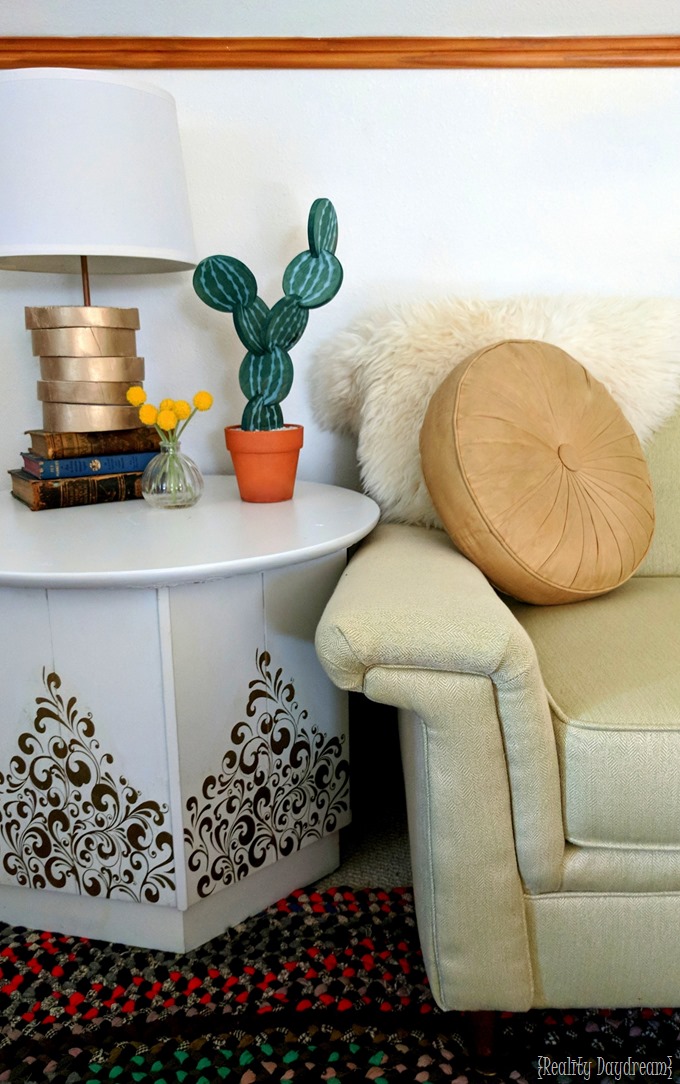
I usually avoid trendy things like the plague. I just don’t want my house to look like every other house on the block… which ironically, we live out in the country and literally don’t have any neighbors, so I’m in the clear, right?! But sometimes, WE LIKE WHAT WE LIKE… right? And I liked cacti long before they were trendy. Like, I have an actual cactus in my house that I nurture and keep alive. (so far so good at least)
So when I saw this one day whilst strolling pinterest for gift ideas for ‘that person that has everything’, I just knew that I HAD to make cactus coasters ASAP.
I mean… it’s a cactus, MADE OF COASTERS.
 *This post is sponsored by Mohawk. Thank you for supporting the fabulous brands that make Reality Daydream possible! This post contains affiliate links.*
How stinkin fun, right? YOU wanna learn how to make this too, am I wrong? Well I’ma teach you.
Supplies for DIY Cactus Coasters
-
Slab of wood (we used pine) planed to 3/8”
-
Terra Cotta pot with approx 4.25” opening (this one)
-
Round lid the size you want for your coaster for tracing
-
Sandpaper (220 grit)
I used a wide-mouth Mason jar lid to trace the circles onto my piece of pine. I didn’t worry about avoiding the knots in the wood, because I love the character and ‘homemade’ quality they add.

I cut out each circle with my Scroll Saw, but you could use a jigsaw too if that’s what you have.

Sand off those rough edges with 220 grit, and smooth off the surfaces so each circle is ready for stain!

Or make your kid do it.

We’re going to take just one of the circles and cut a notch in it that’s the same width as the thickness of your discs (3/8” in our case) with the scroll saw. You can see better how I get this dimension by watching the video above.

Stain this circle that has the notch with Dark Green Behlen Solar Lux Stain using a cloth, and use a tiny craft paint brush to get in the notch. Then after that dries, add curved lines that connect at the notch using the white stain pen, and and little dots along each line to look like a cactus! The reason we’re only doing the first one for now is because we don’t know where we want our notches yet for the future coasters.

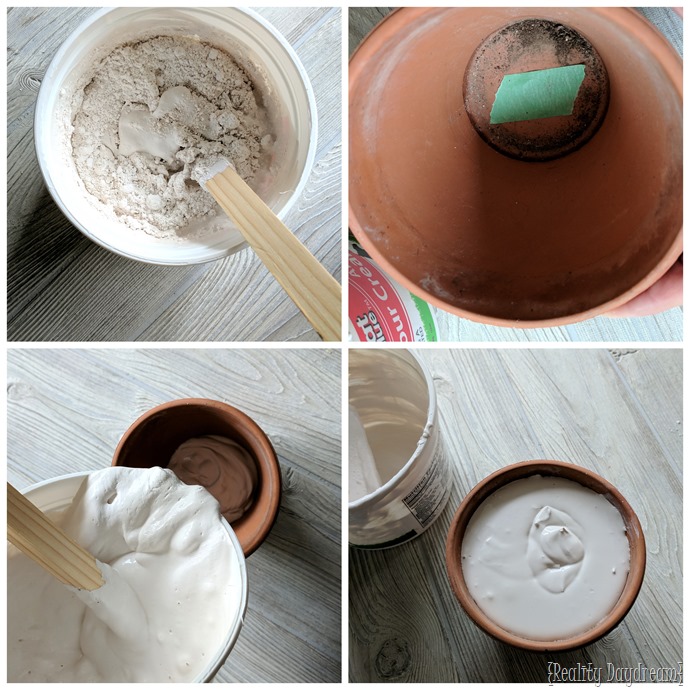
Now it’s time to mix up our plaster! Follow the instructions on the package of whatever kind of plaster you purchase. You’re going to want to mix up about a half gallon of plaster, and you want it to be about the consistency of pudding. Tape over the hole in the bottom of the terra cotta pot (on the inside, not the outside), and pour in your plaster!


Next, we’re going to cut notches one at a time in each of the remaining circles of wood. We’re doing this so that we can decide on a case-by-case basis where we want the notches so that the cactus isn’t just a straight-up line. We want it to have some angles and dimension! With each new addition, I would hold up the next circle and decide where I would want it, then would mark where the notch should be, and cut it! This part came together easier than I thought it would!

Once you got all the notches cut and in place, you can disassemble your cactus coasters and stain them all with Behlen Solar Lux Stain just like you did that first one! And add the curvy lines with dots too (using this stain pen!

I just think these cactus coaster set turned out SO CUTE!

I mean…


You must make one of these for the cactus-lover in your life! Or for yourself if you too love cacti. And send me pics when you do! You can email me at beth@realitydaydream.com, or tag me on social media… @RealityDaydream on Instagram AND Facebook!
~Bethany
~~~~~~~~~~~~~~~~~~~~
Be sure to check out our master list of DIY Handmade Gift Ideas!

Be sure to check out all our other scroll saw projects by clicking the image below!
Thanks for pinning!


These are so cute! I am a Community Education director and I would like to teach this for a class! Can I use your pictures?
I really need new coasters, I should try this
I didn’t like coasters till now!!!
Bethany,
Your set is SO much cuter than the original. Makes me wish I had a scroll saw. Love the blog and read nearly everyday.
Maureen
This is really neat! I love things that form & function. Pinned! 🙂
Super cute and functional. Great tutorial!
Very cute Bethany! I have a friend who loves everything cactus so I’m going to pass this along to her 🙂