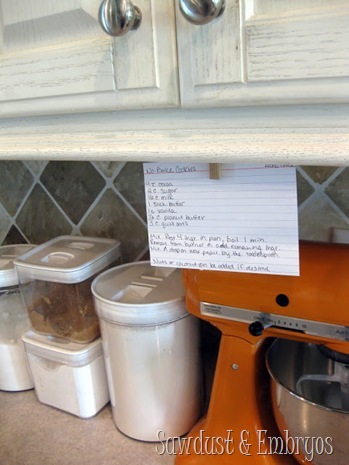
A few years ago, we installed a clothespin under our kitchen cabinets to hold recipes and keep them out of messy ingredients while cooking… because who likes crusty recipe cards? It served it’s purpose for a good long time!
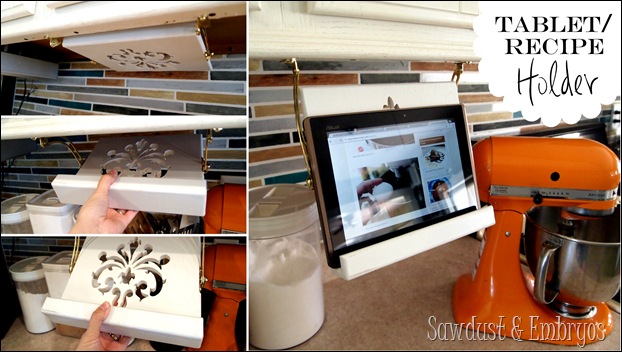
As time has worn on and technology advances, we now need to keep our tablets out of the mess. Amiright? Pulling up a recipe on your iPad and bringing it to the kitchen is super convenient these days, but getting a glob of raw egg on your glossy screen is less than ideal. So we set out to create a remedy! You’re welcome!
It’s a simple build… which I made complicated by cutting out a design with the scroll saw. But that’s totally optional. So stay with me!
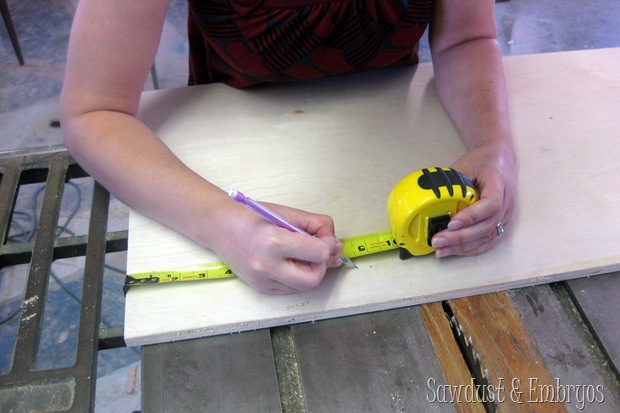
We started out cutting a slab of 1/2” plywood to 10.5” x 9”.
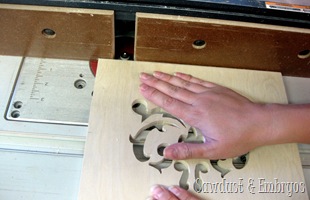
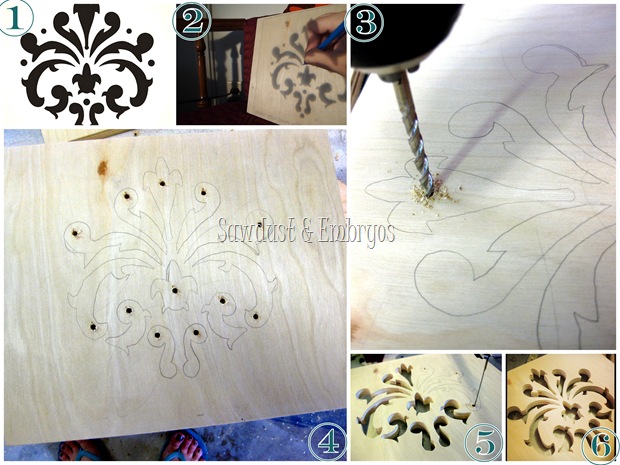
Here’s the optional part… I printed out a damask design onto a transparency, projected it onto the board and traced. Then, after drilling holes in each section, I cut them out with my trusty scroll saw.
Truth be told, this thing is pretty awesome without the design. I just can’t pass up an opportunity to customize things with my scroll saw! So let’s move along!
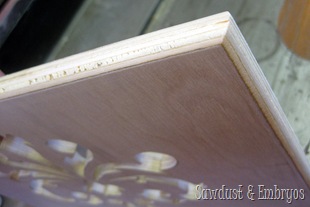
We routed the edges to be rounded using a 1/4” rounded router bit.
 |
 |
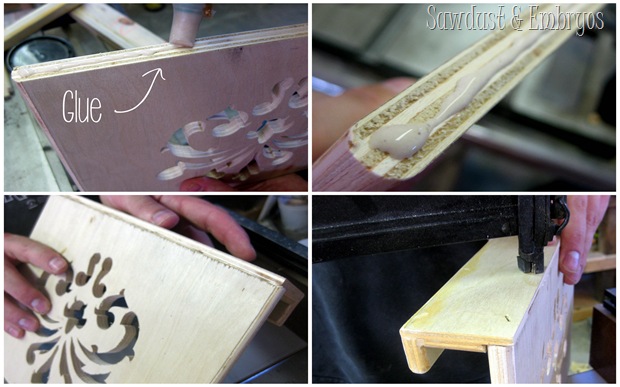
While I was busy with the damask design, Nick was working on building a ledge and ‘lip’ to extend across the bottom of the tablet holder to help keep things in place. Using a Rabbet Bit, he cut grooves for a half lap joint (1/2” x 1/4”). This provides a more secure joint. You don’t have to use router bit for the groove… again OPTIONAL!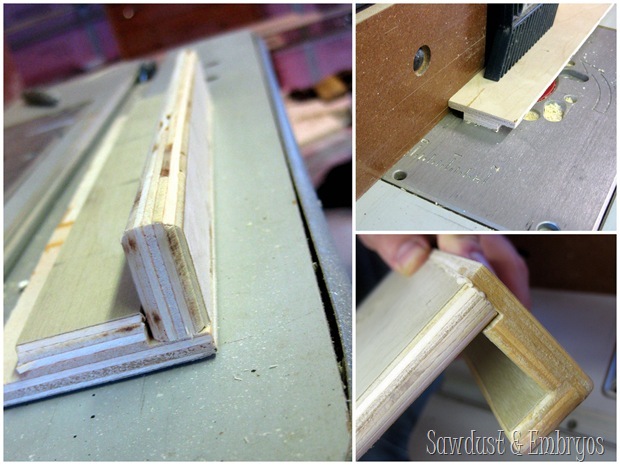
He routed these pieces to have rounded edges as well, and assembled by gluing and nailing.
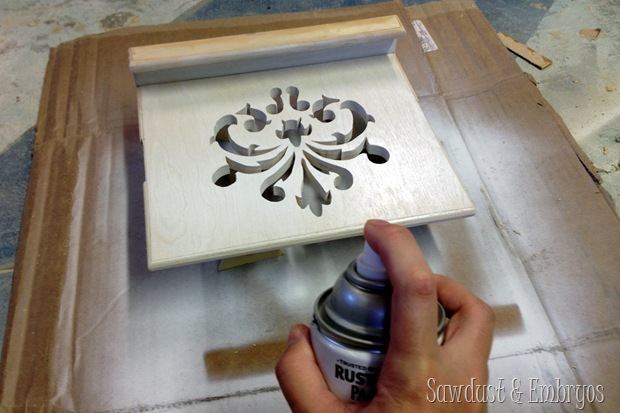
Since we used plywood, there were some rough edges that we filled with wood putty. Then, after sanding and priming, we painted white (Rustoleum Semi-Gloss White Spray Paint).
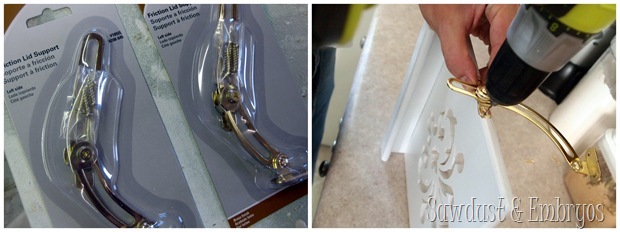
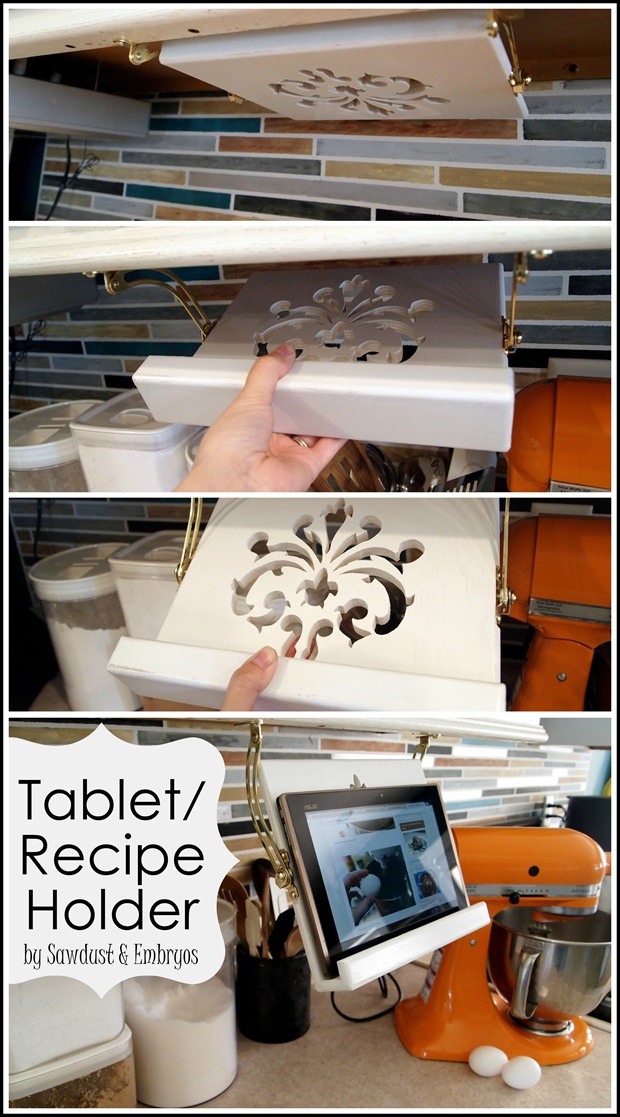
We installed these ‘Friction Lid’ hinges. These hinges allow the Tablet Holder to stay in place at whatever angle you want, and yet still stay securely stowed away under the cabinet when not in use. Be sure to get a left AND right hinge, not two of the same! Links here and here.
See?!
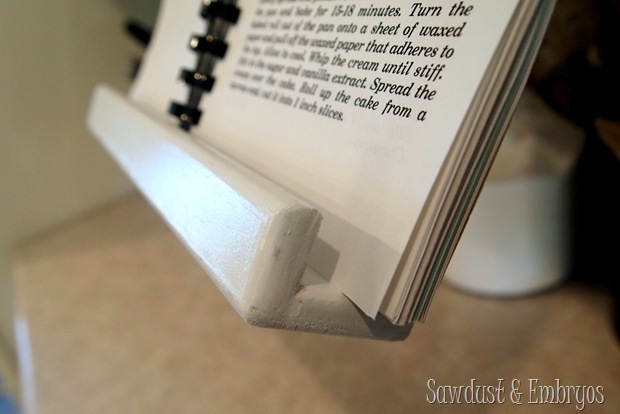
It totally works for recipe books as well!
I love that it’s out of sight and not in my way when I don’t need it, and I love that it’s positionable (totally a word) to my preferences depending on what I’m doing! I’m pretty sure everybody needs one of these in their kitchen!
This bad boy gets used DAILY… not a joke. You should build one!
UPDATE… we’ve found that over time, the hinges loosen gradually and slightly. It’s enough that we’re nervous about putting our expensive tablet on it. So we’re researching hardware alternatives and will be updating this post with our findings. Sorry for the inconvenience!
UPDATE AGAIN! Since writing this post several years ago, I now see that you can purchase something similar HERE if you don’t have the means (or desire) to build one. Just another option!
And P.S, if you’re curious about our backsplash… it’s PAINTED! And the tutorial is here!
Disclosure! we’re SUPER HONORED to have been chosen as a “Lowes Creator”, and were provided with a Lowes gift card to help with the cost of supplies… but as always, all ideas, thoughts and opinions are 100% our own. Because that’s how we roll yo.
*this post contains affiliate links





Just curious if you have tried another friction hinge?
We never did… so sorry!
That’s a idea I’m definetly going to make
Greetings, I stumbled upon this after I built my own tablet holder. I though I’d share the hinges I used. http://www.thehardwarehut.com/catalog-product.php?p_ref=182416 and you can see my finished product here https://plus.google.com/u/0/102102614550914372402/posts/NeXsaqrcjRX?pid=6131231190361413794&oid=102102614550914372402
Thank you so much for this link! We will definitely be trying out this hinge. We’ve been so stumped to find something that works better. Yours turned out awesome!
This is brilliant, I built it made a few size and decorating adjustment but basicly the same design, I also painted my hinges in an oil rubbed bronze. I read your comment about the hinges lossen. I assume it a problem for you when you up it in the upright position with the tablet in in as mine wanted to flip down. So I built a little lip for it to rest in securing it. I wanted to post a picture but didn’t see where that was an option. So far it works great I have to tighten the screws on the sides occasionally but over all it’s a total win win thank you so much for the GREAT and I mean GREAT idea! This was exactly what I was looking for! And trust me when I say I look high and low from ebay, amazon, etsy, and store after store… Found you on pinterest and thrilled thanks again I am a totally DYI’er myself way to rock a great idea and thanks for the share.. built in in a few hours, use it daily!
Any chance you found a solution to your hinge problem?
You should make more and sell them on Etsy.
Love this idea, totally one of those things that you need that you didn’t know you needed. Lol thanks!
Hi!I just made my way over here from pinterest. I bought a drop down recipe holder similar to yours at least 25 years ago. I love it; it is the greatest invention ever. Whenever I move, I remove it from under the cabinets and take it with me. I’ve never found another one to purchase. So cool that you made your own.
That’s amazing! I wonder why they quit making them… They’re sooooo convenient!
Thank you for this.. I will be looking at how to just wall mount it and add a light to the bottom of it.. but thanks to you… I now have a good idea of what I need.
I not only love the way you’ve done this and will follow this guide to do the one for our kitchen (only in walnut stain instead) but I love even more the fact that you use an Asus Tablet vs an iHaveoneTooPad. This makes me want to follow your guides even more.. It shows you’re more about function over form.. 😉
Yeah, I’m a tech nerd, so I notice these things.. Sorry..
Anyway.. Great project.. Thanks.
Hi, I was thinking about having this made by my uncle, did you find a solution for the hinges?
Federica,
I have tried a few things without any luck. The next thing on the agenda is to try and use a couple Bellevue springs and lock nuts to keep consistent pressure on the upper hinge point. There has been a few others with this same question and I apologize for leaving this on the back burner for so long.
Thanks,
What have we done wrong? Everything looks just like it does in your pictures but when I close it up against the cabinet, the top (the part closest to the backsplash) drops down toward the counter top.
Gail,
I am sorry for the inconvenience, After a while our hinges loosened and did the same thing. I have tried a few different ideas and then things got put on the back burner. My most recent idea was to drill out the rivet on the top set of hinges and replace them with a 10-32 bolt, a couple nylon lock nuts, and a set of Bellevue washers. When I get closer to completing the bathroom I will jump back on this project, until then I apologize for not giving you more accurate information. Below is the link for the washers.
http://www.fastenal.com/web/products/fasteners/washers/belleville-washers/_/Navigation?term=&termca=&termpx=&sortby=webrank&sortdir=descending&searchmode=productSearch&zipcode=&filterByStore=&filterByVendingMachine=&r=~|categoryl1:%22600000%20Fasteners%22|~%20~|categoryl2:%22600089%20Washers%22|~%20~|categoryl3:%22600090%20Belleville%20Washers%22|~%20~|sattr01:^%229pound10,%20M5%22$|~
Thanks,
-Nick
Thanks! We will give it a try.
love it!! much cooler than holding my tablet up between two canisters while i cook. a few years ago i saw a knife holder that was built just like this with a magnetic strip to hold on to the knives. i loved that it held the knives up out of the way (i’m always looking for ways to clear up more counter space!) but they were still close at hand.
Wow. Loved it. Great. I will try it sometime.
Hi. Thanks for the great project idea and tutorial. I have a couple of questions on measurements that I didn’t see in the tutorial. How wide did you you cut the pieces of wood that are the ledge and lip? Also, how far from the top (or bottom) of the tablet holder do you mount the hinges?
Thanks,
Mike
Sorry Mike,
The ledge is two inches and the lip is one inch. The hinge is centered at four and a half inches.
I see that you attach the base to the backboard with glue and a power stapler. With your arrangement, the weight of the tablet is pulling against the glue and trying to pull the staples out.
I suggest that your reverse this attachment plan and put the grove in the backboard and attach the base to it. In this arrangement, the weight of the tablet is pulling ACROSS the staples. This is the intended design for staples and nails. If the weight of the project is trying to pull the fastener out, one should always use screws instead of nails or staples.
The front lip of the project is OK since it is supporting no weight. The glue and staples work fine.
Another advantage to this arrangement is that the staples are not showing because they are in the back of the project. However, you probably “set” the staples and filled them in with putty prior to painting. So they wouldn’t show anyway. People who want to stain and “varnish” (does anyone still use varnish?) their project, would have a problem with the staples or screw/nail heads showing. Finishing nails would help minimize this aesthetic problem. In this case, the arrangement that I proposed would be critical since the finishing nails have no heads to keep them from pulling through the wood.
I love this idea. What is the name if your Etsy store so I can get one?
Marissa, our Etsy Shop is called SyWoodInk… but we’re not selling these on the shop. So sorry! We hope you make one using our tutorial!
Love love this!!!!!
When you attach the hinges to you cabinet is it only attached by one screw so the hinge can fold up flat? My DH and I can’t figure out your placement to make it fit so compactly. Thanks!
Yes, I have this question as well. I just bought all the parts today and it seems that only one screw on each side is going to hold it up. I was thinking of putting in a spacer between the second screw hole and the bottom of the cabinet…. I am making this as a gift so I hope the space underneath cabinets is standard!
Currently, We only have one screw on each hinge and it works fine. I am still working on revamping the design though; so stay tuned.
I want one of these. PAINFULLY. I really hope you put these in your Etsy shop, otherwise I’ll need to start convincing my husband to build one.
Beth, this is such a cool idea. I’m a big fan of the iPad but if I try using it for reading off a recipe it’s either in the way or at an odd angle. This is an awesome idea…I need to get around to doing this! Plus like you said it can be used for holding conventional cookbooks. Very cool 🙂
Totally off-topic, but I think you’re on Buzzfeed! http://www.buzzfeed.com/joannaborns/life-lessons-from-pinterest (I’m on my phone, so I don’t know if the link works.) I’ve been stalking your blog since you were doing backsplashes for the baby fund and posting recipes for that amazing butterscotch-yellow-cake-mix awesomeness (I’m such a hipster), so I was vicariously super proud for you. I hope this isn’t too weird of me. I’m not actually a stalker. Just awkward (stalkward?) and I only follow you on the internet, not in real life.
Such a great idea. I’d buy one!
This is one of the most useful inventions ever. I agree with your Dad above and was going to tell you- you need to market this. This could sell really big. You can find the connections. People as entrepreneurial as you can make things happen- you just have to set your mind to it. Think of the customization options, as you demonstrated… people would love it.
I’m serious- this is a one of a kind object and it’s something people need. Go for it!
Wow, Beth. This is really cool. Okay, so I’m probably thinking like Nathan now. This looks like something that could be mass produced in China. If we only had the connections to make that happen. This should be patented!
Quick question for you…what is the stopper for when the hinge/tablet holder are fully extended? In other words, what keeps it from swinging freely and dumping the tablet in a pile of flour? I only ask b/c I’ve never used one of those types of hinges.
Charles,
These supports are originally designed to hold a lid stationary with a support of a piano hinge. They work by tightening screws to increase the friction holding it in place. When I originally designed this I to had my concerns, but it is surprisingly stout. I will eventually update this tutorial to show how to modify the supports to use wing nuts or a knob to make adjustments easier. Stay Tuned for that.
Love it!!!
K, so I have a clothespin recipe holder under my cabinet. I thought it was my own idea, but I’ve been following your blog for a while so I probably originally got it from you and then made myself believe in my mind that it was my own idea. LOL. Any who, I did create a paper towel holder that WAS my own idea, it will be on my blog in a couple of days:) http://howbigimblessed-canna.blogspot.com But this tablet/recipe holder is just perfect. And you’re right, every kitchen should have one! Would you be willing to sell them on Etsy perhaps?
Thx Candace! Maybe great minds think alike? You certainly MAY have come up with the clothespin idea too!
We’re definitely planning on selling the tablet holders on the Etsy shop, and hope to have the listing up in the next week or so, so check back soon!
This is brilliant. I always wanted to do this! Love it love it love it!
I sooo sooo need one of these!! LOL
This is definitely going on my “honey do” list!
great project. really dig the backsplash too. cheers! ~jb