• Home
  • About
  • Tutorials
  • Recipes
  • Furniture
  • Contact
    • Contact
    • Infertility
    • Disclosure
    • Privacy Policy
  • Shop
    • Facebook
    • Instagram
    • Pinterest

Reality Daydream

The Dream is Free, The Hustle Sold Separately

  • Home
  • About
  • Tutorials
  • Recipes
  • Furniture
  • Contact
    • Contact
    • Infertility
    • Disclosure
    • Privacy Policy
  • Shop

DIY Planter with Repurposed Items

June 24, 2020 by Bethany Sy

You KNOW I love unique planters to rearrange my plants to my heart’s content. As evidenced by allllllll these DIY plant-related tutorials from our archives. And today I’m going to share yet another DIY planter idea that is SO EASY and turns out SO CUTE! No power tools necessary on this one!

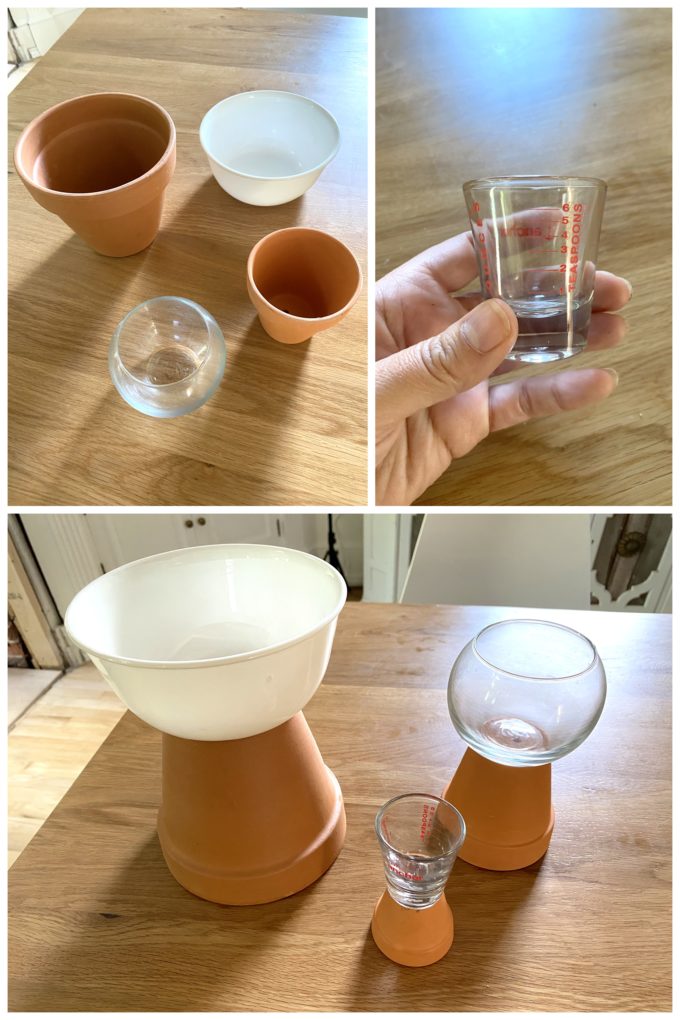
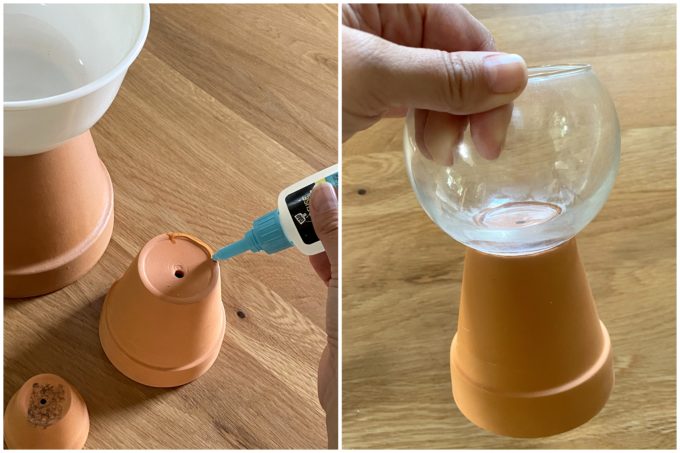
I started out with a variety of sizes of terra cotta pots and some bowls/vessels from around the house (including a shot glass!). 😉

*This post contains affiliate links.*

Using my favorite all-purpose glue (RapidFuse), I simply glued the top vessels to the similar-sized terra cotta pots, and they were dry in 30 minutes!

I know this looks a little janky, but stay with me! Let’s prime these babies to make them look like one piece! It’s important to prime, because otherwise paint won’t stick to the glossy surfaces of the glass OR the porous surface of the terra cotta pots.

I paint them upside down first, and then flip them and apply a second coat. That way the top surface is PERFECT!

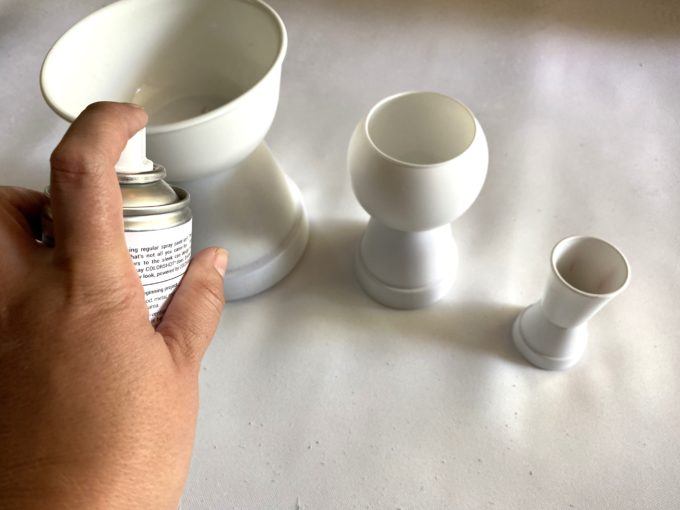
It’s important to always follow instructions on labels regarding dry-times and recoating times, so be sure to read instructions! I usually use this spray primer.

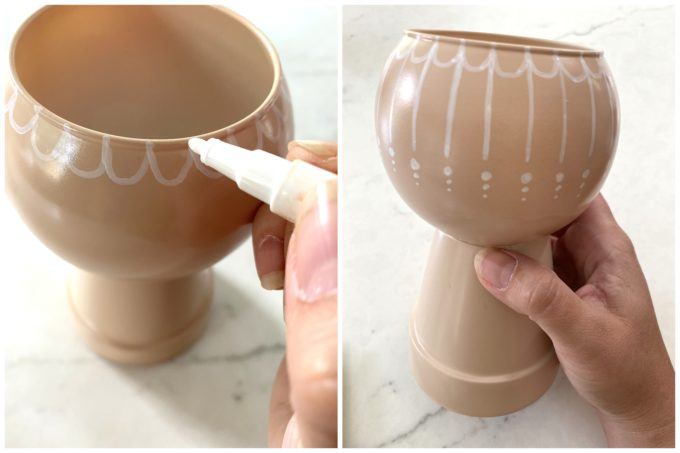
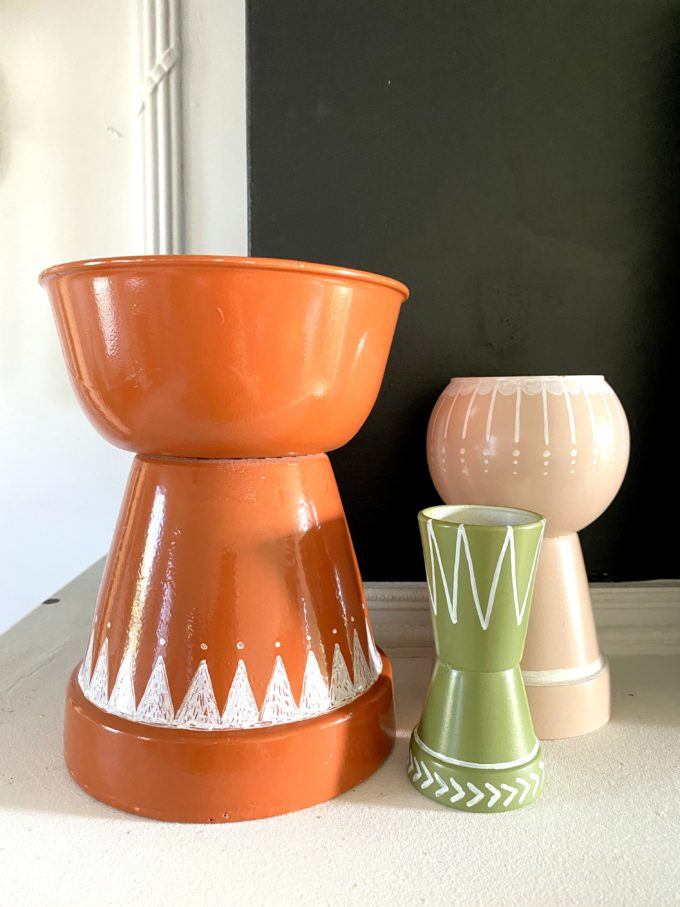
I chose 3 different colors from my spray paint collection, you can choose any color combo you want to match your style!

Remember! Lots of light coats is better than putting on one thick coat, because you can’t undo drips!

I decided to add some detail with a white paint marker. I’ve never used one of these before, and it wasn’t my favorite. I think next time I’ll try a different brand. But it was fun to add some pattern and character to these!

You can add drainage holes easily if you want, using this technique!

Now it’s time to pop your plants in!

I love how fast this project was and HOW STINKIN CUTE THEY ARE!

As always, if you try out one of our tutorials, please tag us on social media so we can see your version! Our handle is @RealityDaydream on both Instagram and Facebook.

~Bethany

~~~~~~~~~~~~~~~~~~~

Thanks for pinning!

Related:

  • DIY fabric-wrapped bulletin boards
    DIY Fabric-Covered Bulletin Tutorial

    My kids are getting to the age where they want to tape pictures, cards, notes...…

  • DIY Rice Pack / Heat Packs - EASY Sewing Tutorial!

    It's been awhile since I've done a sewing project, and as weird as it sounds,…

  • Pair of Cascading Wave Petunia Planters DIY

    These DIY Planters are perfect for cascading Wave Petunias, and it will be so fun…

About Bethany Sy

Nick and Bethany Sy are the creative free-spirits behind DIY/Lifestyle blog, Reality Daydream. They recently purchased a historic mansion and have been documenting the ups and downs of renovation and making this home their own... all while sharing tips and tutorials along the way! When they found themselves in the trenches of infertility, they started a journey that would prove to be their most important DIY project ever, and have 3 beautiful girls to show for it. <3

« Tutorial: Photo Transfer to Wood!
STIHL RB200 Power Washer Review »

Leave a Reply Cancel reply

Your email address will not be published. Required fields are marked *

Recipe Rating


  • Facebook
  • Instagram
  • Pinterest
  • RSS
  • YouTube
We are Nick and Bethany! Welcome to our blog, Reality Daydream where we share our DIY adventures!
Click here for lots of art projects using only wood stain on furniture!!
Please feel free to share or pin my posts! You're welcome to use ONE of my images (no collages or pinnables) with a link back to the corresponding post. Please do not edit or crop that single image in any way. Improper use of my photos, ideas or words is a violation of copyright. Thank you!

Categories

Attention: Almost any do-it-yourself project involves risk of some sort. Your tools, materials, and skills will vary, as will the conditions at your project site. Reality Daydream has made every effort to be complete and accurate in the instructions of the plans on this website. Reality Daydream will not assume any responsibility or liability for damages or losses sustained or incurred in the course of your project or in the use of the item you create. Always follow the manufacturer’s operating instructions in the use of tools, check and follow your local building codes, and observe all commonly accepted safety precautions.


Copyright © 2025 · Modern Blogger Pro On Genesis Framework · Customizations by Sweet Theory Designs · Privacy Policy · Log in