Awhile back, one of the Instagram accounts shared a really cool vintage mod clock that I loved so much that I saved the image so I could MAKE this clock!
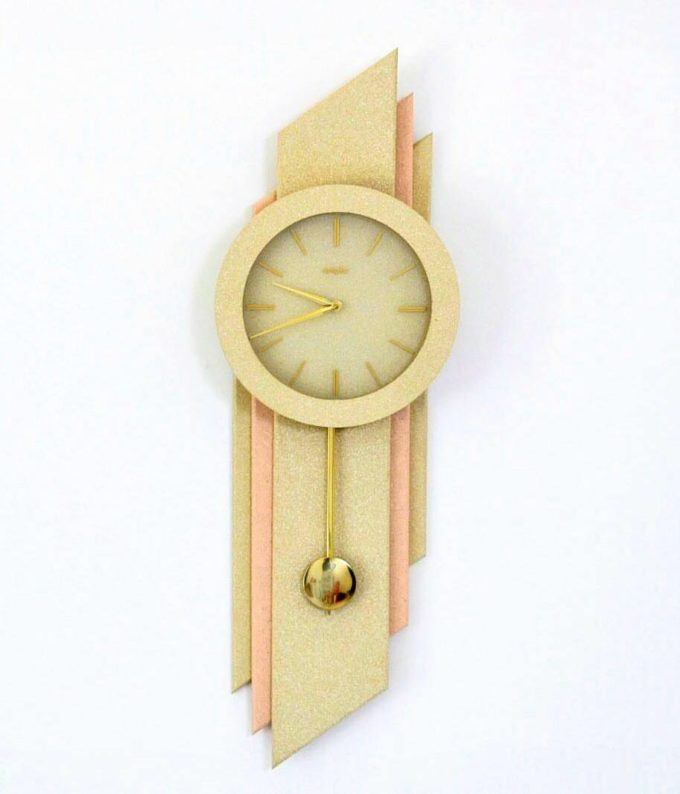
Isn’t that baby FABULOUS?
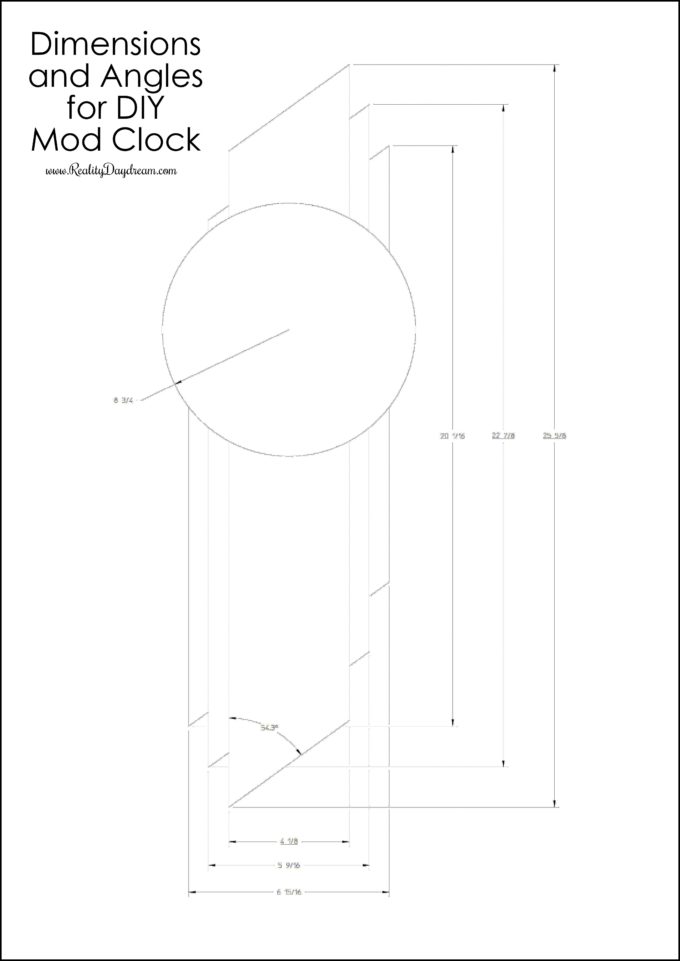
Here’s how the dimensions and angles shake out.
*This post contains affiliate links.*
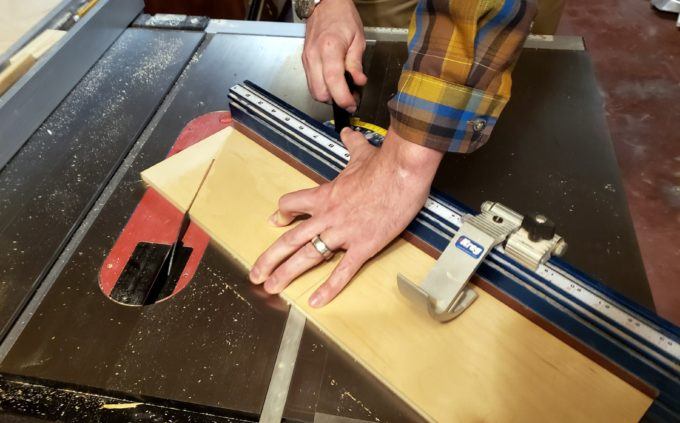
I had the hubs help me with cutting the angles on the table saw, but in hindsight, I totally could have done this using the miter saw. When will I become less dependent on him??
Once my boards are cut to size, I sanded them down with the orbital sander. You could totally just hand sand these with a sheet of sandpaper too.

Next, it’s time to pick out some stain colors (or paint! If that’s the direction you want to go).
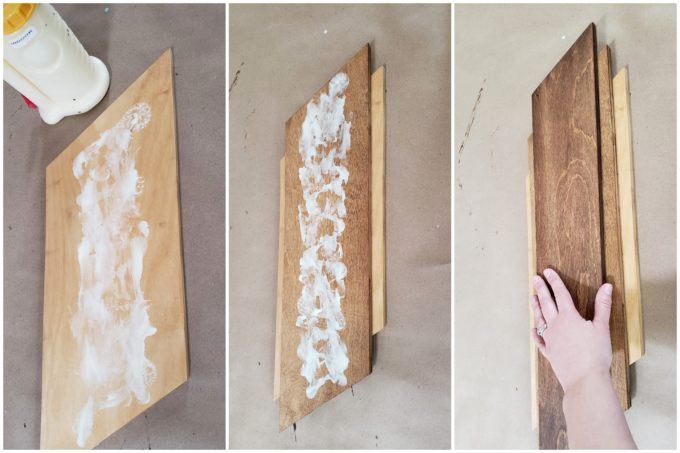
I decided to do an ombre wood tone effect, using a dark, medium, and light shade of wood stain. The colors I used are RustOleum Dark Walnut, Golden Oak, and Summer Oak.

I let the stain dry for a good hour, and then I was ready to glue! Using wood glue, I started by putting a narrow strip on the bottom (wide) board, and working my way up. I just used my eye to make sure everything was centered, but if you’re like my hubs, you can totally measure. 😉
Put something heavy on top while it dries for about 30 minutes. I used a big tub of cat litter.
Now we’re ready to add the actual clock!

I ordered this clock from Amazon. I specifically chose a clock that had numbers on it, because I want this clock to help my kids learn to tell analog time better. And this clock is going to be prominently placed in our living room, so this is perfect!

I wanted this round clock to be centered on the boards, so I did some math to find exactly where the screw should go, based on the notch on the back side of the clock.
We want the actual clock to come off so we can change batteries when necessary.

I made sure to screw the screw in far enough that the clock slides on snuggly and is flush with the back boards. I don’t want it loose and flopping around all willy-nilly. You follow?
I also added a sawtooth hanger on the back, using my no-nail trick. I just used two dots of Rapid-Fuse glue to keep that baby in place. It can hold a lot of weight! And it’s SO MUCH EASIER than trying to wrangle those tiny nails with my big fat fingers.

Time to hang this baby up on the wall!!!

Ain’t she a beauty?
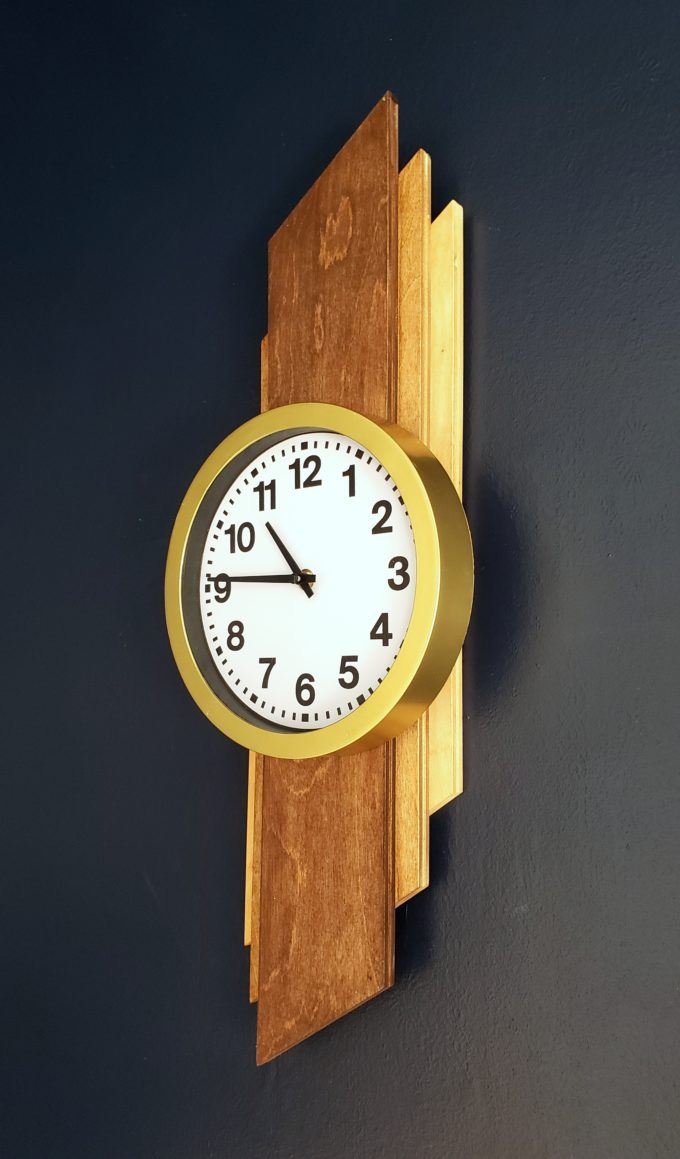
I love the details… like these layers of angled wood. Mmm!

And here it is in our living room!

I hope you enjoyed this tutorial! Please also check out the other clocks that I’ve made in the past. It’s becoming a THING I guess!


If you tackle one of projects, please tag us on social media! We’re @RealityDaydream on both Instagram and Facebook!
~Bethany
~~~~~~~~~~~~~~~~~~~~~
Thank you for pinning!

Related:
-

My kids are getting to the age where they want to tape pictures, cards, notes...…
-

I have a fun and easy building project for you! And while I do end…
-

I've been needing to figure out a solution for my overwhelming plant propagation situation for…
It looks amazing! Great Job!
Awesome! It never ceases to amaze me, how you whip these things out!!!